Certificates Tab
- 20 Feb 2024
- 5 Minutes to read
-
Print
-
DarkLight
-
PDF
Certificates Tab
- Updated on 20 Feb 2024
- 5 Minutes to read
-
Print
-
DarkLight
-
PDF
Article summary
Did you find this summary helpful?
Thank you for your feedback
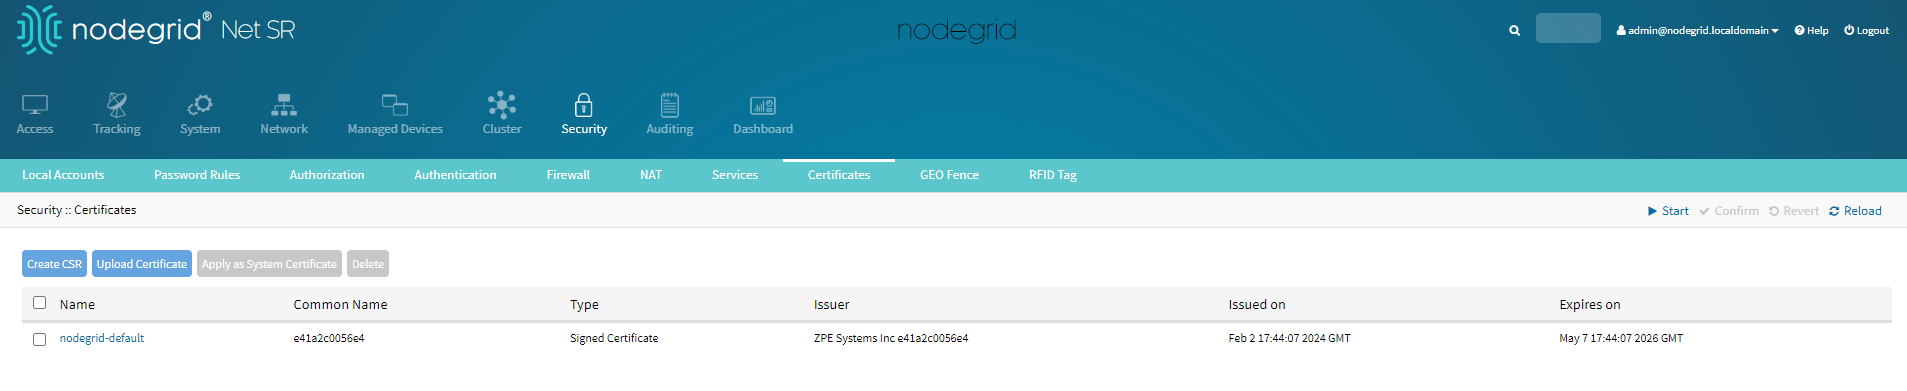
The Certificates tab serves as a central hub for creating and managing certificates. Certificates for the following two functions are managed on this page:
- Certificate for Web server:
- You can create certificates that can be applied to the web server for secure communication.
- The Nodegrid-default certificate is the default web server certificate generated by the system.
- Certificates for IPsec tunnel:
- You can create certificates that you can use while creating IPsec tunnels to ensure secure authentication, encrypted data transfer, and trust between VPN endpoints.
- ZPE supports X.509 encoded certificates. This includes PCKS, PFX, DEM, and PEM formats.
The Webserver Certificate
- You can create a web server certificate or upload a webserver certificate created outside of the Nodegrid. The webserver in the Nodegrid uses this certificate for all the HTTP and HTTPS communication via the web interface.
- For Nodegrid version 6.0.2 and above, a default webserver certificate is installed. This certificate is listed under the Certificates tab.
- If you have the certificate applied to the system, and you delete the certificate, the certificate will continue to remain applied to the system.
Creating a New Certificate
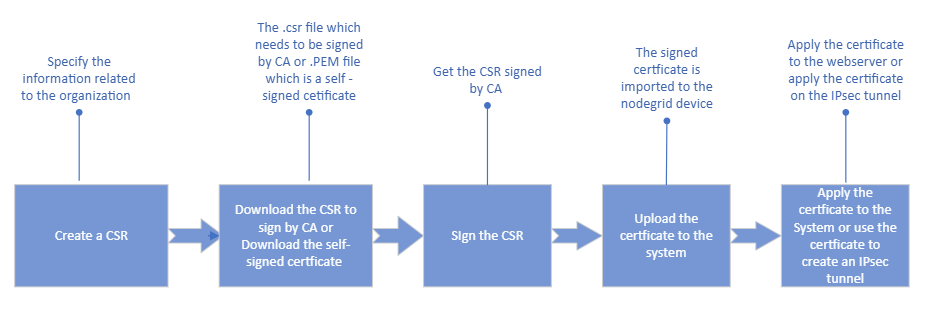
You can import a certificate or generate a CSR and use that certificate on the web server or an IPsec tunnel.
To create a certificate:
- You must first create a CSR; and complete all the required information related to the certificate, including details such as Common Name, Organization, Organization Unit, and more. For more information, see the Create a CSR section.
- After creating the CSR, you can either self-sign it or send it to a Certificate Authority (CA) for signature, and the CA will then generate the certificate.
- Once you upload the certificate to the system, you can either use it as a web server certificate or use it while creating an IPsec tunnel.
Create a CSR
You can either generate a CSR and get it signed by a Certificate Authority or self-sign it.
To create a CSR:
- Go to Security :: Certificates.
- Click Create CSR.
- To generate a CSR to be signed by a CA:
- Enter the details.DO NOT check the Self-signed field.
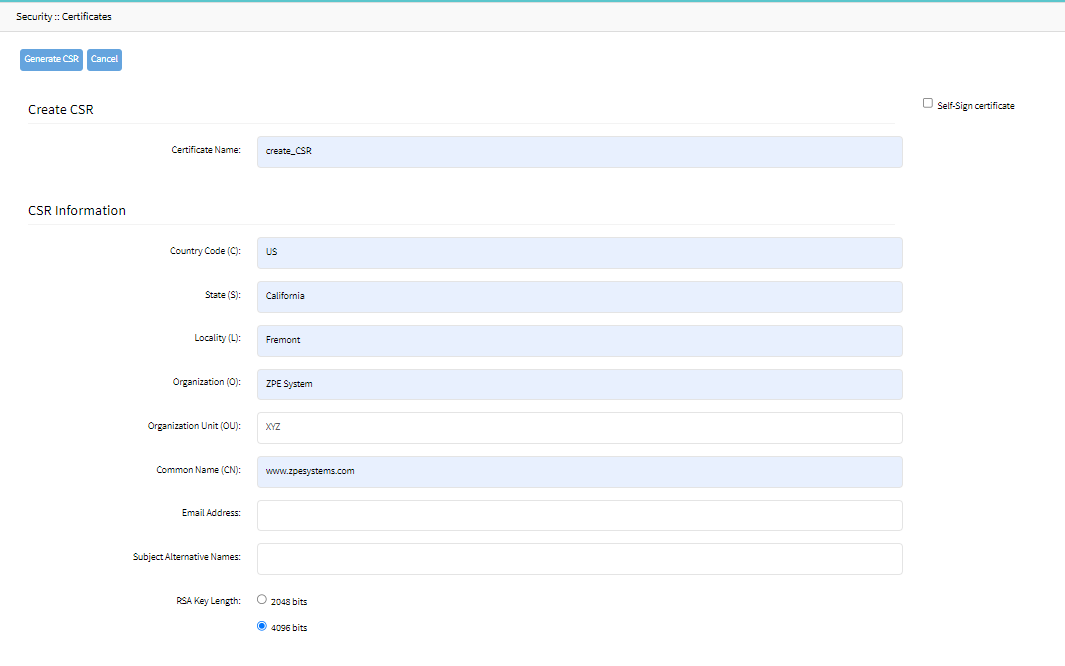
- Click Generate CSR. Download the CSR and send it to a CA.
- To download the CSR, go to the Certificate table, and click the CSR name link.
- Click Download.
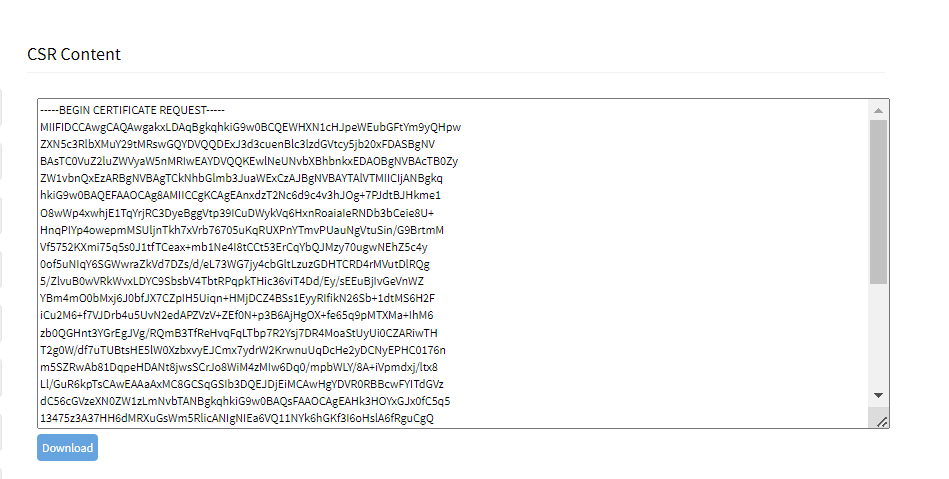
You can share this file with CA and get it certified.
- Enter the details.
- To generate a self-signed certificate for the webserver:
- Select the Self-Sign Certificate field.
- Specify the Certificate validity in days.
- Select the Self-Sign Certificate field.
- Click Generate CSR. A self-signed certificate is listed in the Certificate tab.
- To generate a self-signed certificate for the IPsec tunnel:
- Specify the Certificate validity in days.
- Select the User SSL Certificate Trust Attribute field.
- Trusted Peer (P): Select this field if the Nodegrid device can act as a trusted peer and be used in the authentication phase in an IPsec network.
- In the case of self-signed certificates, where there's no external CA involved, these attributes are used to establish trust within the IPsec network.
- Trusted CA to issue client certificates (T): This attribute ensures that the self-signed CA certificate is trusted to issue client certificates. Select the field to allow the IPsec to be validated against this CA certificate to prove their identity and securely gain access to the IPsec network.
- Trusted CA to issue server certificates (C): This attribute ensures that the self-signed CA certificate is trusted to issue server certificates. Select the field to allow the IPsec servers to validate against this CA certificate to prove their identity and securely gain access to the IPsec.
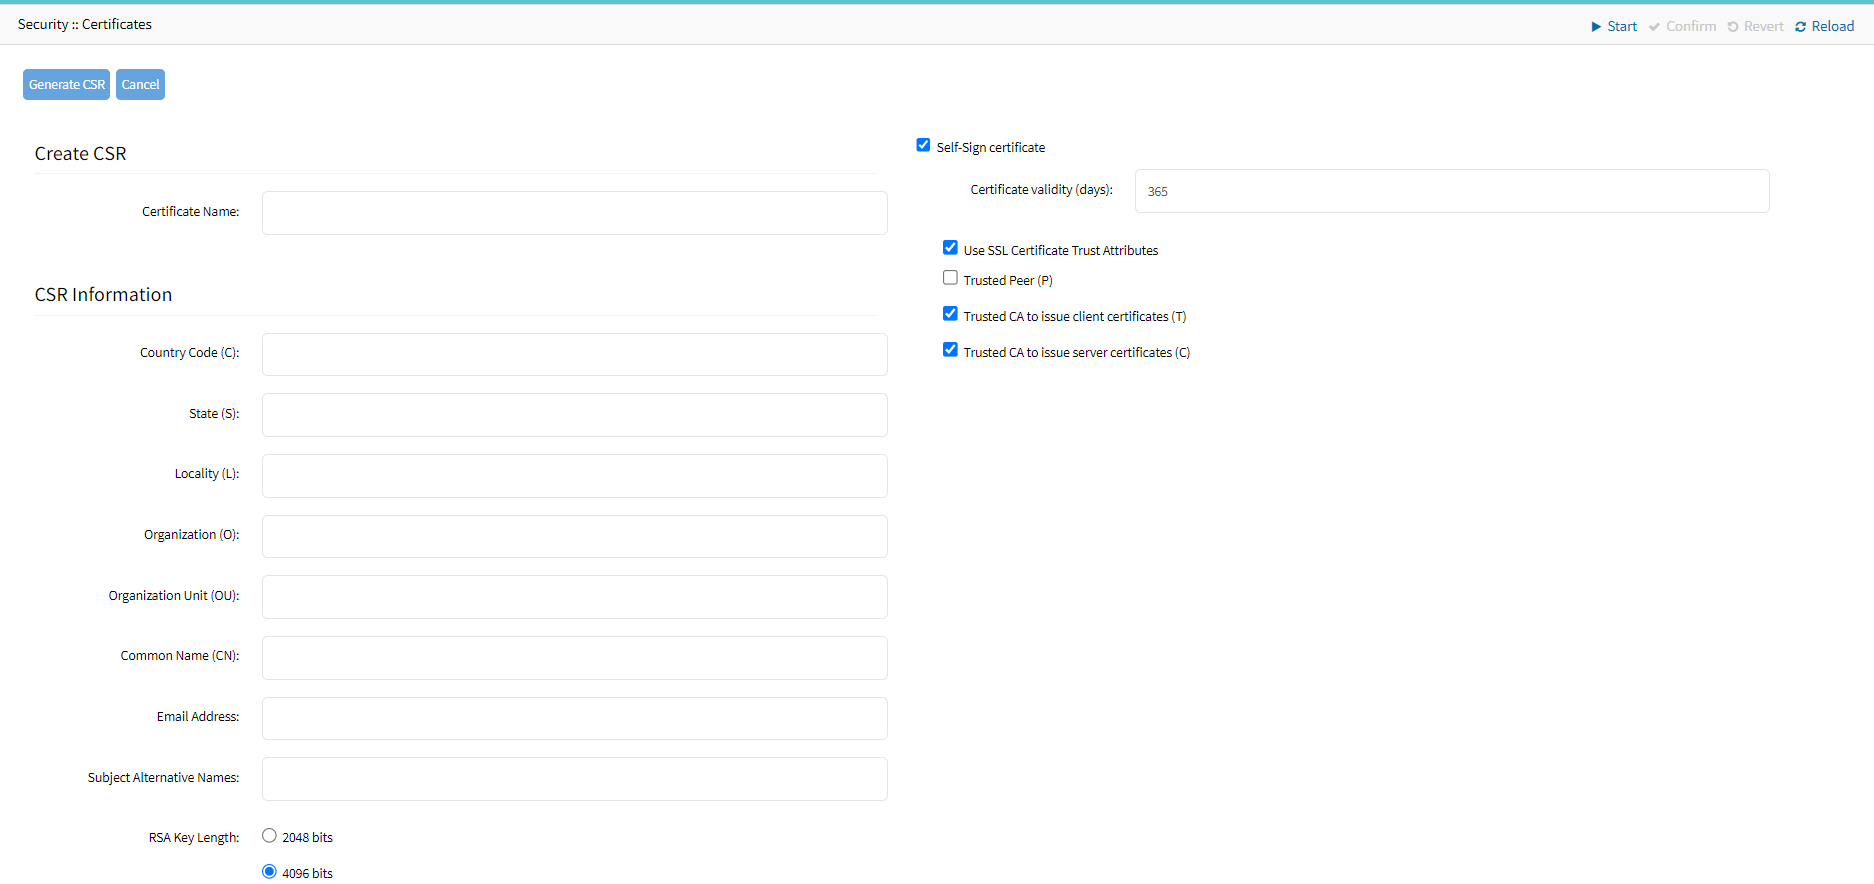
- Click Generate CSR.
- A self-signed certificate is generated and listed under the Certificates tab.

Upload a Certificate
You can use this option to upload certificates generated in a Nodegrid device or certificates generated outside Nodegrid device.
To upload a signed certificate to the Nodegrid device:
- Go to Security :: Certificates.
- Click Upload Certificate.
- When you upload a certificate to use for IPsec, select the User SSL Certificate Trust Attribute field.
- Trusted Peer (P): Select this field if the Nodegrid device can act as a trusted peer and be used in the authentication phase in an IPsec network.
- In the case of self-signed certificates, where there's no external CA involved, these attributes are used to establish trust within the IPsec network.
- Trusted CA to issue client certificates (T): This attribute ensures that the self-signed CA certificate is trusted to issue client certificates. Select the field to allow the IPsec to be validated against this CA certificate to prove their identity and securely gain access to the IPsec network.
- Trusted CA to issue server certificates (C): This attribute ensures that the self-signed CA certificate is trusted to issue server certificates. Select the field to allow the IPsec servers to validate against this CA certificate to prove their identity and securely gain access to the IPsec.
- Certificate Location: This section allows you to upload the certificate using either of the following options:
- Local Computer: Select this option if the certificate is available on your system locally.
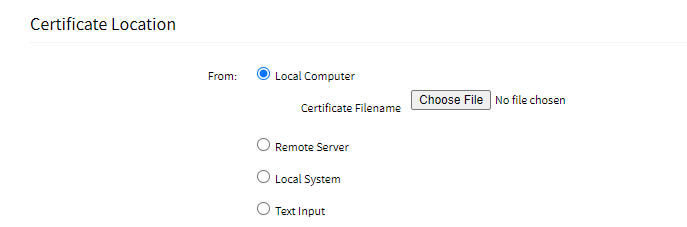
- Remote Server: Select this option if the certificate is available on the remote server. Enter the URL, Username, and Password to connect to the remote server.
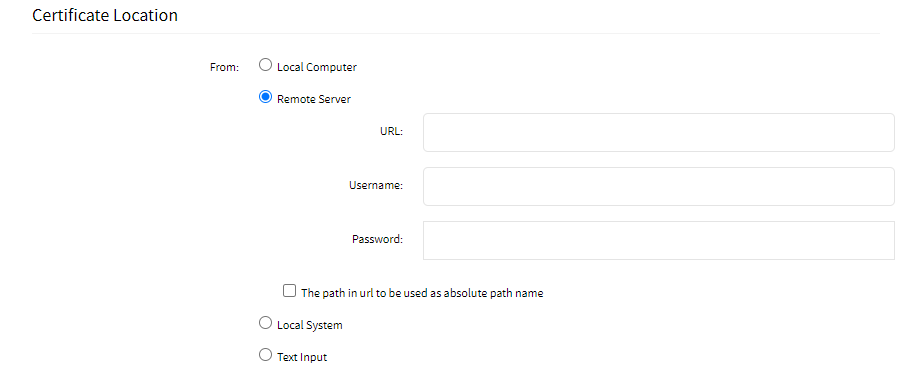
- The path in the URL to be used as the absolute path name: The path on the remote server is an absolute path instead of a relative path. Absolute paths always start with the root directory and provide the full path to the file or directory.
- Local System: Uses certificate files stored on /var/sw on Nodegrid device.
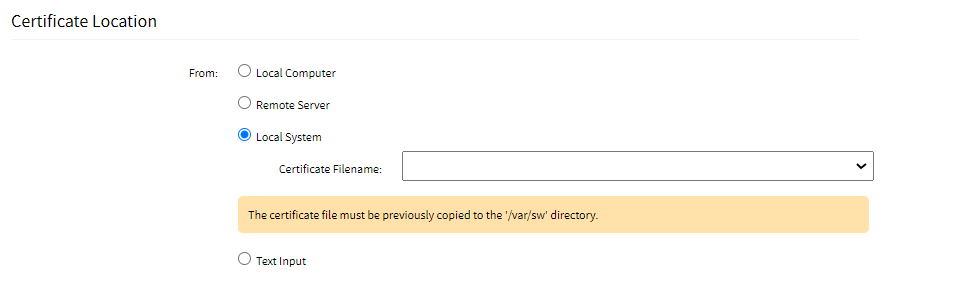
- Text input: Paste the content of the certificate here instead of uploading a file.
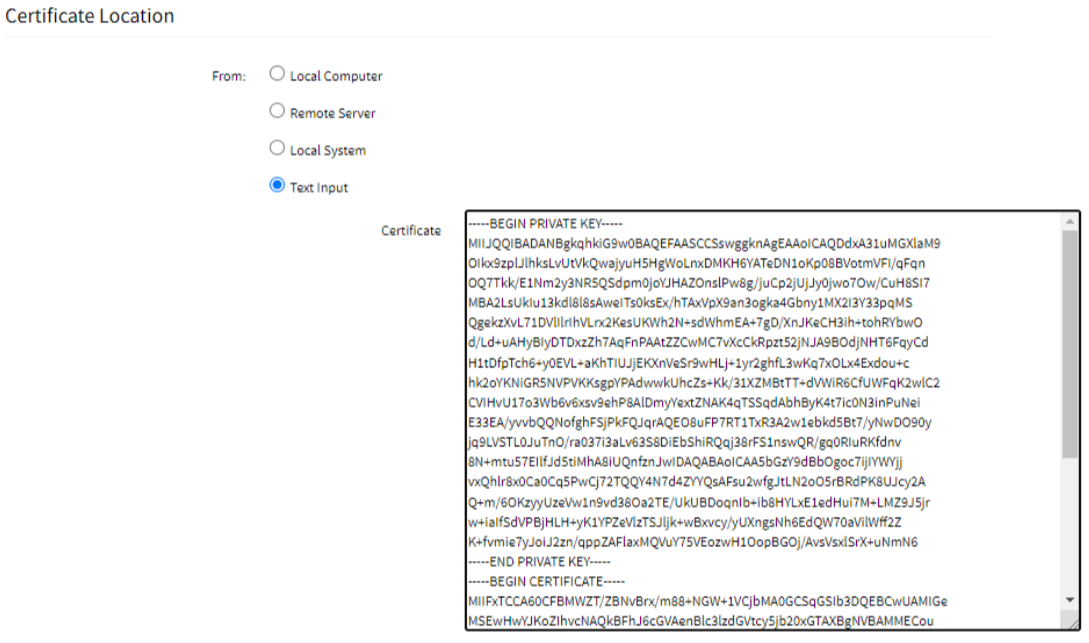
- Local Computer: Select this option if the certificate is available on your system locally.
- Click Save.
The certificate is successfully uploaded to the system.
Apply the Certificate to the System or Webserver
You can use a valid certificate as the system certificate in the following cases:
- CSR was generated in Nodegrid sent to a CA, signed, and uploaded again to the device.
- CSR was generated in Nodegrid and self-signed.
- A valid certificate is uploaded to the device bundled with its private key.
To apply a certificate on the system (webserver)
- Log in to the Nodegrid Device.
- Go to Systems :: Certificates.
- Select the required certificate.
- Click Apply as a System Certificate.
- Click Finish.
You will be logged out of Nodegrid. Enter the credentials again and the new certificate will be applied to the system.
Applying the Certificate while creating an IPsec Tunnel
The certificate created in the Certificates tab can be used while creating an IPSec tunnel. IPsec on Nodegrid supports authentication using X.509 certificates, which is a more secure way to establish a tunnel and identify the systems participating in the tunnel.
To create an IPsec Tunnel using the Certificate:
- Go to Network:: Ipsec :: Tunnel table.
- Click the Add button.
- In the Authentication Method, select Certificate.
- select the Left and Right Certificates.
- The Local and Remote sections are populated once you upload the certificates:
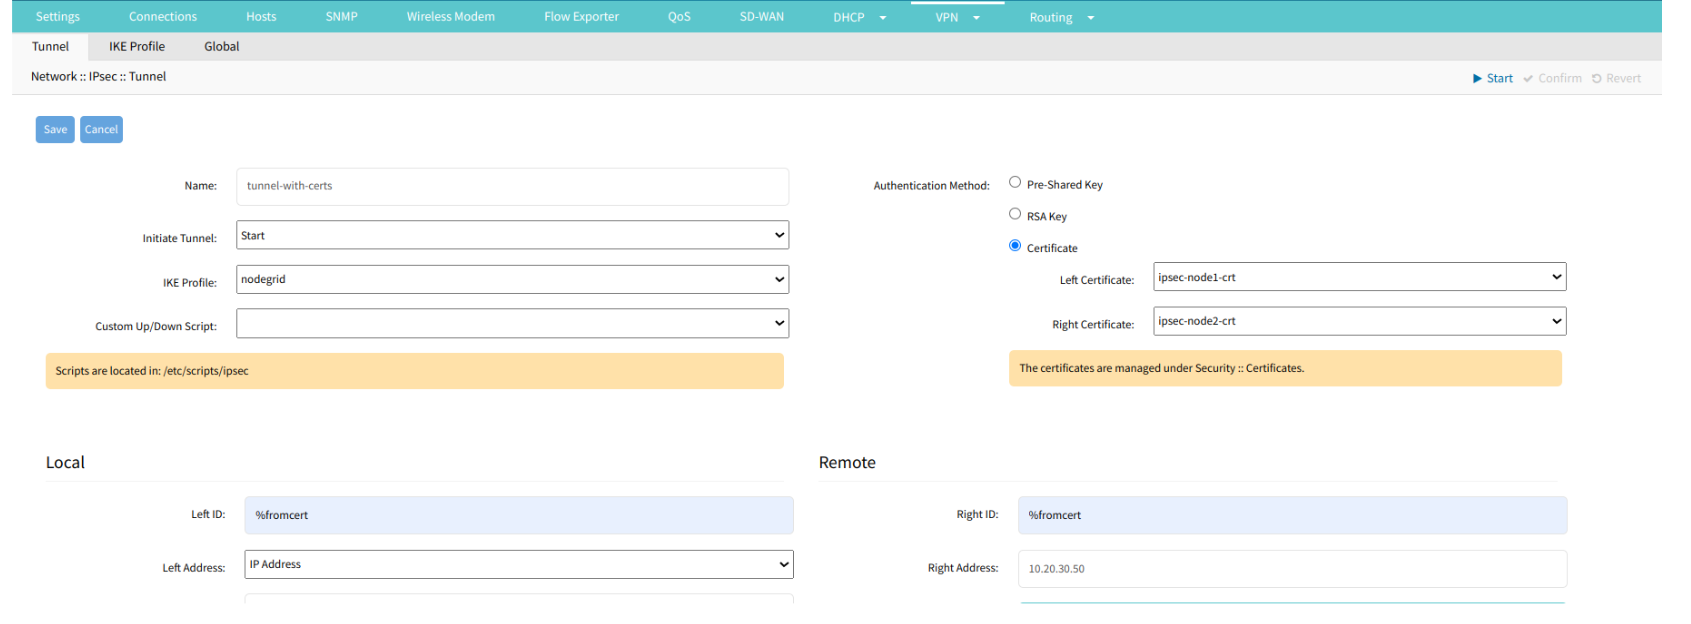
- Click Save.
The certificate is used to ensure secure authentication, encrypted data transfer, and trust between VPN endpoints.
Deleting a Certificate
To delete a certificate:
- Log in to the Nodegrid Device
- Go to Systems:: Certificates.
- Select the required certificate.
- Click Delete.
The certificate is no longer listed on this tab.
Was this article helpful?