Access sub-tab
- 13 Dec 2024
- 5 Minutes to read
- Print
- DarkLight
- PDF
Access sub-tab
- Updated on 13 Dec 2024
- 5 Minutes to read
- Print
- DarkLight
- PDF
Article summary
Did you find this summary helpful?
Thank you for your feedback
The Nodegrid Platform supports RS-232 Serial connections with the available Serial and USB interfaces. Ports are automatically detected and shown in the Devices menu. To provide access to the device, each port needs to be enabled and configured.
Before configuring the Nodegrid port, check the device manufacturer’s console port settings. Most devices use default port settings: 9600,8,N,1
The Nodegrid Console Server S Series supports advanced auto-detection. This simplifies configuration with automatic detection of the cable pinout (Legacy and Cisco) and connection speed.
Configure Device Type
This is a general description of the procedure. Based on the type of device, the details will change. Details provided here are the serial port configuration.
Go to Managed Devices :: Devices :: <device name> :: Access.
.png)
Configure location details:
Address Location (can use Compass icon)
Coordinates
Web URL
Launch URL via HTML5 checkbox (default: enabled)
Method: Select Internal Browser or Browser Extension Forwarder. When you select the Internal Browser option, the device session opens the usual setting with TTYD allowing you to interact with the device terminal remotely via a web interface. When you select the Browser Extension Forwarder option, the request path is changed and the browser plugin is activated for your device session. This allows you to navigate the managed device web interface, providing you with a seamless browsing experience of the device.
.png)
Configure port settings:
Baud Rate drop-down, select one (speed matching device settings) or (Auto, 9600, 19200, 38400, 57600, 115200).
Parity drop-down, select one (None-default, Odd, Even).
Flow Control drop-down, select one (None-default, Software, Hardware).
Data Bits drop-down, select one (5,6,7,8-default).
Stop Bits drop-down, select one (1-default, 2).
RS-232 signal for device state detection drop-down, select one (Auto, DCD, CTS, None).
Set Serial settings:
Enable device state detection based in data flow checkbox
Enable Hostname Detection checkbox
Multisession checkbox (several users can access the same device at the same time, and see the same output. First user has read-write access, others have read-only.)
Read-Write Multisession checkbox (if enabled, all connected users have read-write access to the session)
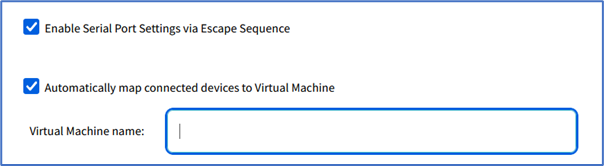
Enable Serial Port Settings via Escape Sequence checkbox
(optional) Select Enable Send Break (configured per device. Not available on: usb_kvm, usb_sensor, usb_device, local_serial). If selected, enter a new Break Sequence (sent via SSH console session).
If selected device is USB, this flag is shown: (available in v5.8+)
Select Automatically map connected devices to Virtual Machine checkbox (expands dialog), enter Virtual Machine name.
On Select Icon pop-up, select an icon.
On Mode drop-down, select one (Enabled, On-Demand, Disabled).
In the Expiration menu, select a radio button: Never, Expiration Date or Expiration Days and provide an appropriate value.
NOTE
With VM devices, both Date and Days are synced with the ESXi Servers where the VMs are constantly being added, moved, and deleted, or if the Nodegrid managed device license becomes available.
Date (YYYY-MM-DD) Device available until the specified date. After that date, set to Disabled mode. Admin user has 10 days to take action. After 10 days, the device and its data are removed from the system.
Days (between 1 and 9999999999) If no update on the device’s configuration after specified days, device and data is removed from the System (similar to a timeout).
In Inbound Access menu, enter details:
Skip authentication to access device (NONE authentication) checkbox (displays dialog).
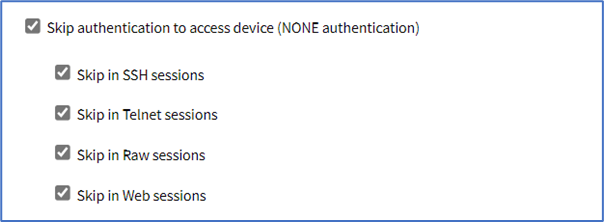
Skip in SSH sessions checkbox (default: enabled)
Skip in Telnet sessions checkbox (default: enabled)
Skip in Raw sessions checkbox (default: enabled)
Skip in Web sessions checkbox (default: enabled)
Escape Sequence (default: ^Ec – Ctrl+Shift+E+c)
Power Control Key (default: ^O – Ctrl+Shift+O)
Show Text Information checkbox
Select Enable IP Alias checkbox (user can connect to a device with IP addresses).
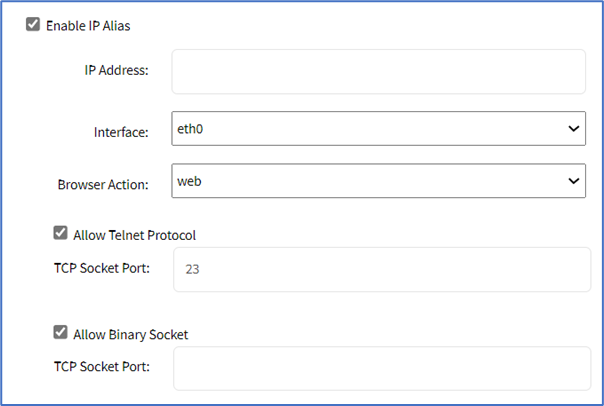
Enter IP Address.
On Interface drop-down, select one (backplane0, eth0, loopback).
On Browser Action drop-down, select one (console, web).
Select Allow Telnet Protocol checkbox. Enter TCP Socket Port (default: 23).

Select Allow Binary Socket checkbox. Enter TCP Socket Port.

Select Allow SSH protocol checkbox. Enter SSH Port.

Select Allow Telnet protocol checkbox. Enter Telnet Port.

Select Allow Binary Socket checkbox. Enter TCP Socket Port.

Select Enable Second IP Alias checkbox (same dialog as Enable IP Alias).
Click Save.
.png)
.png)


CLI Procedure
This example provides some of the configurations provided above.
Go to /settings/devices
Use the edit command with the port name to change the port configuration. Multiple ports can be defined.
Use the show command to display current values.
Use the set command for:
baud_rate (set to the correct speed matching device settings or to Auto)
parity (None (default), Odd, or Even)
flow_control (None (default), Software, Hardware)
data_bits (5, 6, 7, 8 (default))
stop_bits (1)
rs-232_signal_for_device_state_detection (DCD (default), None, CTS)
mode (Enabled, On-Demand, Disabled)Use the commit command to change the settings.
[admin@nodegrid /]# cd /settings/devices
[admin@nodegrid devices]# edit ttyS2
[admin@nodegrid {devices}]# show
name: ttyS2
type: local_serial
address_location =
coordinates =
web_url =
launch_url_via_html5 = yes
baud_rate = 9600
parity = None
flow_control = None
data_bits = 8
stop_bits = 1
rs-232_signal_for_device_state_detection = DCD
enable_device_state_detection_based_in_data_flow = no
enable_hostname_detection = no
multisession = yes
read-write_multisession = no
icon = terminal.png
mode = disabled
skip_authentication_to_access_device = no
escape_sequence = ^Ec
power_control_key = ^O
show_text_information = yes
enable_ip_alias = no
enable_second_ip_alias = no
allow_SSH_protocol = yes
SSH_port =
allow_telnet_protocol = yes
telnet_port = 7002
allow_binary_socket = no
data_logging = no
[admin@nodegrid {devices}]# set mode=enabled baud_rate=Auto
[admin@nodegrid {devices}]# commit
Configure USB Mode
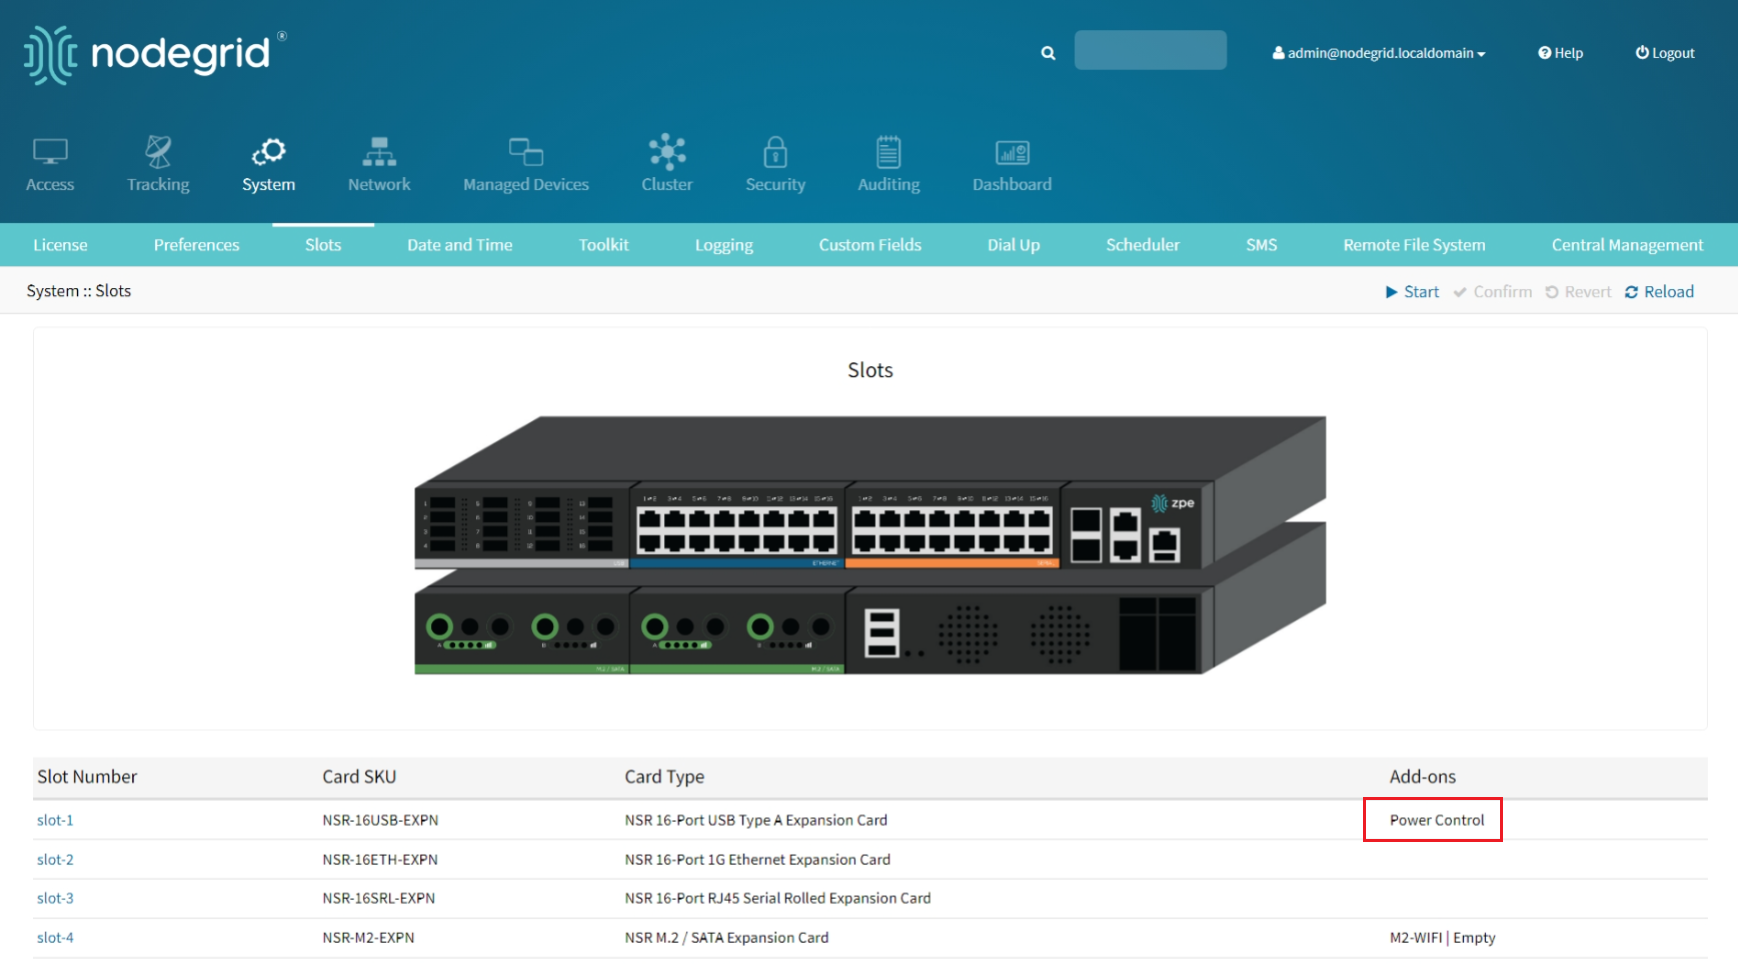
To confirm the USB card supports USB Passthrough, go to System :: Slots . Check the Add-ons column for an entry: Power Control.
Go to Managed Devices :: Devices.
On the list, locate the USB and click the Name (displays dialog).
On the Access tab, USB Mode menu, select one:
Host radio button (expands dialog), Initial State drop-down, select one (On, Off, Last State)
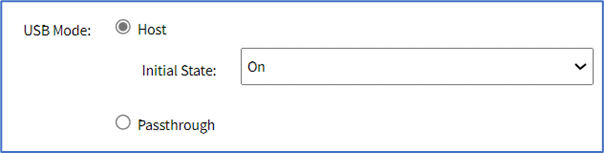
NOTE
The device with an internal USB serial adapter provides the power for the adapter. Power control setting does not affect power to the USB.
Passthrough radio button (expands dialog).

NOTE
When a device’s Passthrough mode is enabled, its peer is also set to Passthrough mode.
Click Save.


Configure SSH Key Authentication
For added security, devices can be configured to authenticate via SSH keys. When enabled, SSH is connected with key pairs (user does not require password).
NOTE
Not all devices support this feature.
Go to Managed Devices :: Devices :: <device name> :: Access.
Select Allow Pre-shared SSH Key checkbox.
Click Save.
The SSH Keys button displays next to the Save and Return buttons.
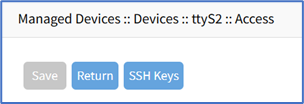
Click SSH Keys (expands dialog).
On SSH Key Type drop-down, select one (ECDSA 521, ECDSA 384, ECDSA 256, ED25519, DSA 1024, RSA 4096, RSA 2048, RSA 1024).
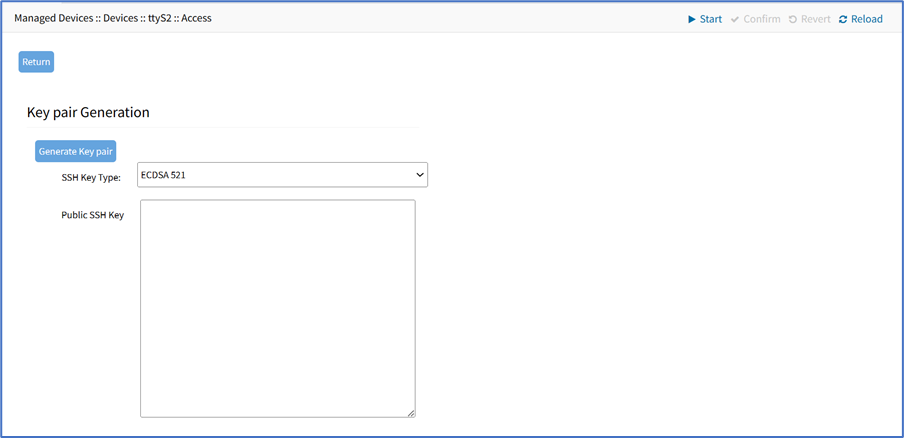
Click Generate Key Pair.
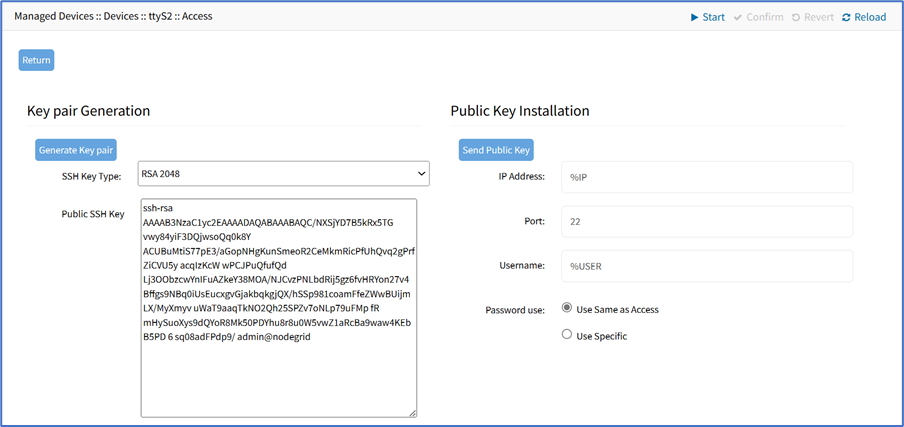
In Public Key Installation menu, enter details:
IP Address (default: %IP)
Port (default: 22)
Username (default: %USER)
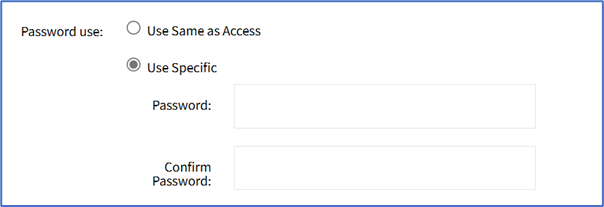
On Passport Use menu (select one)
Use Same as Access radio button
Use Specific radio button (expands dialog), enter Password and Confirm Password.
Send Public Key (sends key to the device). On a connection to a Managed Device with Pre-shared SSH Key enabled, username is still required. If the device fails to authenticate, at the prompt, enter the password. If an error message displays, resolve and click again.
NOTE
Not all devices support the Send Public Key feature. If not, manually copy the Public SSH Key textbox contents to the device.
Click Return (goes back to the Access sub-tab view).


Enable Launch URL with Chrome Forwarder extension
(Chrome browser only) This requires Chrome Forwarder extension. This reduces resource usage by redirecting to a web server. This provides the same behavior as the HTML5 frame. The device’s interface can be viewed in full-screen mode rather than a windowed frame.
Install Chrome Forwarder Extension and Activate
Open Google Chrome and go to https://chrome.google.com/webstore/detail/nodegrid-web-access-exten/cmcpkbfnablakhllgdmbhkedpoengpik
Click Add to Chrome.
When the extension is installed, go to Managed Devices :: Devices :: <device name> :: Access.
Select Launch URL via Forwarder checkbox.
Click Save.
Was this article helpful?