This section provides detailed instructions to set up SSL VPN on Nodegrid, enabling secure remote access. Follow the steps below to generate the required certificates and configure the VPN server and client.
Configuring Nodegrid as a VPN server
Configuring Nodegrid as a VPN Client
Testing the VPN Connection
Checking the server Status
Configuring Nodegrid as a VPN Server
Pre-requisites
Before you begin configuring a VPN using SSL, ensure that you meet the following pre-requisites:
You have the requiered certificates (CA, Client, and server)
Place the CA, Server, and Client certificates in the correct location
Copy the required files to the following location on the server: /etc/openvpn/CA/
In the case of TLS authentication, copy the tls-auth.key file to the /etc/openvpn/CA/ location
Copy the ca.crt file to the Nodegrid client:
scp keys/ca.crt admin@192.168.1.2
Configuring Nodegrid as a VPN Server
Once you have the required server certificates placed in the /etc/openvpn/CA/ location, perform the following actions to configure Nodegrid as a VPN server:
Log in to the Nodegrid Web UI
Go to Network :: VPN:: SSL VPN
Click the Server tab
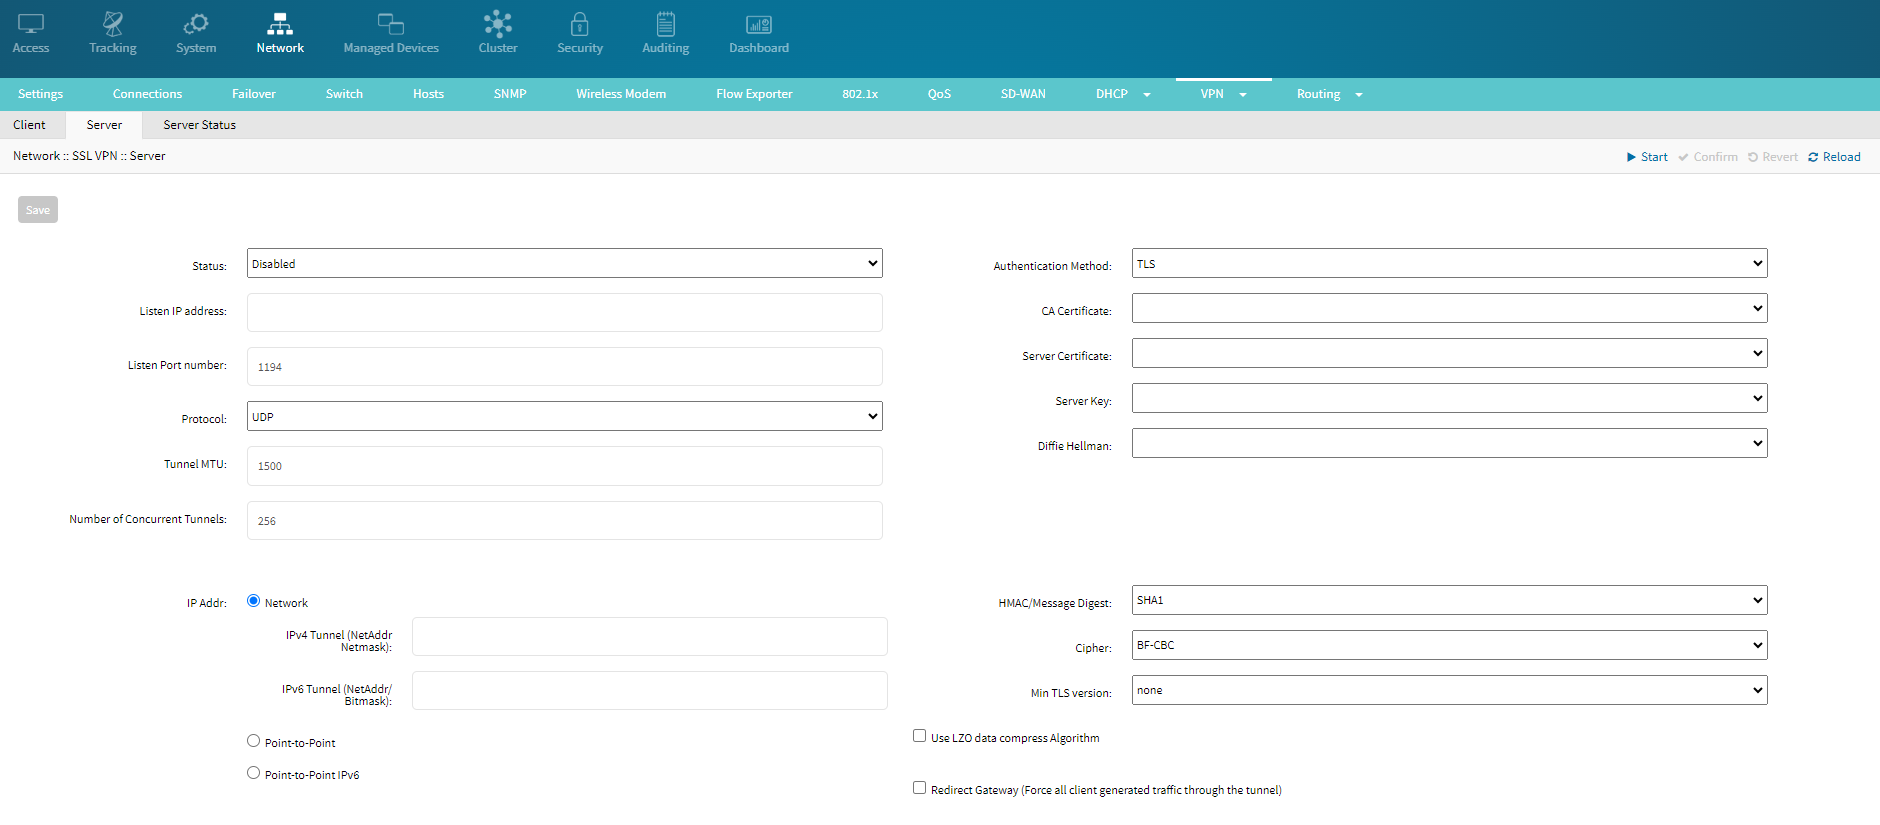
Configure the following details:Status: From the drop-down list select enabled to enable the VPN server
Listen IP address: The IP address the VPN server listens to for incoming connections. Specify the IP address that the server will use to accept VPN connections
Listen Port number: The port number on which the VPN server listens for incoming connections. The Default is 1194 for OpenVPN. If you change the port number, ensure you also configure the same one for the client
Protocol: The protocol used for VPN communication. To make your connection more secure, recommend using TCP
Tunnel MTU: 1500: The maximum transmission unit (MTU) size for the VPN tunnel. This defines the largest packet size transmitted over the VPN tunnel
Number of Concurrent Tunnels: 256: The maximum number of concurrent VPN connections the server can handle
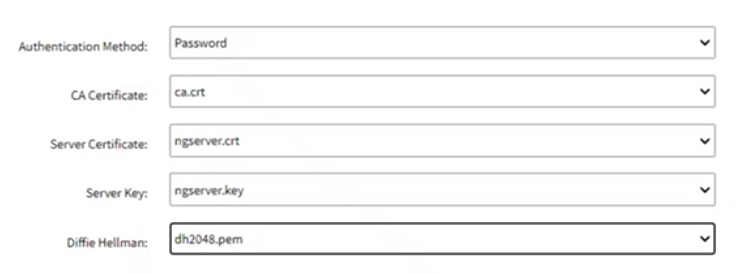
Authentication Method: Select one of the Authentication Method. If you have placed your files correctly in the requiered location, the following fields are populated
Password:
CA Certificate: The certificate authority (CA) certificate validates the server and client certificates
Server Certificate: The certificate used to authenticate the VPN server to the clients
Server Key: The private key corresponding to the server certificate. This key should be kept secure and not shared
Diffie Hellman: The Diffie-Hellman parameters used for key exchange. These parameters help establish a secure connection
TLS: TLS (Transport Layer Security) is a common choice for secure communication.
CA Certificate: From the drop-down list select the required CA certificate
The certificate authority (CA) certificate validates the server and client certificatesServer Certificate: The certificate used to authenticate the VPN server to the clients. From the drop-down list select the required Server certificate.
Server Key: The private key corresponding to the server certificate. This key should be kept secure and not shared
Diffie Hellman: The Diffie-Hellman parameters used for key exchange. These parameters help establish a secure connection
Static key:
Select Static Key from the Authentication drop-down list
Select a secret from the drop-down list
Select the Diffie Hellman from the list. The Diffie-Hellman parameters are used for key exchange. These parameters help establish a secure connection
IP Addr: The IP address assigned to the VPN server within the VPN network
Network: The network settings for the VPN server, including IPv4 and IPv6 configurations
IPv4 Tunnel (NetAddr Netmask): The network address and netmask for the IPv4 VPN tunnel. This defines the range of IP addresses used for the VPN tunnel
IPv6 Tunnel (NetAddr/ Bitmask): The network address and bitmask for the IPv6 VPN tunnel. This defines the range of IPv6 addresses used for the VPN tunnel
Point-to-Point: The configuration for point-to-point connections within the VPN. This setting specifies the IP addresses for direct connections between VPN endpoints
Point-to-Point IPv6: The configuration for point-to-point IPv6 connections within the VPN. This setting specifies the IPv6 addresses for direct connections between VPN endpoints
HMAC/Message Digest: Select the requiered algorithm from the drop-down list
Cipher: BF-CBC: Select the requiered encryption algorithm for securing the VPN traffic
Min TLS version: The minimum version of TLS required for the connection. None indicates no minimum version, specifying a version can enhance security
Use LZO data compress Algorithm: Option to enable or disable LZO compression for the VPN data. Compression can improve performance but may have an impact on security
Redirect Gateway (Force all client-generated traffic through the tunnel): Enabling this option forces all client traffic to be routed through the VPN tunnel, providing a higher level of privacy and security by routing all traffic through the VPN server
Click Save
Your server is now successfully configured.
Once you establish Nodegrid as a server, you can configure any other Nodegrid as a client to connect to the server using the steps mentioned in the next section. Once the client is configured, you can see the details of the connected clients in the Server Status tab.
Server Status
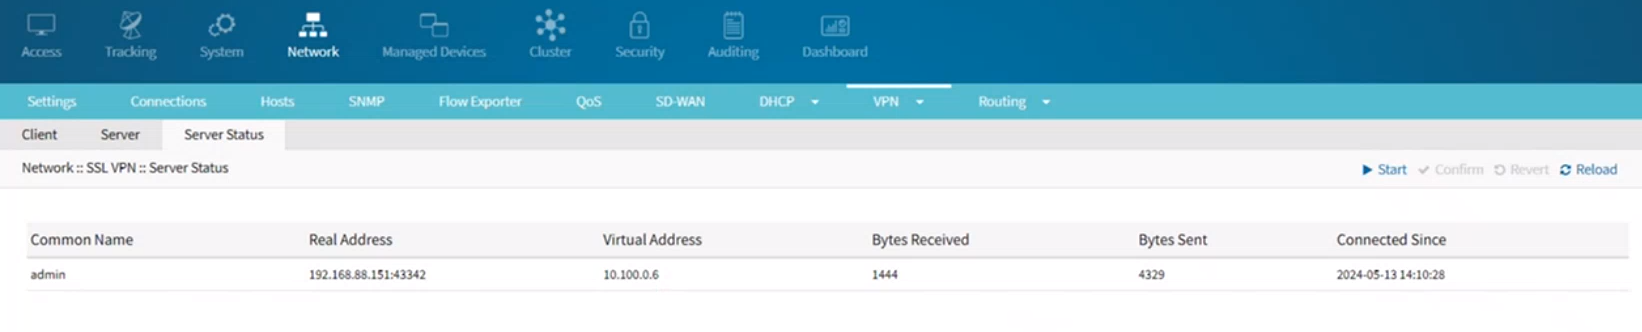
Once your server is configured, you can go to the Server:: Status tab, to see the clients that are connected to the server:
Common Name: The identifier or name assigned to the VPN client or user. This is extracted from the client’s certificate and is used to uniquely identify each VPN client in the server's logs and configuration.
Real Address: The IP address from which the VPN client connects. This is the public IP address assigned to the client by their ISP, and it is visible to the VPN server.
Virtual Address: The IP address assigned to the VPN client within the VPN network. This address is used for communication within the VPN tunnel and is part of the virtual private network’s IP range.
Bytes Received: The total amount of data (in bytes) that the VPN client has received from the VPN server. This metric helps monitor the data usage and traffic flow from the server to the client.
Bytes Sent: The total amount of data (in bytes) that the VPN client has sent to the VPN server. This metric helps monitor the data usage and traffic flow from the client to the server.
Connected Since: The timestamp indicates when the VPN client established the current connection with the VPN server. This information helps track the duration of the client’s session and can be useful for troubleshooting and monitoring purposes.
Configuring Nodegrid as a Client
You can configure Nodegrid as a Client, using either of the following methods:
Adding a new client configuration
Importing a client configuration
When you configure Nodegrid as a client, you need the CA, client, and server certificate for authentication. Ensure that the required certificate and keys are placed in the correct location before beginning the configuration:
Adding a New Client Configuration
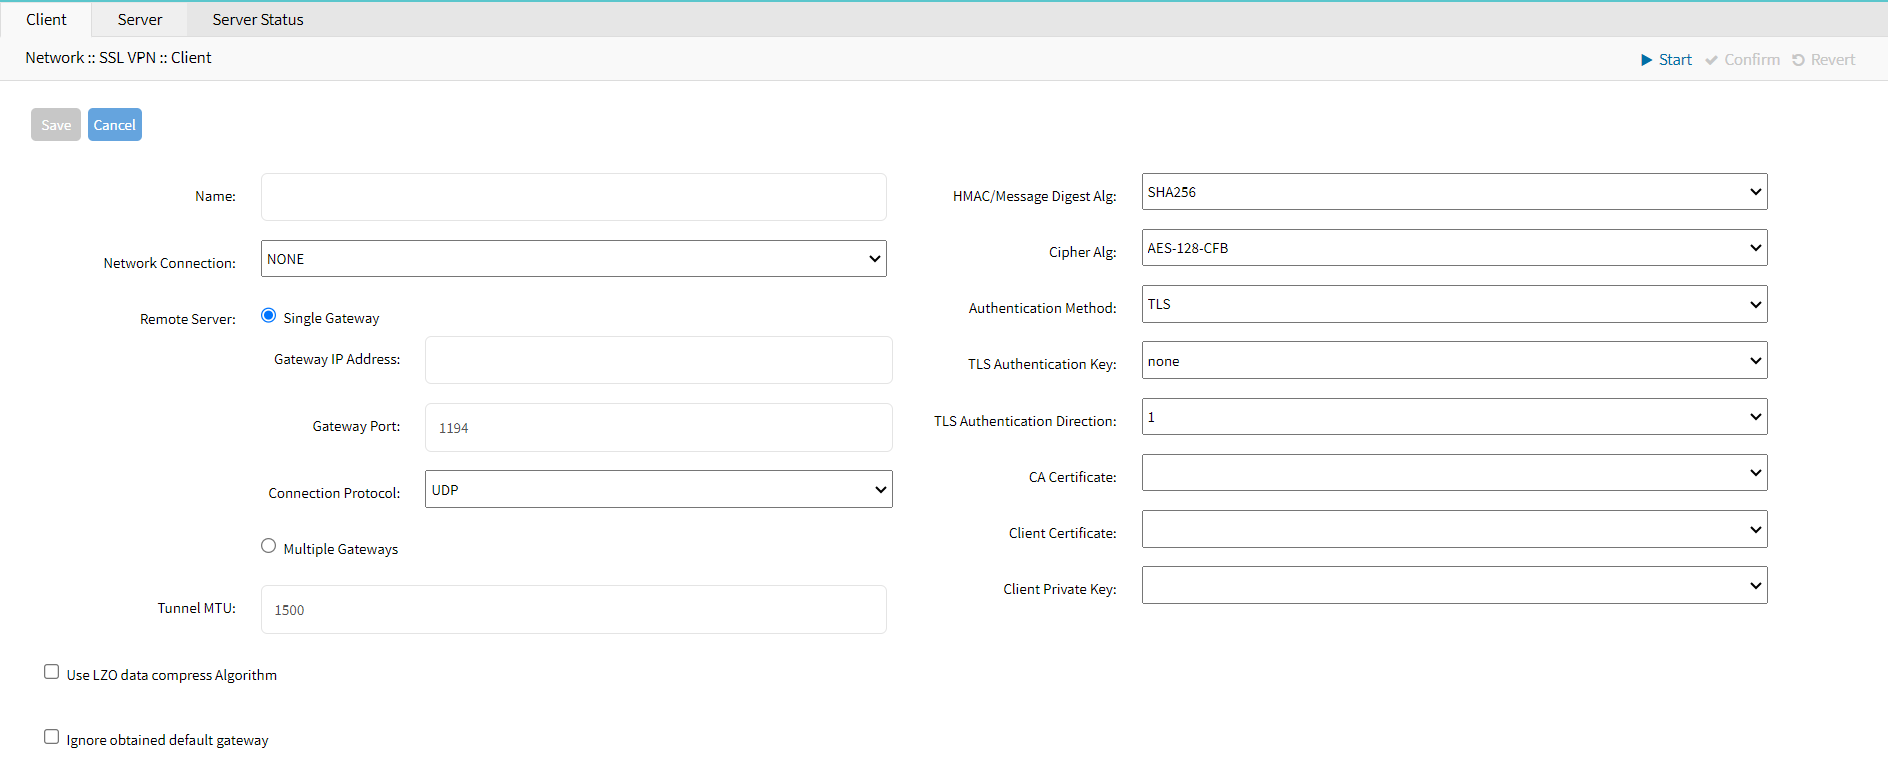
Perform the following actions to configure Nodegrid as a Client.
Name: The name assigned to this VPN configuration. This can be used to identify and manage multiple VPN configurations
Network Connection: Select ETHO from the drop-down list
Remote Server: The remote server configuration details for the VPN connection
Single Gateway: Indicates that the VPN connection will use a single gateway for connecting to the remote server
Gateway IP Address: The IP address of the remote VPN server's gateway
Gateway Port: The port number on which the remote VPN server is listening. The default is 1194 for OpenVPN. Select the same port that you selected while configuring a server
Connection Protocol: Select TCP to make your connection more secure
Multiple Gateways: Indicates that the VPN connection can use multiple gateways for connecting to the remote server. This can provide redundancy and load balancing
Tunnel MTU: The maximum transmission unit (MTU) size for the VPN tunnel. This defines the largest packet size transmitted over the VPN tunnel
Use the LZO data compress Algorithm: Option to enable or disable LZO compression for the VPN data. Compression can improve performance but may have an impact on security
Ignore the obtained default gateway: If enabled, the client will ignore the default gateway obtained from the VPN server, allowing the use of a different gateway
HMAC/Message Digest Alg: SHA256: The hash algorithm used for HMAC (Hash-based Message Authentication Code) to ensure data integrity. SHA256 provides a strong level of security
Cipher Alg: AES-128-CFB: The encryption algorithm used for securing the VPN traffic. AES-128-CFB (Advanced Encryption Standard with 128-bit key in Cipher Feedback mode) is a common and secure choice
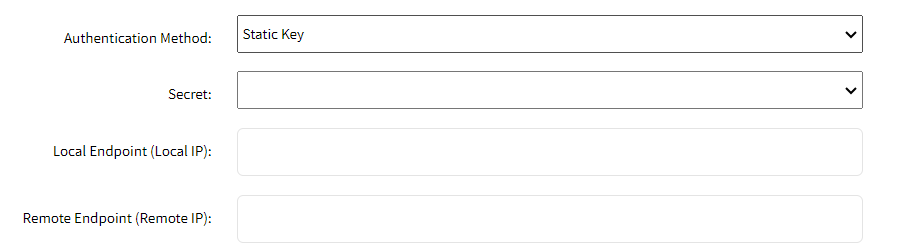
Authentication Method:
TLS: The method used for authenticating the VPN client. TLS (Transport Layer Security) is a common choice for secure communication
TLS Authentication Key: none: The key used for additional authentication via TLS. None indicates that no specific key is set, though specifying a key can enhance security
TLS Authentication Direction: The direction of TLS authentication. This indicates whether the key is used for incoming (1) or outgoing (0) authentication
CA Certificate: The certificate authority (CA) certificate validates the server and client certificate
Client Certificate: The certificate used to authenticate the VPN client to the server
Client Private Key: The private key corresponding to the client certificate. This key should be kept secure and not shared
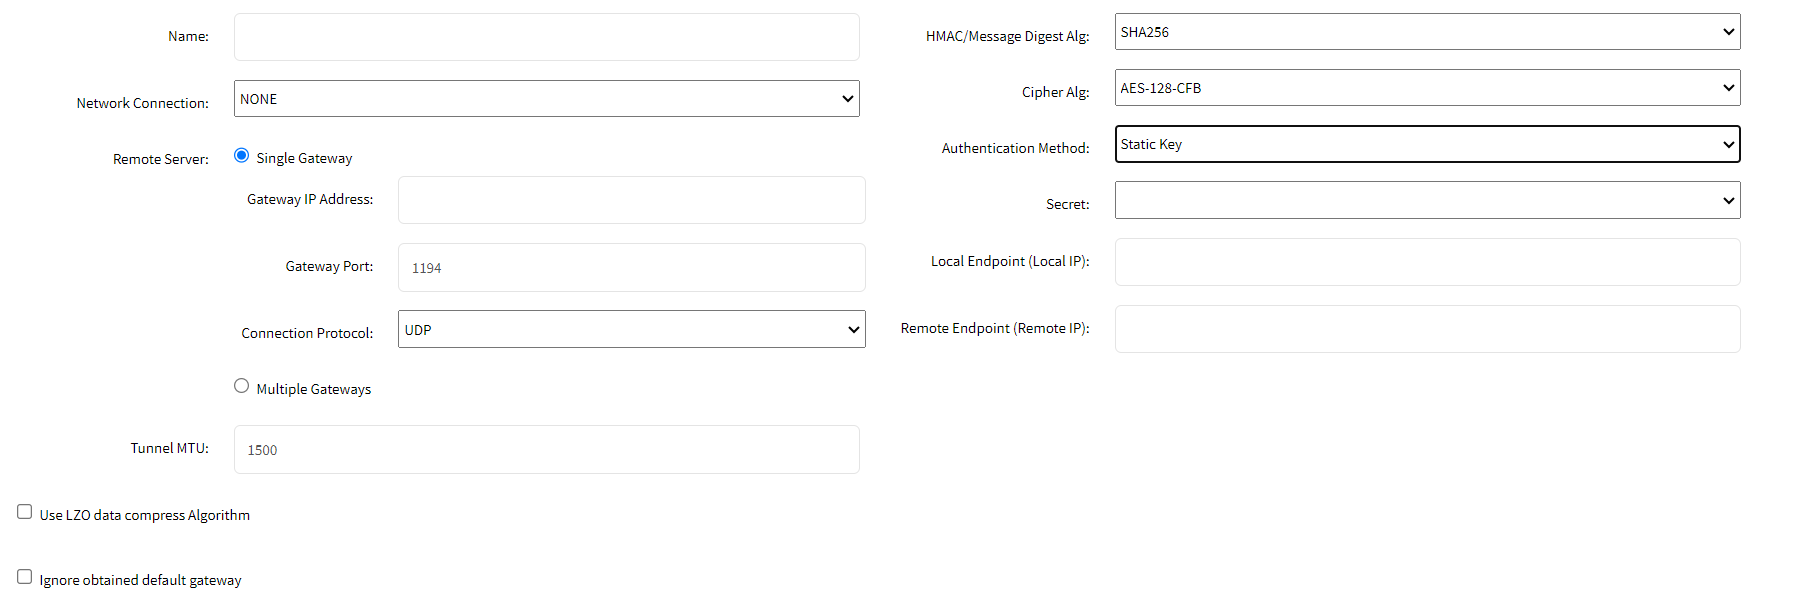
Static Key:
Secret: The pre-shared static key is used to authenticate the VPN client and server. Select the key from the drop-down list
Local Endpoint (Local IP): The local IP address assigned to the VPN interface on the client side. This IP address is used within the VPN network to identify the local endpoint of the VPN connection
Remote Endpoint (Remote IP): The remote IP address is assigned to the VPN interface on the server side. This IP address is used within the VPN network to identify the remote endpoint of the VPN connection
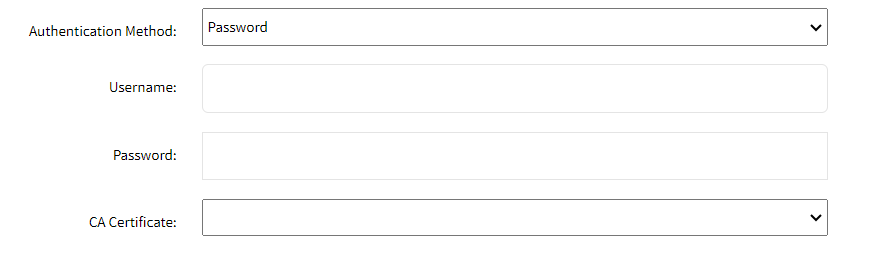
Password: Enter the following details:
Username: The username used for authenticating the VPN client. This is typically provided by the VPN administrator and is required for connecting to the VPN server
Password: The password associated with the username for authenticating the VPN client. This should be kept secure and not shared with others
CA Certificate: The certificate authority (CA) certificate is used to validate the server certificate. This ensures that the VPN client connects to a trusted server, preventing man-in-the-middle attacks
Password plus TLS: This method uses both a username and password for authentication and TLS (Transport Layer Security) for secure communication. This adds an extra layer of security by combining both types of authentication.
Username: The username used for authenticating the VPN client. This is typically provided by the VPN administrator and is required for connecting to the VPN server
Password: The password associated with the username used for authenticating the VPN client. This should be kept secure and not shared with others
TLS Authentication Key: The key used for additional authentication via TLS. "None" indicates that no specific key is set, though specifying a key can enhance security by ensuring that the client and server use the same pre-shared key for the TLS handshake
TLS Authentication Direction: The direction of TLS authentication. This typically indicates whether the key is used for incoming (1) or outgoing (0) authentication. Setting this ensures proper use of the TLS authentication key
CA Certificate: The certificate authority (CA) certificate is used to validate the server certificate. This ensures that the VPN client is connecting to a trusted server, preventing man-in-the-middle attacks
Client Certificate: The certificate used to authenticate the VPN client to the server. This certificate is issued by the CA and is required for establishing a secure TLS connection
Client Private Key: The private key corresponding to the client certificate. This key should be kept secure and not shared with others. It is used to establish the client's identity and enable encrypted communication

Importing OVPN Client Configuration
Before you begin to import the OVPN configuration, ensure that you have the requiered ovpn file and place it in the requiered location. You can request the ovpn file from the IT administrator.
Go to Network :: VPN :: SSL VPN :: Client
Click Import OVPN (displays dialog)
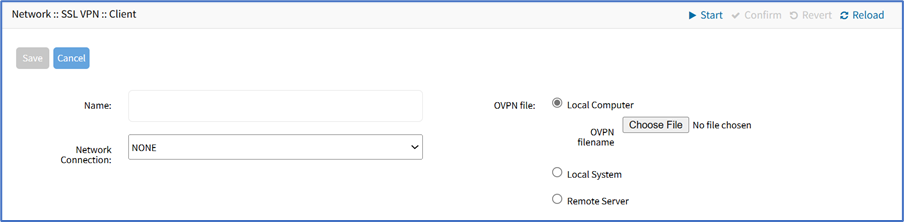
Enter Name.
On Network Connection drop-down, select one (NONE, ETH0, ETH1, hotspot)
In OVPN File menu, select one
Local Computer radio button (expands dialog), click Choose File. Locate and select the file
Local System radio button (expands dialog). On OVPN filename drop-down, select one

Remote Server radio button (expands dialog), enter details:
Enter URL: URL can be the IP address or hostname/FQDN. If using IPv6, use brackets [ ... ]. Supported protocols: FTP, TFTP, SFTP, and SCP.)
Enter Username and Password
(optional) Select The path in url to be used as the absolute path name checkbox.
Click Save.
Testing the VPN connection as a Client
Once you configure the Client, you can test whether the connection is working.
Log in as a root user on the client machine from the CLI. This ensures you have the necessary permissions to run network commands and check the VPN connection
Ping the server using the following command: ping <IP address of the server> Replace <IP address of the server> with the actual IP address of your VPN server. Example:
ping 192.168.1.1This step verifies that the client can reach the VPN server over the network
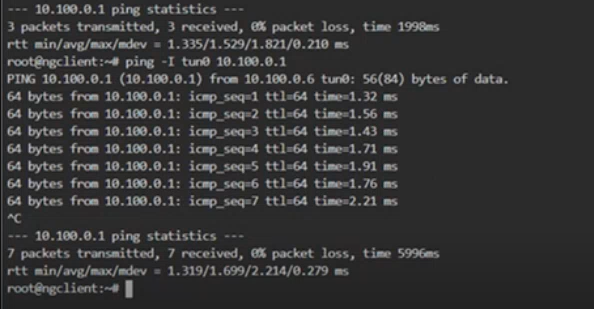
Once the connection is verified, check if the VPN tunnel is established by pinging through the tunnel interface:
ping -I tun0 10.100.0.1This command specifies the tunnel interface (typically tun0) and the internal IP address assigned within the VPN. Example:
-I tun0 10.100.0.1Replace 10.100.0.1 with the actual internal IP address of the VPN server or another client within the VPN network