Settings are provided with individual sections on the page.
Configure Nodegrid Device Preferences
Go to SYSTEM::PREFERENCES
In the Nodegrid Location section, enter details:
Enter Address Location (a valid address for the device location).
Enter Coordinates (Lat, Lon) (if GPS is available, click Compass icon
 or manually enter GPS coordinates).
For Help Location, if applicable, enter alternate URL location for the User Guide. (The administrator can download the documentation from ZPE (HTML5 or PDF, as preferred) to be available for users (when Help icon is clicked.)
In the Session Idle Timeout section, enter the number of seconds (number of seconds of session inactivity until the session times out and logs the user off.) This setting applies to all telnet, SSH, HTTP, HTTPS, and Console sessions.
In Timeout (s), enter a value:
zero (0) – the session will never expire
Enter a value greater than or equal to 90. The default unit is seconds. Once the session is inactive for the specified duration, the user is logged out of the session and is informed on the GUI that the session has been timed out
In the Configuration Confirm Timeout section, enter the number of seconds the user has to confirm the change before reverting to the previous configuration:
In Timeout (s), enter a value:
Enter a value between 30 and 3600 seconds (default is 60)
Note
Configuration Confirm Timeout settings can be configured through the API, but the rollback workflow (
config_start) and automatic rollback is only supported in the WebUI and CLI.
In the Nodegrid Configuration section:
Enter Revision Tag (a free format string used as a configuration reference tag - can be manually updated or updated with an automated change management process)
Latest Profile Applied (read-only) is the last applied profile (ZTP process or on ZPE Cloud)
Show Hostname on WebUI Header checkbox (displays the device hostname on the WebUI banner. For Choose Text Color, click in the color box and select color (click in color grid or enter RGB or CYMK values (optional)
Note
Any change in value is applied on the next login.
In the Logo Page Logo Image section: The administrator can change the logo image (png or jpg) used on the Nodegrid WebUI login. It can be uploaded from the local desktop or a remote server (FTP, TFTP, SFTP, SCP, HTTP, and HTTPS). This is the URL format (username and password may be required): <PROTOCOL>://<Server Address>/<Remote File>.
Logo Image selection checkbox (optional)
In Logo Image menu, select one:
Use default logo image radio button
Update log image from local computer radio button (expands dialog). Click Choose File to locate and select logo (jpg, png)On Remote Server radio button (expands dialog). URL (URL can be the IP address or hostname/FQDN. If using IPv6, use brackets [ ... ]. Supported protocols: FTP, TFTP, SFTP, and SCP.)
Enter Username and Password
Select The path in url to be used as absolute path name checkbox (optional)
After upload, refresh the browser cache to display the new image
In the Logo Banner Message section, enter content in Banner textbox. Or modify text, as needed (use Enter for hard returns).
NOTE
Nodegrid can be configured to show a login banner on Telnet, SSHv2, HTTP, HTTPS and Console login. This banner is displayed on the device login page. The default content (below) can be edited.
The message can include device-specific information, such as Device Alias or other device identifier details.
In the Utilization Rate Events section:
Enable Local Serial Ports Utilization Rate checkbox (optional)
Select Enable License Utilization Rate checkbox
Enter Percentage to trigger events (event notification is generated when percentage is reached)
In the Serial Console section, on Speed drop-down, select baud rate (9600, 19200, 38400, 57600, 115200)
In the Power Supplies section, select Enable Alarm Sound when one power supply is powered off checkbox
NOTE
This displays only when device is equipped with two power supplies). Includes option to enable alarm when powered off.
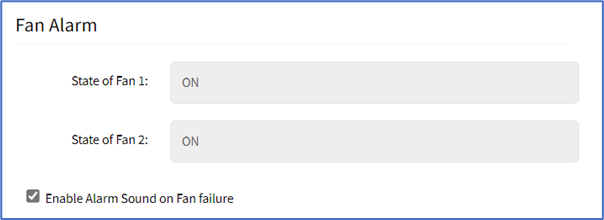
In the Fan Alarm section (displays only when device is equipped with fans), select Enable Alarm Sound on Fan Failure checkbox
In the Network Boot section:
NOTE
Nodegrid can boot from a network ISO image.
Enter Unit IPv4 Address. (URL format:http://ServerIPAddress/PATH/FILENAME.ISO)
Enter Unit Netmask
On Unit Interface drop-down, select one (eth0, eth1)
Enter ISO URL
Review details, then click Save
Configuration Confirm Timeout CLI
To configure the number of seconds the user has to confirm the change before reverting to the previous configuration via CLI, follow the example below:
Path to preference (persistent): /settings/system_preferences/configuration_confirm_timeout
# Set a persistent timeout (takes effect for future sessions)
[admin@nodegrid /]# cd /settings/system_preferences
[admin@nodegrid system_preferences]# set configuration_confirm_timeout=300
Start configuration with inline override (session-only):
# Inline override only for this transaction; does not persist
[admin@nodegrid /]# config_start --timeout 120
... make changes ...
[admin@nodegrid /]# config_confirm
Note
Precedence: If
--timeoutis supplied, it overrides the saved preference for that run only. The saved value in System Preferences remains unchanged.
Configuration Confirm Timeout API
To configure the number of seconds the user has to confirm the change before reverting to the previous configuration via API, follow the example below:
API -/api/v1/system/preferences
Field: configuration_confirm_timeout (seconds) -integer, range 30-3600, default 60.
GET example:
GET /api/v1/system/preferences

200 OK
{
  ...
  "configuration_confirm_timeout": 60,
  ...
}
PUT example:
PUT /api/v1/system/preferences
Content-Type: application/json

{
  "configuration_confirm_timeout": 300,
  /* include other required fields per schema */
}

204 No Content
Note
Validation: values outside 30–3600 or non-numeric types must be rejected. Updates persist and are reflected in subsequent GETs.