Review/edit System Information
Go to Network :: SNMP.
Click System (displays dialog).
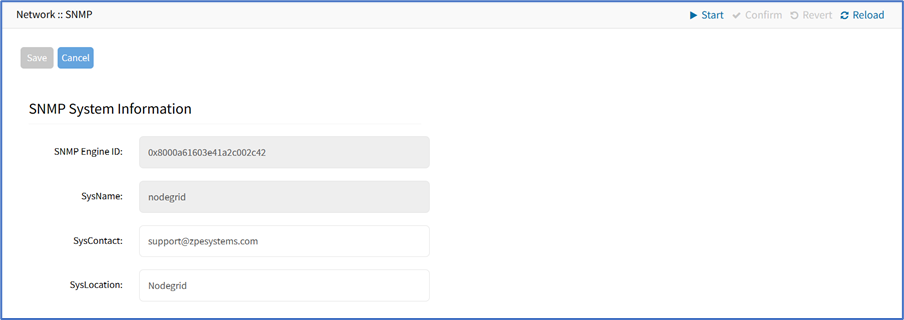
Two fields can be edited:
SysContact (email address)
SysLocation (location name)
If changed, click Save.
If not, click Cancel to return to table.
Add SNMP Community/Username Configuration
Go to Network :: SNMP.
Click Add (displays dialog).
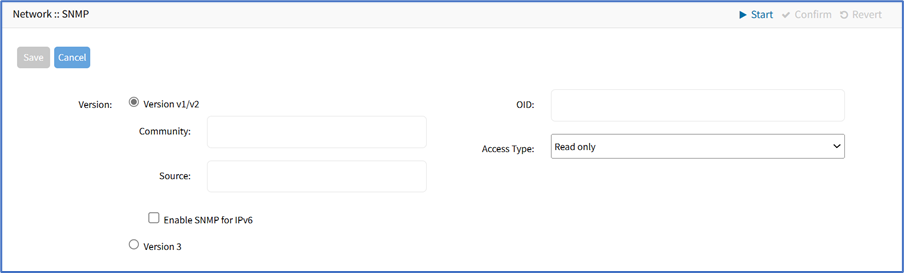
In the Version menu (select one):
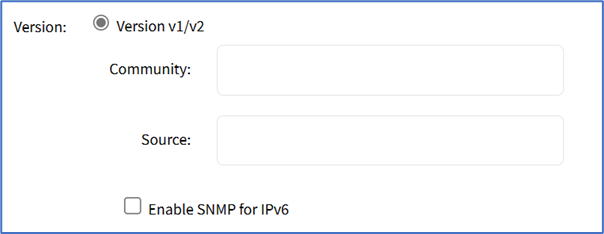
Version V1/V2 radio button (expands dialog). Enter Community and Source. (if applicable) Enable SNMP for IPv6 checkbox.
Version 3 radio button (expands dialog):
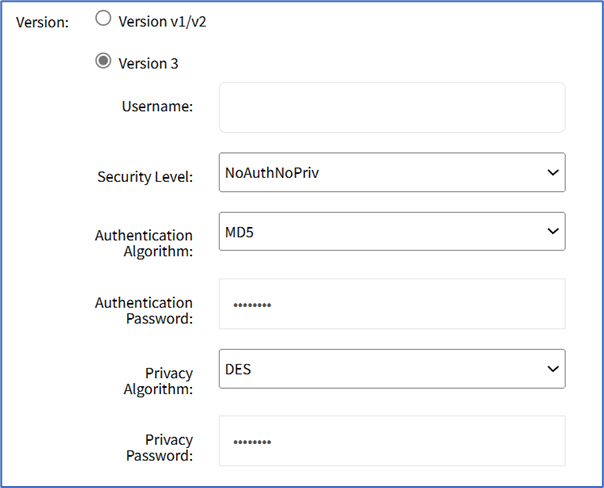
Enter Username.
On Security Level drop-down, select one (NoAuthNoPriv, AuthNoPriv, AuthPriv).
On Authentication Algorithm drop-down, select one (MD5, SHA, SHA-224, SHA-256, SHA-384, SHA-512).
Enter Authentication Password.
On Privacy Algorithm drop-down, select one (DES, AES, AES-192, AES-256).
Enter Privacy Password
Note
Now when using the export_settings command in CLI there will be a behavior change. The fields authentication_password and privacy_password will no longer display the actual password values as this implementation will store SNMPv3 passwords in a hashed format. For this the service needs to be enabled on the SECURITY::SERVICES::GENERAL SERVICES page, under Active Services, Enable SNMP Service checkbox.
Before the SNMP service is enabled:
It is possible to create and configure SNMPv3 users and traps even if the SNMP service is currently disabled.
During this phase, SNMPv3 authentication and privacy passwords are stored in plain text in the system configuration.
This is necessary so the system can apply the credentials correctly when the SNMP service is later enabled.
After the SNMP service is enabled:
Once the SNMP service is enabled for the first time, Nodegrid will automatically hash all stored SNMPv3 passwords.
From the point the service is enabled, SNMPv3 credentials are no longer stored in plain text.
Subsequent updates to SNMPv3 passwords are also stored only in hashed form.
Warning
Executing “Apply Settings” on a device with a different MAC Address than the one used during “Save Settings” will break SNMPv3 functionality. In such cases, you must re-enter the passwords configured for SNMPv3 users and/or traps.
This condition applies only to old installations in which “Save Settings” was executed on a device that was upgraded without disk reformatting. If “Save Settings” was performed on a new installation (i.e., after a software upgrade with disk formatting or after resetting the unit to factory defaults), “Apply Settings” will function normally.
On OID menu:
OIDs and Descriptions are:
ngCellularConnections (OID: .1.3.6.1.4.1.42518.4.2.1.1.7)
DESCRIPTION: This is the root for cellular connections.ngCellularNumOfConnections (OID: .1.3.6.1.4.1.42518.4.2.1.1.7.1.0)
DESCRIPTION: This object contains number of Cellular Connections. This identifies the number of Cellular Connections.ngCellularConnectionsTable (OID: .1.3.6.1.4.1.42518.4.2.1.1.7.2)
DESCRIPTION: This table has information about Cellular Connections in this unit.ngCellularConnectionsEntry (OID: .1.3.6.1.4.1.42518.4.2.1.1.7.2.1)
DESCRIPTION: An entry for each Cellular Connection plugged in this unit. Each entry contains information on connection status, slot, SIM, data consumption and signal strength.ngCellularConnectionNumber (OID: .1.3.6.1.4.1.42518.4.2.1.1.7.2.1.1)
DESCRIPTION: This object unique identifies Cellular Connection Index.ngCellularConnectionSlot (OID: .1.3.6.1.4.1.42518.4.2.1.1.7.2.1.2)
DESCRIPTION: Slot of the Cellular Connection.ngCellularConnectionInterface (OID: .1.3.6.1.4.1.42518.4.2.1.1.7.2.1.3)
DESCRIPTION: Interface of the Cellular Connection.
ngCellularConnectionStatus (OID: .1.3.6.1.4.1.42518.4.2.1.1.7.2.1.4)
DESCRIPTION: Status of the Cellular Connection.ngCellularConnectionSIMState (OID: .1.3.6.1.4.1.42518.4.2.1.1.7.2.1.5)
DESCRIPTION: State of the SIM Card of the Cellular Connection.ngCellularConnectionSIMActive (OID: .1.3.6.1.4.1.42518.4.2.1.1.7.2.1.6)
DESCRIPTION: Number of the Active SIM Card of the Cellular Connection.ngCellularConnectionDataConsumption (OID: .1.3.6.1.4.1.42518.4.2.1.1.7.2.1.7)
DESCRIPTION: Data Consumption in kBytes of the Cellular Connection.ngCellularConnectionOperator (OID: .1.3.6.1.4.1.42518.4.2.1.1.7.2.1.8)
DESCRIPTION: Operator of the Cellular Connection.ngCellularConnectionRadioMode (OID: .1.3.6.1.4.1.42518.4.2.1.1.7.2.1.9)
DESCRIPTION: Radio Mode of the Cellular Connection.ngCellularConnectionSignalStrength (OID: .1.3.6.1.4.1.42518.4.2.1.1.7.2.1.10)
DESCRIPTION: Signal Strength of the Cellular Connection in percent.ngCellularConnectionTemperature (OID: .1.3.6.1.4.1.42518.4.2.1.1.7.2.1.11)
DESCRIPTION: Temperature of the Cellular Connection device.
On Access Type drop-down, select one (Read and Write, Read Only)
Click Save.
Edit Community/Username
Go to Network :: SNMP.
On Community or Username column, click a name (displays dialog).
Make changes, as needed.
Click Save.
Delete Community/Username
Go to Network :: SNMP.
Select checkbox to be deleted.
Click Delete.