The SSH Key-Pair Management capability enables administrators to centrally manage and use SSH key-based authentication when accessing managed devices through Nodegrid.
This feature provides a secure and flexible alternative to password-based authentication by allowing administrators to upload, store, and assign SSH key-pairs to one or more managed devices.
General Considerations
Ensure that the public SSH key is installed on the managed device (it is possible to do it manually with ssh-copy-id command), the system does not do this automatically when assigning the SSH key under managed device drilldown page.
This feature does not support import/export settings.
Running the import_settings routine for a managed device that has an SSH key assigned to it will not work if the SSH key doesn’t exist on Nodegrid.
The registered SSH key-pairs are not user/group restricted for usage, if an admin uploads a key-pair and assigns it to a device, a user with managed device permissions will access it using that SSH key.
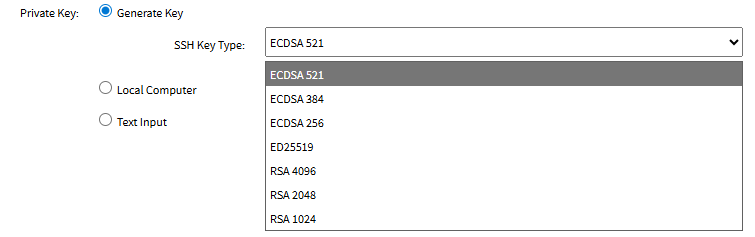
If FIPS 140-3 mode is enabled, the RSA 1024 algorithm option will not be displayed on the SSH key type selection field when generating a new key.
Deprecated API endpoints:
GET /api/v1/devices/table/<device>/sshkeys
POST /api/v1/devices/table/<device>/sshkeys/generate
POST /api/v1/devices/table/<device>/sshkeys/send
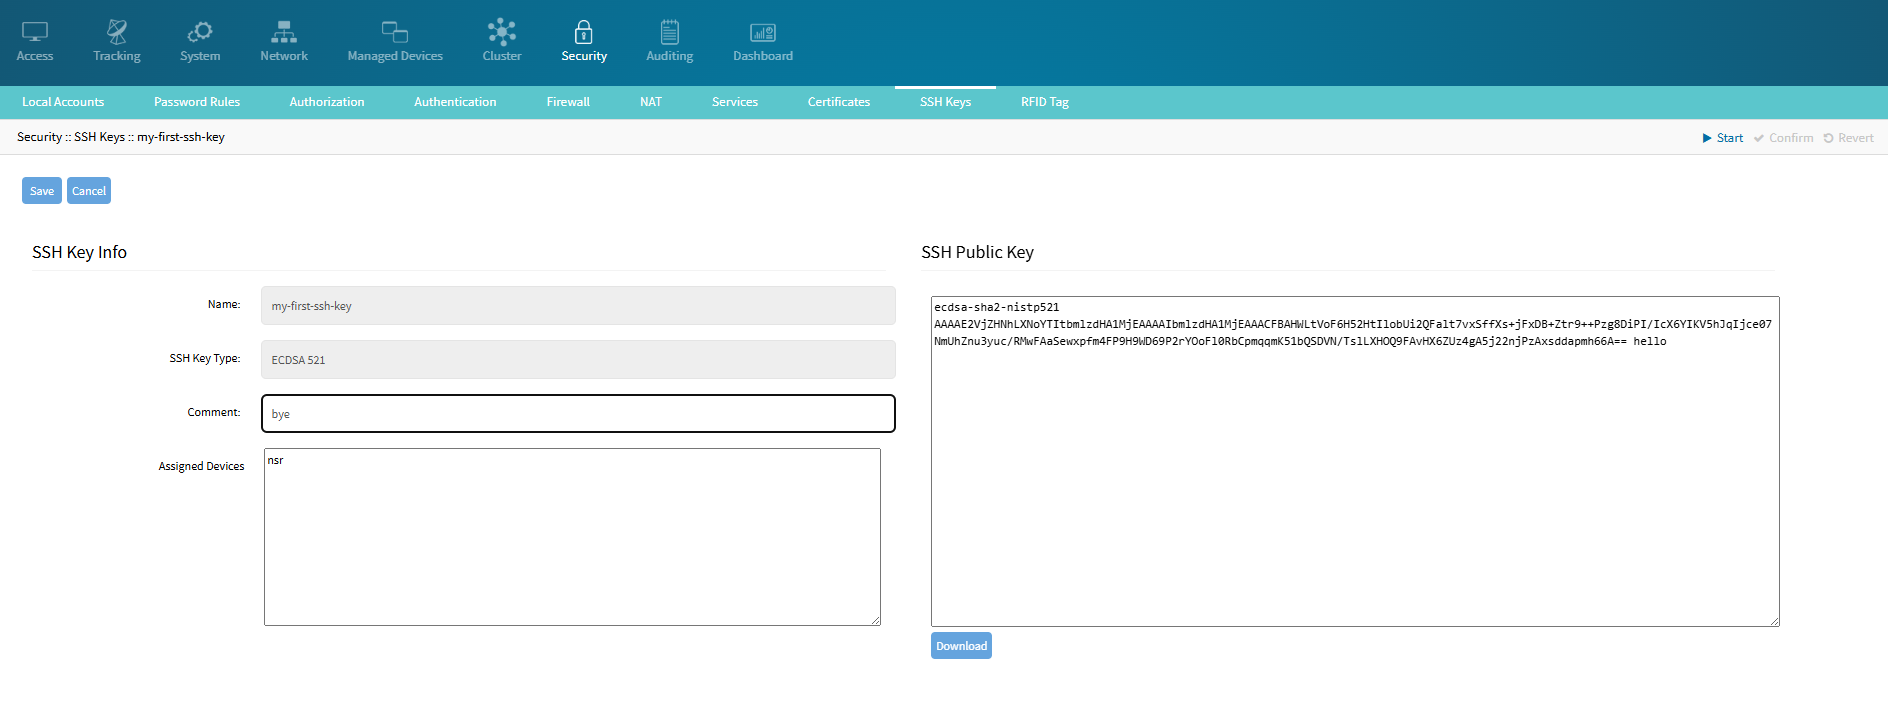
Creating an SSH key entry
Navigate to SECURITY::SSH KEYS
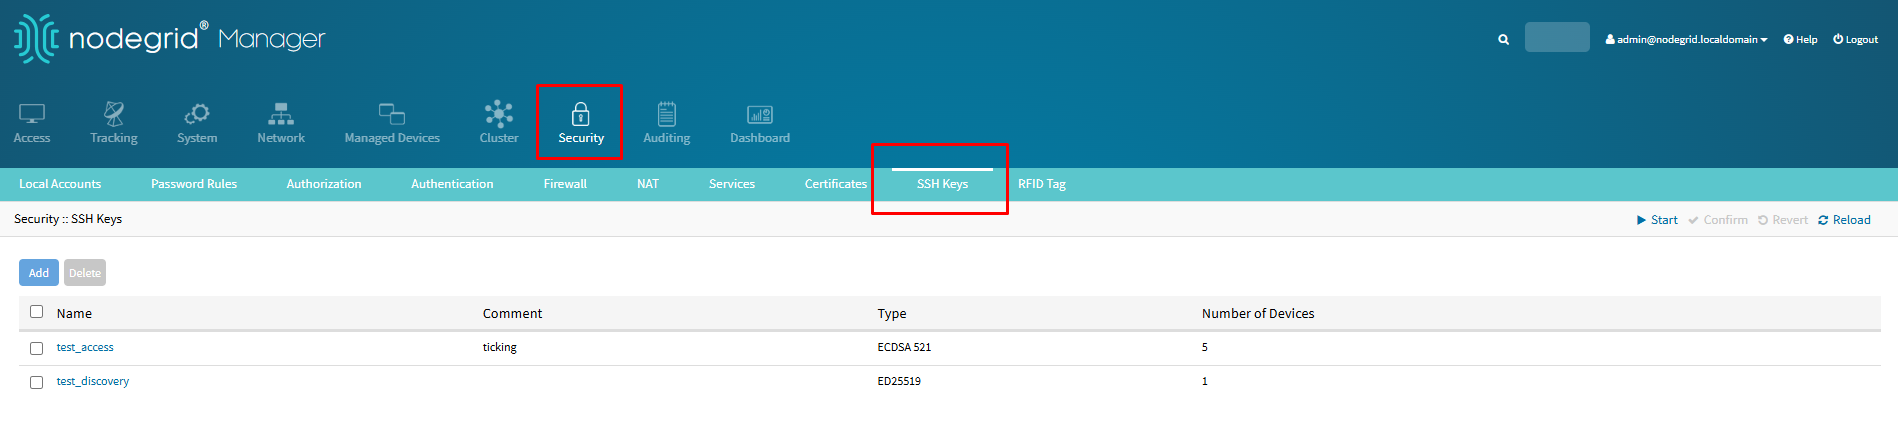
Click Add
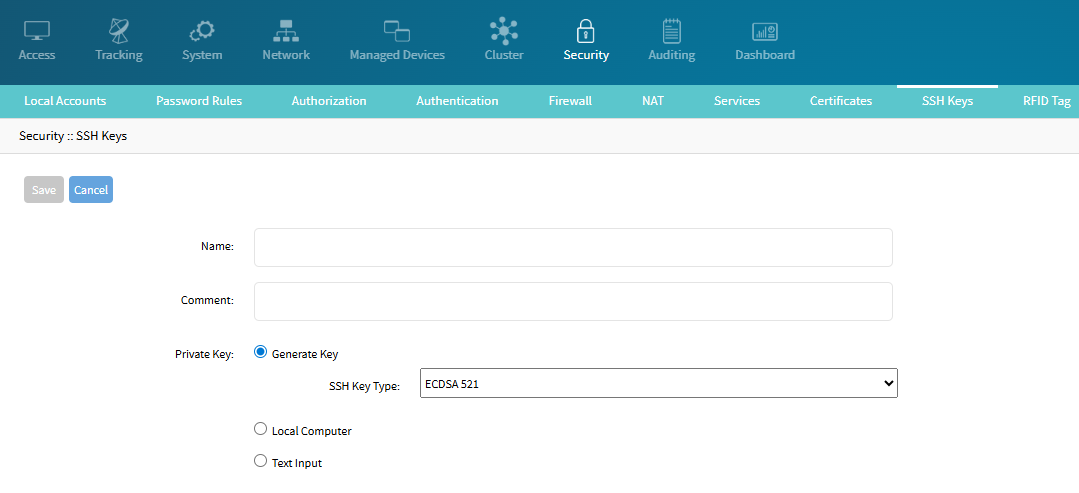
Enter the Name (required if not uploading key file)
Enter a Comment (optional)
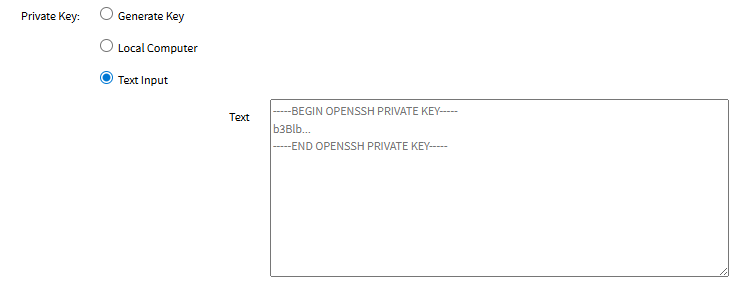
Under Private Key, select one of the following options:
Generate Key
Select the SSH Key Type from the drop-down menu
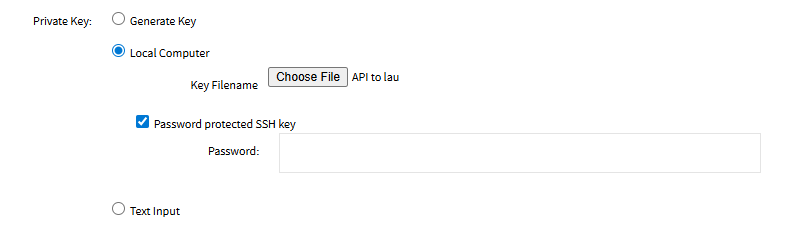
Local Computer
Click Choose File to upload a private key file from the local machine
Select the Password protected SSH key checkbox if the key is password protected, and fill-in the Password field
Text Input
Paste the private key content in the text area (OpenSSH format)
Click Save
Editing an SSH key entry
Navigate to SECURITY::SSH KEYS
Select the SSH key
Only the Comment field can be edited
Click Save
Assigning an SSH key to a managed device console access
Navigate to MANAGED DEVICES::DEVICES
Select the device to assign the SSH key, or create one
Select the Allow Pre-shared SSH Key checkbox
Select the existing SSH Key from the drop-down menu
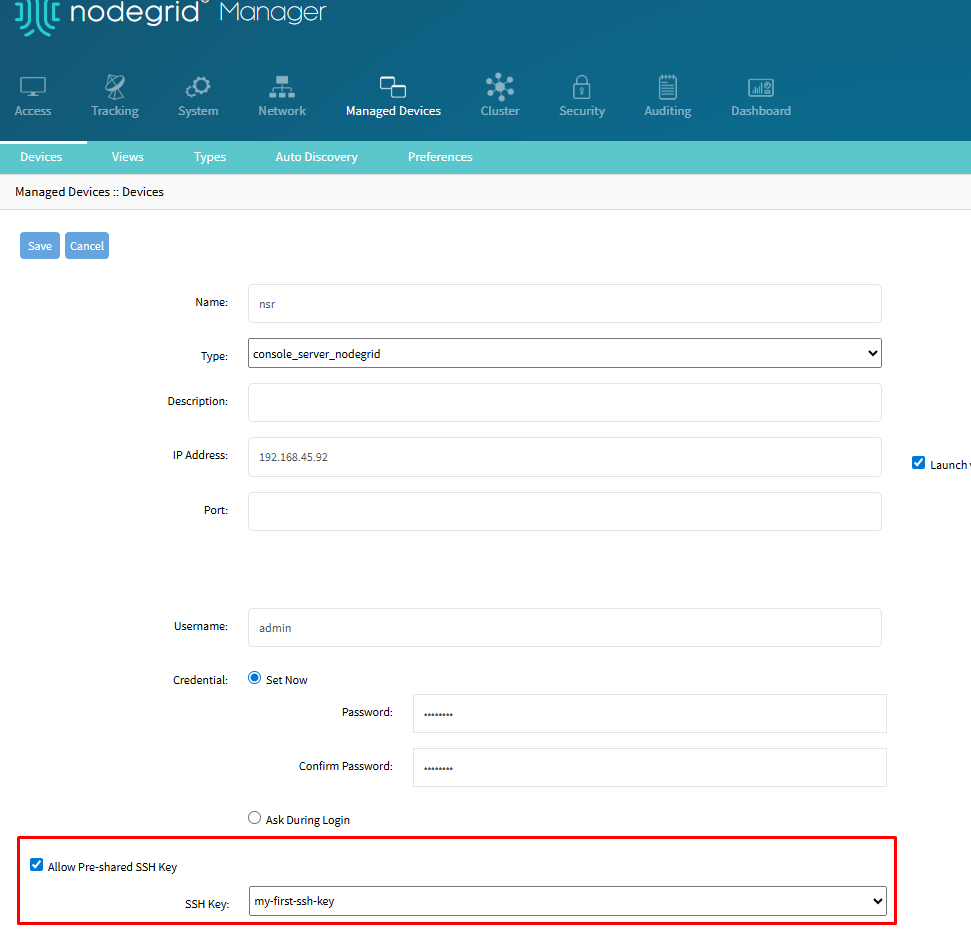
Click Save
Note
The user has to manually send the SSH public key to the selected managed device, since the system does not do this automatically.
It is possible to do this is going to the root shell and running
ssh-copy-id -i /etc/devices_keys/key_pairs/{key-name}.pub {user}@{device_ip}.After running the code, it is possible to perform a console access using the SSH Key (If the device status is "Enabled", make sure to close the current connection and open a new one to force usage of SSH key).
Assigning an SSH key to auto-discovery management
Navigate to MANAGED DEVICES::DEVICES
Select the device to assign the SSH key, or create one
Go to the Management tab
Select the SSH/Telnet checkbox under Protocol
On Credential, select the Use Specific option
Select the Allow Pre-shared SSH Key checkbox, a drop-down menu will be displayed with the existing SSH Keys

Click Save
Note
Given that your discovery rules are configured correctly, when the discovery is executed and it creates new children managed devices, they should inherit the access configuration from the parent, including the SSH key assigned, if any.
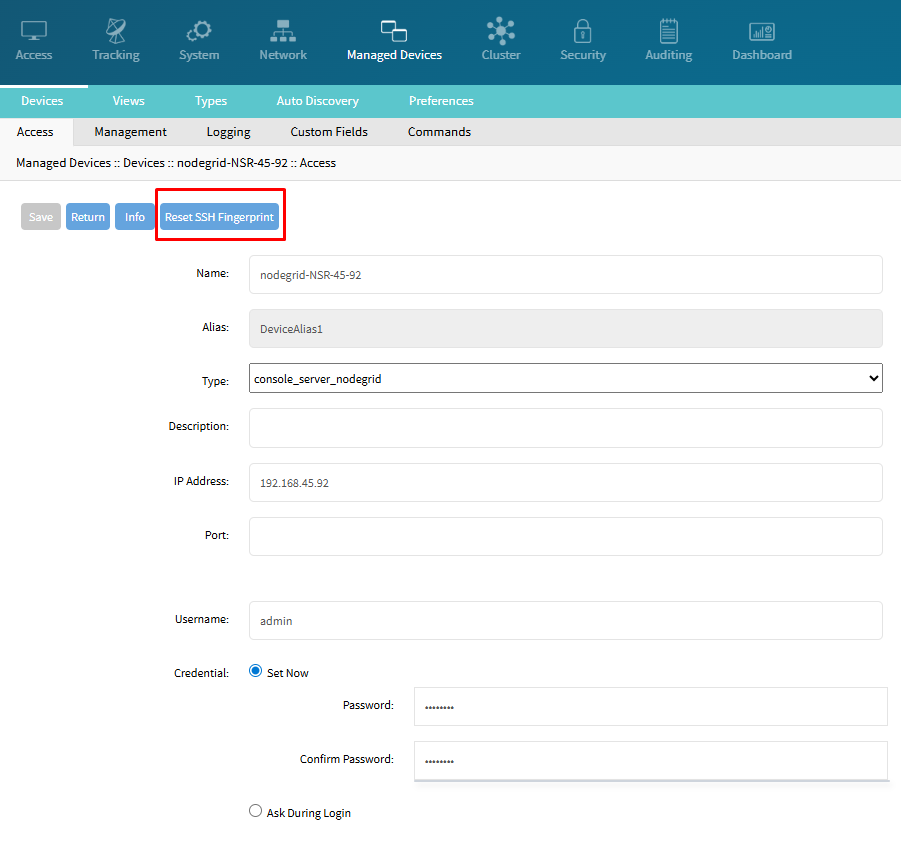
Reset SSH fingerprint
Navigate to MANAGED DEVICES::DEVICES
Select the device to Reset SSH Fingerprint
Click the Reset SSH Fingerprint button
A confirmation pop-up is displayed
click OK
Note
The button is only displayed if the managed device IP Address is present on the /etc/devices_keys/known_hosts file.
Note
The next SSH connection done to this device (either via console access or auto-discovery) will automatically add the new SSH fingerprint to the known_hosts file.