Servers sub-tab
- 22 Jan 2025
- 5 Minutes to read
- Print
- DarkLight
- PDF
Servers sub-tab
- Updated on 22 Jan 2025
- 5 Minutes to read
- Print
- DarkLight
- PDF
Article summary
Did you find this summary helpful?
Thank you for your feedback
Authentication server configuration is done on this page.
.png)
Edit Local Authentication
Click on the Index of the Local authentication server to enable/disable it, or set 2-Factor Authentication if a method is configured in the 2-Factor tab:
Add Remote Server
Go to Security :: Authentication :: Servers.
Click Add (displays dialog):
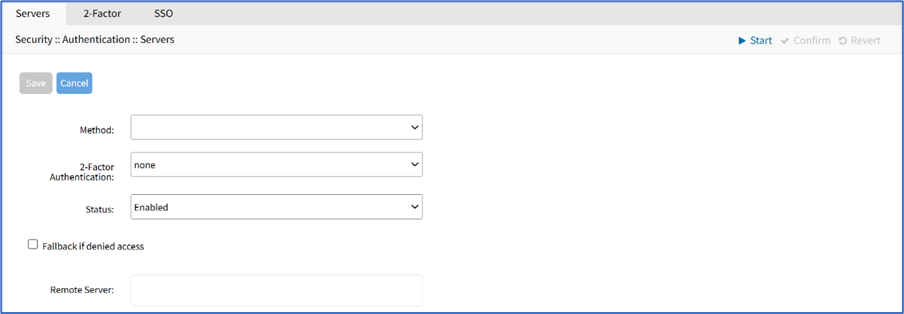
On Method drop-down, select one of the following authentication methods:
- LDAP or AD, see Method: LDAP or AD- RADIUS, see Method: RADIUS authentication and authorization - TACACS+, see Method: TACACS+
- Kerberos, see Method: Kerberos
On 2 Factor Authentication drop-down, select one (None, Enabled).
On Status drop-down, select one (Enabled, Disabled).
Select Fallback if denied access checkbox.
Enter Remote Server (IP address of remote server).
Click Save.

Method: LDAP or AD
Enter Base (root DN or a sublevel DN – highest point used to search for users or groups).
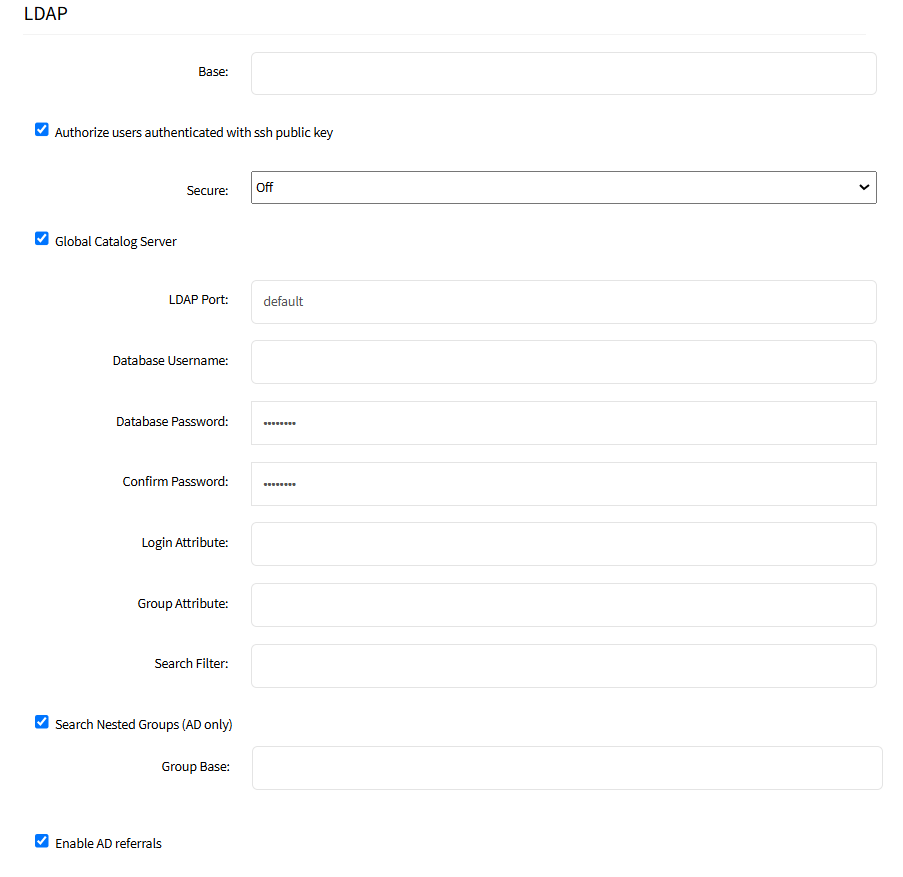
Select/unselect Authorize users authenticated with ssh public key checkbox (default: disabled).
On Secure drop-down, select one (On, Off, Start_TLS) (default: Off).
Select/unselect Global Catalog Server checkbox (if enabled, uses an Active Directory Global Catalog Server).
Enter LDAP Port (or accept "default").
Enter Database Username, Database Password and Confirm Password.
Enter Login Attribute (contains username - for AD, default: sAMAccountName).
Enter Group Attribute (group identifier - for AD, default: memberOf).
Enter Search Filter.
Select/unselect Search Nested Groups (AD only) checkbox (default: disabled).
Enter Group Base.
Example: OpenLDAP Configuration
Status: True; Fallback if denied access: True; Remote Server: 192.168.1.1; Base: dc=zpe, dc=net; Secure: Off; Global Catalog Server: False; Database Username: cn=admin, dc=zpe, dc=net; Login Attribute: cn; Group Attribute: Member, UID
Example: Active Directory Configuration
Status: True; Fallback if denied access: True; Remote Server: 192.168.1.1; Base: dc=zpesystems, dc=com; Secure: Start TLSl; Global Catalog Server: True; Database Username: cn=Administrator, cn=Users, dc=zpesystems, dc=com; Login Attribute: sAMAccountName; Group Attribute: memberOf

Method: RADIUS authentication and authorization
RADIUS (Remote Access Dial In User Service ) provides central authentication for users.
It is a client server protocol that runs on application layer. It can use either TCP or UDP as transport. Normally, all users have access to use all devices without restriction.
Configuration
Step 1 - On the Nodegrid side:
Login in as admin into Nodegrid and go to Security.
Select Authentication and click Add.
Select Radius as method and enter the IP address of remote server.
.png)
Enter IP address of Radius accounting server.
Enter the secret key and confirm it.
Select Fallback if denied access option.
Click Save.
NOTE:
The "Fall-back if denied access" option enables you to log-in to the Nodegrid with local accounts in case you cannot authenticate with the Radius users.
In the case there is no accounting server on the Radius side, it is recommended to leave the field 'Accounting Server' above empty (i.e. no IP address).
Go back to Security and select Services.
Look in to Manage devices portion and select Device access enforced via user group authentication option.
Click Save.
.png)
Log in as a user and one can see that user does not have access to any devices. To give access to a user:
Log in as admin and go to Security.
Select Authorization and select the group needed and click Add.
Enter the user one wants to add. If more users needs to be added then separate each username with a comma.
Click Save.
Log in back as user and one can see that user will have access to devices allowed by the group.
To match the Radius group, Go to Security :: Authorization, select or create a new group. In Profile, assign the permissions of that group. In Remote Groups, enter the name of group as per declared on the Radius server.
Step 2 - On the RADIUS server side
In this example, the free radius server (opensource) is used. It is assumed that the free radius server is installed.
Go to the location /etc/freeradius/3.0/clients.conf.
Declare the Nodegrid, following the format:
client your_nodegrid_device {
    ipaddr = 10.10.10.6
    secret = your_secret_password
    require_message_authenticator = no
    nastype = other
}
The secret must match the secret entered, during the first step, on the Nodegrid side.
Create the file "usr/share/freeradius/dictionary.zpe" with the content listed below:
VENDOR ZPE 42518BEGIN-VENDOR ZPE
ATTRIBUTE ZPE-User-Groups 1 string
END-VENDOR ZPE
Edit the file "usr/share/freeradius/dictionary.zpe".
Add a line with the dictionary.zpe:
$INCLUDE dictionary.zpeThen, in /etc/freeradius/users, assign user groups.
Define the "Framed-Filter-ID" attribute (as before) or define a new attribute "ZPE-User-Groups".
user_radius Cleartext-Password := "password_user_radius"ZPE-User-Groups = "radius_network_admin"
Restart the radius server: systemctl restart freeradius
NOTE: If both attributes are defined, "ZPE-User-Groups" takes precedence:
Troubleshooting
Make a local test, on the Radius server, with the command:
radtest user_radius password_user_radius localhost 0 your_secret_passwordLog in to the Nodegrid, using the Radius user of the Radius group:
The permissions of that user shall match the ones of the local and associated group.
Method: TACACS+
Enter Accounting Server.
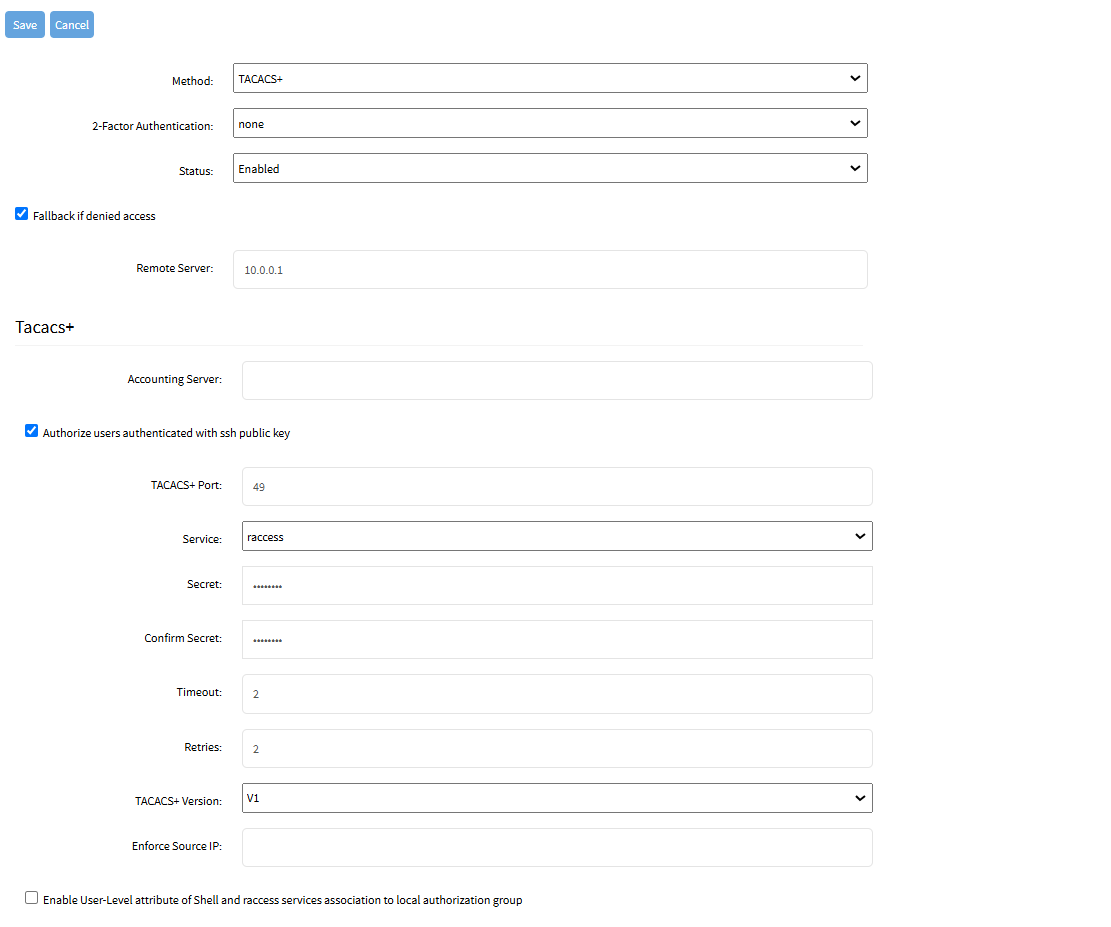
Select Authorize users authenticated with ssh public key checkbox.
Enter TACACS+ Port (default: 49).
On Service drop-down, select one (PPP, Shell, raccess) (default: raccess).
Enter Secret and Confirm Secret.
Enter Timeout (default: 2).
Enter Retries (default: 2).
On TACACS+ Version drop-down, select one (V0, V1, V0_V1, V1_V0) (default: V1).
Enter Enforce Source IP for AAA authentication (available in v5.8+).
Select Enable User-Level attribute of Shell and raccess services association to local authorization group checkbox (expands dialog with 15 User Levels).
Per instruction, “Enter local authorization group name for each User Level.”

NOTE
User Level displays User Level 1 through User Level 15.
Method: Kerberos
Enter Realm Domain Name.
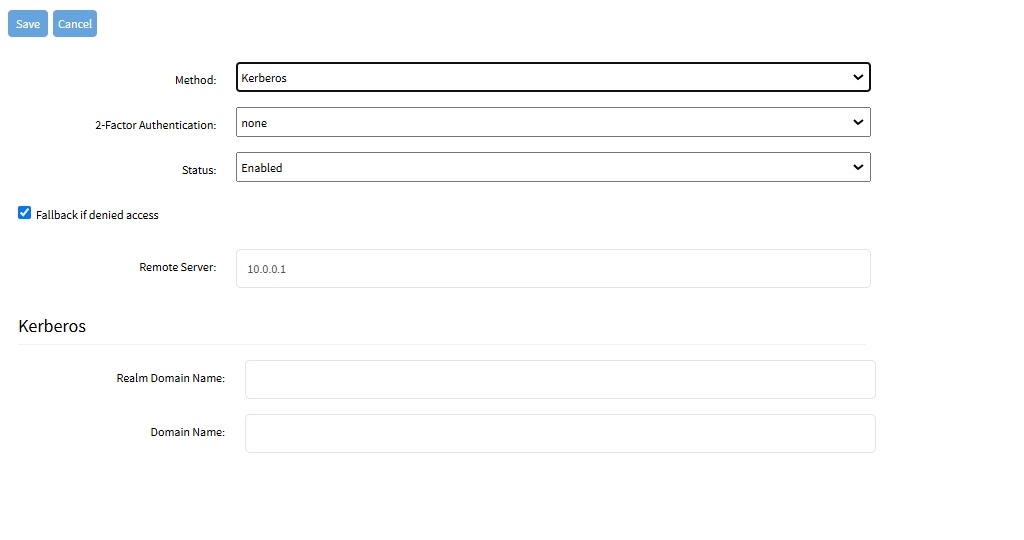
Enter Domain Name.

Configure 2-Factor Authentication for Admin/Root Users
Go to Security :: Authentication :: Servers.
In Index column, click the index to be updated (displays dialog).
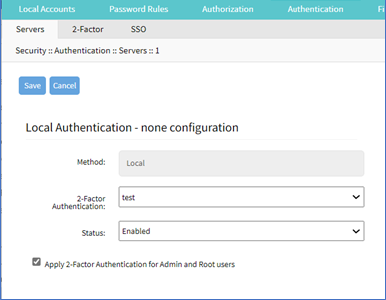
Select Apply 2-Factor Authentication for Admin and Root users checkbox (if not selected, Admin and Root roles can use single logon).
Click Save.

Edit a Server
Go to Security :: Authentication :: Servers.
In Index column, click the index to be updated (displays dialog).
Make changes, as needed.
Click Save.
Delete a Server
Go to Security :: Authentication :: Servers.
Locate and select checkbox.
Click Delete.
On the confirmation dialog, click OK.
Move Index Priority Up
Go to Security :: Authentication :: Servers.
Locate and select checkbox.
Click Up to move the selection up in the table.
Click Save.
Move Index Priority Down
Go to Security :: Authentication :: Servers.
Locate and select checkbox.
Click Down to move the selection down in the table.
Click Save.
Enable/disable Console Authentication
Go to Security :: Authentication :: Servers.
Locate and select checkbox).
Click Console (displays dialog).
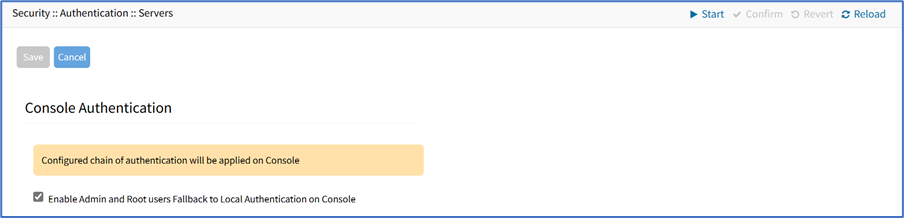
Select Enable Admin and Root users Fallback to Local Authentication on Console checkbox.
Click Save.

Set Default Group
Go to Security :: Authentication :: Servers.
Locate and select checkbox.
Click Default Group (displays dialog).
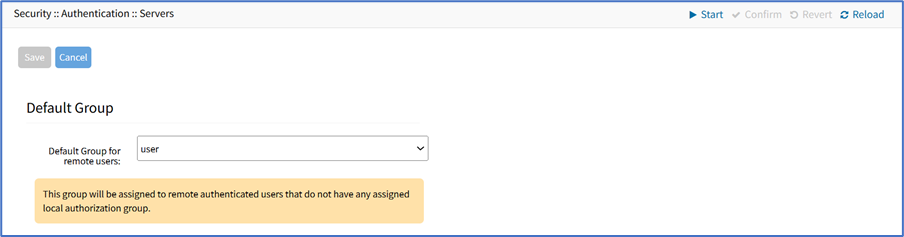
On Default Group for Remote Server drop-down, select one.
Click Save.

Set Realms
(available in v5.6+)
Realms allow the user to select authentication server when logging in with the notation user@server or server\user.
Go to Security :: Authentication :: Servers.
Locate and select checkbox.
Click Realms (displays dialog).
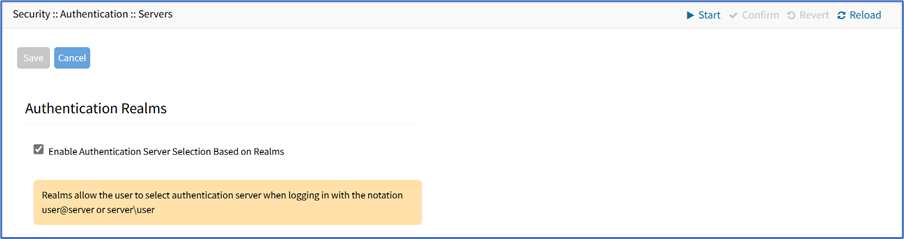
Select Enable Authentication Server Selection Based on Realms checkbox.
Click Save.

Was this article helpful?