You can use this option to upload certificates generated in a Nodegrid device or certificates generated outside Nodegrid device.
To upload a signed certificate to the Nodegrid device:
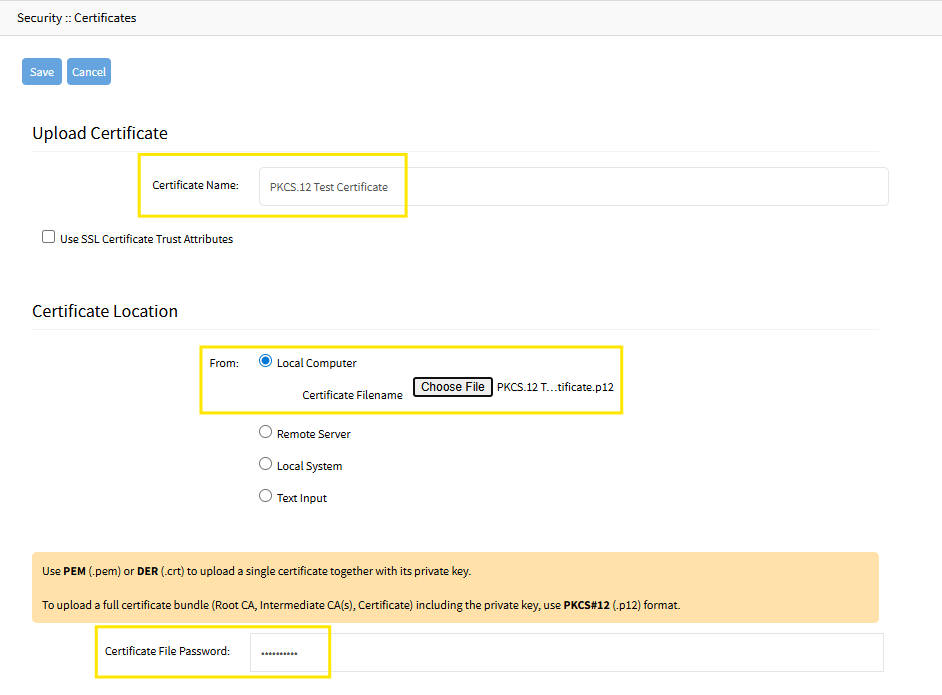
Go to the SECURITY::CERTIFICATES page
Click Upload Certificate
When you upload a certificate to use for IPsec, select the User SSL Certificate Trust Attribute field
Trusted Peer (P): Select this field if the Nodegrid device can act as a trusted peer and be used in the authentication phase in an IPsec network
In the case of self-signed certificates, where there's no external CA involved, these attributes are used to establish trust within the IPsec network
Trusted CA to issue client certificates (T): This attribute ensures that the self-signed CA certificate is trusted to issue client certificates. Select the field to allow the IPsec to be validated against this CA certificate to prove their identity and securely gain access to the IPsec network
Trusted CA to issue server certificates (C): This attribute ensures that the self-signed CA certificate is trusted to issue server certificates. Select the field to allow the IPsec servers to validate against this CA certificate to prove their identity and securely gain access to the IPsec
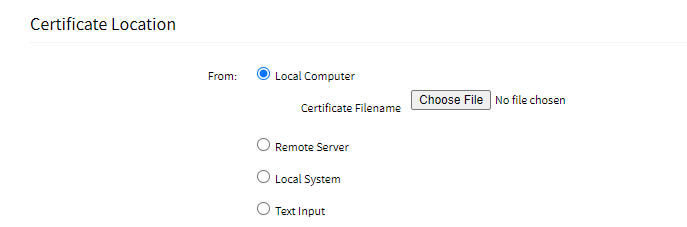
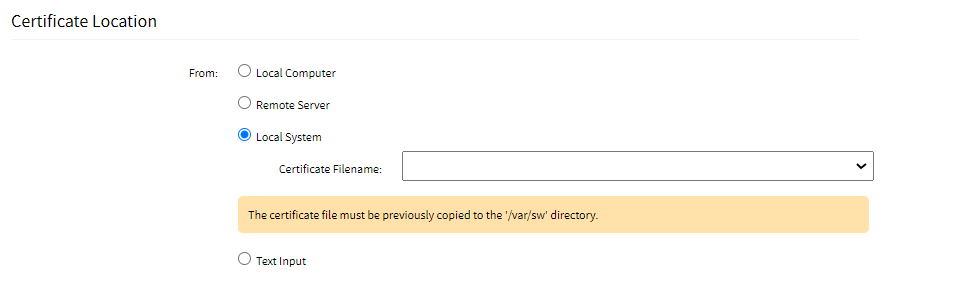
Certificate Location: This section allows you to upload the certificate using either of the following options:
Local Computer: Select this option if the certificate is available on your system locally
Remote Server: Select this option if the certificate is available on the remote server. Enter the URL, Username, and Password to connect to the remote server
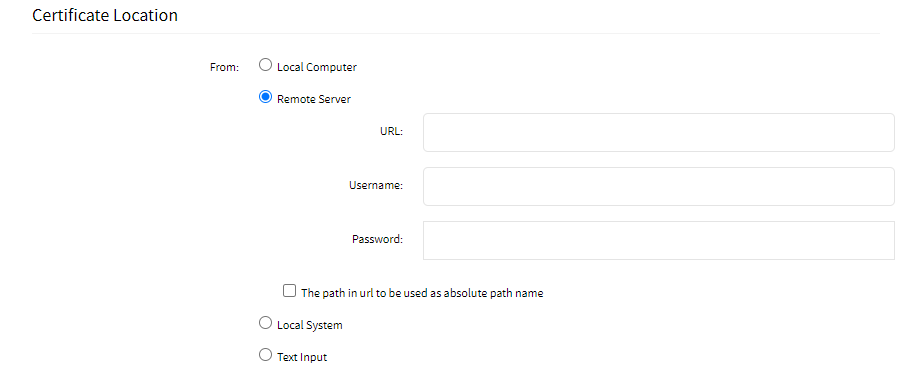
The path in the URL to be used as the absolute path name: The path on the remote server is an absolute path instead of a relative path. Absolute paths always start with the root directory and provide the full path to the file or directory.
Local System: Uses certificate files stored on /var/sw on Nodegrid device
Text input: Paste the content of the certificate here instead of uploading a file
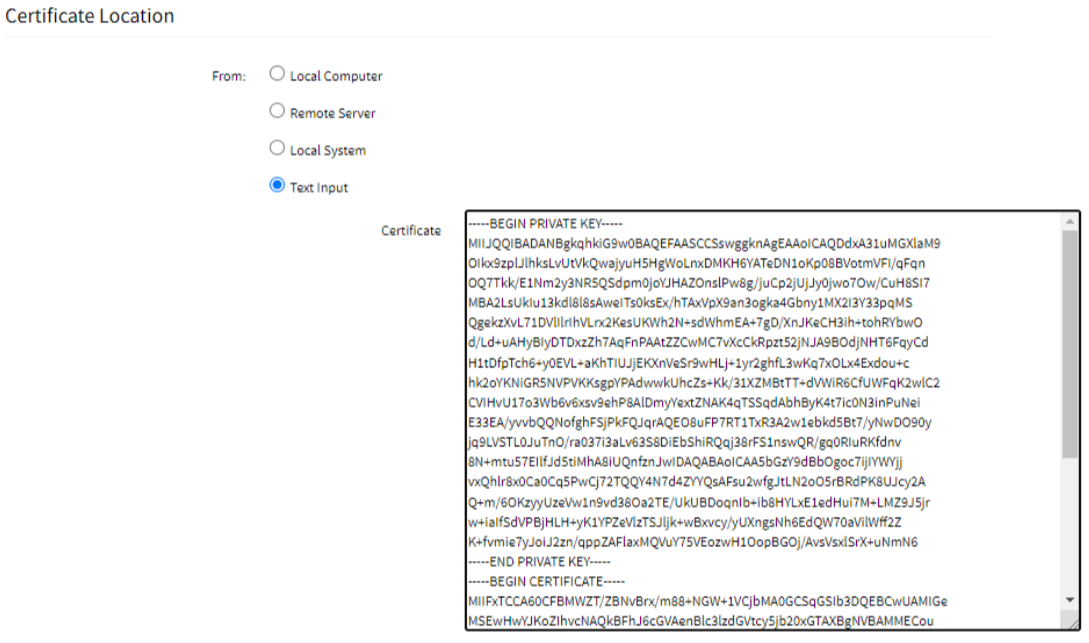
Note: If you are uploading a certificate whose CSR was not generated in Nodegrid, ensure that the private key of that certificate is included while uploading the certificate. This can be done by concatenating the private key with the certificate content or by using a PKCS12 file containing both the private key and the certificate.
Certificate File Password: Some certificates are encrypted using a password, such as the PKCS12 (.p12) files. In this case, you must specify the password to decrypt the file
Click Save
The certificate is successfully uploaded to the system
Uploading Multiple PKCS.12 Certificates
This section describes how to upload and use a PKCS#12 full-chain bundle file in Nodegrid. The workflow remains the same as the existing PKCS#12 upload flow, the difference is that the bundle may now contain the private key, the end-entity certificate, and the complete CA chain in a single .p12/ .pfx file.
Prerequisites
A valid PKCS#12 full-chain bundle file containing:
The private key.
The end-entity certificate, also referred to as the leaf/client certificate.
All required intermediate CA certificates and the root CA certificate.
The PKCS#12 password is used to protect the bundle.
A certificate name to use in Nodegrid. This name will be applied to the end-entity certificate.
Administrator access to the SECURITY::CERTIFICATES page.
Uploading the PKCS.12 Full-Chain Bundle
Go to the SECURITY::CERTIFICATES page
Click Upload Certificate
Enter the Certificate Name
On the Certificate Location section, click on Local Computer
Click on Choose File and navigate to the .p12/.pfx file
Click Open
Enter the Certificate File Password
Click Save
Expected Naming Behavior
The user-provided certificate name is reserved for the end-entity certificate. CA certificates imported from the same bundle are named using the same base name plus a sequential suffix.
Imported item | Certificate table name | Notes |
|---|---|---|
End-entity certificate (leaf/client certificate) |
| Uses the exact name provided by the user. Existing duplicate-name validation still applies. |
First CA certificate |
| Generated automatically. |
Second CA certificate |
| Generated automatically, unless the name already exists. |
Additional CA certificate |
| The suffix continues sequentially for each CA certificate. |
Note
If a generated CA certificate name already exists, Nodegrid skips that suffix and uses the next available one. For example, if
my-certificate-2already exists and the imported bundle contains three CA certificates, the imported CA certificates may be stored asmy-certificate-1,my-certificate-3, andmy-certificate-4, while the end-entity certificate remainsmy-certificate.
Expected SSL Certificate Trust Attributes Behavior
If the user enables the Use SSL Certificate Trust Attributes checkbox, the SSL Certificate Trust Attributes are only applied to the Device Certificate on PKCS#12 bundle. The Intermediate and Root Certificates on the bundle will always be imported with the T (Trusted CA to issue client certificates) and C (Trusted CA to issue server certificates) attributes set. If the checkbox is disabled, the device certificate will have the Trusted Peer (P) attribute by default.