Getting Started with ZPE Cloud
- 20 Jan 2025
- 15 Minutes to read
- Print
- DarkLight
- PDF
Getting Started with ZPE Cloud
- Updated on 20 Jan 2025
- 15 Minutes to read
- Print
- DarkLight
- PDF
Article summary
Did you find this summary helpful?
Thank you for your feedback
Introduction to ZPE Cloud
ZPE Cloud is a cloud-based management and monitoring solution specifically designed to efficiently oversee Nodegrid devices. By registering all Nodegrid devices with the ZPE Cloud, you can establish a singular point of access, facilitating comprehensive control over the entire infrastructure— making remote management a seamless and efficient experience easing the troubleshooting processes and effectively minimizing downtime.
ZPE Cloud places a strong emphasis on security and adopts a Zero Trust-based access policy incorporating features such as multi-factor authentication and role-based access control. The development life cycle follows a secure approach through thorough code analysis, zero CVE policy, encrypting both data at rest and data in motion, and so on. The platform holds industry-leading certifications including SOC2 Type 2 and FIPS140-3, ensuring a high level of security.
Pre-requisites
To enable your device to establish communication with the ZPE Cloud, ensure that the following configuration requirements are met. If your device is situated behind a firewall or within a corporate environment, it is crucial to verify that the required firewall rules have been configured correctly to permit incoming and outgoing traffic to and from the ZPE Cloud services.
The Nodegrid appliance needs to be on v4.2.13 or later. If the upgrade is needed, see the Upgrading a Nodegrid Device section.
If the unit has TPM 1.2, TPM needs to be enabled, for more information, see How to enable TPM on BIOS. For other versions, the TPM is enabled by default.
Configure the Firewall Rules: ZPE Cloud uses some IP addresses and hostnames that the Firewall rules may block. This can prevent the Nodegrid appliances from connecting to the Cloud and/or utilizing specific ZPE Cloud features. Refer to the following table for information on the IP addresses and hostnames.
Supported IPv4 and IPv6 Address
US ZPE Cloud Servers
Hostname(s) | IPv6 Address | IPv4 Address | Usage |
second-tier-ca.zpecloud.com | 2600:1901:0:6091:: | 34.49.235.253 |
|
api.astarte.zpecloud.com | 2600:1901:0:53ce:: | 34.49.39.37 |
|
access.zpecloud.com | 2600:1901:0:ab8f:: | 34.49.235.61 |
|
broker.astarte.zpecloud.com | 2600:1901:0:5abb:: | 34.49.26.197 |
|
www.zpecloud.com, api.zpecloud.com, proxy-access.zpecloud.com, zpecloud.com | 2600:1901:0:910b:: | 34.120.236.72 |
|
proxy-forwarder.zpecloud.com | 2600:1901:0:4792:: | 34.36.157.245 |
European ZPE Cloud Servers
Hostname(s) | IPv6 Address | IPv4 Address | Usage |
second-tier-ca.zpecloud.eu device-api.zpecloud.eu device-apiv2.zpecloud.eu | 2600:1901:0:b0cb:: | 34.128.171.100 |
|
api.astarte.zpecloud.eu | 2600:1901:0:7123:: | 34.49.228.213 |
|
access.zpecloud.eu | 2600:1901:0:e8af:: | 34.128.152.77 |
|
broker.astarte.zpecloud.eu | 2600:1901:0:9065:: | 34.36.11.79 |
|
www.zpecloud.eu, api.zpecloud.eu, proxy-access.zpecloud.eu, zpecloud.eu | 2600:1901:0:ec0d:: | 34.111.34.34 |
|
proxy-forwarder.zpecloud.eu | 2600:1901:0:598e:: | 34.49.218.26 |
How to get Started with ZPE Cloud?
To start using a ZPE cloud, you need to first create an account in the ZPE cloud, and enable the Nodegrid device to access the ZPE Cloud, then enroll the devices in the ZPE Cloud. Once the devices are enrolled, you can start performing the required operations.
The following is a step-by-step walkthrough:
1. Sign up for the Cloud Account
1.1 Login to the ZPE Cloud Account
1.2 Forgot Password?
2. Enable ZPE Cloud Services in the Nodegrid Device
4. Enroll Devices to a Company in ZPE Cloud
4.1 Enrolling Devices Using Claim ID
4.2 Enrolling Devices Using Transfer Key
4.3 Enrolling Devices Using Customer Code and Enrollment Key
6. Performing Basic Operations Using Profiles
6.1 Scheduling Backup for a Nodegrid device using ZPE Cloud
6.2 Restoring a Backup from ZPE Cloud
6.3 Upgrading a Nodegrid Device using ZPE Cloud
1. Sign up for the Cloud Account
To sign up for a ZPE Cloud account, perform the following actions:
If you are from the EU region, use the https://zpecloud.eu/signup URL, for other regions you can use the https://zpecloud.com/signup URL. Contact your ZPE Cloud Account manager to identify the region to create the account.
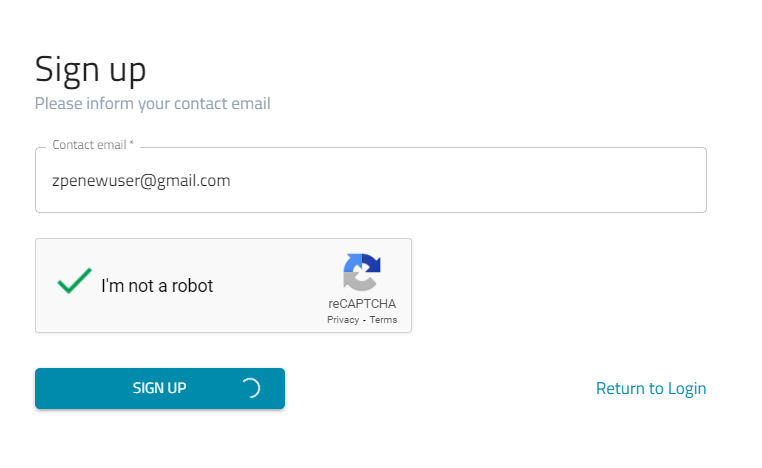
Enter the Email ID and click SIGN UP. The specified email ID is used for all communication. An invitation email is sent immediately to the specified email ID.
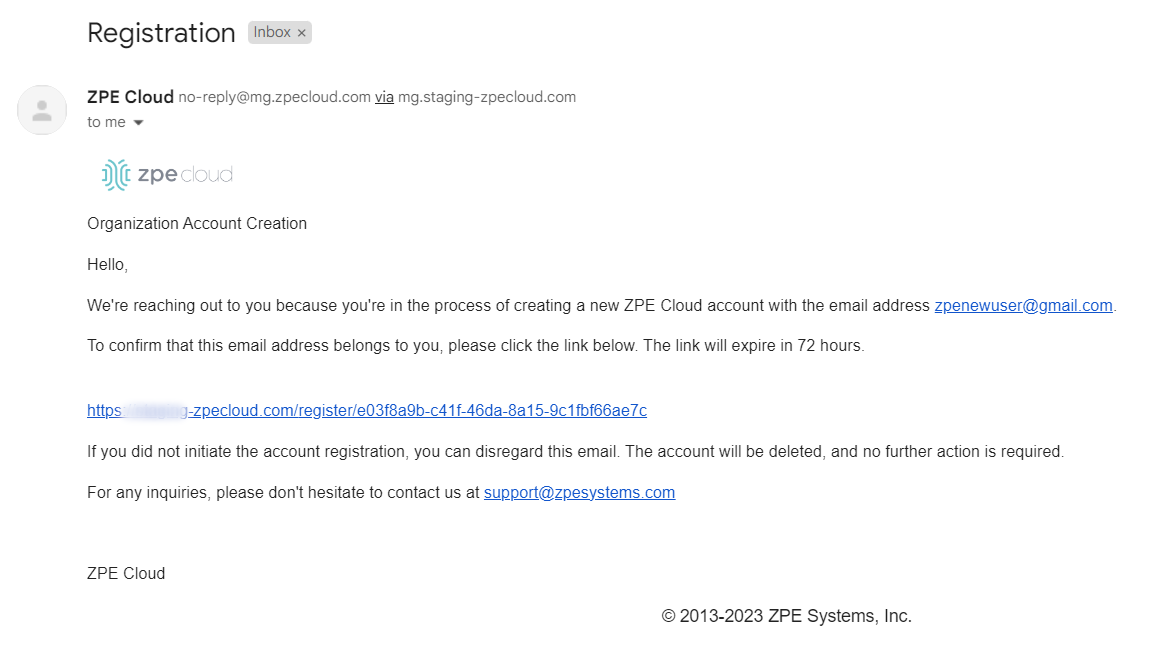
Open the email and click the invitation link. You are directed to the Sign-up form.
Enter the required details in the Sign-up form:
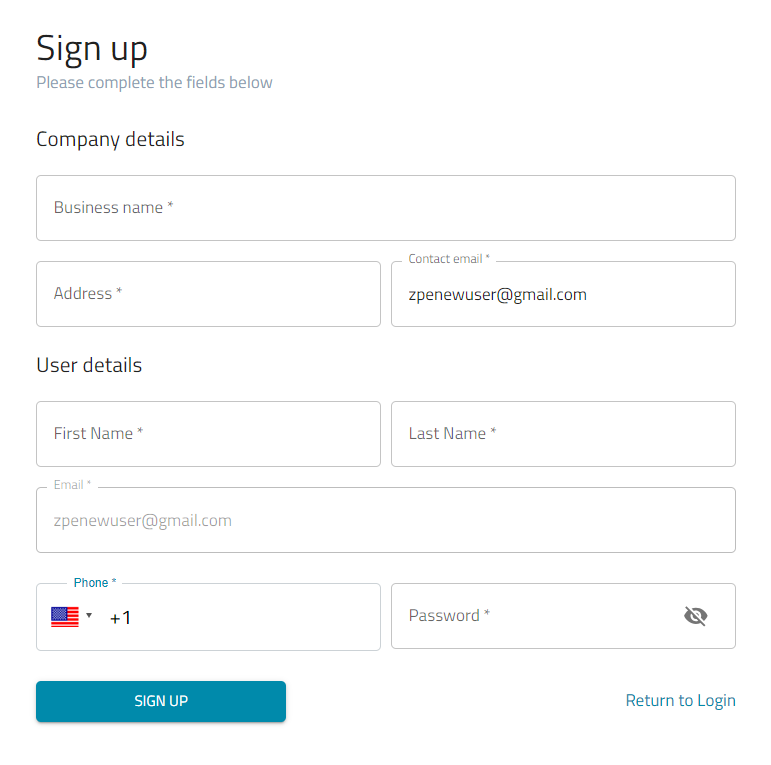
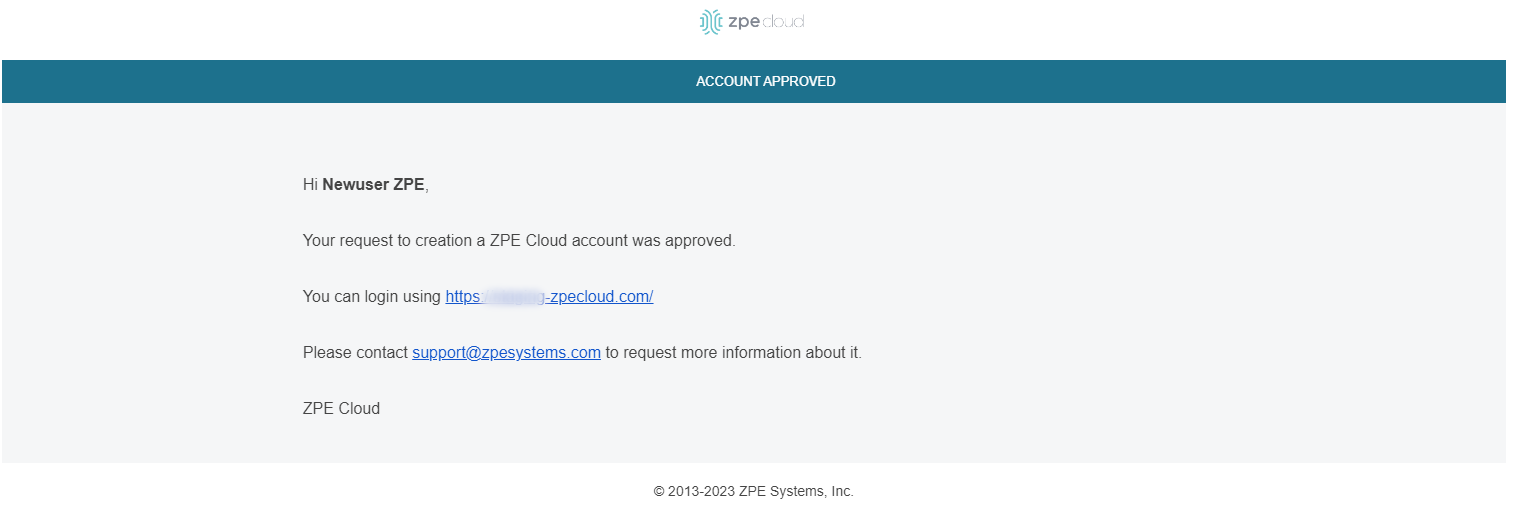
The request is sent for approval. Once the account is approved, an approval email is sent to the user.


1.1 Login to the ZPE Cloud Account
Once you receive the approval email. Use the link specified in the email to log in to the ZPE Cloud account.
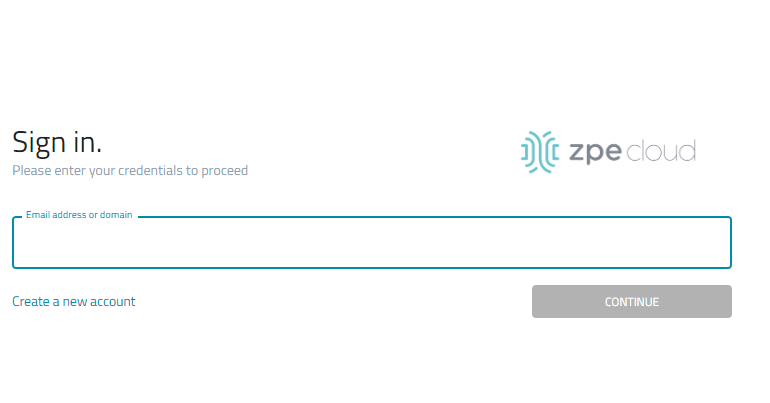
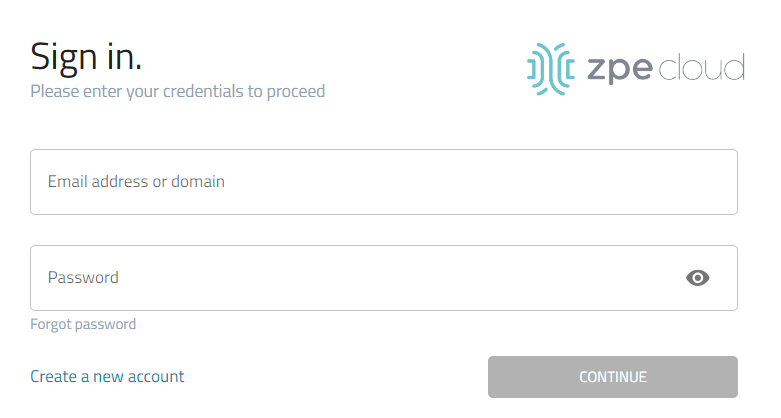
On the Sign-in page enter the Email ID and Password and log in to the account.


Note: New companies have a 90-day free trial. If you want to learn more about the ZPE Cloud features and subscription, contact your account manager or send your questions to support@zpesystems.com.
1.2 Forgot Password?
On the Login page, click FORGOT PASSWORD.
On the Forgot Password dialog, enter the email address associated with the ZPE Cloud account.
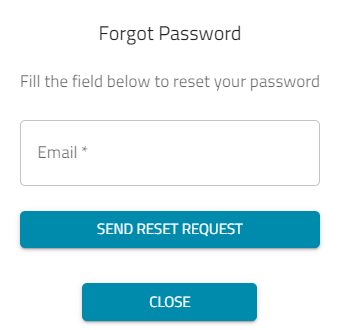
Click SEND RESET REQUEST.
When the response email is received, follow the instructions to reset the password.


Still need help?
To contact the ZPE Support team, send an email describing the situation to: support@zpesystems.com
2. Enable ZPE Cloud Services in the Nodegrid Device
Before you use the ZPE Cloud features, the ZPE Cloud needs access to the Nodegrid device. To access the device remotely you also need to enable remote access.
Enabling ZPE Cloud to access the Nodegrid device
For SR family devices, this service is enabled by default, but for other models, you need to enable it.
Using the Nodegrid GUI
Log in as admin in Nodegrid GUI.
Go to Security:: Services.
Check the Enable ZPE Cloud field. The ZPE Cloud URL is not editable and the field is prefilled.
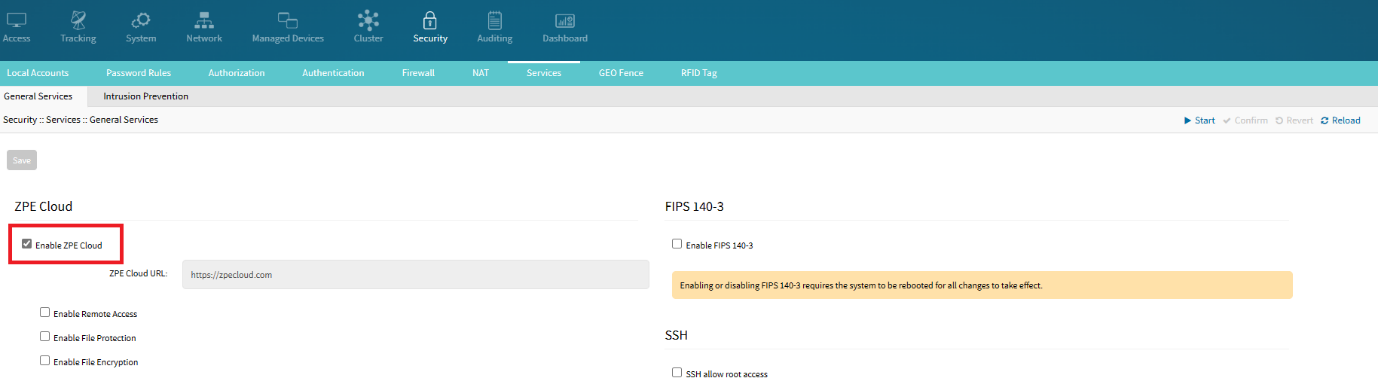
Click Save.
To disable the service, uncheck the Enable ZPE Cloud field.Using the Nodegrid CLI

Log in as an admin to the Nodegrid device.
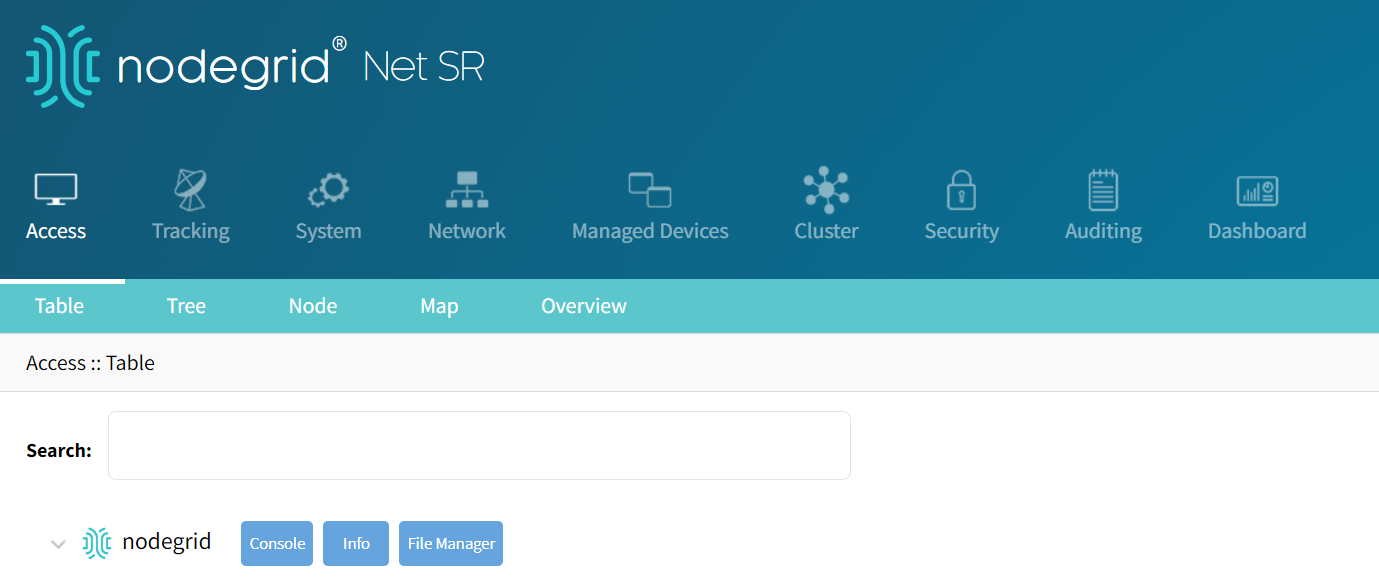
Go to the Access tab and click Console.
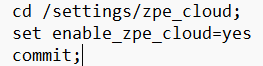
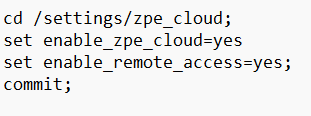
Enter the following commands:
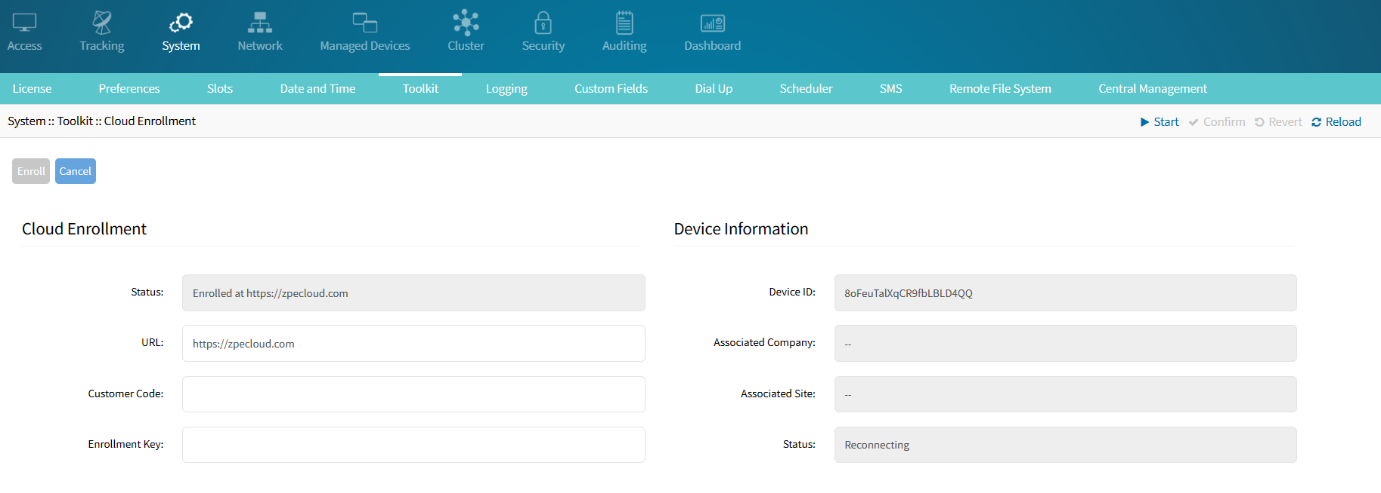
To check if the Nodegrid device is connected to the ZPE cloud, log in to the Nodegrid device, and go to Tracking:: ZPE Cloud, you can view the details of the connection between the Nodegrid device and ZPE Cloud. You can see the status of the connection (whether it is connected, reconnecting, and so on), the device ID, and the ZPE Cloud URL the device is associated with. The following image displays the details of the Device Information page:
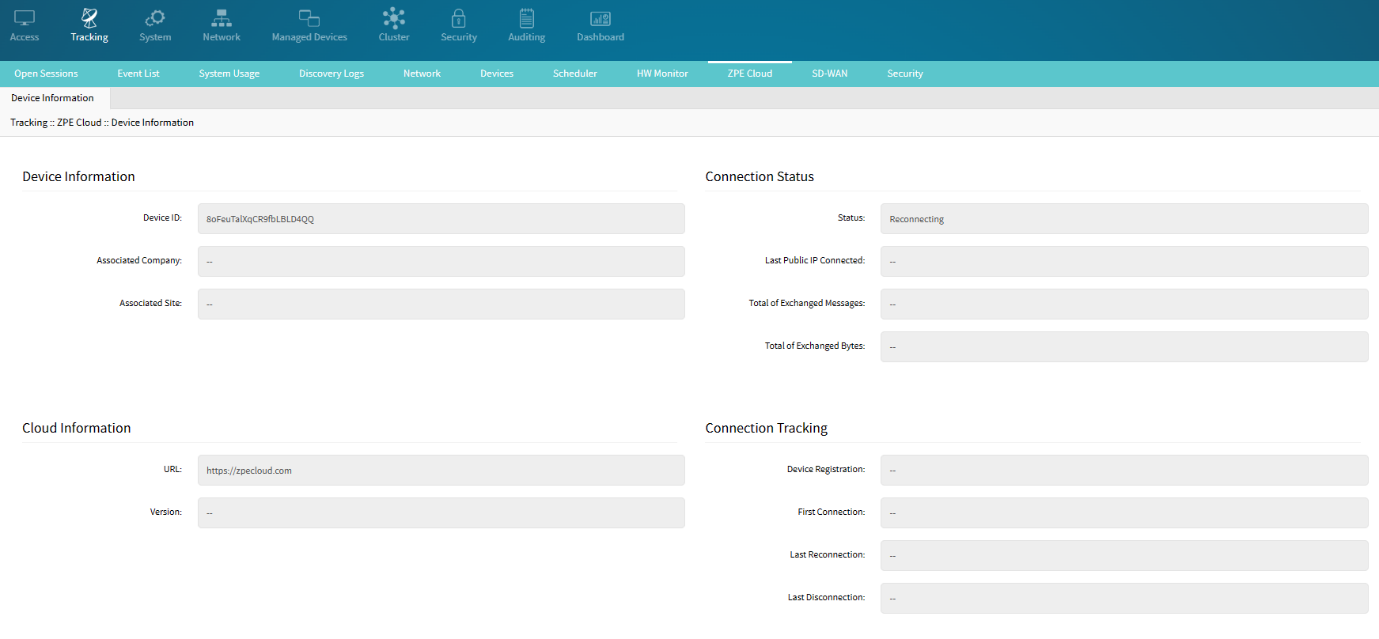


Note: It may take a few minutes for the Nodegrid to show Online in ZPE Cloud depending on your device network link speed and different hardware capabilities.
3. Enable Remote Access
Remote access is one of the multiple ZPE Cloud features. It allows you to access the Nodegrid device and target devices from anywhere in the world using an internet connection.
Using the Nodegrid GUI
Log in as admin in Nodegrid GUI.
Go to Security::Services.
Check the Enable Remote Access field if not checked.
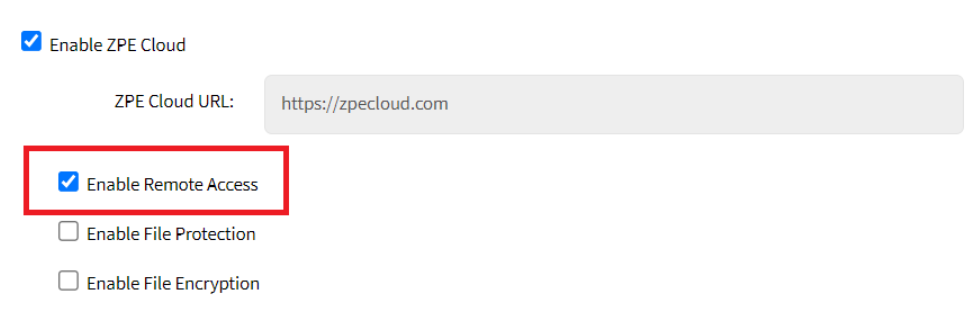
Click Save.

Using Nodegrid CLI
Log in as admin to the Nodegrid device.
Go to the Access tab and click Console.
Execute the following commands:


Note: Enabling remote access does not mean it is immediately available for use, which can take some time. To disable the service, set the value of the Enable Remote Access field to no.
4. Enroll Devices to a Company in ZPE Cloud
After enabling the Nodegrid devices to access ZPE Cloud and enabling the remote access, you need to enroll the devices to start managing them. Enroll is a term used for associating a device with a ZPE Cloud company. The Enrollment process involves two steps:
Make the devices Available in the ZPE Cloud using any of the recommended three methods, the devices are then listed on the Available tab. At this point, the device subscription is not consumed and they are ready for enrollment.
Enroll the available devices to enable the device subscription so that you can use the device to perform different operations and start managing it. Once the device is enrolled, it is listed on the Devices::Enrolled page. When you enroll in a device, your subscription to the device is effective.
Three Methods to Enroll Devices in ZPE Cloud
The following are the different methods to make a Nodegrid device available in a ZPE Cloud and enroll the device:
Using the Claim ID: When you have less number of devices to associate with the cloud, you can add the devices using the Claim ID. You can only add one device at a time using Claim ID.
Using the Transfer Key: You can use this option when you want to add devices in bulk. One Transfer key will have several devices associated with it.
Using the Customer Code and Enrollment Key: If you do not have the claim ID of the device and do not have direct access to the ZPE Cloud, you can use the Customer Code and Enrollment Key to enroll the device. This action is performed using the Nodegrid UI.
4.1 Enrolling Devices Using Claim ID
To add a device using the unique 8-digit Claim ID, perform the following actions:
Locate the Claim ID of the Nodegrid device. You can find the Claim ID on a sticker located on the device. The Claim ID is an 8-digit code that is unique to each device.

Log in to ZPE Cloud as a customer admin, and go to Devices > Available tab.
Select the device.
Click ADD BY CLAIM ID.

Enter the Claim ID without the dashes.
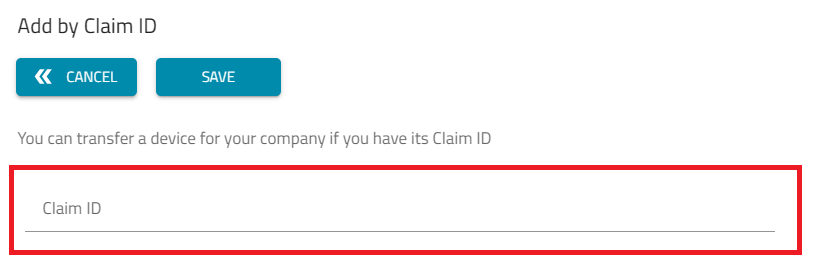
Click Save.
A confirmation message states the device has been added to your company in ZPE Cloud. The device is listed on the Available tab.
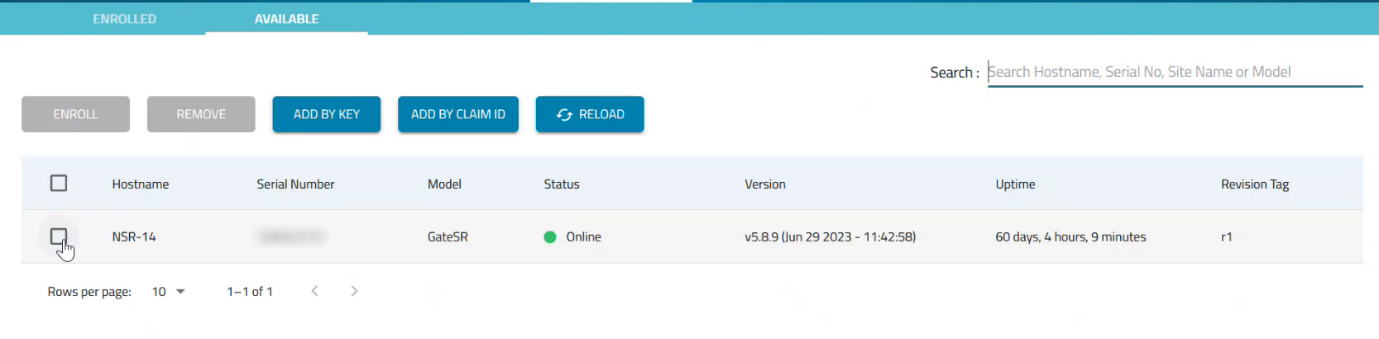
Select the device and click Enroll.
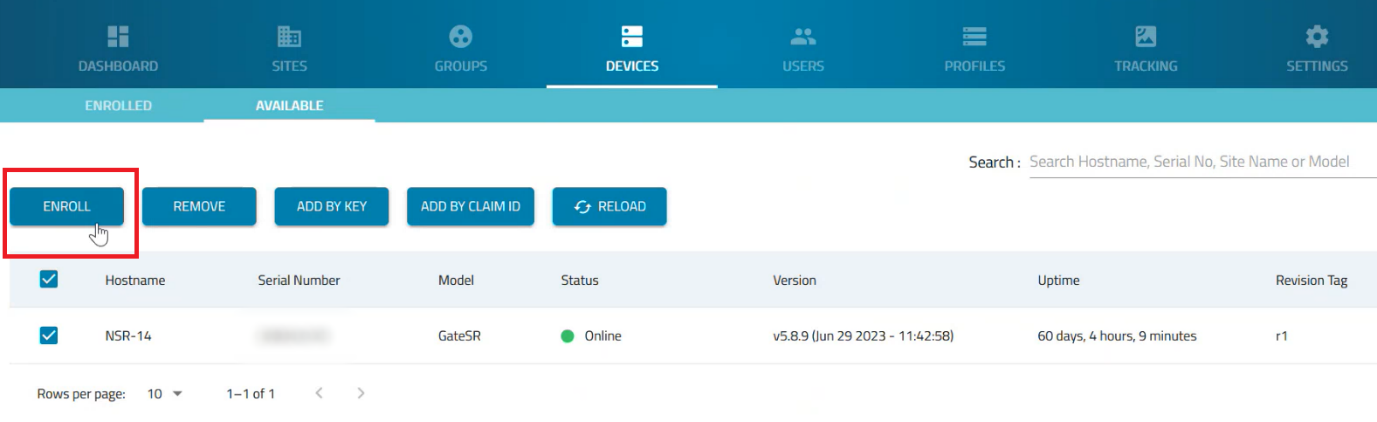
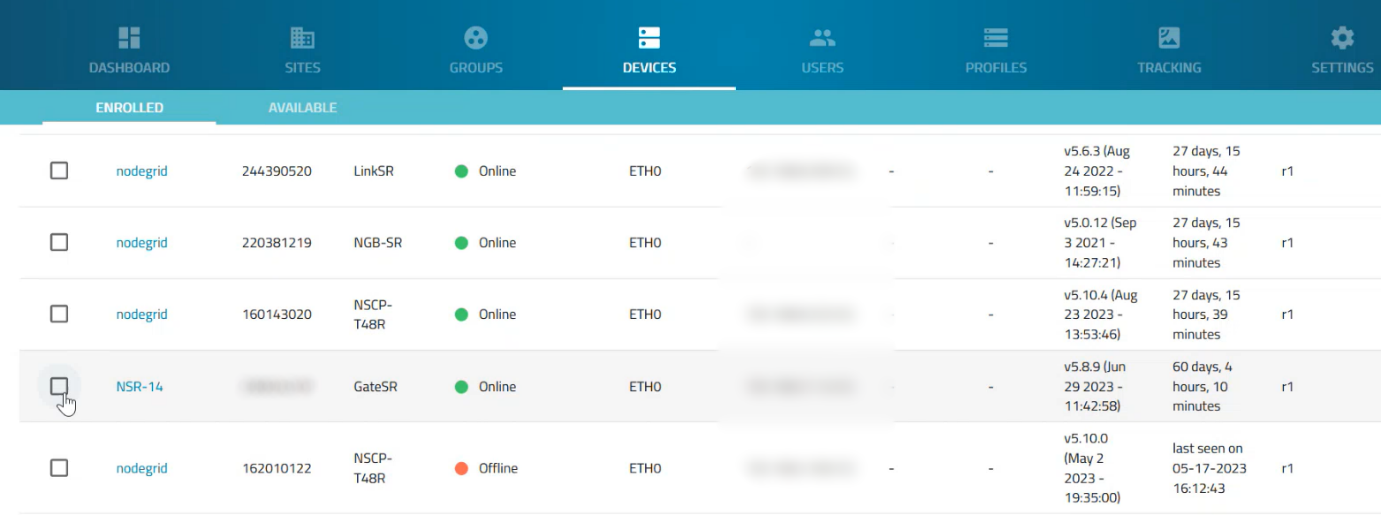
Once the device is enrolled, it is listed on the Enrolled tab.
Note: Add a device by Claim ID can only be executed in ZPE Cloud, not via CLI or Shell.


4.2 Enrolling Devices Using Transfer Key
One of the methods to add a device to your company in ZPE Cloud is to use a unique 45-digit Transfer Key, which is a unique identifier assigned to a device or list of devices.
Pre-requisites:
Obtain the Transfer Key with ZPE support. You must contact ZPE support and provide them with the serial numbers of the devices you want to add. Once ZPE verifies that the devices are available for transfer, they will provide you with a Transfer key.
Perform the following actions to add single or multiple devices to your company in ZPE Cloud using Transfer Key:
Log in to ZPE Cloud as an admin, and go to the Devices > Available tab.
Under the Devices > Available tab, click ADD BY KEY.
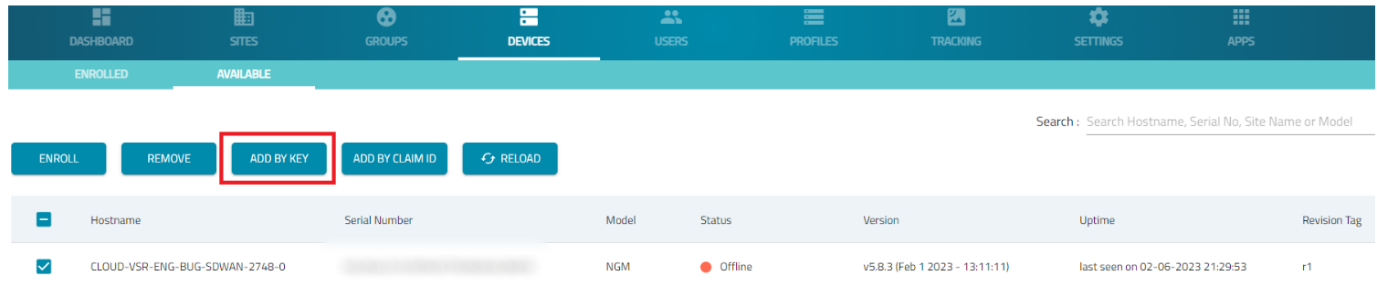
Enter the Transfer Key and click Load Devices. All the devices associated with the Transfer Key are loaded as shown in the following image:

Click Transfer.
A confirmation message states that the devices have been loaded into your company in ZPE Cloud. The devices are listed in the Devices > Available tab.
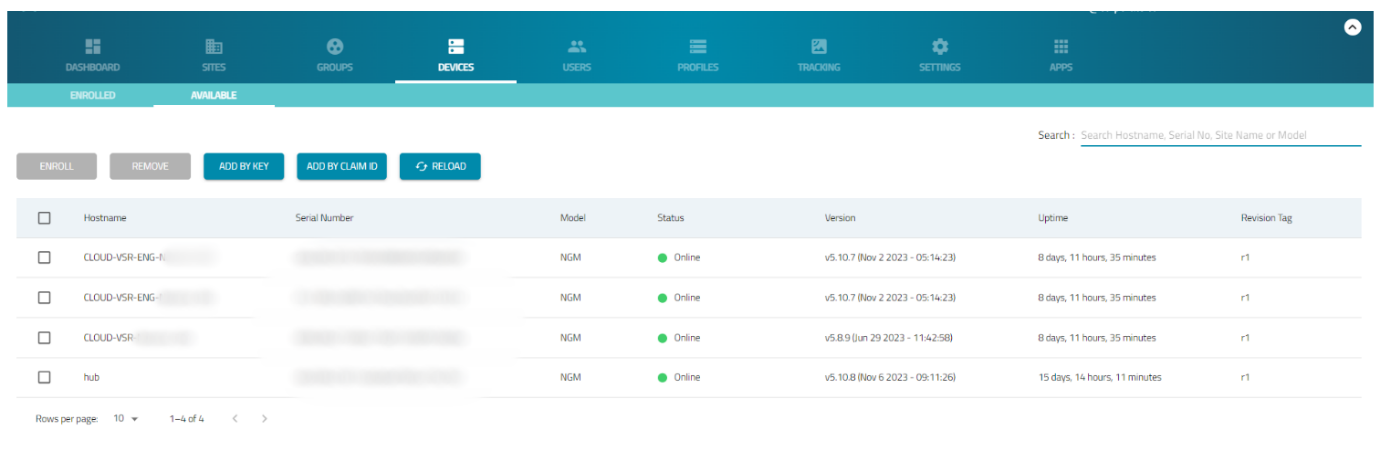
Select the devices that you just added and click Enroll.
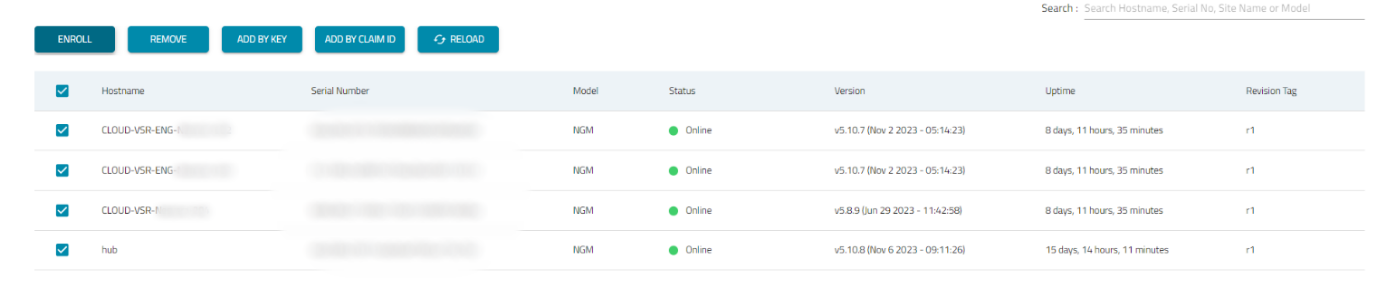
This will enroll the devices in the ZPE Cloud. Once the device is enrolled, it is listed in the Devices > Enrolled tab.


Note: Adding a device by Transfer Key can only be done through ZPE Cloud and not via CLI or Shell.
4.3 Enrolling Devices Using Customer Code and Enrollment Key
Customer Code is a unique 5-digit identifier assigned to each company and Enrollment Key is a key initially randomly generated that can be changed by authorized company users in ZPE Cloud, together they represent the company's enrollment credentials.
Perform the following actions to add devices to your company in ZPE Cloud using the Customer code and Enrolment key:
Enrolling Devices Using the ZPE Cloud GUI
Log in to ZPE Cloud as an admin, and go to the Settings > Enrollment tab.
Under the Settings > Enrollment tab, ensure that the Enable Device Enrolment field is enabled.
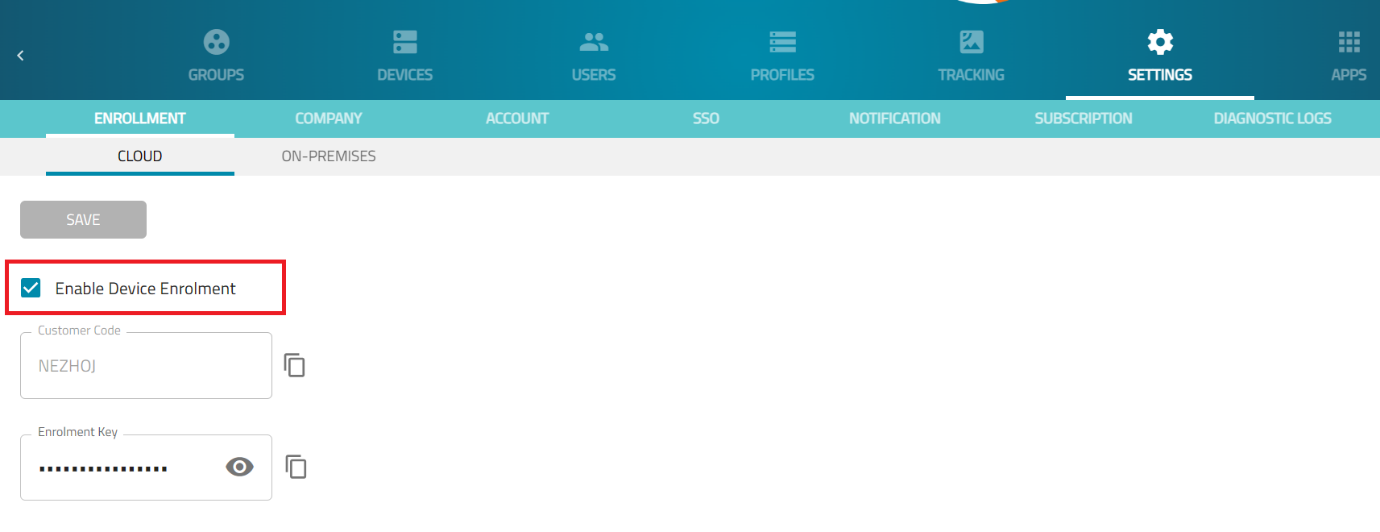
Copy the Customer Code and Enrollment key to use in the next steps.
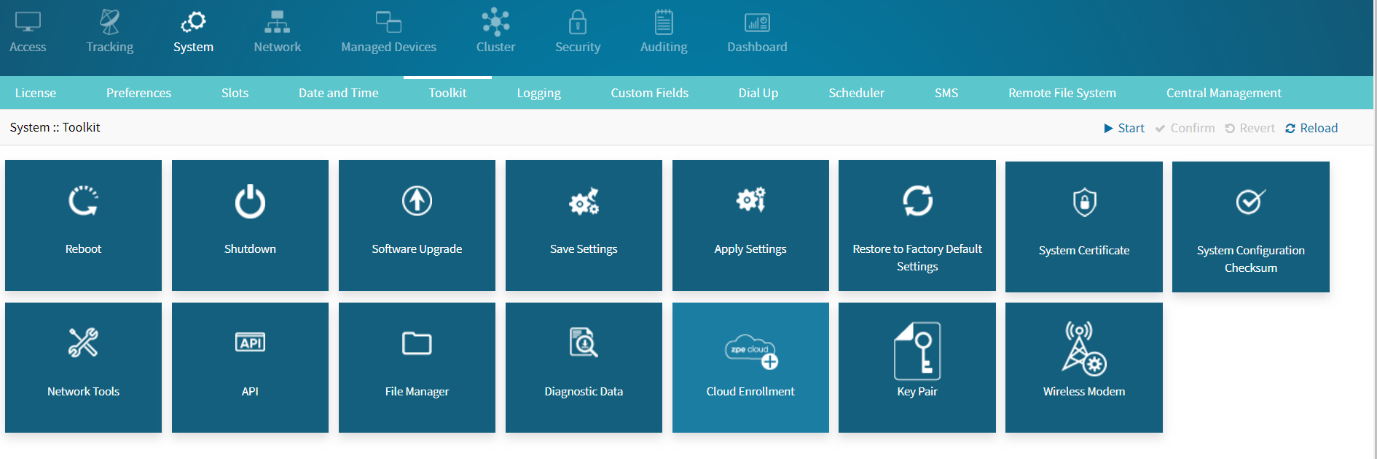
Log in to the Nodegrid Device's GUI as an admin, and go to the System > Toolkit tab.
Under the System > Toolkit tab, click Cloud Enrollment.
Enter the Customer Code and Enrollment Key that you copied in Step 3.
Click Save.
A confirmation message states that the device has been transferred to your company in ZPE Cloud.Go back to ZPE Cloud, the device will now appear in the Devices > Available tab.

Select the device that you just added and click Enroll. This will enroll the device in the ZPE Cloud.

Once the device is enrolled, it is listed on the Devices > Enrolled tab.


Enrolling a Device Through CLI
Log in to ZPE Cloud as an admin, and go to the Settings > Enrollment tab.
Under the Settings > Enrollment tab, check the Enable Device Enrollment field and click Save.
Copy the Customer Code and Enrollment key to use in the next steps.
Log in to the Device's CLI as an admin, and type the following commands:

Note: Replace the <customer_code> and <Enrollment_Key> with the actual Customer Code and the Enrollment Key.
Login to ZPE Cloud, go to Devices > Available tab, the device is listed on this page.
Select the device that you just added and click Enroll.
This will enroll the device in ZPE Cloud and the device is listed in the Devices > Enrolled tab.Note: Adding a device by Customer Code and Enrollment Key can only be done via API, CLI, GUI, or Shell strictly restricted to ZPE only. You cannot add a device by Customer code and Enhancement key through ZPE Cloud.
Your devices are now successfully enrolled in ZPE Cloud, you can start monitoring them and perform operations in ZPE Cloud.

5. Accessing Devices Remotely
Once these devices are enrolled in the ZPE cloud, you can access them from anywhere via ZPE Cloud. To access the device remotely:
Log in to the ZPE cloud.
Go to Device :: Enrolled.
Navigate to the device you want to access. Click Connect.
To connect to the device using the web UI click Web.
To connect the device using the CLI, click Console.
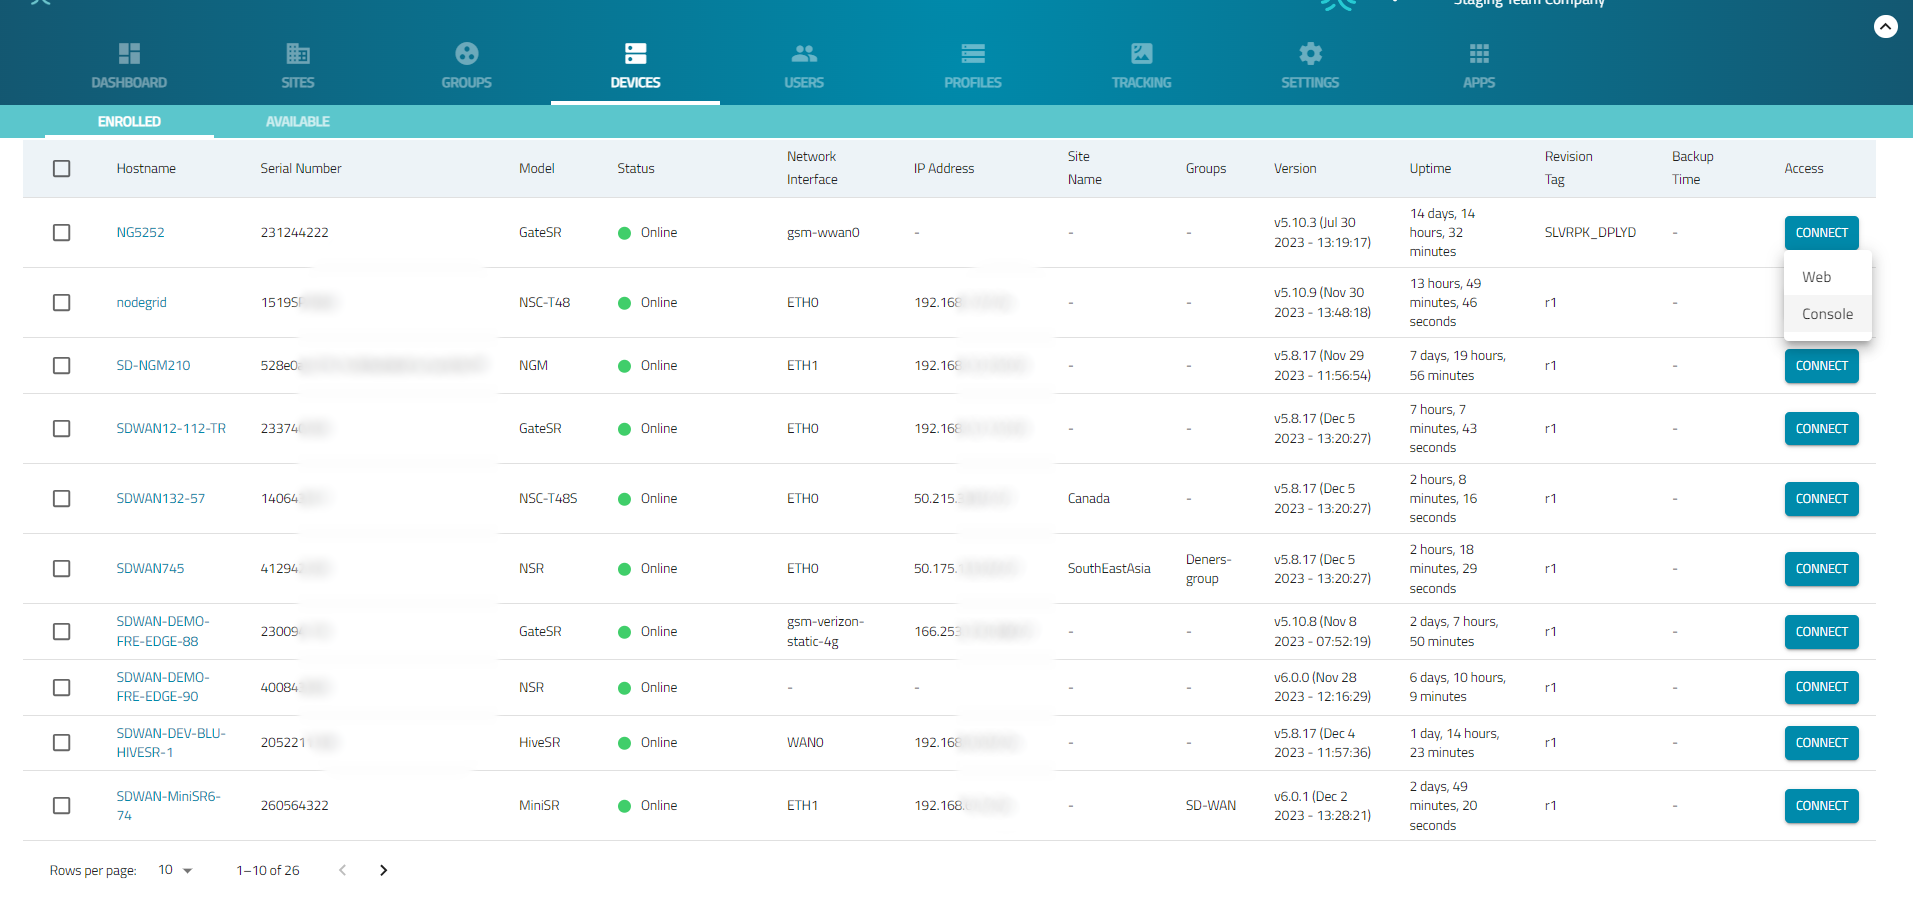
Enter the Username and Password of the device and click login.

Congratulations! You are now successfully logged in to the Nodegrid Device


6. Performing Basic Operations Using Profiles
Now that the devices have been enrolled in the ZPE Cloud, you can perform different operations on these devices. The Profile tab allows you to perform various operations but in this document, we have covered some of the basic operations to get you started. These operations are as follows:
Scheduling Backup for a Nodegrid device using ZPE Cloud
Restoring a Backup from ZPE Cloud
Upgrading a Nodegrid Device using ZPE Cloud
Adding Device to a Group
6.1 Scheduling Backup for a Nodegrid Device using ZPE Cloud
ZPE Cloud enables managing on-demand and scheduled backups of your Nodegrid devices. To schedule the backup:
Login to ZPE Cloud.
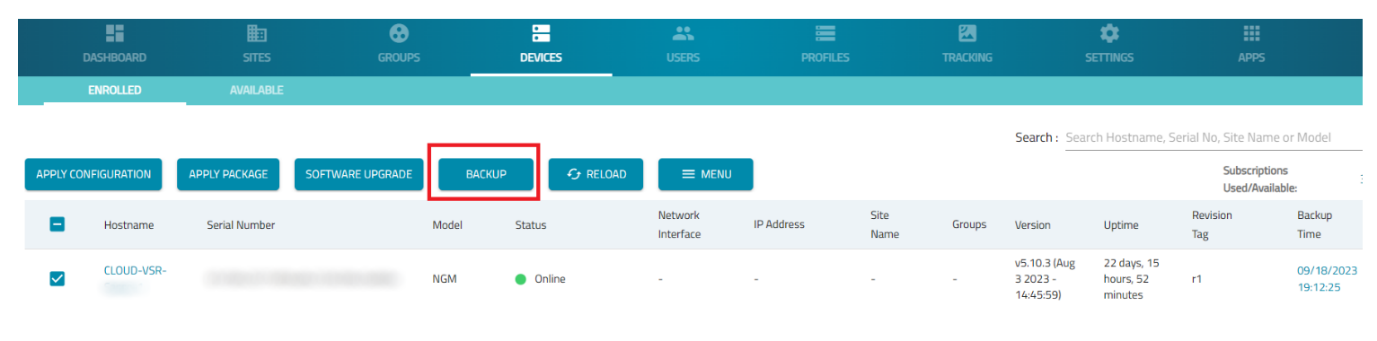
Go to Devices :: Enrolled.
Select the devices you want to back up and then click Backup. You can back up multiple devices at once.
Select the required type of File Protection:
None: If selected, the backup file is not encrypted.
TPM Encrypted: If selected, the backup is encrypted using the TPM key and it cannot be opened outside of the device.
Password Encrypted: If selected. the backup is encrypted using a file protection password. Backups with File Protection type as 'Password Encrypted' require File Protection enabled on the device, otherwise, the Backup will fail.
Select the File Storage
Temporary: The file is overwritten if it is the oldest file and the device's limit of 5 backups is reached.
Persistent: The file will not be overwritten by any other backup:
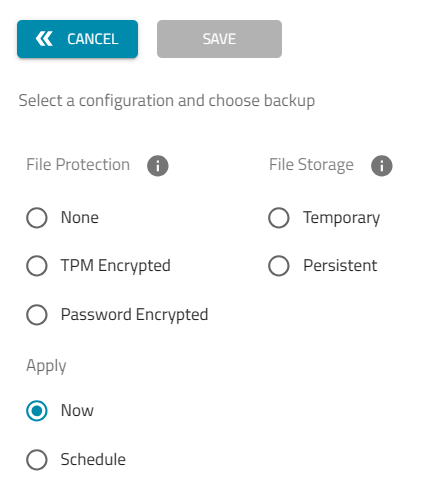
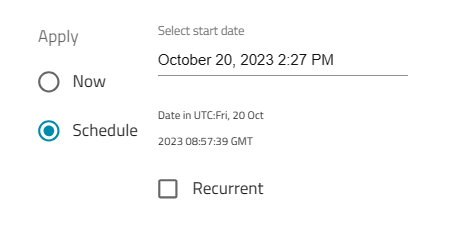
In the Apply section, select the schedule to run the backup:
Now: The update procedure will start right after you click the Save button.
Schedule: You can select the start date and time for the update. You can make your backup Recurrent on an hourly, daily, weekly, or monthly basis.
Click Save.


6.2 Restoring a Backup from ZPE Cloud
ZPE Cloud allows you to restore a backup of your Nodegrid devices in a few steps.
Log in to ZPE Cloud.
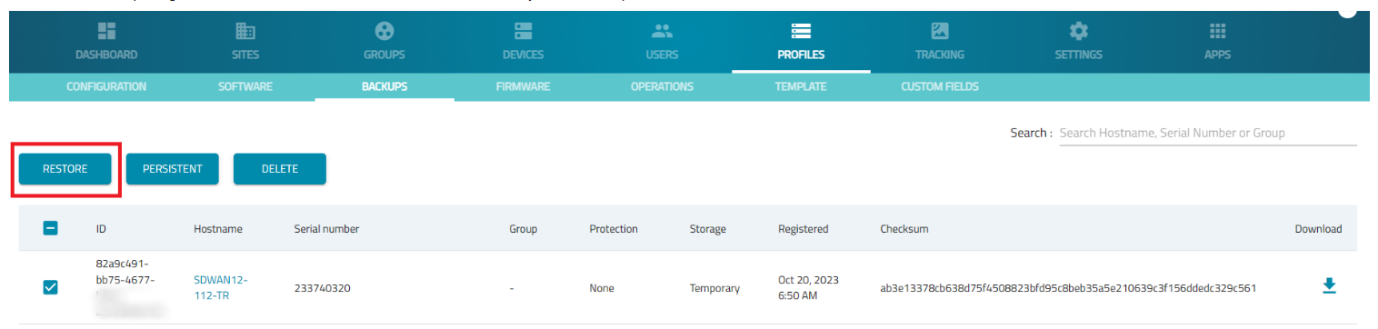
Go to Profiles:: Backup.
Select the backup image and click Restore. You can also download the file to your local computer.
Select the device you want to restore and click Apply. The restoration will start immediately.

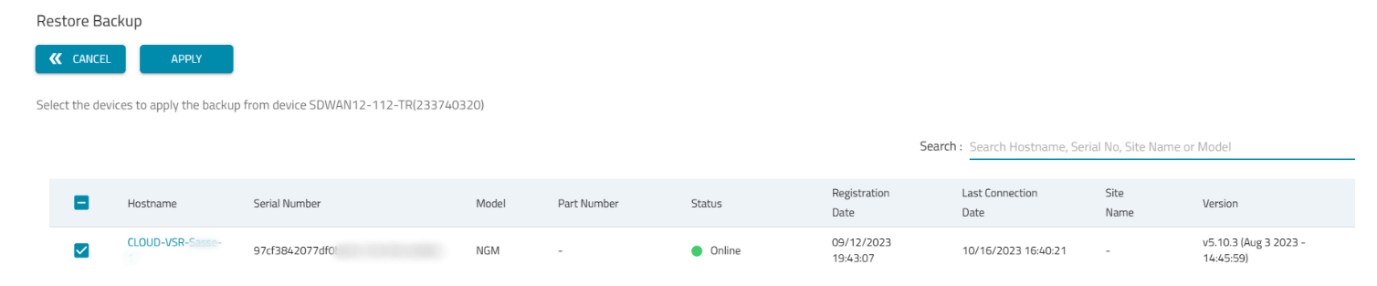
Note: Restoring files with File Protection type as 'Password Encrypted' requires File Protection enabled on the device, otherwise the restoration will fail.
6.3 Upgrading a Nodegrid Device using ZPE Cloud
ZPE cloud enables managing on-demand and scheduled software updates of your Nodegrid devices.
Log in to ZPE Cloud.
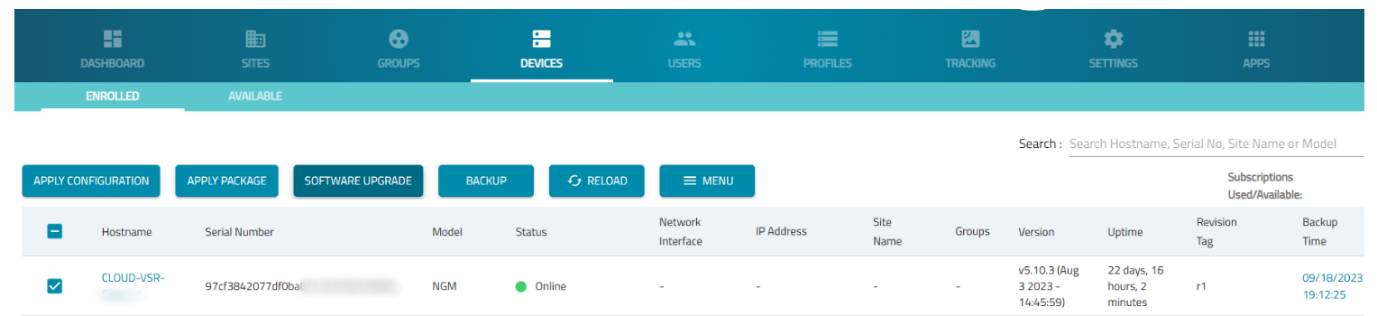
Go to Devices:: Enrolled.
Select the device you want to update and then click Software Upgrade. You can select multiple devices at once.
Select the image you want to use. ZPE provides the images. You can use the search to find the images quickly. if you don’t find the required image, contact the ZPE Support team.
In the Apply section, select either of the following three options:
Now: The update procedure will start right after you click the Save button.
On First Connection: The moment the device changes the state from Never connected to Connected.
Schedule: You can select the day and the hour of the device update.

Click Save.


Note: Devices connected to ZPE Cloud through GSM / LTE or weak connections are not recommended to receive profiles bigger than 500MB, including SW Upgrade (around 700MB to 1,7GB), as it might affect your Data Usage plan and the connection might reset in the middle of the download, causing the Job failure.
6.4 Adding Devices to a Group in ZPE Cloud
Adding devices to specific groups in ZPE Cloud helps organize and manage your network infrastructure effectively. By assigning devices to a group, you can control access and visibility of devices for users in that group.
Log in into ZPE Cloud as an admin.
Go to Groups::Devices.
Select the devices you want to add to the group.

The users of the assigned Group can access the device based on the permissions. For example, if a Group has administrator-level permissions, then the users from this Group can see all the added devices. Users belonging to the Groups with User and Operator permissions can only view devices that are assigned to the Group.Click Add.
Select the group you want your devices to be added to.

Click Add on Group.


6.5 Verifying that a Device is Added to the Group
Log in in ZPE Cloud as an admin.
Go to Groups::Devices.
Click the All drop-down list, and all the available groups are listed. Click the required group.
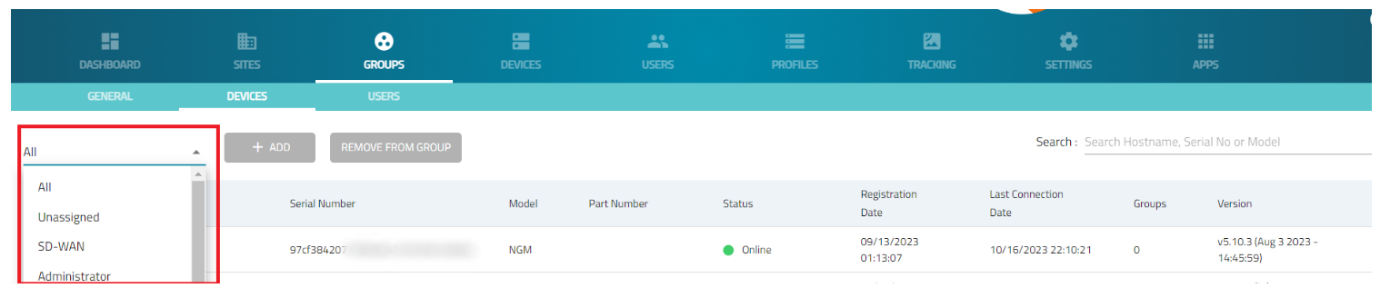
See the list of devices added to your group.

Note: One device can be associated with more than one group.
Forgot Password?
Was this article helpful?