Install Immune Guard on Nodegrid appliances
- 18 May 2023
- 1 Minute to read
- Print
- DarkLight
- PDF
Install Immune Guard on Nodegrid appliances
- Updated on 18 May 2023
- 1 Minute to read
- Print
- DarkLight
- PDF
Article summary
Did you find this summary helpful?
Thank you for your feedback
Install Immune Guard on Nodegrid OS
The following guide outlines how Immune Guard can be installed on any Nodegrid OS using ZPE Cloud.
Requirements
- Immune Guard subscript
- valid ZPE Cloud account
- Nodegrid OS version 5.8 or newer
Overview
The installation process contains the following steps:
- Create ZPE Cloud profiles
- Store the Immune Guard API as Custom Variable
- Install Immune Guard on Nodegrid OS
- Schedule regular scans
ZPE Cloud setup
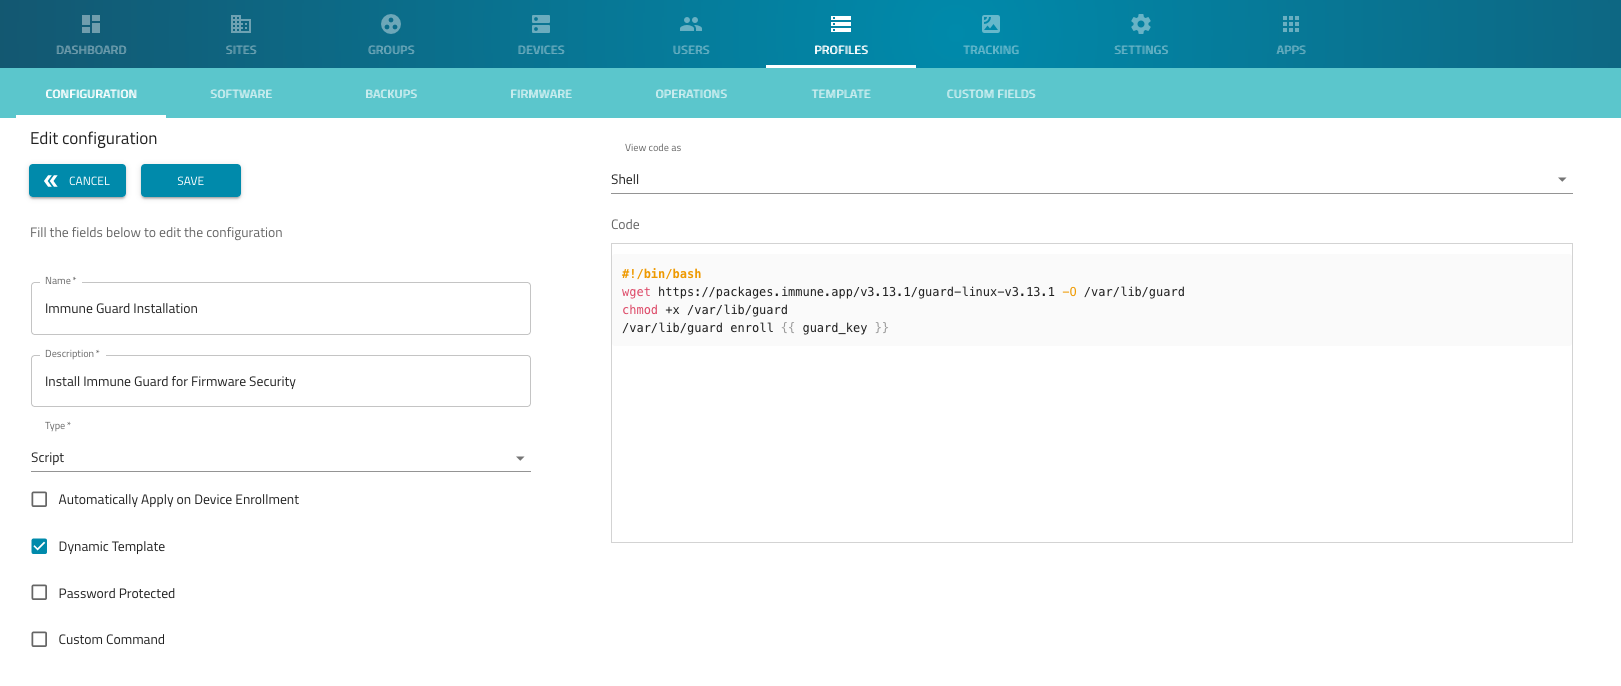
Create ZPE Cloud profile for Immune Guard Installation
- Login to the ZPE Cloud account (https://zpecloud.com or https://zpecloud.eu)
- Navigate to Profiles -> Configuration
- Click on
ADDto create a new Profile, and provide the following details
| Setting | Value | Comment |
|---|---|---|
| Name | Install Immune Guard | |
| Description | Install Immune Guard for Firmware Security | |
| Type | Script | |
| Dynamic Template | Enabled | |
| View Code as | Shell | |
| Code | copy below script | adjust version and file name as needed |
#!/bin/bash
wget https://packages.immune.app/v3.13.1/guard-linux-v3.13.1 -O /var/opt/guard
chmod +x /var/opt/guard
/var/opt/guard enroll {{ guard_key }}
- Click on
Save

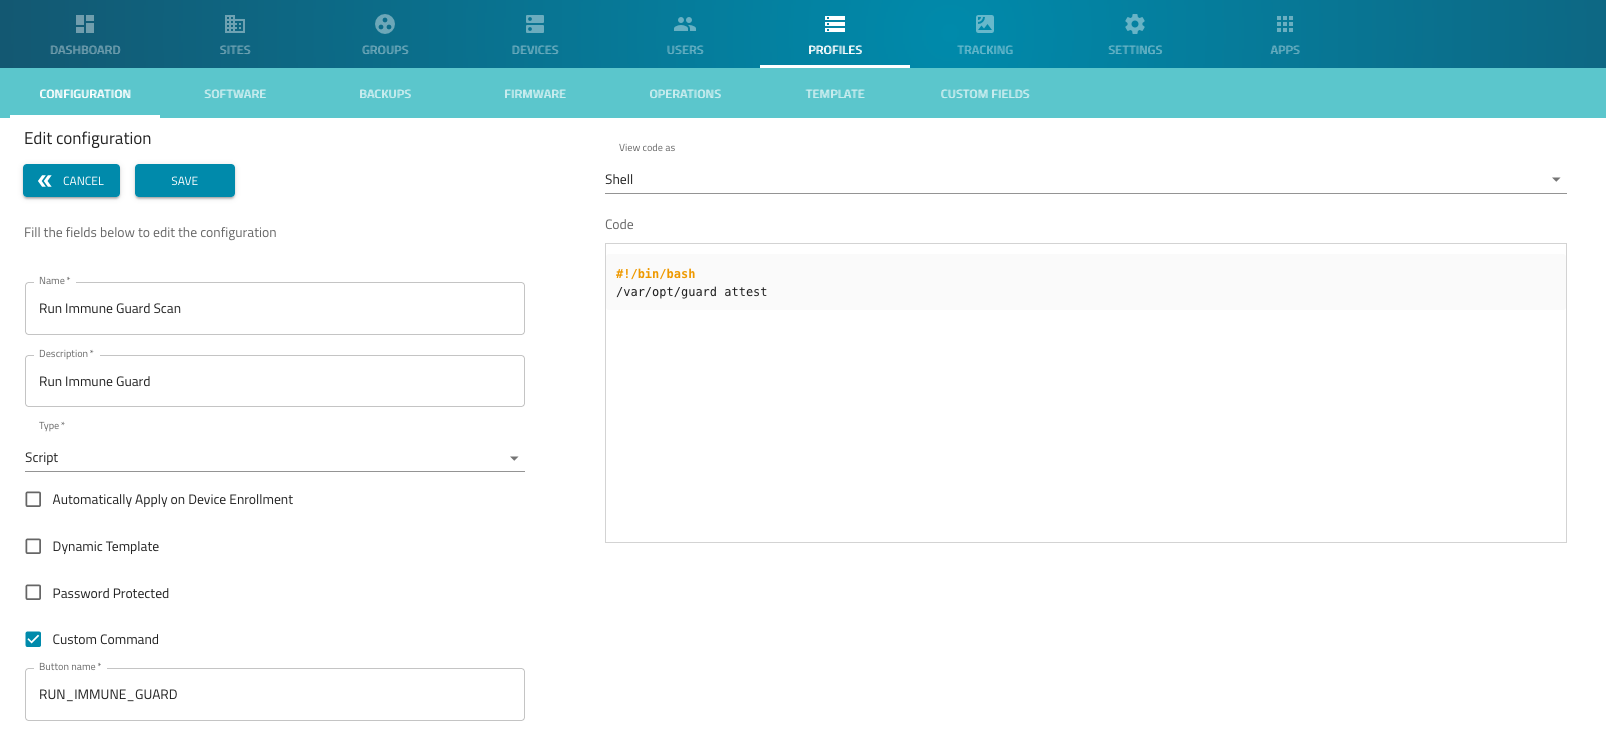
Create ZPE Cloud profile to run Immune Guard scan
- Navigate to Profiles -> Configuration
- Click on
ADDto create a new Profile, and provide the following details
| Setting | Value | Comment |
|---|---|---|
| Name | Run Immune Guard Scan | |
| Description | Run Immune Guard Scan | |
| Type | Script | |
| Dynamic Template | Disabled | |
| Custom Command | Enabled | |
| Button Name | RUN_IMMUNE_GUARD | |
| View Code as | Shell | |
| Code | copy below script |
#!/bin/bash
/var/opt/guard attest
- Click on
Save

Store Immune Guard API Key
- Navigate to Profiles -> Custom Fields
- click on
NEW - Create a new custom field with the following value
| Setting | Value | Commit |
|---|---|---|
| Name | guard_key | |
| Value | <API KEY from Immune Guard> | |
| Scope | Global |

Install Immune Guard on Nodegrid OS
- Navigate to Devices -> Enrolled
- Select a or multiple devices
- click on
APPLY CONFIGURATION - Search for
Run Immune Guard Scan - Click on
SAVE - Immune Guard will now be installed onto the devices and enrolled with the provided API key
- To review the current deployment status, navigate to Profiles -> Operations
Run Immune Guard Scan (Once off)
- Navigate to Devices -> Enrolled
- Select one or multiple devices
- click on
MENUto expand the menu - Click on
RUN_IMMUNE_GUARD
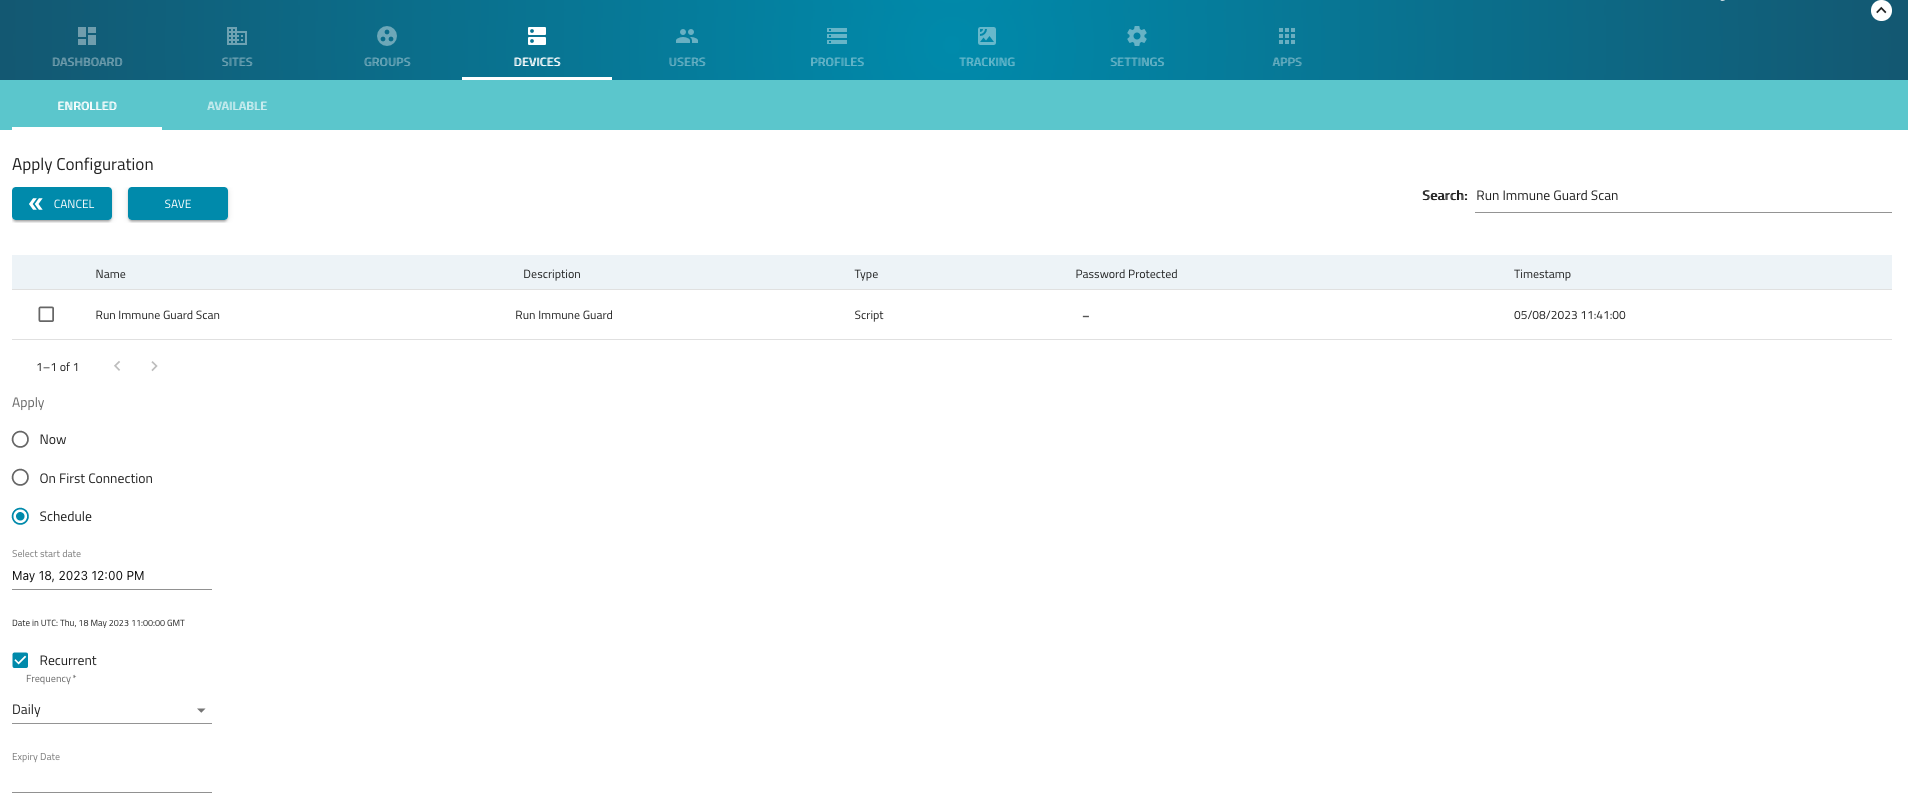
Schedule Immune Guard Scan
- Navigate to Devices -> Enrolled
- Select a or multiple devices
- click on
APPLY CONFIGURATION - Search for
Run Immune Guard Scan - Select under *Apply -> Schedule
- Set a start date and time
- Enable Recurrent and select the frequency, for example, daily
- Click on
SAVE

Was this article helpful?


