- 03 Dec 2024
- 8 Minutes to read
- Print
- DarkLight
- PDF
Nodegrid Hive SR - Hardware Installation Guide - English
- Updated on 03 Dec 2024
- 8 Minutes to read
- Print
- DarkLight
- PDF
About Hive SR
The Nodegrid Hive Services Router (Hive SR) device provides secure, resilient, intelligent network management and offers innovative solutions for out-of-band management, SD-WAN, and edge computing.
Hive SR Features
The Hive SR device includes the following features:
Four SIM card slots for up to two cellular modems
Four RJ-45 Network Ports (2.5G)
Two SFP+
+12V DC power
Fan-cooled
Rack or wall mountable
Five antenna slots
Zero Touch Provisioning (ZTP) for fast and easy setup in remote locations
Integrates with ZPE Cloud and ZPE Systems Nodegrid Manager for a vendor-neutral, unified management solution
For more information, refer to the section Hive Device Specifications.
Hardware Installation Safety Considerations
The Nodegrid Hive SR provides access to the internet for devices attached to the LAN ports. As a result, care must be taken to avoid compromising your security policies.
From the factory, this equipment is shipped with the following settings:
DHCP – ENABLED in WAN and SFP ports
DHCP Server – ENABLED in LAN ports
USB, SFP, WAN, and LAN ports – ENABLED
Firewall – ENABLED in WAN and SFP ports
One default user with passwords – admin / admin
Warning
ZPE requires changing the default passwords of the admin at the first login, as well as carefully configuring security settings immediately after initial setup. Ensure your new password is at least 8 characters long and includes at least one digit, one uppercase letter, and one special character.
Refer to the Security Section for more information on security settings.
Refer to the Safety information for safety requirements before installation.
Device Onboarding
The following device onboarding steps are covered in this document:
Unboxing the Hive SR Device
The Hive SR device is an encased sturdy solid structure that contains its various hardware components. It is delivered in a cardboard carton, protected by foam packing material. Inside the box, you will also find hardware accessories and a documentation card.
Following are the list of accessories that are required to install a Hive SR device:
Component | Included in the Box | Quantity | Comments |
Hive SR Appliance | Yes | 1 | - |
HSR Power Supply Adapter | Yes | 1 | 12VDC external 100-240 VAC, 50/60 Hz power adapter |
Antennas | Yes | 4 | LTE and WiFi antennas
|
Rack Mount Ears and Screws | No | 2 | - |
Console Cable and Adapter | Yes | 1 | - |
Screwdriver | No | 1 | Philips size #2 |
Cage Nuts | No | 8 |
|
Lacing Bars | No | 1 | - |
Velcro Strips | No | 2+ | - |
Documentation card | Yes | 1 | - |
Verify the Hive SR Part Number
Check the part number of the shipment against the device. Part Numbers can be found either on the box containing the unit or underneath the appliance on the product label. The following are the covered part numbers for Hive:
ZPE-HSR416-Base-GW
ZPE-HSR416-W5-GW
ZPE-HSR416-4G-GW
ZPE-HSR416-4G-W5-GW
ZPE-HSR416-4G-W5-D128G-GW
ZPE-HSR416-5G-GW
Installing Hive SR Device
This section provides an overview of the various hardware components of the Hive SR device. It covers each component's functions and roles within the device. Additionally, this section includes essential references and guidelines required for the proper installation and setup of the Hive SR device, ensuring that users can effectively utilize the device to connect to their managed devices.

Hive SR Back and Side Panel
Mount your Hive SR device on a rack or a wall. You can also place it at a desk. For detailed rack mounting and wall mounting instructions, refer to the section Rack Mounting. | |||||||||||||||||||||||||
Connect a ZPE-recommended CAT 5e or CAT 6 cable to your network from the WAN0/WAN1 port. The LED behavior of the WAN ports is described in the Nodegrid Hive SR hardware specifications topic. | |||||||||||||||||||||||||
Connect a ZPE-recommended CAT5e and RJ45-DB9 Z000036 adapter/cable from the console port to communicate with the Nodegrid unit. For more information, refer to Connect to the Console Port. The LED behavior of the console ports is described in the Nodegrid Hive SR hardware specifications topic. | |||||||||||||||||||||||||
Connect the power cord to the appliance. Power will automatically turn on. For more information, refer to Power Cord Connection. | |||||||||||||||||||||||||
5 and 6. | (Optional) You can connect antennas to the Hive SR device to enable wireless WAN connectivity via WiFi and 4G/LTE connections. Proper antenna placement is critical for achieving optimal network strength and performance. The Hive SR device supports four antennas: two dedicated to WiFi signals and two dedicated to LTE signals. Each antenna can be rotated 360° to maintain the best angle for maximum signal strength.
To install the antennas, attach them to the designated antenna base. Ensure to connect the antennas in the correct combination as indicated in the following figure. If the antenna base is a socket type, choose the corresponding plug-type antenna for the connection. This alignment is crucial to avoid mismatched connections that could impair signal reception and device functionality.
| ||||||||||||||||||||||||
7. | (Optional) You can insert SIM cards to connect up to two cellular modems. The Hive SR device contains two integrated modems, where one modem operates over 4G/LTE connections and the other modem operates over WiFi connections. The following dual SIM slots are available in the Hive SR to allow SIMs to be active on either slots:
Wherein SIM A1 and SIM B1 are the primary slots that get selected when the device boots up. If the SIM card is not present in the primary slot, the alternative slot is selected if SIM card is present. If a SIM card loses network connectivity, failover to the alternative slot occurs, if a SIM card is present. Ensure that the cards are oriented correctly in the slots as indicated in the following figure and table:
After inserting the SIM cards, place the cover over the SIM slots.
|
Rack Mounting Hive SR Device
To rack mount the Hive SR device follow the instructions as described in this section:
To insert the Hive SR device into the rackmount bracket, place the rackmount bracket and the Hive SR device on a flat surface.
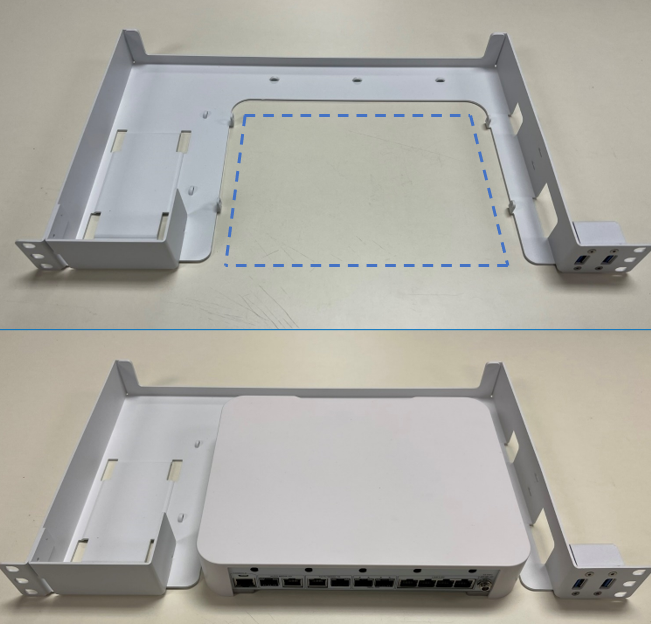
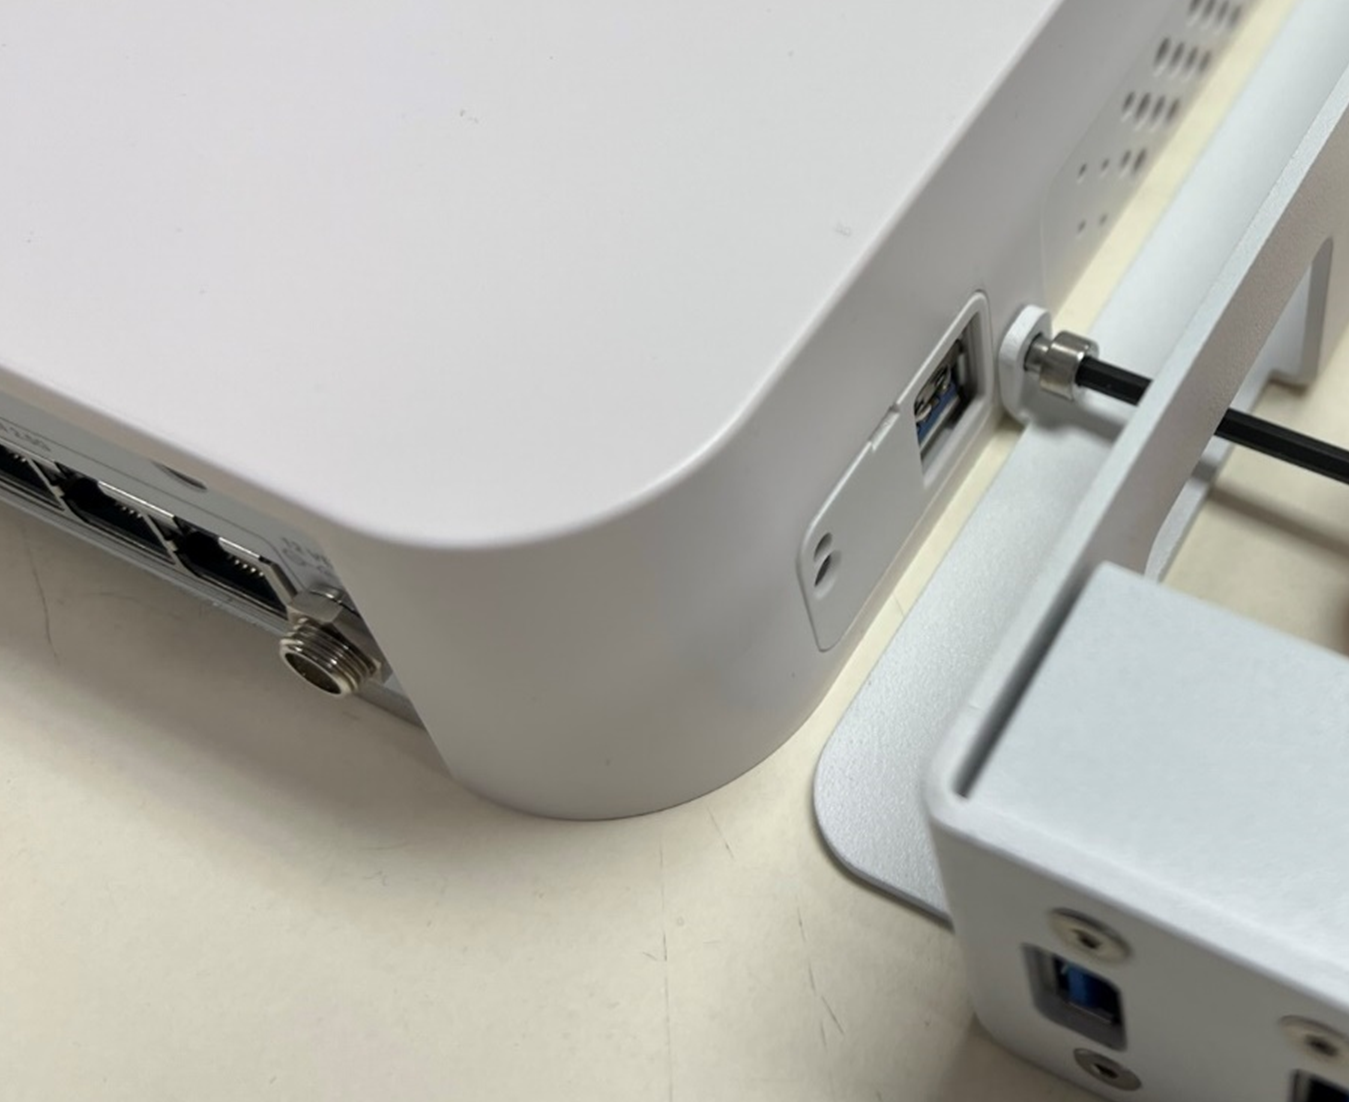
Align the mounting holes (sideways) of the Hive SR device with the holes located on the rackmount bracket. Insert the screw into the device mounting holes, however do not overtighten the screws.
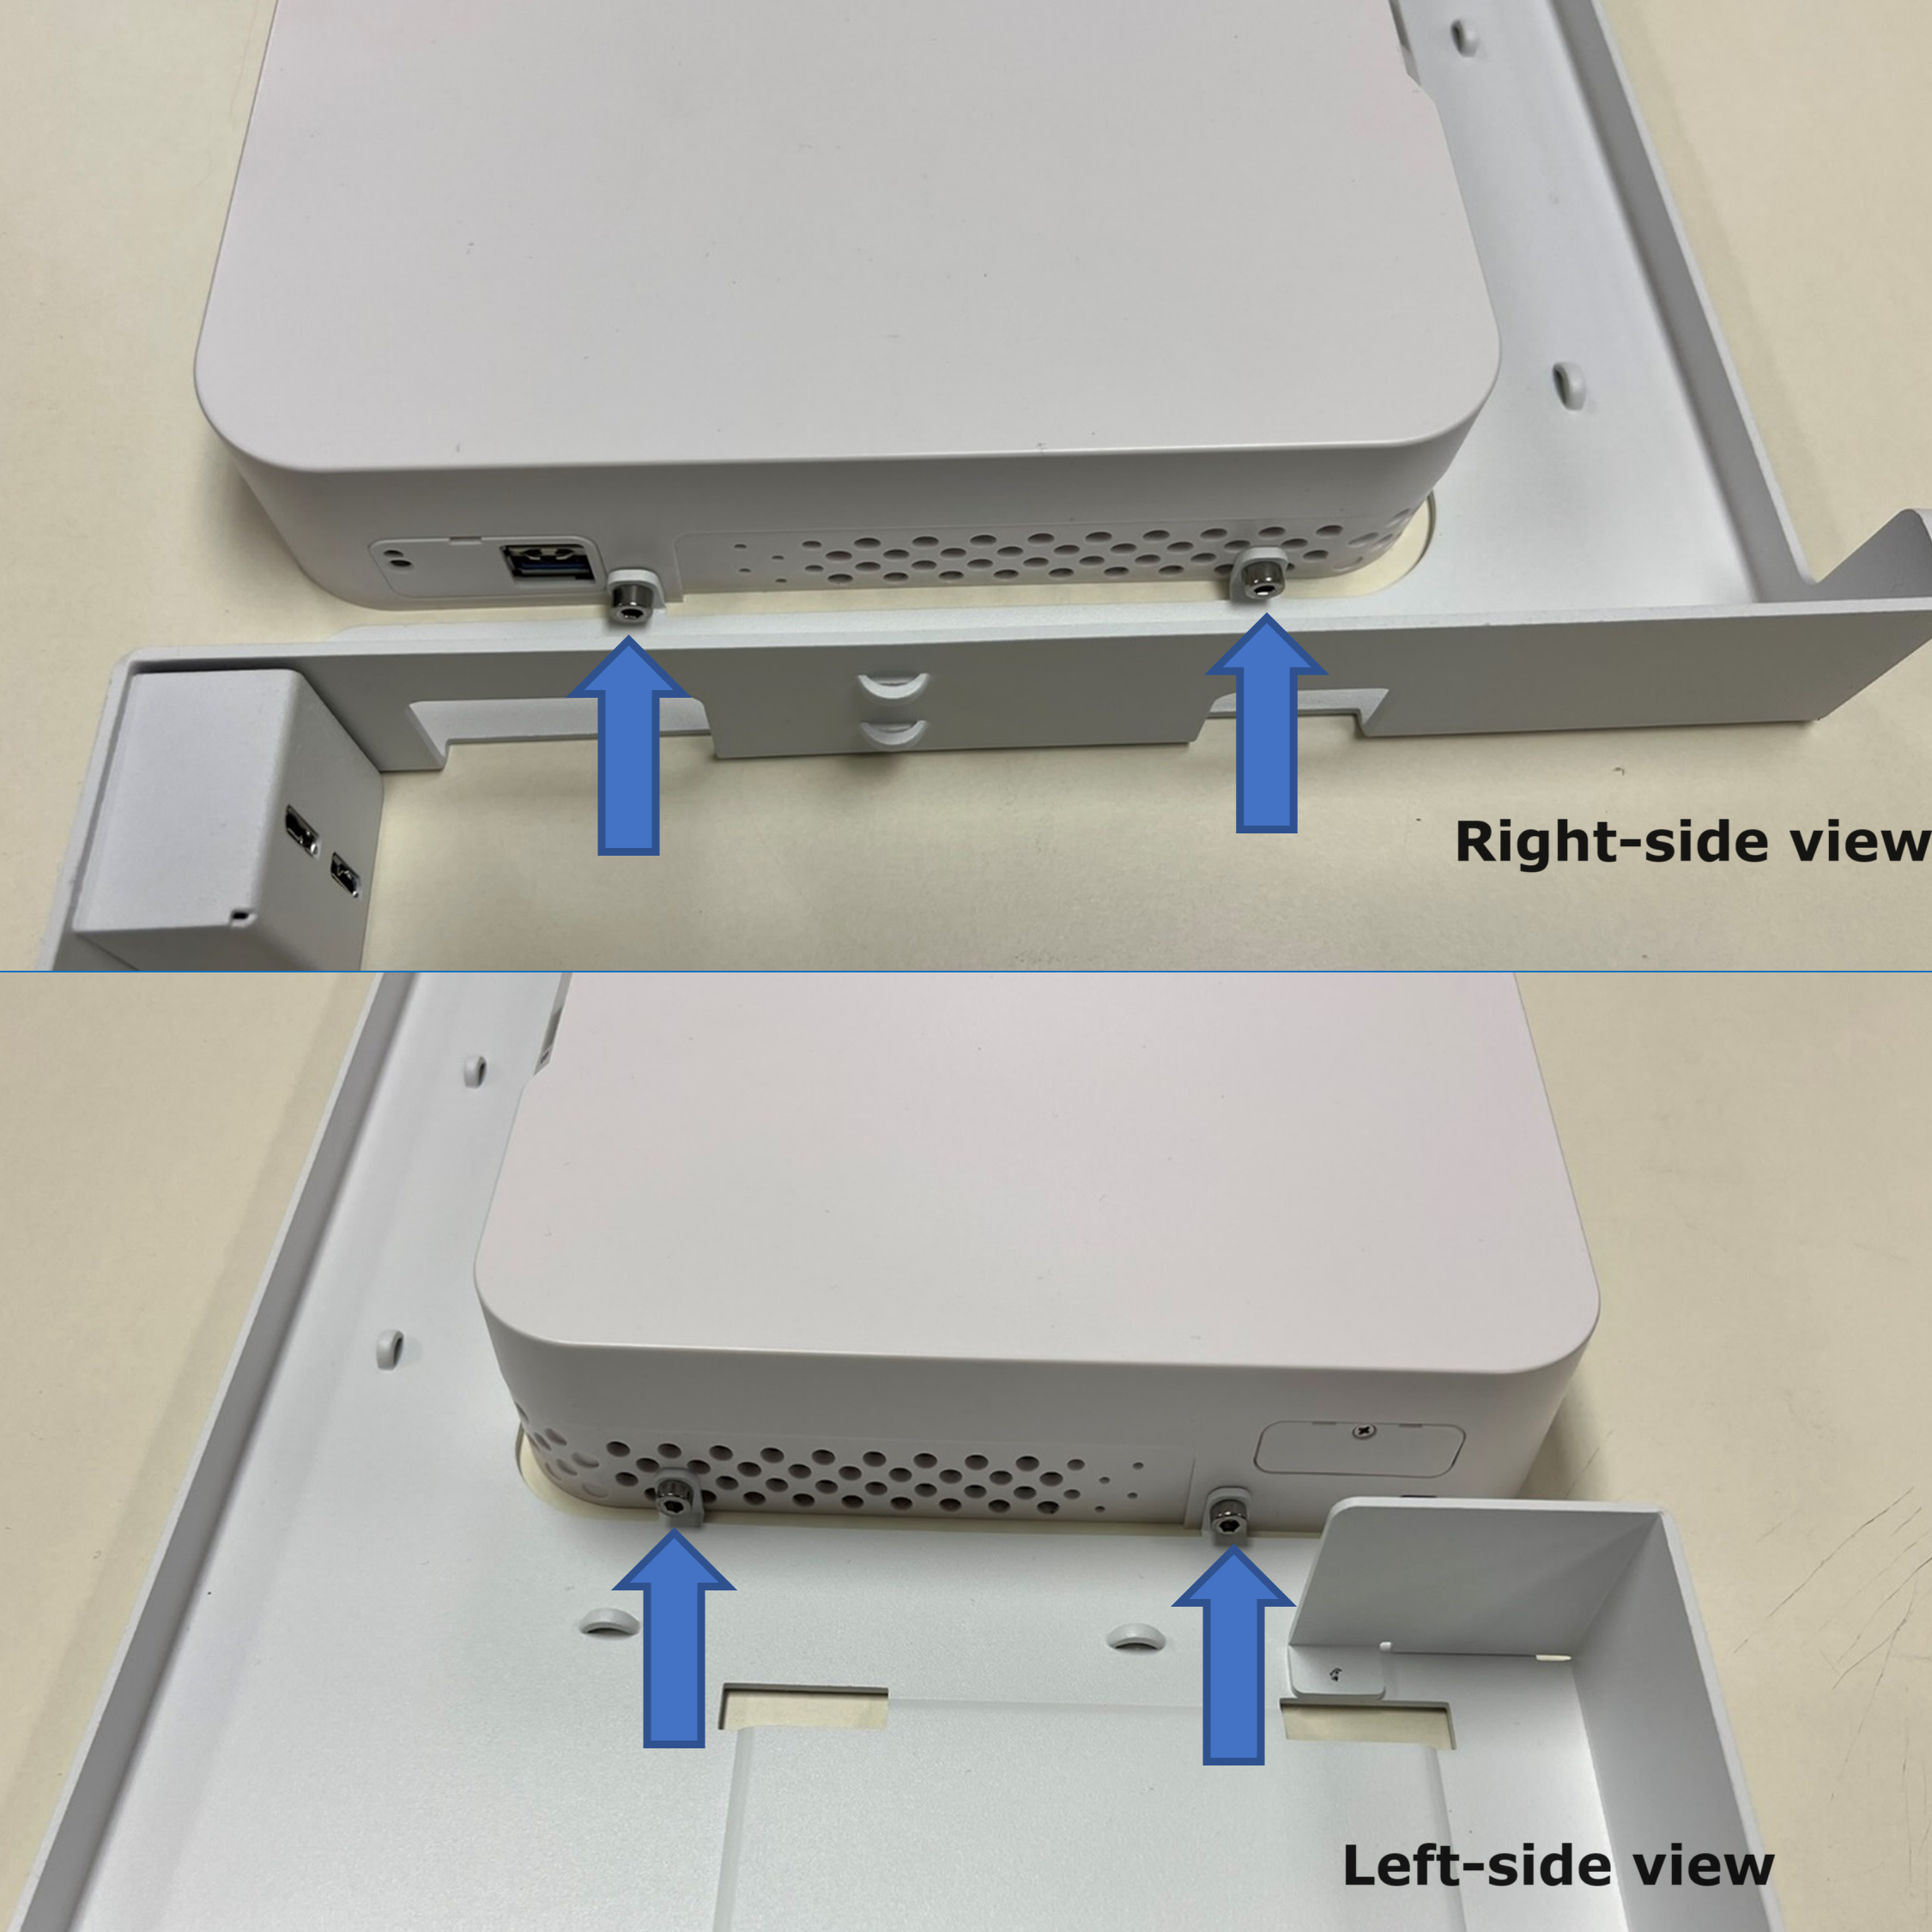
Repeat the above step for the other mounting holes of the Hive SR device.
Install the USB cables between USB 3.0 Micro B connections on the rackmount bracket and the USB 3.0 Type A connections of the Hive SR device. Secure the USB cable with a 300mm cable to prevent USB cable from loosening.
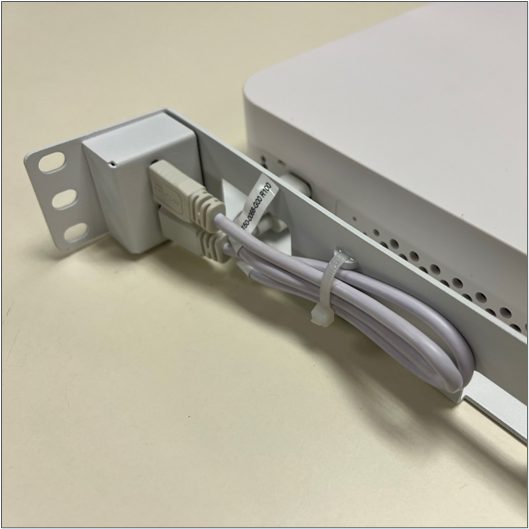
Place the power adapter on the stand and secure the adapter to the rackmount bracket with cables.
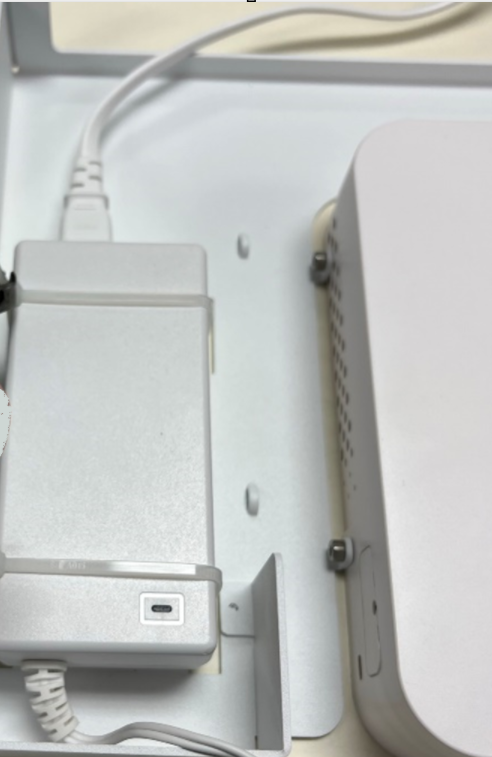
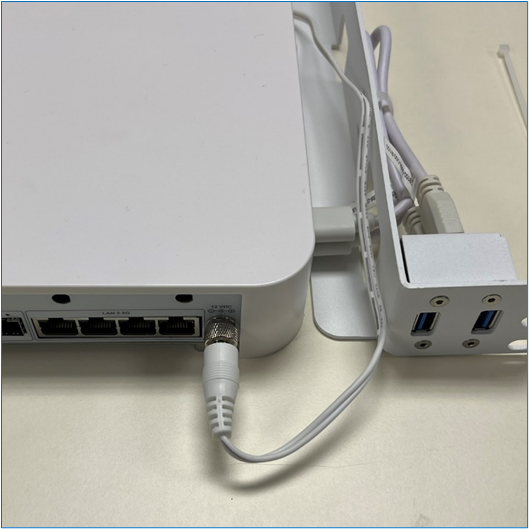
Screw the one end of the power adapter to the Hive SR device.
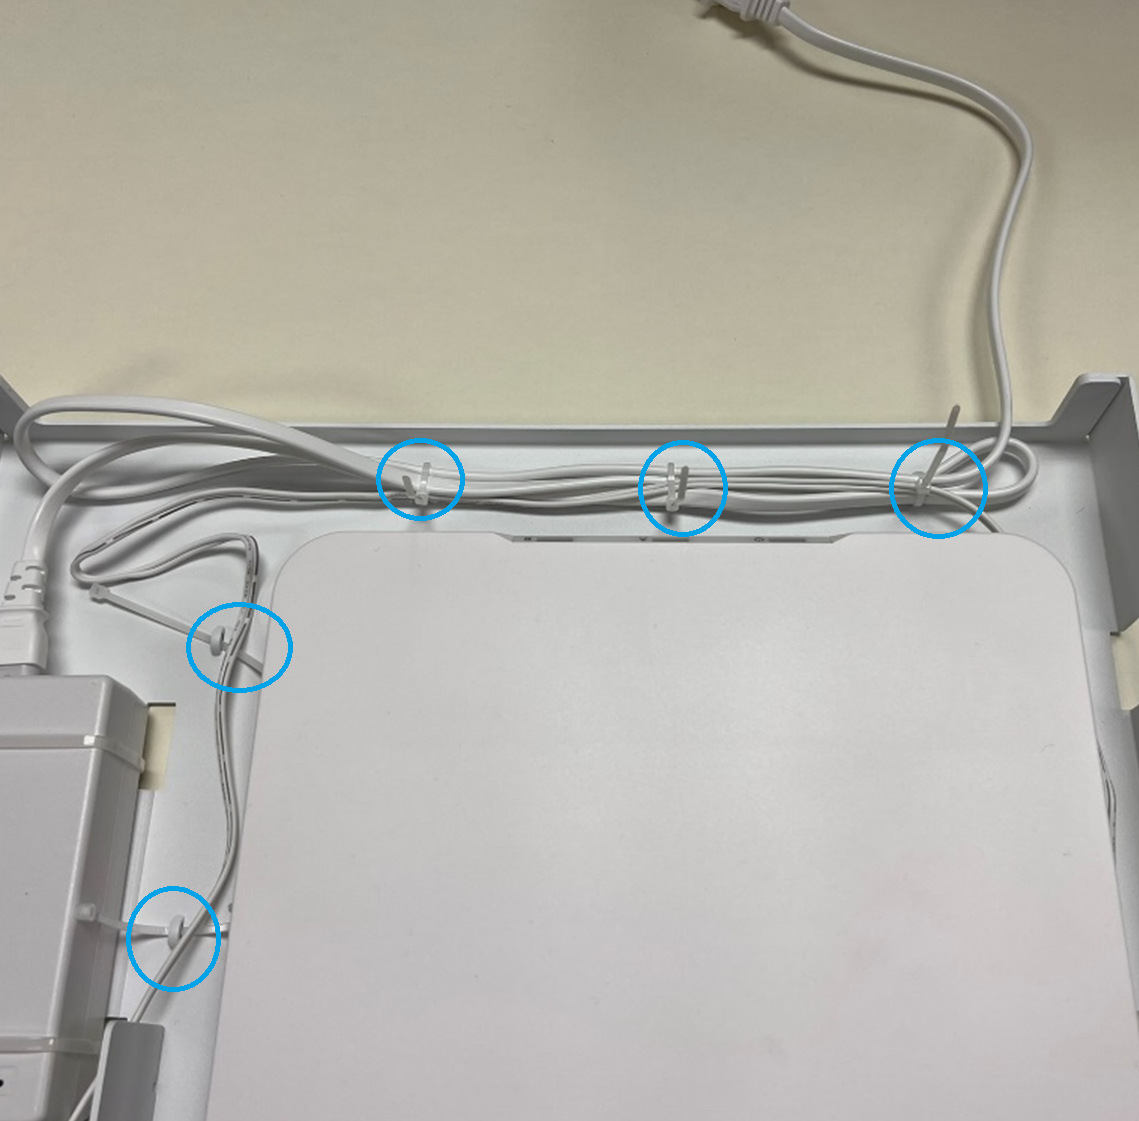
Insert the 99mm cable ties through the cable tie mounts on the rackmount bracket to bundle the power adapter cables.
Performing Initial Configurations
After the successful installation of your Hive SR device, perform the following initial configurations. To perform these configurations Hive SR supports the network and other interfaces as shown in the following figure.

Configuring Network Parameters
DHCP is the default IP configuration. If no DHCP server is available, log in to Nodegrid Hive SR via its console port using admin credentials and configure a static IP address using CLI instructions as follows. The console port is an management interface using which you can access the devices via a SSH or a Telnet session.
NOTE
This section describes the steps to configure the static IP for the device. You can skip to the next section if you have a DHCP environment.
[admin@nodegrid /]# cd
settings/network_connections/WAN0/
[admin@nodegrid WAN0]# set ipv4_mode=static
[admin@nodegrid WAN0]# set ipv4_address=10.0.0.10
[admin@nodegrid WAN0]# set ipv4_bitmask=24
[admin@nodegrid WAN0]# set ipv4_gateway=10.0.0.1
[admin@nodegrid WAN0]# show
name: WAN0
type: ethernet
ethernet_interface = wan0
connect_automatically = yes
set_as_primary_connection = yes
enable_lldp = no
ipv4_mode = static
ipv4_address = 10.0.0.10
ipv4_bitmask = 24
ipv4_gateway = 10.0.0.1
ipv4_dns_server =
ipv4_dns_search =
ipv6_mode = address_auto_configuration
ipv6_dns_server =
ipv6_dns_search =
[admin@nodegrid WAN0]# commit
[admin@nodegrid WAN0]# exit
Changing Default Password
Log in as root with default credentials and change the root password.
Configuring Network and USB devices
NOTE:
To check your current IP address, connect to the Hive SR console port and hit Enter at the login prompt until you see the IP address of the WAN0 interface.
To configure the Hive SR for the first time via Network:
Connect the laptop to the LAN0 port via CAT 5e/6 cable. The laptop will receive an IP address in the 192.168.10.0/24 network.
Open the browser on the laptop to connect to 192.168.10.1.
Log in to your Hive SR as admin.
Set your Hive SR basic configuration:
Security:
Security, Services: Select the desired services and ports, cryptographic protocols, and cipher suite levels and click Save when finished.
Authentication: Add your Remote Authentication servers (AD, LDAP, Tacacs+, Radius, and/or Kerberos) and click Save when finished.
Authorization: Create user groups, set profiles assign devices and click Save when finished.
Network:
Network Settings: Set your desired Network parameters and click Save for each submenu.
Network Connections: Set the parameters of your desired network interfaces and click Save for each submenu.
USB ports:
Managed Devices: Enable and configure your desired USB ports.
Change Admin Password:
At any time, click admin@domain.com in the upper right corner of your screen and click Change Password to change your system password.
Click Save when finished.
Congratulations!
Your Nodegrid Hive SR is now configured and ready to accept users and connections to its ports and interfaces.
Configuring Additional Parameters
After completing the initial setup, you can explore advanced configurations on your Hive SR device. This section mentions some common configurations often performed as part of these advanced settings.
NOTE:
We recommend that you set up a new Administrator account (in the admin group with full privileges) and use the new account instead of the default admin account.
Adding New Users
Create new user accounts and ensure that the users are granted the necessary permissions to access the Hive SR device.
Sending Alerts and Logs
Set and send alerts by email, SMS, and/or SNMP.
Configuring PDUs and Storage Devices
Control network attached PDU power strips and server, network, and storage devices.
For more information on advanced configuration options, refer Nodegrid User Guide.
Get Technical Updates
To automatically receive future firmware updates and technical information, sign up here:
www.zpesystems.com/the-loop/
By installing, copying, or otherwise using this device, you agree to be bound by the terms of the licensing, maintenance, and sale agreements set forth on www.zpesystems.com/docs/legal. If you do not agree to the terms of those agreements, do not install or use the Hardware and/or Software Product(s).


.png)


