This article provides guidelines for installing Nodegrid on Equinix.
Pre-requisites
Ensure that the following prerequisites are met before you start installing Nodegrid with iPXE on XSR:
A public HTTP Server is available
You have the following Files provided by the HTTP Server:
Extracted Nodegrid Netboot Image. To get the Nodegrid Netboot image, contact the ZPE Support team.
IPXE script: This is the iPXE script template file. You must only change lines 4,5, and 6:
1 #!ipxe
2
3 #### Edit the values below ####
4 set PROTOCOL https
5 set HTTP_SERVER <OUR_HTTP_SERVER_ADDRESS>
6 set NETBOOT_PATH <PATH_TO_NODEGRID_NETBOOT>
7 #### Do not change the lines below ####
8 dhcp
9 set BASE_URL ${PROTOCOL}://${HTTP_SERVER}/${NETBOOT_PATH}
10 kernel ${BASE_URL}/vmlinuz LABEL=pxeboot NET_PROTO=${PROTOCOL} IPV4_ADDR=${netX/ip} GW=${netX/gateway} NET_MASK=${netX/netmask} MAC_ADDR=${netX/mac} TFTP_SERVER=${HTTP_SERVER} TFTP_DIR=${NETBOOT_PATH} console=ttyS1,115200n8
11 initrd ${BASE_URL}/initrd
12 boot
Create a file called ng.ipxe with the content above.
Edit this file by replacing <OUR_HTTP_SERVER_ADDRESS> with the HTTP server IP address.
Edit this file by replacing <PATH_TO_NODEGRID_NETBOOT> with the path to the Nodegrid Netboot uncompressed files into the HTTP server.
The files inside this path are: vmlinuz, initrd, rootfs_main.img.gz
Example for the URL = https://203.0.113.0/datastore/nodegrid-5.8.9
set PROTOCOL https
set HTTP_SERVER 203.0.113.0
set NETBOOT_PATH datastore/nodegrid-5.8.9
Note: If the HTTP server supports Basic authentication, the credentials can be set by adding user/pass at the beginning of the address using the separators ':' and “@“. Example: set HTTP_SERVER <username>:<password>@<ip_address>
Installing Nodegrid on Equinix
Perform the following actions to install the Nodegrid on Equinx server:
Create a New Server on Equinix
On the Equinix console, go to the Manage Servers page under the Bare Metal Servers category and click the New Server button.
Note:
Creating a new server and converting it to a reserved server is recommended.

On the On Demand Servers page, the server will be configured.
In the Choose a Metro section, use the default option.
In the Choose You Server section, select c3.medium.x86. (it should work with any other server type).
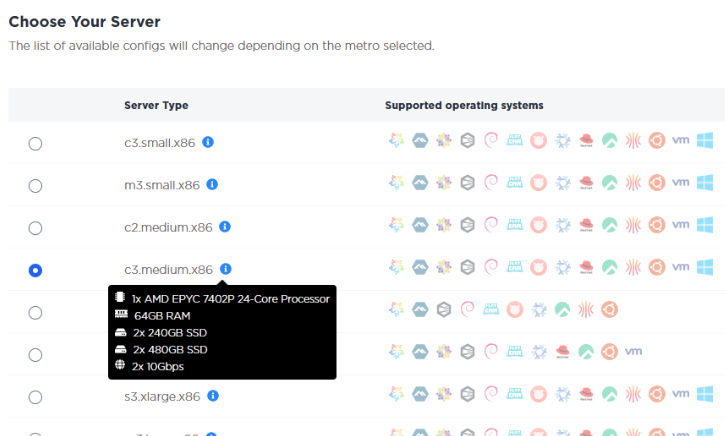
In the Choose Your Operating System section, select custom_ipxe and add the URL of the iPXE script on the text field. Do NOT enable Always PXE.
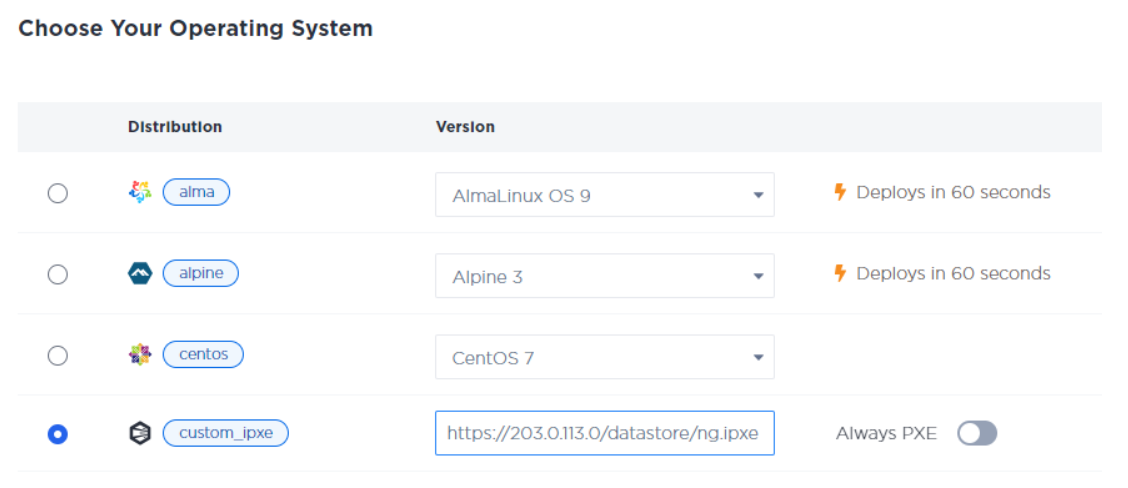
You can create up to 5 servers with this configuration and choose the hostname of each one of them.

In the Optional Settings section, configure the active IP of the server. Note that Public IPV4 is required for remote access to the device, so it needs to be enabled.

Click on the Deploy Now button and wait for the server to be created.
Configure SSH key on Equinix
To access the console of the servers created on Equinix, it is necessary to register your public SSH key within Equinix.
Get your public SSH key.
On Windows OS, type in the following commands on Command Prompt (CMD).

On a Unix-like OS, type the following commands in the Terminal.

Go to Project Settings and click SSH Keys. In Project SSH Keys, click the Add New Key button.
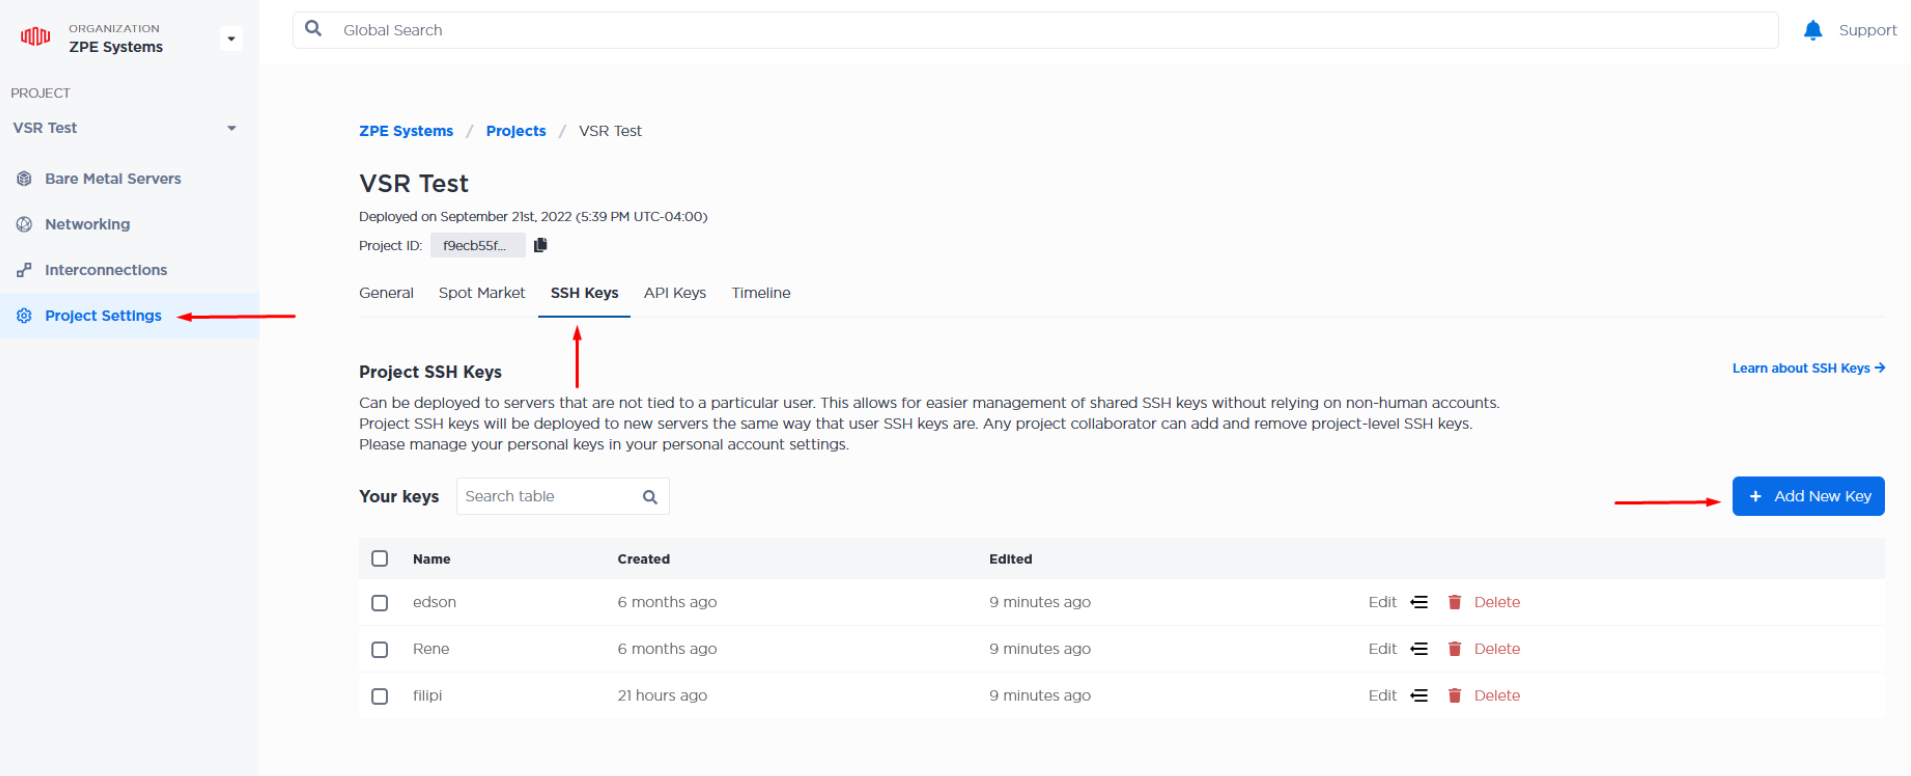
Add a name for the key, enter your public key, and select all servers you want to access.
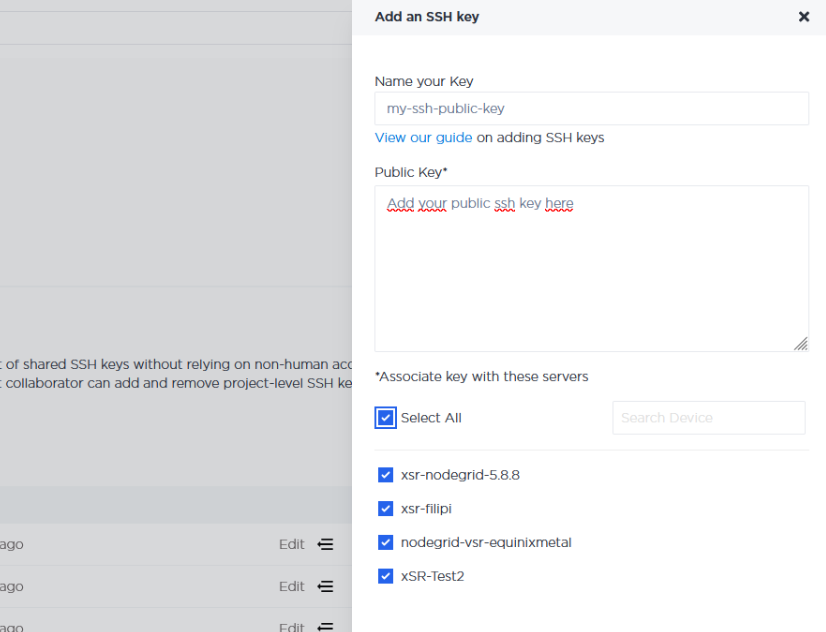
Click the Add SSH Key button.
Access the console
On Manage Servers, click on the icon for Out-of-Band.

Copy the SSH command shown.
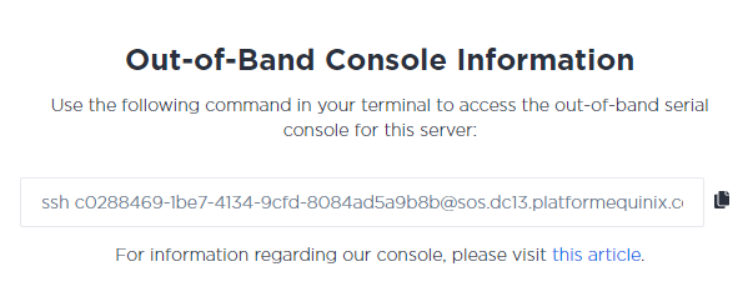
Newer versions of some operating systems will return an error: no matching host key type found. Their offer: ssh-rsa when trying to SSH into the serial console, even if you have valid SSH keys. To fix this, you will need to allow ssh-rsa by adding -o PubkeyAcceptedAlgorithms=+ssh-rsa -o HostKeyAlgorithms=+ssh-rsa to the SSH command.
For Example ssh -o PubkeyAcceptedAlgorithms=+ssh-rsa -o HostKeyAlgorithms=+ssh-rsa c0288469-1be7-4134-9cfd-8084ad5a9b8b@sos.dc13.platformequinix.comConnect using a terminal.
