NOTE
Regardless of activation options, users can change their passwords at any time.
Add Local User
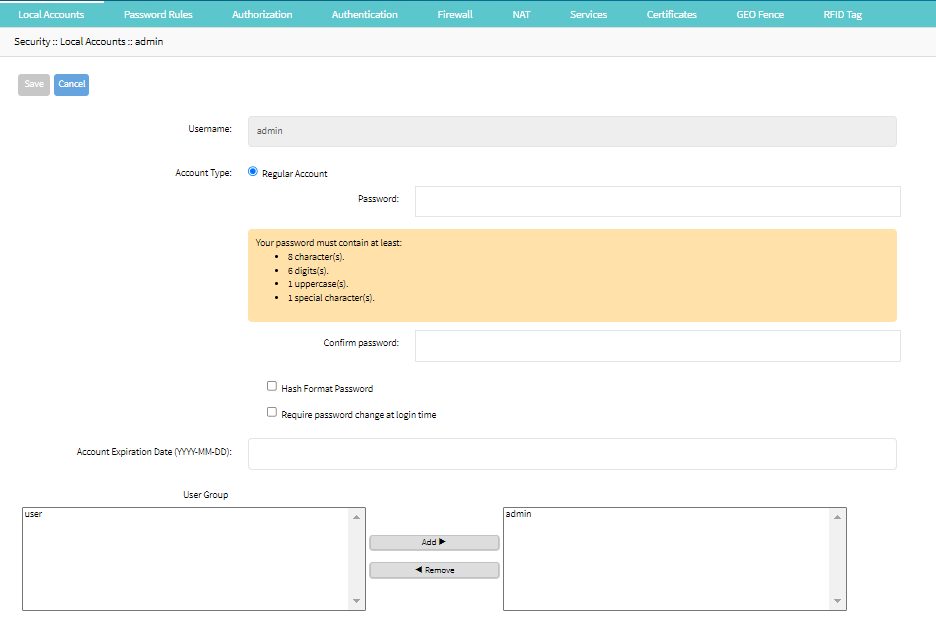
Go to Security :: Local Accounts.
Click Add (displays dialog).

Enter Username.
On the Account Type menu, select one.
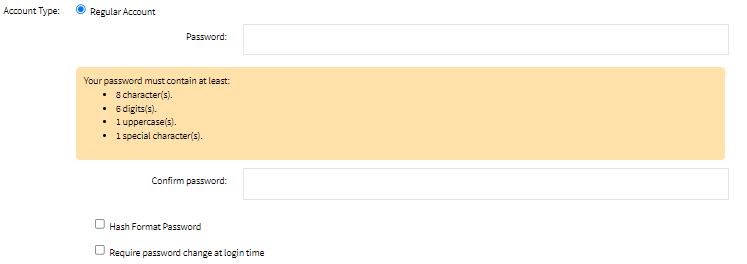
Regular Account radio button (expands dialog).

Enter Password and Confirm Password (If the password is in a hash format, select the Hash Format Password checkbox.).
Alternatively, select Require password change at the login time checkbox.Note:
Set the password based on the rules defined under the Security :: Password Rules tab. You can change the rules from the same tab.
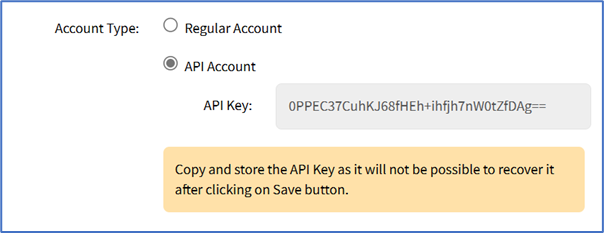
API Account radio button
An API Account will only have access to API requests (not CLI nor WebUI). The API Key can be used directly for API requests authentication in any endpoint, using the
api_keyandusernameheaders instead of authenticating to get a ticket and then using theticketheader. For example:Shell
curl -X GET "https://nodegrid/api/v1/system/preferences" \
    -H "accept: application/json" -H "Content-Type: application/json" \
    -H "api_key: 0PPEC37CuhKJ68fHEh+ihfjh7nW0tZfDAg==" \
    -H "username: myapiuser" -k
To turn the user into an API Account, select the API Account option. The API Key will be automatically generated and displayed.

On the API Key, follow this instruction: "Copy and store the API Key as it will not be possible to recover it after clicking on Save button."
(optional) Account Expiration Date (YYYY-MM-DD).
On the User Group panel, select from the left-side panel, and click Add► to move to the right-side panel. To remove from the right-side panel, select, and click ◄Remove.
Click Save.
Edit Local User
Go to Security :: Local Accounts.
Locate and select checkbox next to username.
Click Edit (displays dialog).
Make changes as needed.
Click Save.
Delete Local User
Deleting a local user account on your Nodegrid device involves removing a user profile and all associated data, such as files, settings, and installed applications. This step is crucial when a user no longer requires access to the device. Removing unused accounts helps protect your device from unauthorized access, safeguarding sensitive information.
Web UI Procedure
Go to Security :: Local Accounts.
Locate and select checkbox next to username.
Click Delete.
On the confirmation dialog, click OK.
CLI Procedure
Use the delete command to delete the user account using CLI.
Syntax
[admin@nodegrid /]# deleteParameters
Parameter | Description |
|---|---|
delete <target> | Delete one target |
delete - | Deletes ALL targets |
delete <target1>,<target2> | Deletes multiple targets |
Arguments
Arguments | Description |
|---|---|
-f, --force | Skips all confirmation prompts |
-q, --quiet | Hides all error and warning messages |
-fq, -qf | Arguments can be combined for simultaneous functionality |
Examples
To delete users:
[admin@nodegrid local_accounts]# show
  username  state     user group  type
  ========  ========  ==========  =======
  admin     Unlocked  admin       Regular
  user1     Unlocked  user        Regular
  user2     Unlocked  user        Regular
[admin@nodegrid local_accounts]# delete -
are you sure you want to delete this user from the local database? (yes, no) : yes
Warning: Protected users cannot be deleted
[+admin@nodegrid local_accounts]# show
  username  state     user group  type
  ========  ========  ==========  =======
  admin     Unlocked  admin       Regular
To delete users by including - -force and - -quiet arguments. The - -force argument deletes the users without a confirmation message and the - -quiet argument suppresses error and warning messages, making it ideal for automation deployment.
To delete users by including - -force argument:
[admin@nodegrid local_accounts]# show
  username  state     user group  type
  ========  ========  ==========  =======
  admin     Unlocked  admin       Regular
  user1     Unlocked  user        Regular
  user2     Unlocked  user        Regular
[admin@nodegrid local_accounts]# delete - --
--force  --quiet
[+admin@nodegrid local_accounts]# delete - --force
Warning: Protected users cannot be deleted
  [+admin@nodegrid local_accounts]# show
  username  state     user group  type
  ========  ========  ==========  =======
  admin     Unlocked  admin       Regular
To delete users by including - -quiet argument:
[admin@nodegrid local_accounts]# show
  username  state     user group  type
  ========  ========  ==========  =======
  admin     Unlocked  admin       Regular
  user1     Unlocked  user        Regular
  user2     Unlocked  user        Regular
[admin@nodegrid local_accounts]# delete - --
--force  --quiet
[+admin@nodegrid local_accounts]# delete - --quiet
are you sure you want to delete this user from the local database? (yes, no) : yes
  [+admin@nodegrid local_accounts]# show
  username  state     user group  type
  ========  ========  ==========  =======
  admin     Unlocked  admin       Regular
To delete users by combining both the - -force and - -quiet arguments:
[admin@nodegrid local_accounts]# show
  username  state     user group  type
  ========  ========  ==========  =======
  admin     Unlocked  admin       Regular
  user1     Unlocked  user        Regular
  user2     Unlocked  user        Regular
[admin@nodegrid local_accounts]# delete - --
--force  --quiet
[+admin@nodegrid local_accounts]# delete - --force --quiet
[+admin@nodegrid local_accounts]# show
  username  state     user group  type
  ========  ========  ==========  =======
  admin     Unlocked  admin       Regular
NOTE:
There are also short forms for the - -force and - -quiet arguments. The following are these arguments:
-f
- -force argument
-q
- -quiet argument
-fq
-qf
- -force - -quiet arguments combined
Lock Local User
The administrator can lock a user out of the device.
Go to Security :: Local Accounts.
Locate and select checkbox next to username.
Click Lock (locks user out of device).
Unlock Local User
As needed, the administrator can unlock a user.
Go to Security :: Local Accounts.
Locate and select checkbox next to username.
Click Unlock (allows user access)
There is a function whereby the user is authorized by an external authentication provider (LDAP, AD, or TACACS+) and the Local user account is locked. The user can authenticate with the sshkey, but permissions are enforced based on his group permissions with the external authentication provider.
Hash Format Password
As needed, the administrator can use a hash format password, rather than plain password. This can be used for scripts (avoids requiring scripts to use actual user passwords). The hash password must be generated separately beforehand. Use a hash password generator. These applications (OpenSSL, chpasswd, mkpasswd) use MD5, SHA256, SHA512 engines.
Hash Format
CLI Procedure
The Nodegrid Platform has an OpenSSL version. In the Console, use this:
root@nodegrid:~# openssl passwd -1 -salt mysall
Password:
$1$mysall$YBFr9On0wjde5be32mC1g1
Generate a new API key for a User
In the Type column, the user must have a value of API.
Go to Security :: Local Accounts.
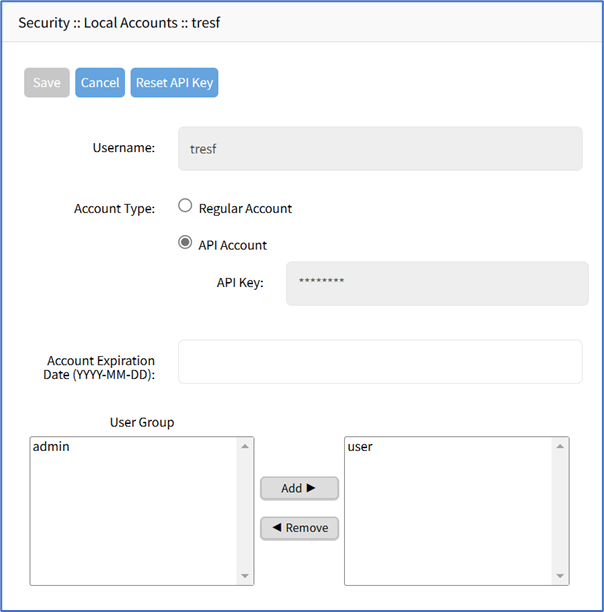
Locate and click the user’s name – Type column must be API (displays dialog). (Alternatively, select checkbox and click Edit.)

Click Reset API Key.
IMPORTANT
The new key is displayed in the API Key field. Copy the key and save in a secure location.
Click Save.