With Single Sign-On (SSO), users authenticate once to gain access to multiple secured systems without resubmitting credentials. Nodegrid currently supports multiple identify providers. 
Add SSO
- Go to Security :: Authentication :: SSO.
- Click Add (displays dialog).
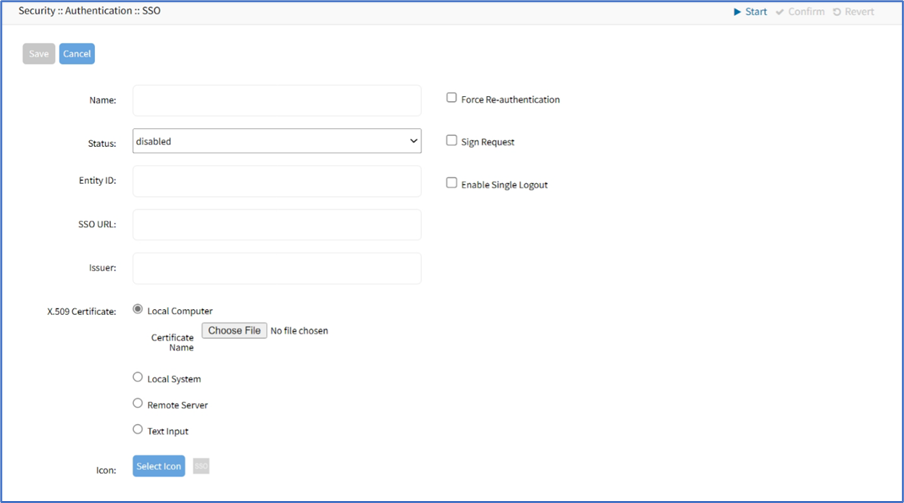
- Enter Name.
- On Status drop-down, select one (Enabled, Disabled).
- Enter Entity ID (globally unique name).
- Enter SSO URL.
- Enter Issuer.
- On X-509 Certificate menu, select one:
- Local Computer radio button (expands dialog). Click Choose File to locate and select file.

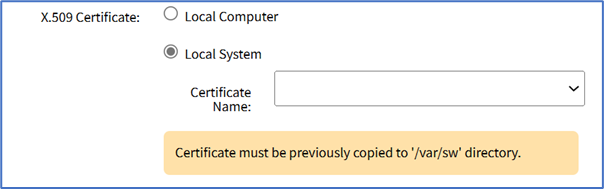
- Local System radio button (expands dialog). On Certificate Name drop-down, select one.
- Remote Server radio button (expands dialog).
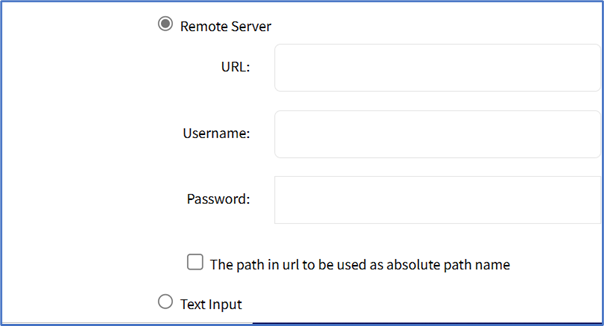
- Enter URL (URL can be the IP address or hostname/FQDN. If using IPv6, use brackets [ ... ]. Supported protocols: FTP, TFTP, SFTP, and SCP.).
- Enter Username and Password.
- (optional) Select The path in url to be used as absolute path name checkbox.
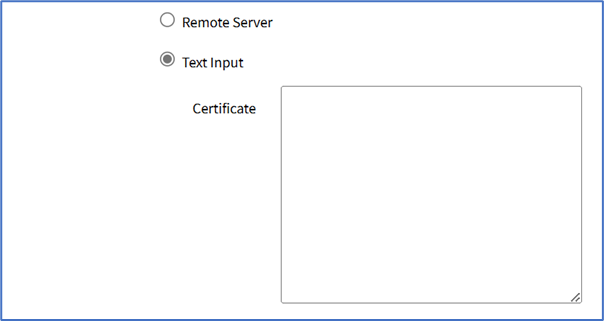
- Text Input radio button (expands dialog). Enter in Certificate text box.
- Local Computer radio button (expands dialog). Click Choose File to locate and select file.
- Select Force Re-authentication checkbox.
- Select Sign Request checkbox.
- Select Enable Single Logout checkbox (expands dialog). Enter Logout URL.

- (optional) Icon, click Select Icon (expands dialog). Click on a logo to set as 2-Factor icon.

- Click Save.
The following fields are required to configure a successful SAML flow for each Identity Provider:
SAML Requirements
Identity Provider (IDP) | Copy Fields from Nodegrid to IdP | Paste Fields from IDP to Nodegrid |
Duo | Login URL Entity ID | SSO URL Entity ID Download Certificate |
Okta | Single Sign On URL Audience URI (SP Entity ID) | Identity Provider SSO URL Identity Provider Issuer X.509 Certificate |
G Suite | ACS URL Entity ID | SSO URL Entity ID Certificate |
Ping | Entity ID ACS URL | Issuer Idpid The idpid from Ping is used as the SSO URL field in Nodegrid: |
ADFS | Entity ID (maps to Relying party trust identifier) ACS URL (maps to Trusted URL) | Entity ID (maps to Issuer on Nodegrid) |
IdP configuration fields:
- Entity ID (globally unique name for the SP URL)
- ACS URL (Assertion Consumer Service URL in which the Identity Provider redirects the user and sends the SAML assertion after its authentication process.)
- Attributes (attributes that IdP sends back with the SAML assertion. SP can have more than one attribute, nameID is the most common.)
- SAML Signature Algorithm (either SHA-1 or SHA-256. Used with X.509 certificate. Default: SHA-256.)
SP configuration fields:
- X.509 Certificate (certificate provided by the IdP to allow the SP to verify that the SAML assertion is from the IdP)
- Issuer URL/Entity ID (unique identifier of the IdP)
- Single Sign On URL (IdP endpoint that starts the authentication process)
- RelayState: (optional) (deep linking for SAML for <ip>/direct/<device>/console)
- For more information on SSO, please see https://support.zpesystems.com/portal/kb/articles/single-sign-on-sso
Import Metadata
- Go to Security :: Authentication :: SSO.
- Click Import Metadata (displays dialog).
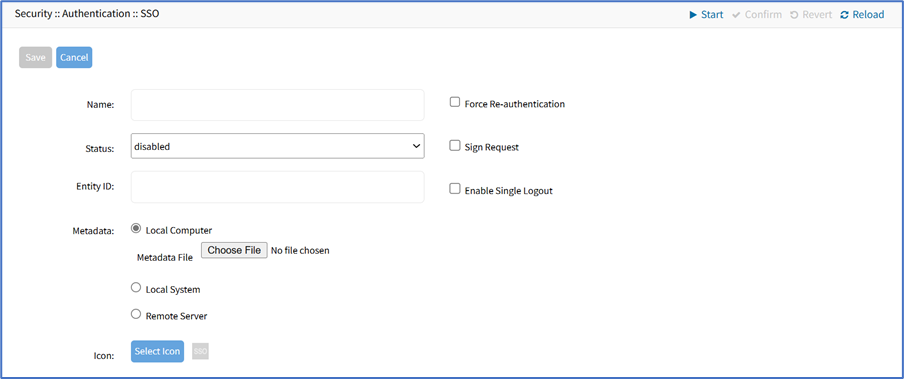
- Enter Name.
- On Status drop-down, select one (Enabled, Disabled).
- Enter Entity ID (globally unique name).
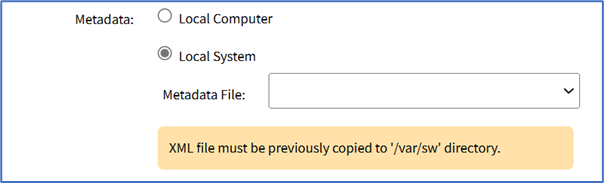
- On Metadata menu, select one:
- Local Computer radio button (expands dialog). Click Choose File, locate and select.

- Local System radio button (expands dialog). On Metadata File drop-down, select one.
- Remote Server radio button (expands dialog):

- Enter URL (URL can be the IP address or hostname/FQDN. If using IPv6, use brackets [ ... ]. Supported protocols: FTP, TFTP, SFTP, and SCP.)
- Enter Username and Password.
- (optional) Select The path in url to be used as absolute path name checkbox.
- Local Computer radio button (expands dialog). Click Choose File, locate and select.
- (optional) Icon, click Select Icon. Click on a logo to set as 2-Factor icon.
- Select Force Re-authentication checkbox.
- Select Sign Request checkbox.
- Select Enable Single Logout checkbox.
- Click Save.