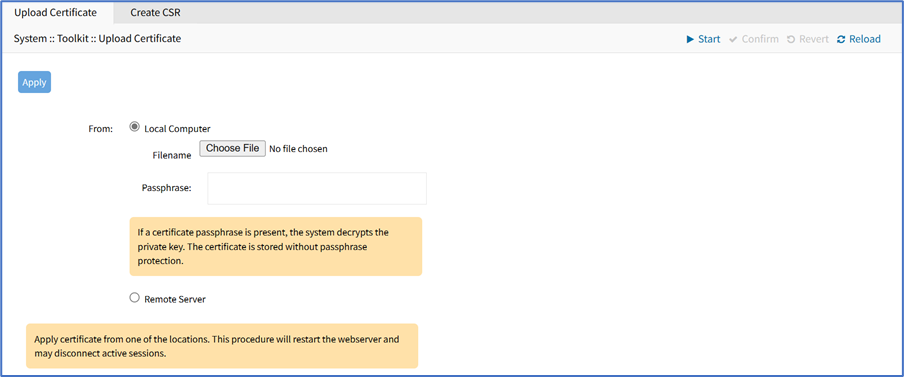
A certificate can be loaded to the Nodegrid device from a connected local computer or a remote server. On the dialog, there are two sub-tabs: Upload Certificate and Create CSR.
WARNING!
When the certificate is applied, the web server is restarted and active sessions are disconnected.
The protocols FTP, TFTP, SFTP, SCP, HTTP, and HTTPS are supported.
Upload Certificate
- Go to System :: Toolkit.
- Click System Certificate icon (displays Upload Certificate sub-tab dialog).

- On From menu, select one.
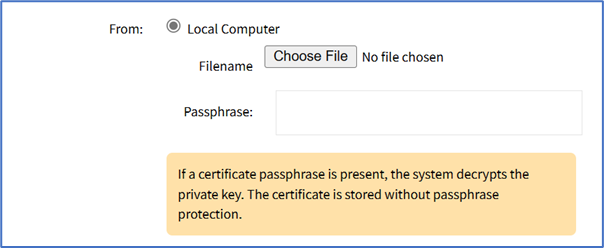
- Local Computer radio button (expands dialog). Click Choose File (locate and select the file). Enter Passphrase.

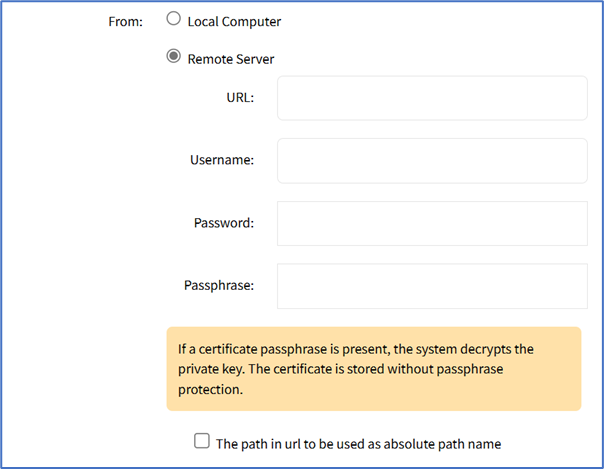
- If Remote Server radio button selected (expands dialog).
 NOTEImporting an encrypted certificate (with the Passphrase) is supported.
- Enter URL. (URL can be the IP address or hostname/FQDN. If using IPv6, use brackets [ ... ]. Supported protocols: FTP, TFTP, SFTP, and SCP.)
- Enter Username, Password, and Passphrase.
- (optional) Select The path in url to be used as absolute path name checkbox.
- Enter URL. (URL can be the IP address or hostname/FQDN. If using IPv6, use brackets [ ... ]. Supported protocols: FTP, TFTP, SFTP, and SCP.)
- Local Computer radio button (expands dialog). Click Choose File (locate and select the file). Enter Passphrase.
- Click Apply.
Create a Self-Sign Certificate
A self-sign certificate can be created and applied directly in the Nodegrid.
- Go to System :: Toolkit.
- Click System Certificate icon.
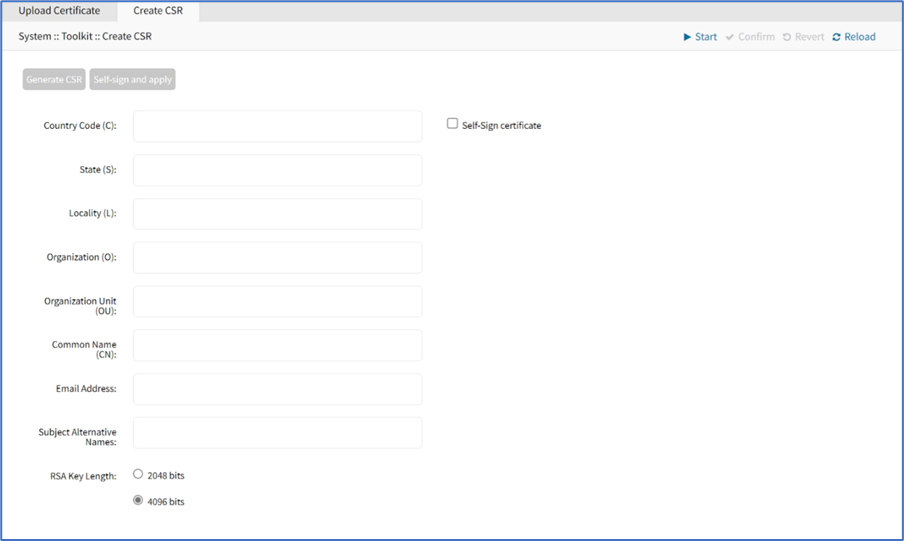
- On the Create CSR sub-tab, enter details:

- Country Code (C)
- State (S)
- Locality (L)
- Organization (O)
- Organization Unit (OU)
- Common Name (CN)
- Email Address
- (optional) Enter Subject Alternative Names.
- Select Self-Sign certificate checkbox (expands dialog). Enter Certificate validity (days) value.

- Click Self-sign and apply.
The page reloads after 10 seconds, and the certificate is applied.