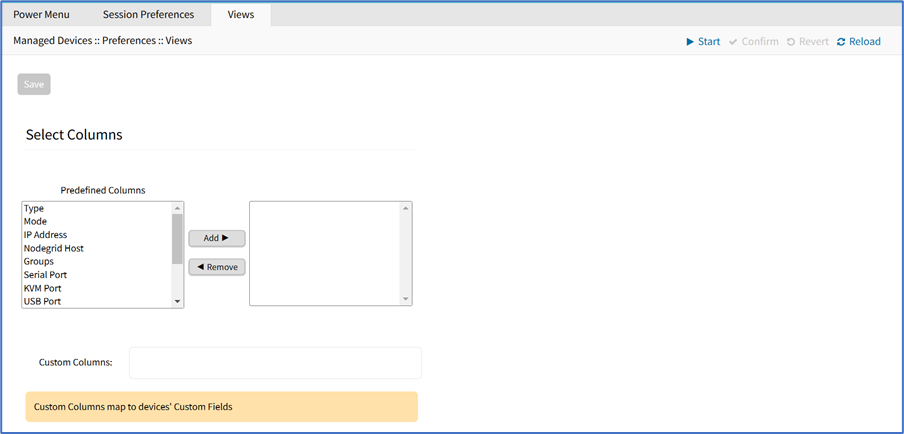
This changes how columns are displayed, as well as creating custom columns. 
Change Table Column Preferences
Column selections and arrangements are stored on the local computer. This column layout is not available when logged into another device.
- Go to Managed Devices :: Preferences :: Views.
- To add columns to right panel, in Predefined Columns, select and click Add►.
- To remove columns from right panel, in right side panel, select and click ◄Remove.
- Click Save.
Step 1 – Create Custom Columns (per Device)
These provide additional organization of data on connected devices, custom columns can be created and enabled. This is a two-step process. First create the custom column, then add the custom column(s) to the individual device.
This two-step procedure connects the device's custom column to the device's custom field displayed in tables that contain that device's settings/values.
- Go to Managed Devices :: Preferences :: Views.
- In the Custom Columns text box, enter the column name.

- To add multiple columns, separate each name with a comma.

- Click Save.
NOTE
The new custom column(s) do not appear on the Access :: Devices page until the associated device and column is enabled.
Step 2 – Associate Device to the new Custom Field
- Go to Managed Devices :: Devices.
- Click the device name to be associated with the custom field.
- On Custom Fields sub-tab, click Add (displays dialog).
- Enter Field Name (must exactly match name entered in the Custom Columns dialog).
- Enter Field Value.
- Click Save.