This article covers the steps in Configuring a compute card for Nodegrid NSR.
Introduction to the Compute Expansion Card
Nodegrid Compute Expansion Card adds unparalleled capabilities to your Nodegrid Net Services Router.
The Compute Expansion Card has its multi-core x86-64bit CPU, memory, storage, and two 10G links to the backplane.
The Compute Expansion Card functions as an independent server, ideal for additional compute capabilities at the edge of the network, point of presence, or remote office.
End users can run more demanding applications, and implement even more Virtual Machines, Docker Containers, and Virtualized Network Functions; The Compute Expansion Card grants you the ability to scale as needed, with up to three Compute Expansion Cards per Nodegrid Net Services Router.
The compute modules are not hot-swappable and must be installed before the unit is powered up. The card should be installed in an ESD (Electrostatic Discharge) protected environment to avoid damage.
Step-by-step Walkthrough
Understand the slot compatibility
Connecting a compute card to the Nodegrid device
Detect the Compute Card
Connect to BIOS or Console
Install the Operating System
Configure the Network Port to Access the Backplane
Slots Compatible with Compute Card
The Nodegrid Net Services Router has up to five slots for cards that provide extreme flexibility and expanded functionality. The compute card (server on a card), provides independent compute capabilities.
Expansion Card Compatibility Chart:
Expansion Card | Slot 1 | Slot 2 | Slot 3 | Slot 4 | Slot 5 |
Compute | ✓ | ✓ | ✓ | Secure Isolated Mode ** | Secure Isolated Mode ** |
(**) The Secure Isolated Mode allows for the management of the cards as if they were located in a normal Slot, but the network traffic is isolated from any other slot.
Connecting the Compute Card to a Nodegrid NSR
To install a compute card, follow the steps below:
Ensure that the Nodegrid Net Services Router is powered off.
Turn off the power supplies on the Nodegrid Net Services Router.
Unscrew the blanking panel which covers the slot in which the card should be installed.
Unbox the card and insert it into the appropriate slot.
Fix the card with the provided screws.
The Nodegrid Net Services Router can now be turned on.
Detect the Compute Card
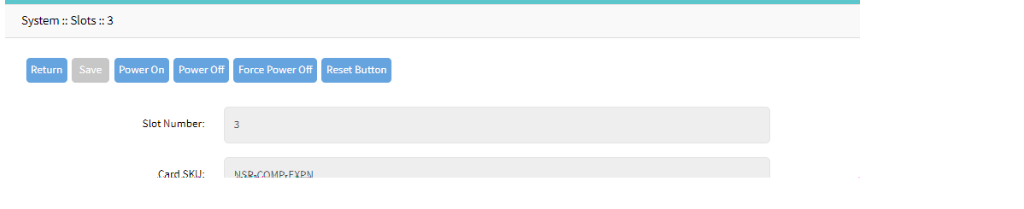
Once the compute card is connected to the NSR it will be listed under the connected Expansion cards.
Login to the Nodegrid Device.
Go to System > Slots.
All the connected cards are listed along with the slot number.

When you click the slot name link, you can perform different actions on the Compute Card.
Power On: click to turn on the compute card.
Power Off: When clicked shuts down the compute card and turns it off.
Force Power Off: when clicked aborts all the existing programs and immediately shuts down the compute card.
Connect to BIOS or Console
You can connect to the serial console or console monitor and these consoles have access to BIOS.
To connect to the console:
Connect to the compute card Serial Console port using the ZPE’s RJ-45 console adaptor (same used to connect to the NSR console port).
Connect a terminal or workstation to the serial console port on the Compute Card. The default settings are 115200 bps, 8N1, and no flow control.
Alternatively, use the VGA port plus the USB Keyboard.
Power ON or Reset the computer card via Nodegrid NSR Web UI.
Press DELETE to enter the BIOS setup menu.
Installing the Operating System
You can install any Operating System such as Windows, Linux, or Ubuntu on the Compute Card.
To install an OS on your compute card, you need to create a bootable USB to be able to boot the compute card from the USB.
Download the Operating System image.
Use an image writer tool like Balena Etcher to create a bootable USB from the image.
As you attach your bootable USB, go through the typical boot process until you get to the grub menu.
Perform the rest of the operations based on the Operating system you choose to install.
Configure the Compute Card Backplane
The Backplane settings configure the switch ports connected to the compute expansion card.
The compute card has two 10G network interfaces connected to the built-in switch in NSR.
The switch ports connected to the compute card appear as slot<X>-0 and slot<X>-1, where X is the slot number where the compute card is inserted.
To edit backplane Settings
Go to Network :: Switch :: Backplane.
Make changes, as needed:
Port VLAN ID: VLAN to be assigned to the untagged ingress packets coming from Nodegrid OS
Jumbo Frame: If enabled, the Jumbo Frame configured under Global will be used.
DHCP Snooping:
Trusted means this is a trusted port so DHCP Server Responses will be accepted
Untrusted means the DHCP Server responses will be dropped.
This configuration is applicable only if DHCP Snooping is enabled under Global, and DHCP Snooping is enabled in the VLANs in DHCP Snooping sub-tab.
Click Save.
Access the Compute Card
To access the compute card from Nodegrid UI,
Connect video and keyboard to the compute card or ssh directly to the compute card like any server
The compute card can also be added as a Managed Device to be accessible via Nodegrid UI:
Add as a device_console if the compute card supports SSH or HTTP (s)
Add as a serial console if the compute card OS supports a serial console connection
To add the compute card as a managed device:
Log in to the Nodegrid device to which the compute card is attached.
Go to Managed Devices :: Devices.
Click Add.
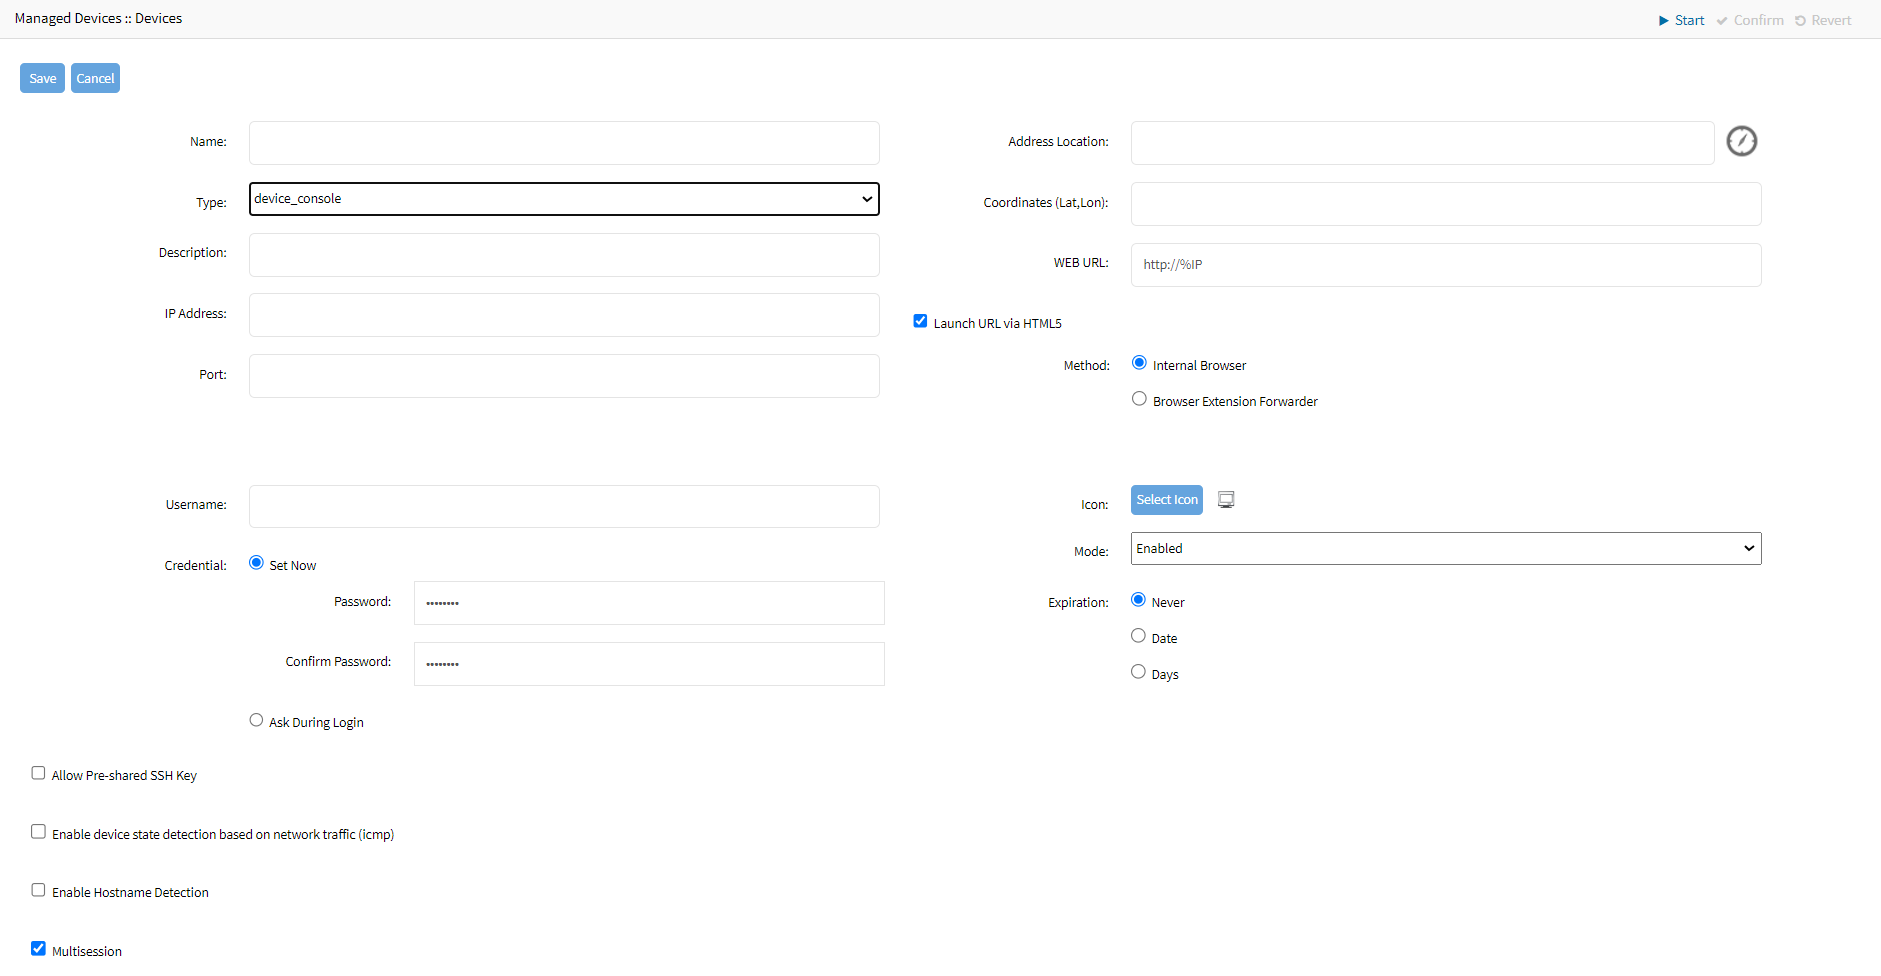
Enter the required details.
Select the Type as device_console.
Enter the IP address.
Enter the username.
Set the password.
Set the port as 22 if the compute card OS accepts the ssh connection.
These are mandatory settings that you need to configure, you can enter the other details based on your requirements.
Click Save.
Go to Access to verify that the compute card is listed on this page.

Click Web to access the compute card through webUI.

Enter the Username and password of the compute card.

or
Click Console to access the compute card through the console.
Once you log in to the compute card, you can use it to perform the necessary operations.