The Ethernet card provides network connectivity and can be configured to manage various aspects of network performance and security. It supports features like VLAN tagging, speed configuration, ACLs, DHCP snooping, and 802.1x authentication. These features enable efficient data transmission, secure access control, and network traffic management, making the Ethernet card a crucial component for reliable and secure network infrastructure.
To configure the ethernet card, perform the following actions:
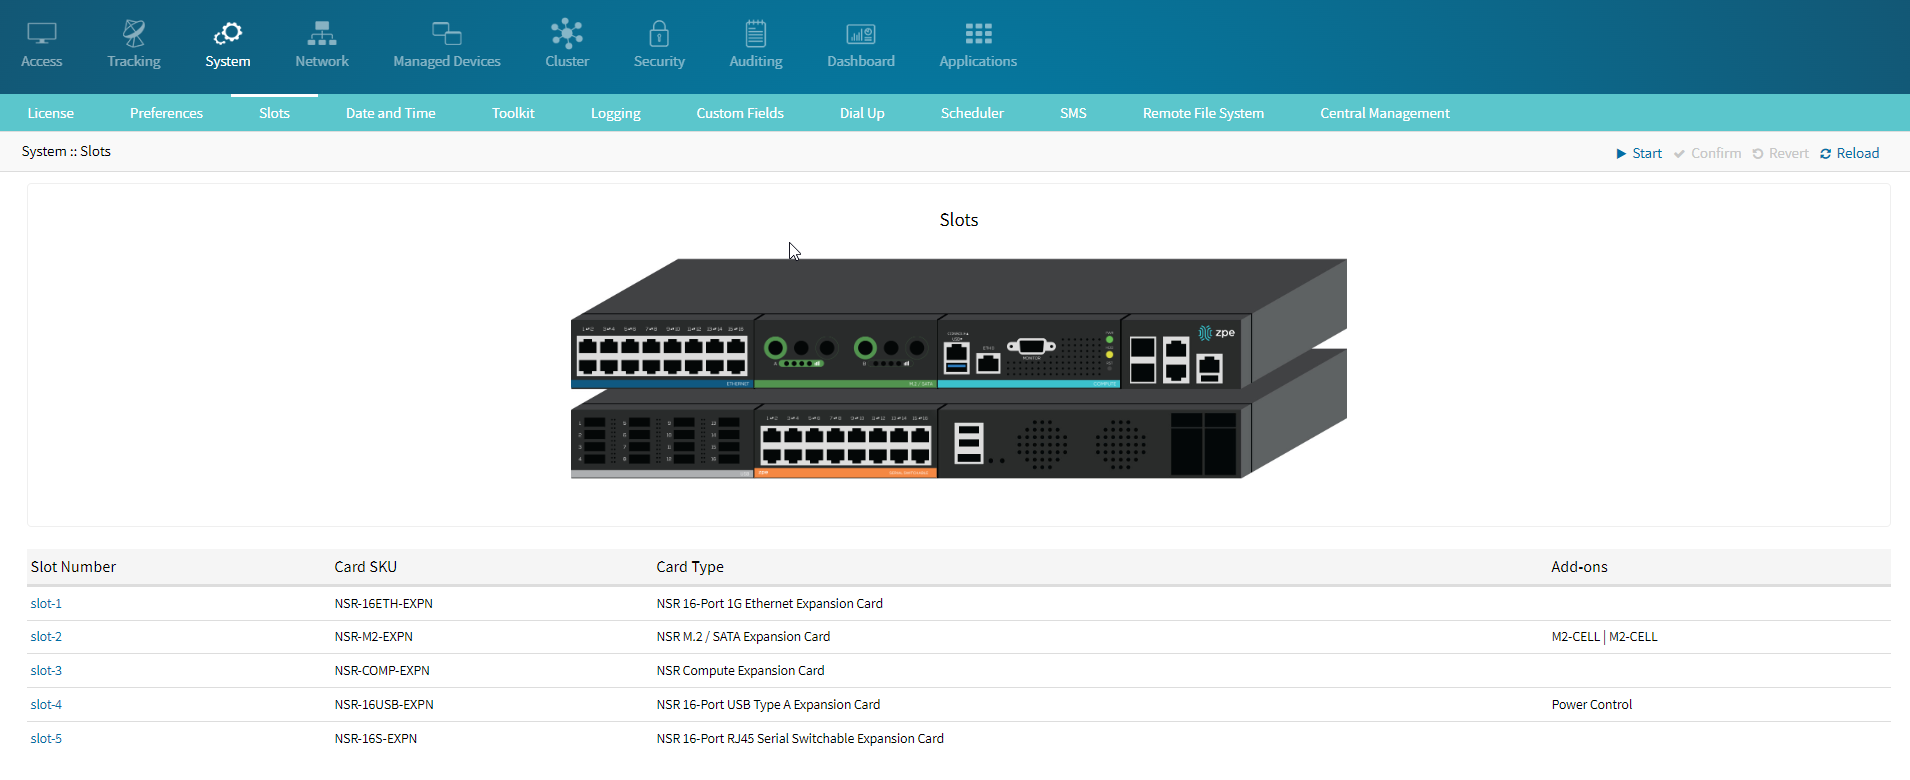
Attaching the ethernet card
Insert the Ethernet Card into one of the compatible slots: Slot 1, Slot 2, or Slot 3.
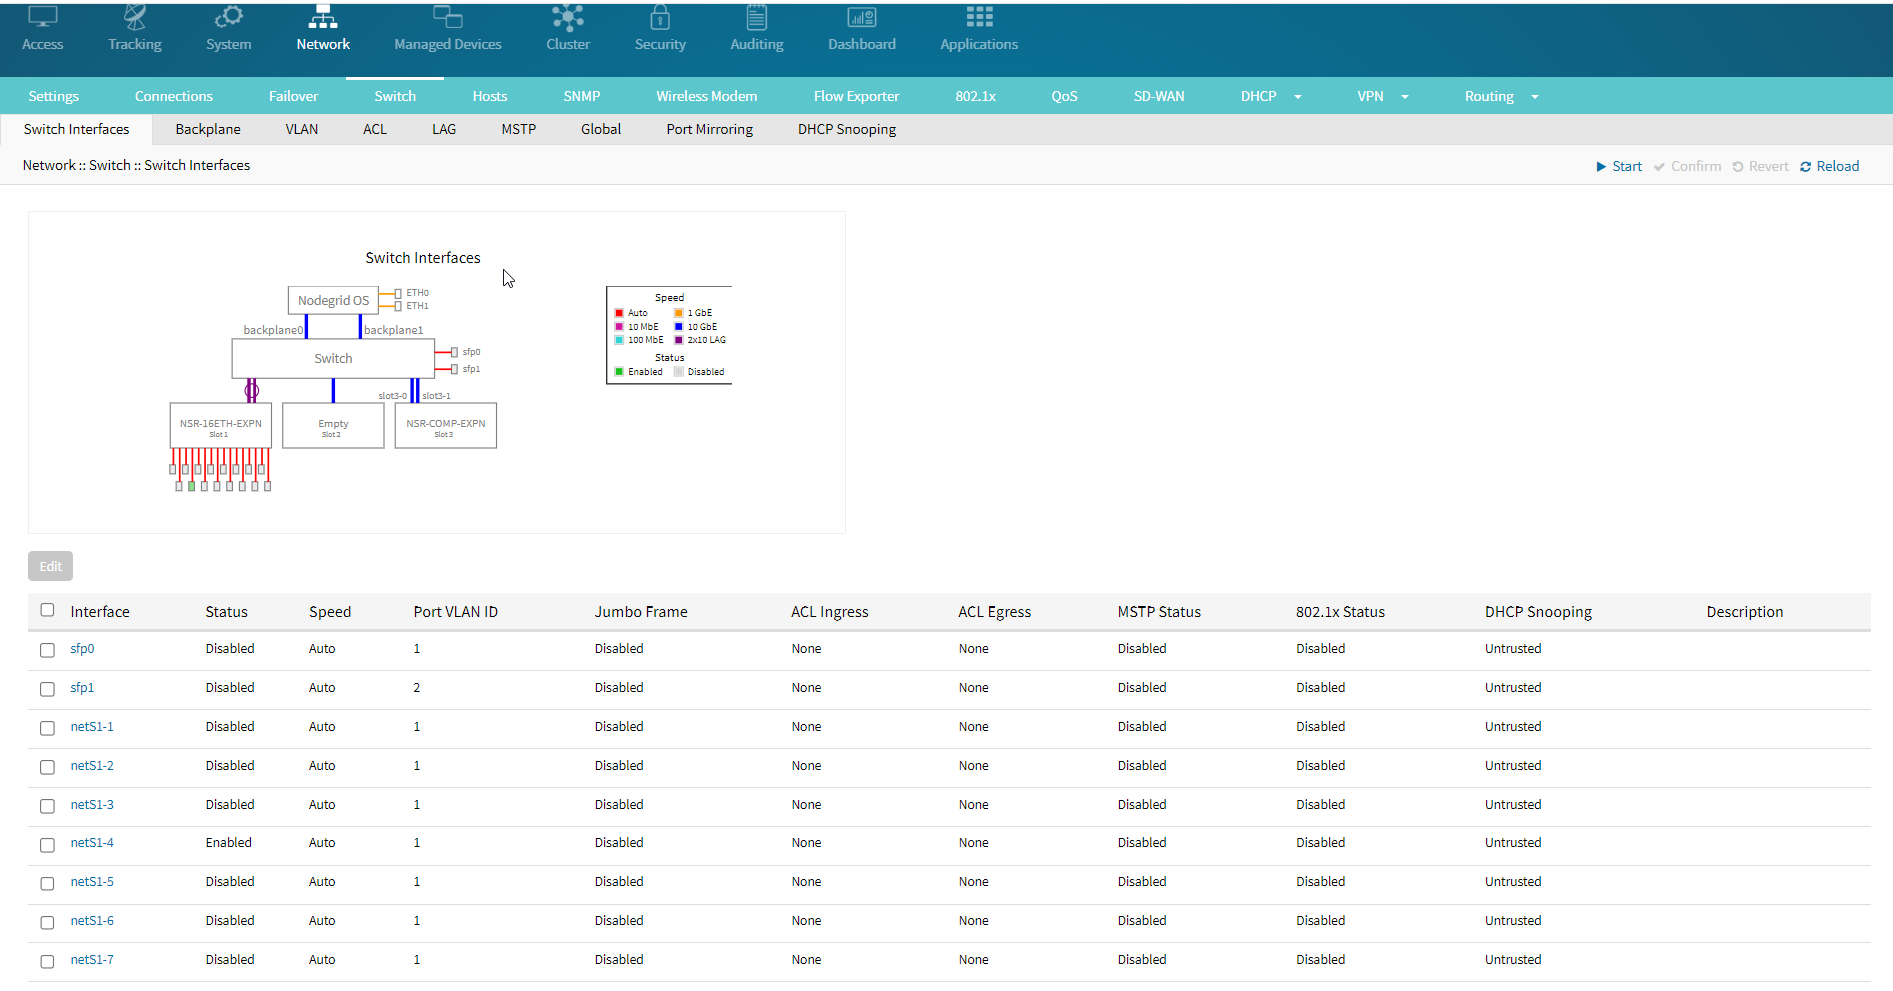
Access the Network Settings:
Navigate to the Network tab in the top menu.
Select Switch from the submenu.
Select the Interface:
Under the Switch Interfaces section, choose the interface you wish to configure. In this example, netS1-1 is selected.
Ensure the Status is set to Enabled. This activates the port.
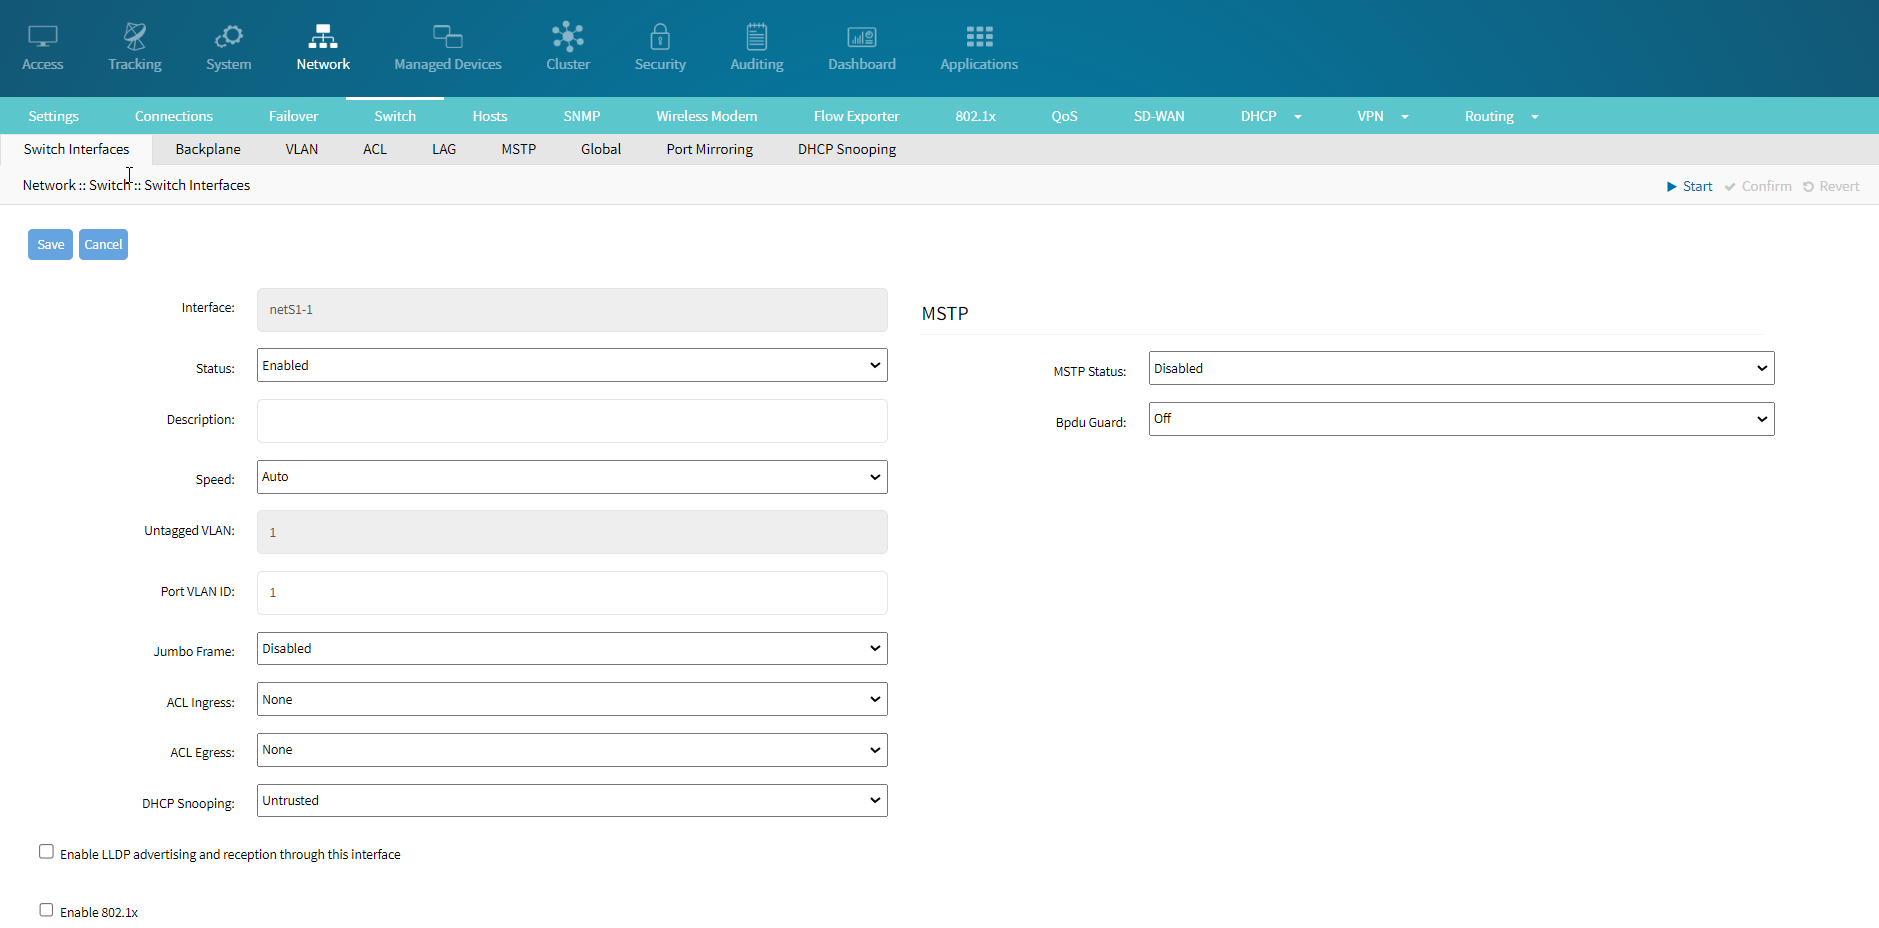
Optionally, you can add a description to the interface to help identify its purpose.
Set the Speed of the interface. The default setting is Auto, which allows the port to automatically negotiate the best speed.
VLAN Settings:
Untagged VLAN: Assign an untagged VLAN ID to the interface. This is typically used for native VLAN traffic.
Port VLAN ID: Set the VLAN ID for tagged VLAN traffic. This must match the VLAN ID used by other devices on the network.
Jumbo Frame: Enable or disable Jumbo Frames. Jumbo Frames are larger than the standard Ethernet frame size and can improve performance in certain network environments. The default setting is Disabled.
Access Control Lists (ACLs):
ACL Ingress: Define any ingress (incoming) ACLs to filter traffic entering the interface.
ACL Egress: Define any egress (outgoing) ACLs to filter traffic leaving the interface.
DHCP Snooping: Set the DHCP Snooping status to Trusted or Untrusted. This feature helps prevent DHCP spoofing attacks. The default setting is Untrusted.
Link Layer Discovery Protocol (LLDP): Enable LLDP advertising and reception: This checkbox enables LLDP, a protocol used for network device discovery.
802.1x Authentication: Enable 802.1x: This checkbox enables 802.1x authentication on the interface, which is used for network access control.
MSTP Settings: MSTP Status: Enable or disable Multiple Spanning Tree Protocol (MSTP). MSTP helps prevent network loops by creating multiple spanning trees.
Bpdu Guard: Enable or disable BPDU Guard. When enabled, the BPDU Guard shuts down the port if any BPDU (Bridge Protocol Data Unit) is received, protecting against potential loops.
Save the Configuration: Once all the settings are configured as desired, click the Save button to apply the changes. If you want to discard the changes, click the Cancel button.