Install Immune Guard on Nodegrid OS
The following guide outlines how Immune Guard can be installed on any Nodegrid OS using ZPE Cloud.
Requirements
- Immune Guard subscript
- valid ZPE Cloud account
- Nodegrid OS version 5.8 or newer
Overview
The installation process contains the following steps:
- Create ZPE Cloud profiles
- Store the Immune Guard API as Custom Variable
- Install Immune Guard on Nodegrid OS
- Schedule regular scans
ZPE Cloud setup
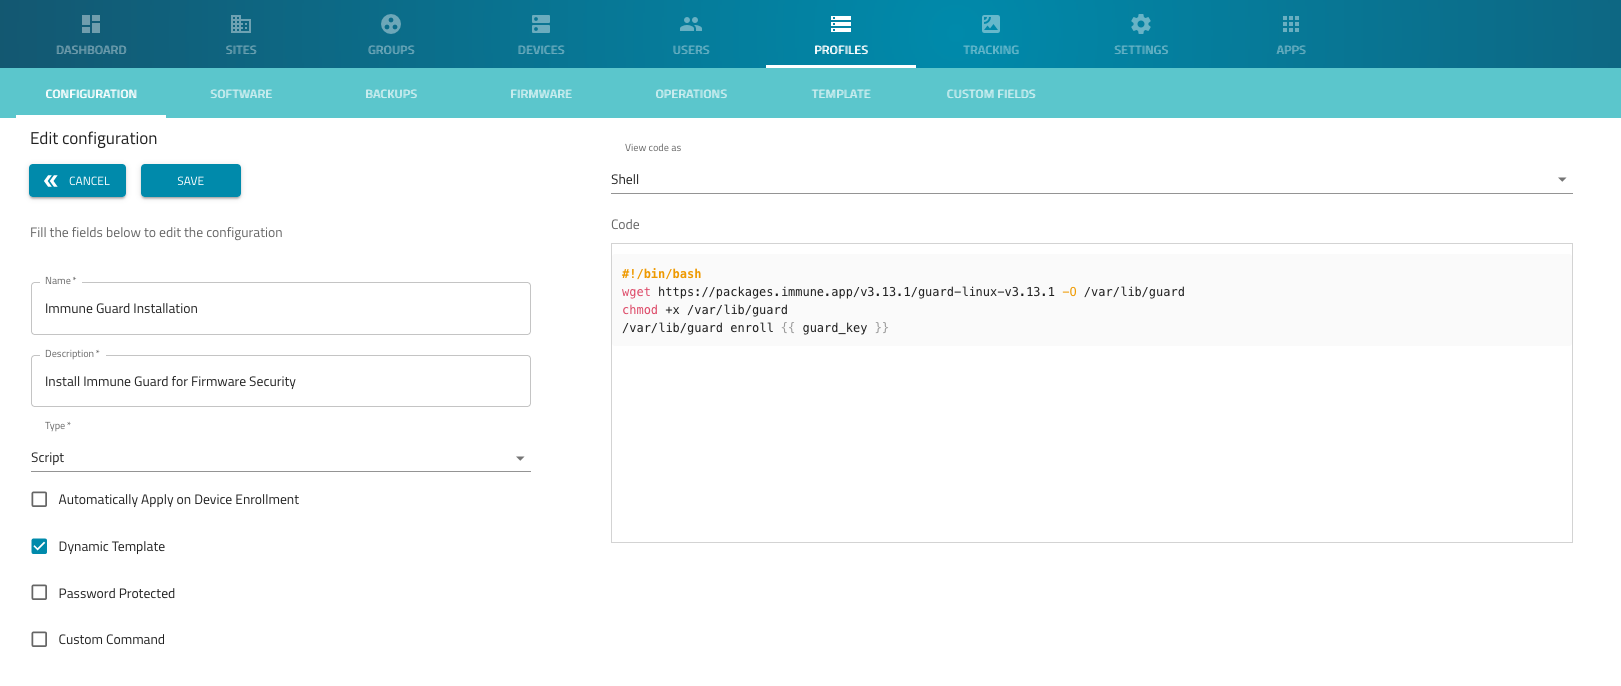
Create ZPE Cloud profile for Immune Guard Installation
- Login to the ZPE Cloud account (https://zpecloud.com or https://zpecloud.eu)
- Navigate to Profiles -> Configuration
- Click on
ADDto create a new Profile, and provide the following details
| Setting | Value | Comment |
|---|---|---|
| Name | Install Immune Guard | |
| Description | Install Immune Guard for Firmware Security | |
| Type | Script | |
| Dynamic Template | Enabled | |
| View Code as | Shell | |
| Code | copy below script | adjust version and file name as needed |
#!/bin/bash
wget https://packages.immune.app/v3.13.1/guard-linux-v3.13.1 -O /var/opt/guard
chmod +x /var/opt/guard
/var/opt/guard enroll {{ guard_key }}
- Click on
Save
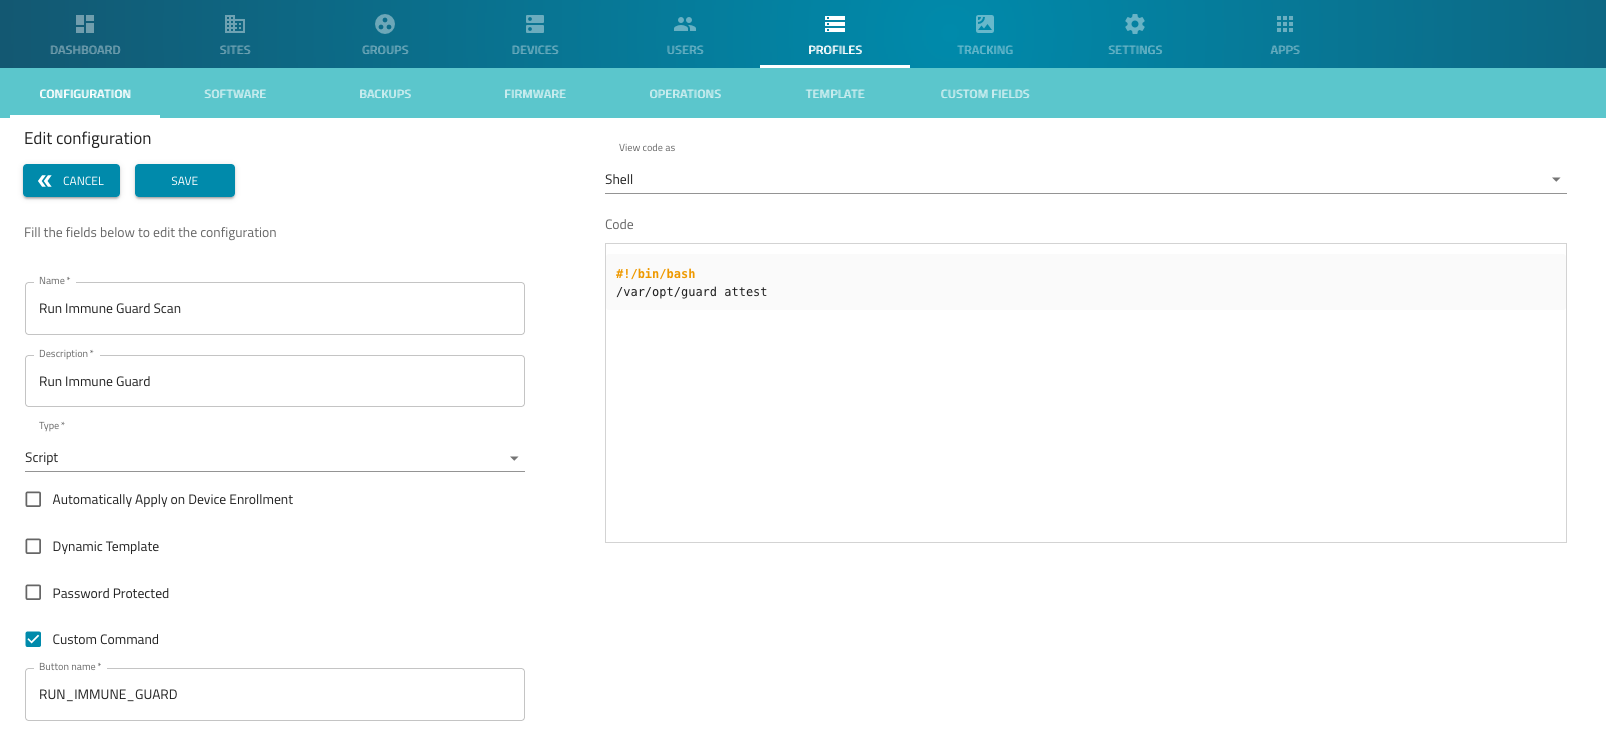
Create ZPE Cloud profile to run Immune Guard scan
- Navigate to Profiles -> Configuration
- Click on
ADDto create a new Profile, and provide the following details
| Setting | Value | Comment |
|---|---|---|
| Name | Run Immune Guard Scan | |
| Description | Run Immune Guard Scan | |
| Type | Script | |
| Dynamic Template | Disabled | |
| Custom Command | Enabled | |
| Button Name | RUN_IMMUNE_GUARD | |
| View Code as | Shell | |
| Code | copy below script |
#!/bin/bash
/var/opt/guard attest
- Click on
Save
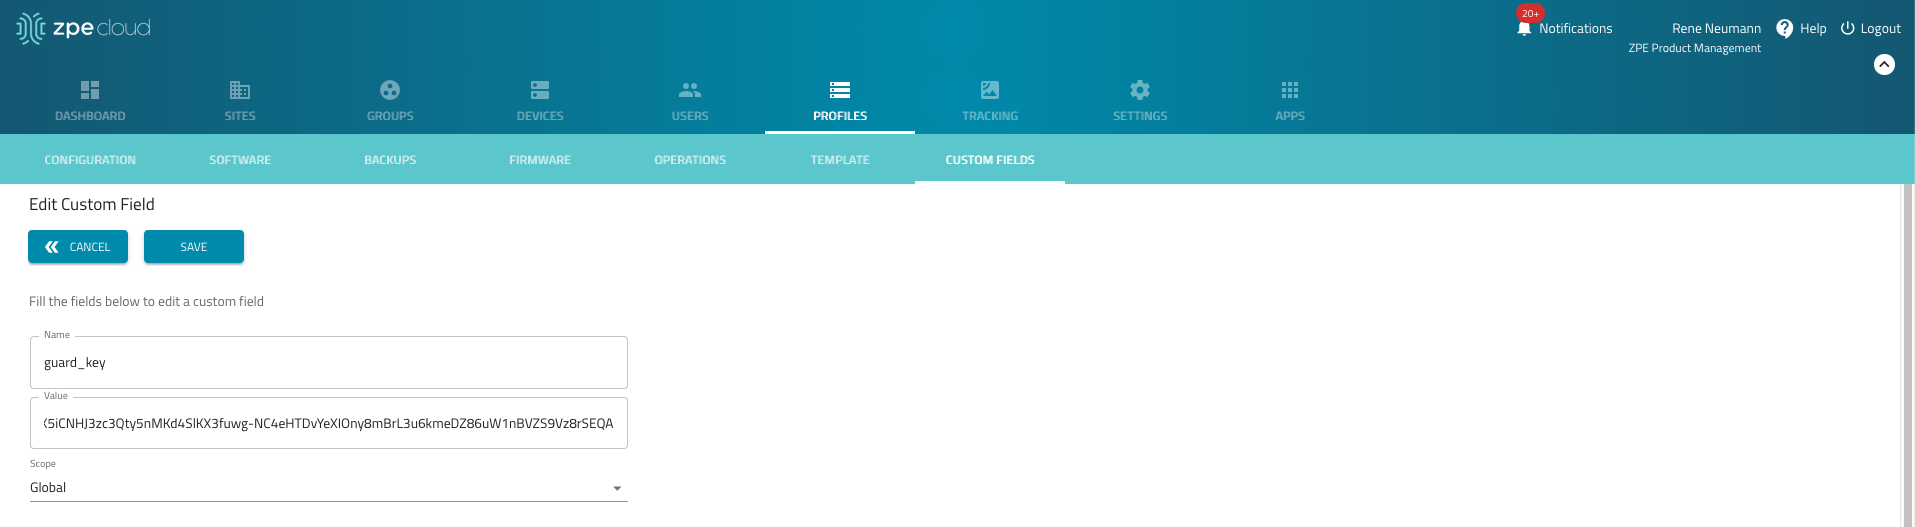
Store Immune Guard API Key
- Navigate to Profiles -> Custom Fields
- click on
NEW - Create a new custom field with the following value
| Setting | Value | Commit |
|---|---|---|
| Name | guard_key | |
| Value | <API KEY from Immune Guard> | |
| Scope | Global |
Install Immune Guard on Nodegrid OS
- Navigate to Devices -> Enrolled
- Select a or multiple devices
- click on
APPLY CONFIGURATION - Search for
Run Immune Guard Scan - Click on
SAVE - Immune Guard will now be installed onto the devices and enrolled with the provided API key
- To review the current deployment status, navigate to Profiles -> Operations
Run Immune Guard Scan (Once off)
- Navigate to Devices -> Enrolled
- Select one or multiple devices
- click on
MENUto expand the menu - Click on
RUN_IMMUNE_GUARD
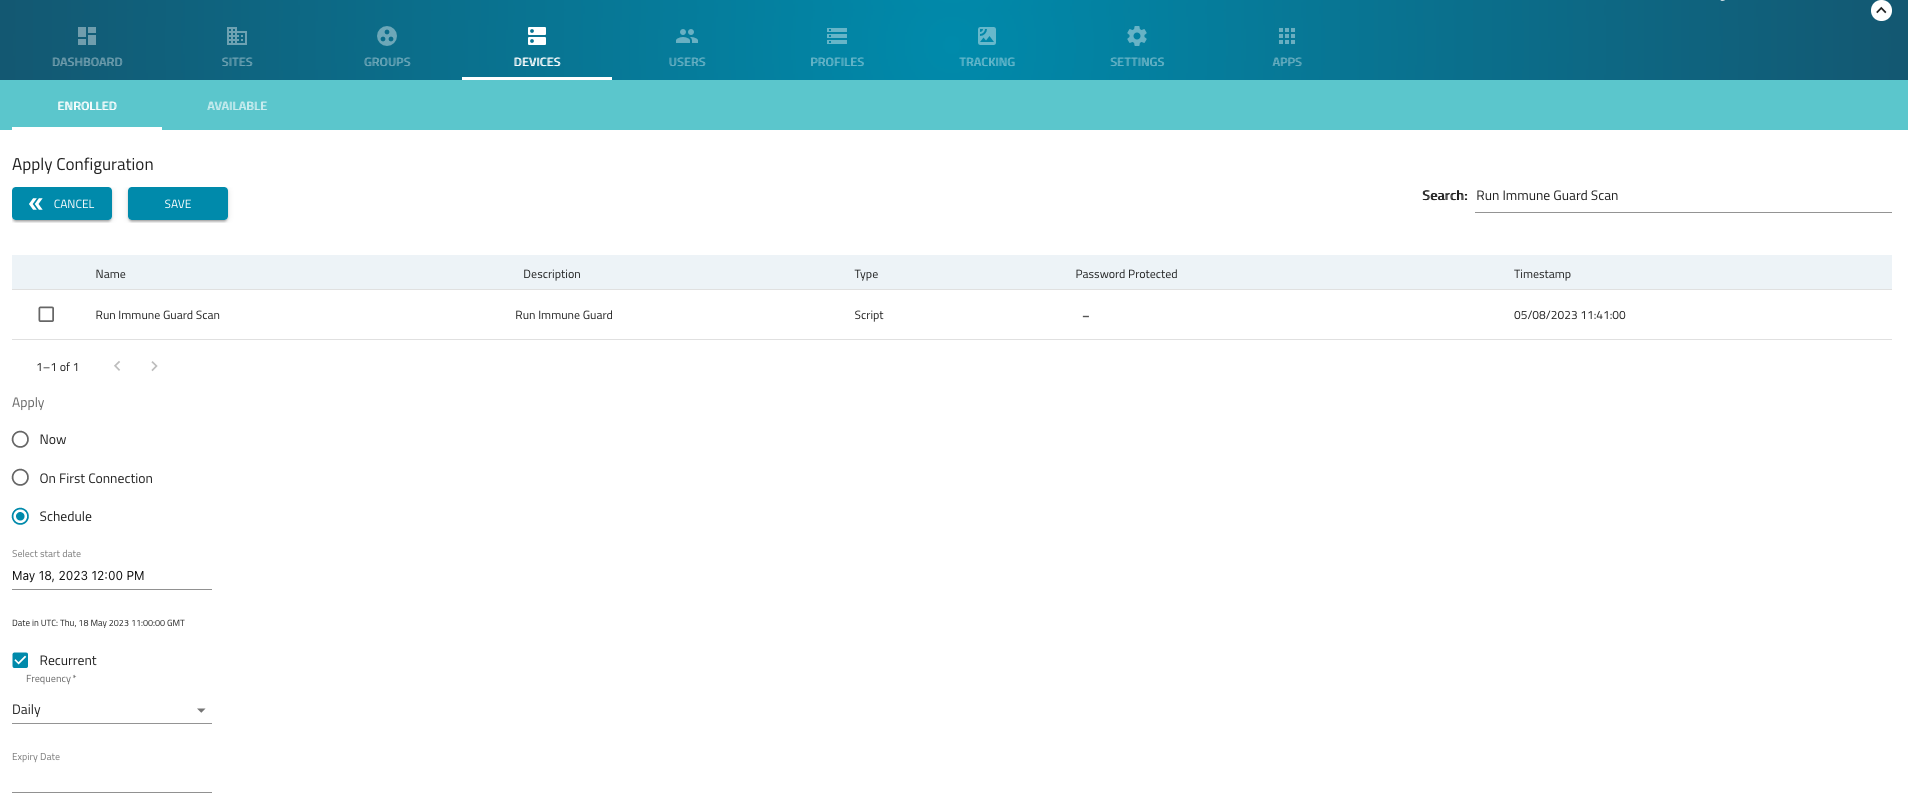
Schedule Immune Guard Scan
- Navigate to Devices -> Enrolled
- Select a or multiple devices
- click on
APPLY CONFIGURATION - Search for
Run Immune Guard Scan - Select under *Apply -> Schedule
- Set a start date and time
- Enable Recurrent and select the frequency, for example, daily
- Click on
SAVE