This documentation details steps to create a Nodegrid Manager VM instance on Linux Qemu/KVM.
Kernel-based Virtual Machine (KVM) is a full virtualization solution for Linux on x86 hardware with virtualization extensions support (e.g., Intel VT or AMD-V). It consists of a loadable kernel module on the host (kvm.co) that provides core virtualization infrastructure and a processor-specific module (e.g., kvm-intel.ko or kvm-amd.ko).
KVM is a type 1 hypervisor (i.e., bare metal hypervisor) and enables the definition of virtual machines (VM guests). Each VM has private virtualized hardware like a network card, disk, graphics adapter, serial ports, and others.
The kernel component of KVM is included in mainline Linux, as of 2.6.20. The user space component of KVM is included in mainline QEMU, as of 1.3.
The following diagram, Diagram-1, depicts the expected result: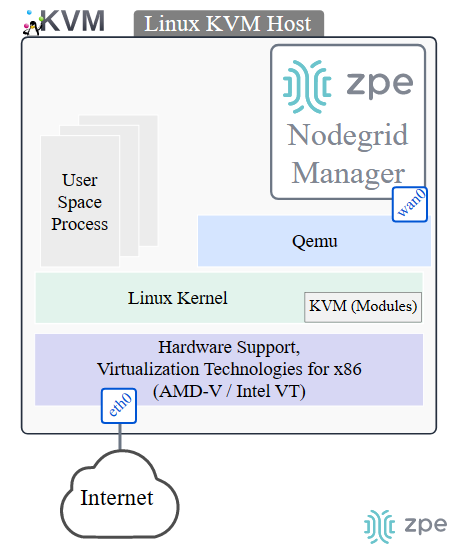
This guide structure is as follows:
Linux Host requirements
Nodegrid Manager ISO image
Create a Nodegrid Manager instance
Web Access to the Nodegrid Manager
1. Linux Host requirements
The requirements for Linux Qemu/KVM include:
Hardware:
Virtualization Technologies for x86 (AMD-V / Intel VT)
Software:
Linux kernel 2.6.20 or newer
QEMU 1.3 or newer
This guide consider the following software:
Libvirt, the virtualization API
libvirt is an open-source API, daemon and management tool for managing platform virtualization.
Virtual Machine Manager virt-manager
The virt-manager application is a desktop user interface to manage virtual machines through libvirt.
NOTE: virt-manager is not required to be installed on the KVM hypervisor. It can be installed in a desktop, with
sshaccess to the KVM hypervisor.
Here are further details about KVM installation on Debian 11 https://wiki.debian.org/KVM.
2. Nodegrid Manager ISO image
The following steps describe how to obtain a Nodegrid Manager ISO file:
Access with your credentials to https://zpecloud.com or https://zpecloud.eu based on your region.
Go to PROFILES :: SOFTWARE.
Select a VSR Nodegrid version, e.g., Nodegrid_Platform_v5.8.2_20230114
Download the ISO file
NOTE: The iso file can be obtained through the support portal.
3. Create a Nodegrid Manager instance
The following steps describe the procedure to deploy a VM instance using the virt-manager graphical interface. This creates the resources shown in the Diagram-1.
Open the application virt-manager (Virtual Machine Manager) on your desktop
If the KVM hypervisor is installed on the same machine, skip to step 3. To access a remote KVM hypervisor via
ssh:Select File > Add Connection
Click Connect to remote host over SSH
Enter the credentials
Click Connect
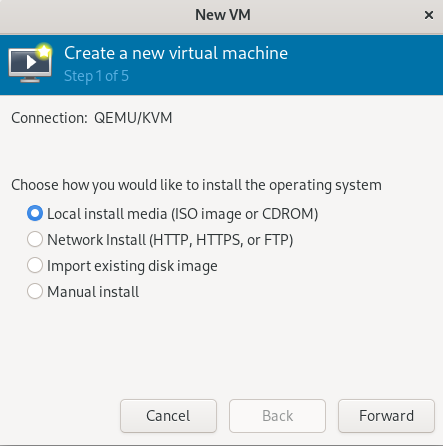
Click Create a new virtual machine.
Click Local install media (ISO image or CDROM) > Forward
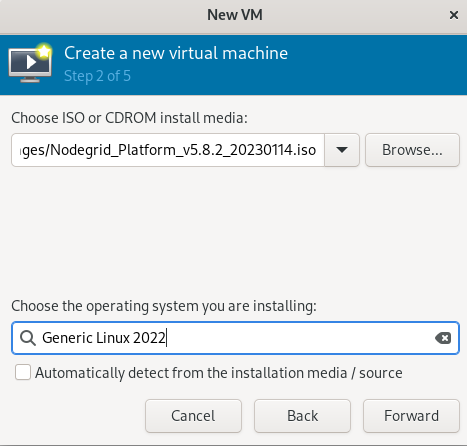
On Choose ISO or CDROM install media, go to Browse > Browse Local and locate the downloaded ISO file.
On Choose the operating system to install, insert Generic Linux 2022 (unselect Automatically detect from the installation media/source)
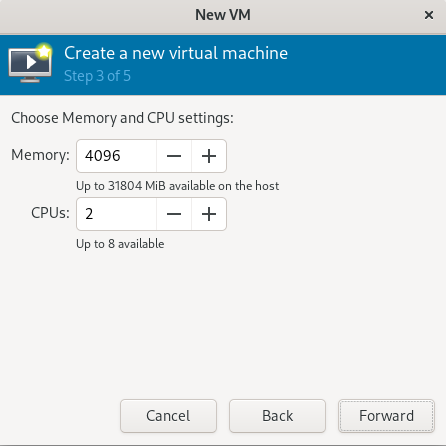
Select Memory=4096, and CPUs=2
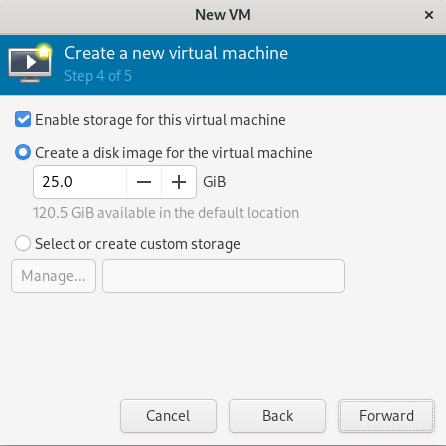
Create a disk image for the virtual machine of 25GiB or greater
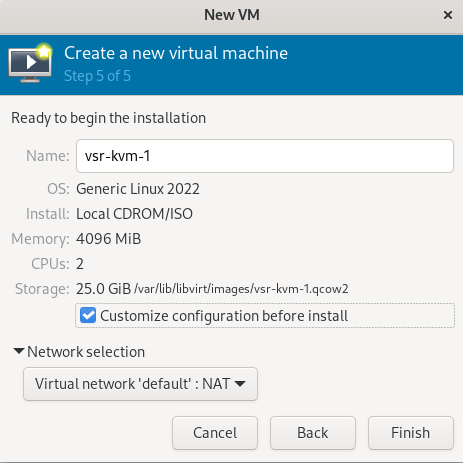
On the Ready to begin installation page:
Enter Name for the VM, e.g., vsr-kvm-1
Click Customize configuration before install
Select Network selection > Virtual network 'default': NAT
Click Finish
The following window displays:
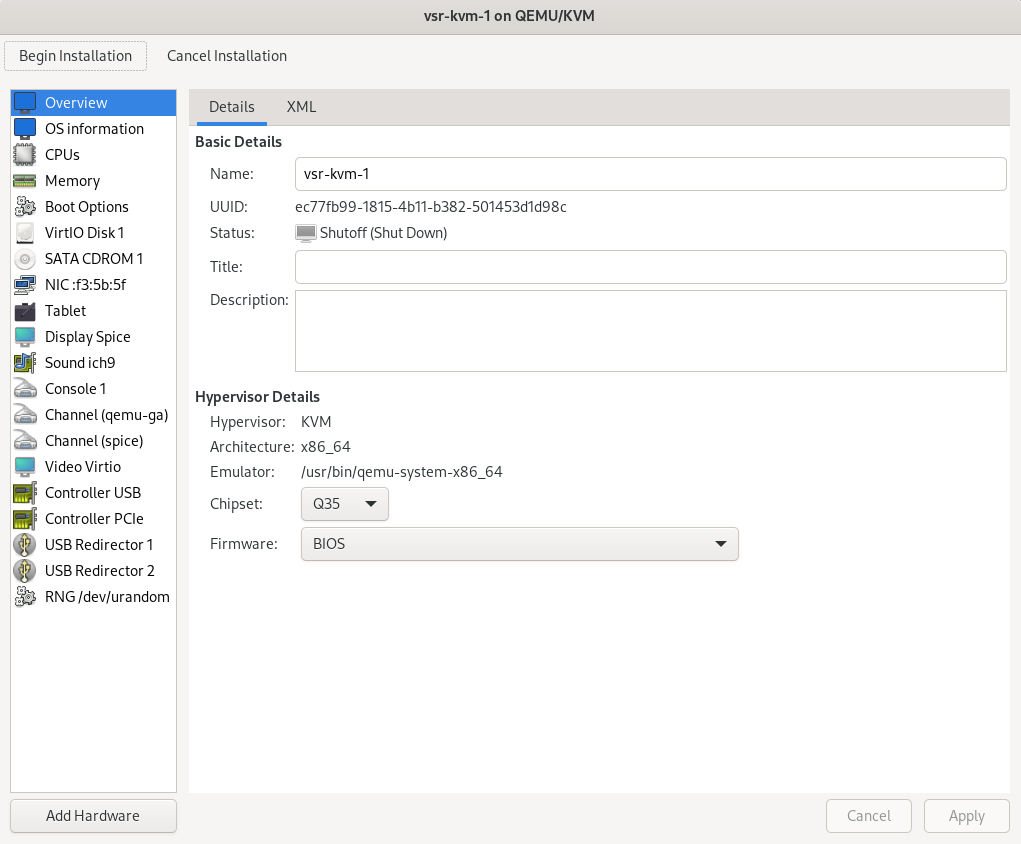
The following configurations are required prior to Begin Installation
Select Overview > Firmware > UEFI X86_64:/usr/share/OVMF/OVMF_CODE_4M.fd. Apply the changes.
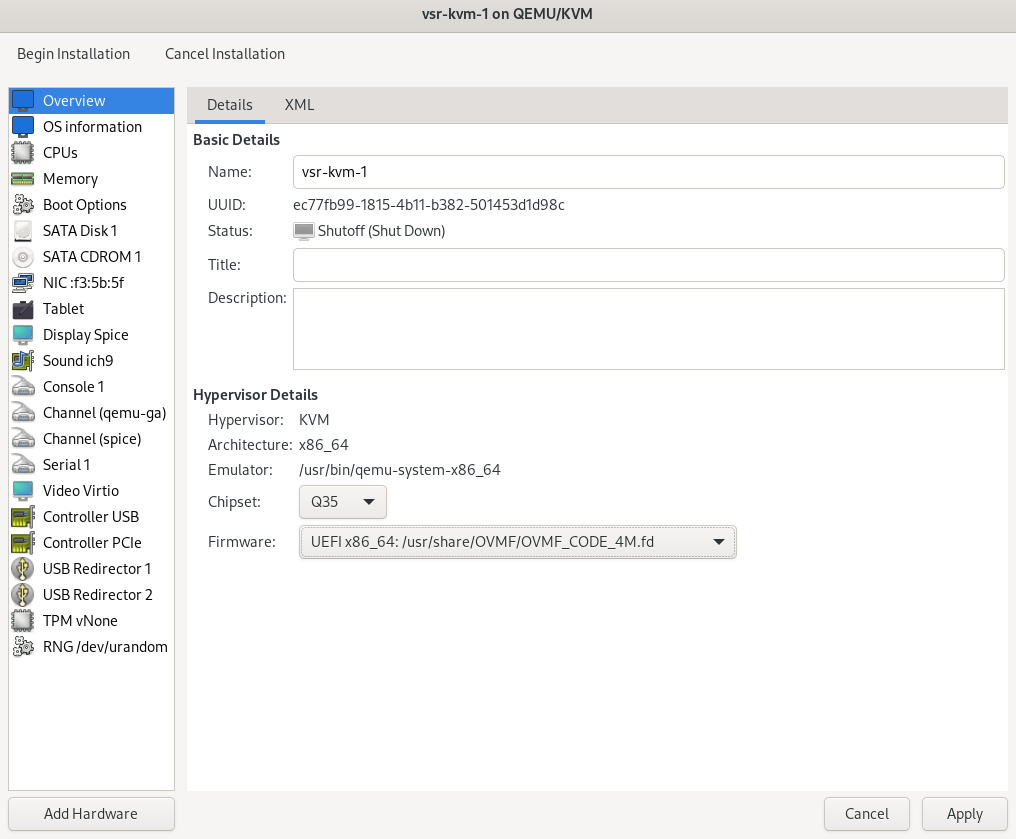
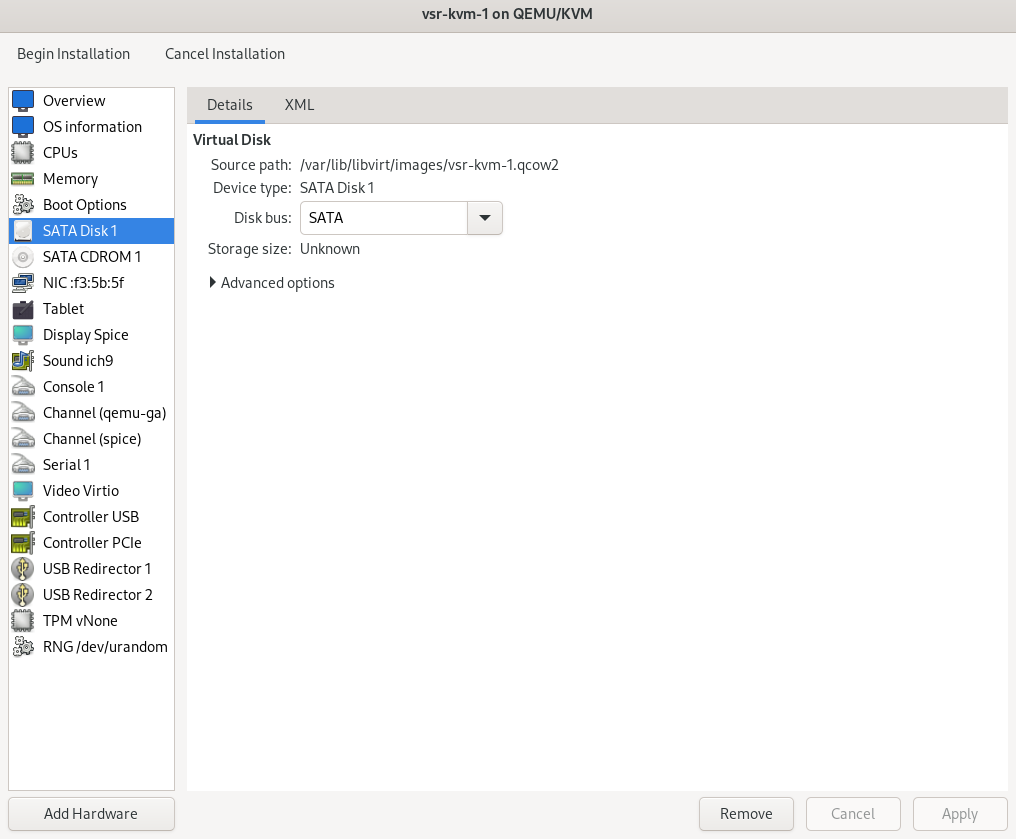
Select Disk 1 > Disk bus: SATA > Apply
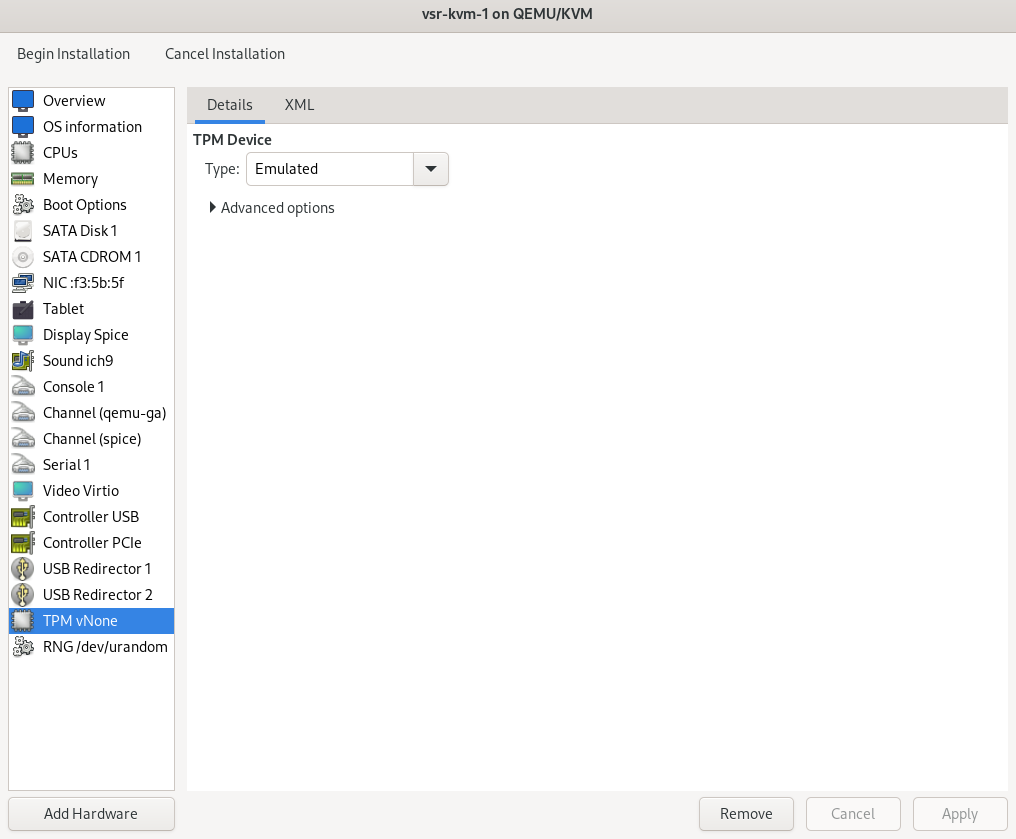
Select Add Hardware > TPM > Type: Emulated > Finish > Apply.
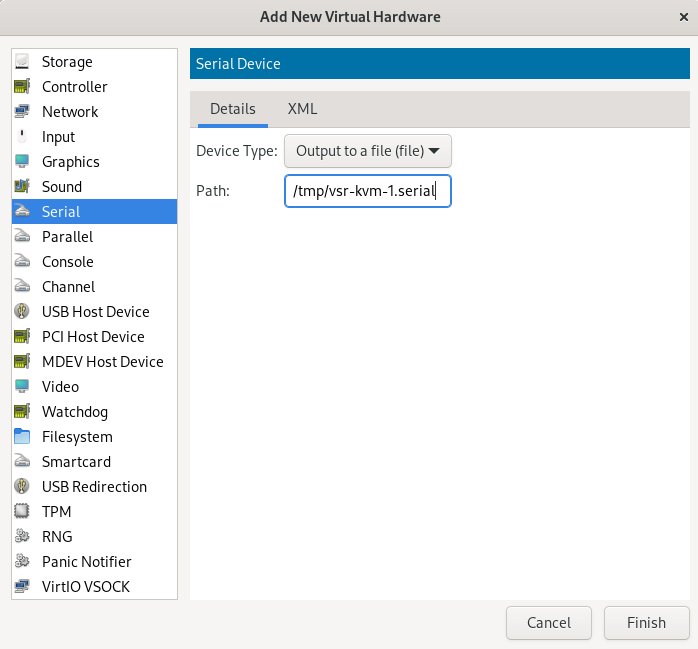
Select Add Hardware > Serial > Device Type: Output to a file (file)
In Path enter a file path, e.g., /tmp/vsr-kvm-1.serial
Select Finish > Apply
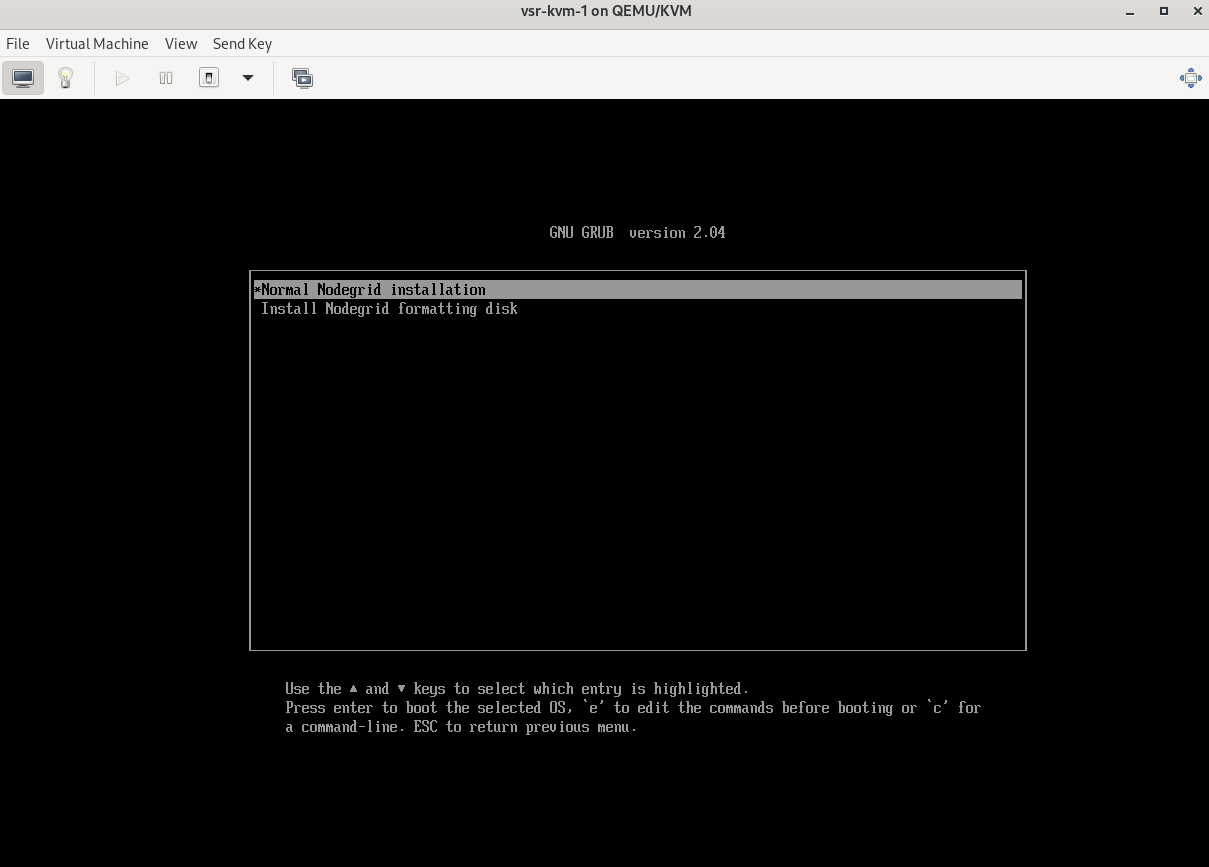
Click Begin Installation. The VM installation process starts.
The VM installation process is:
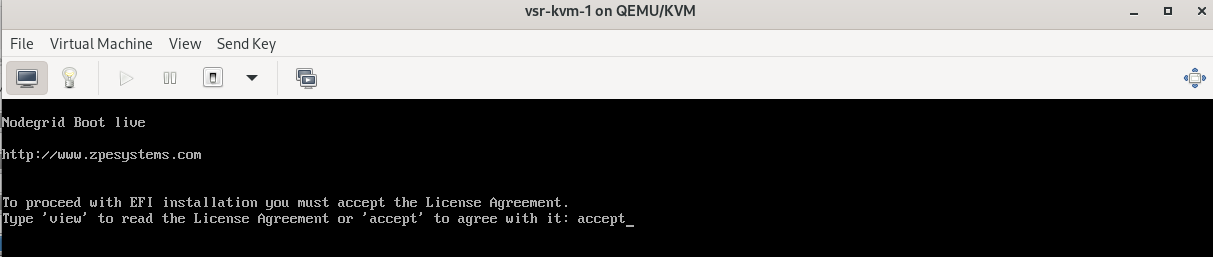
Select Normal Nodegrid installation
To accept the License Agreement, enter accept
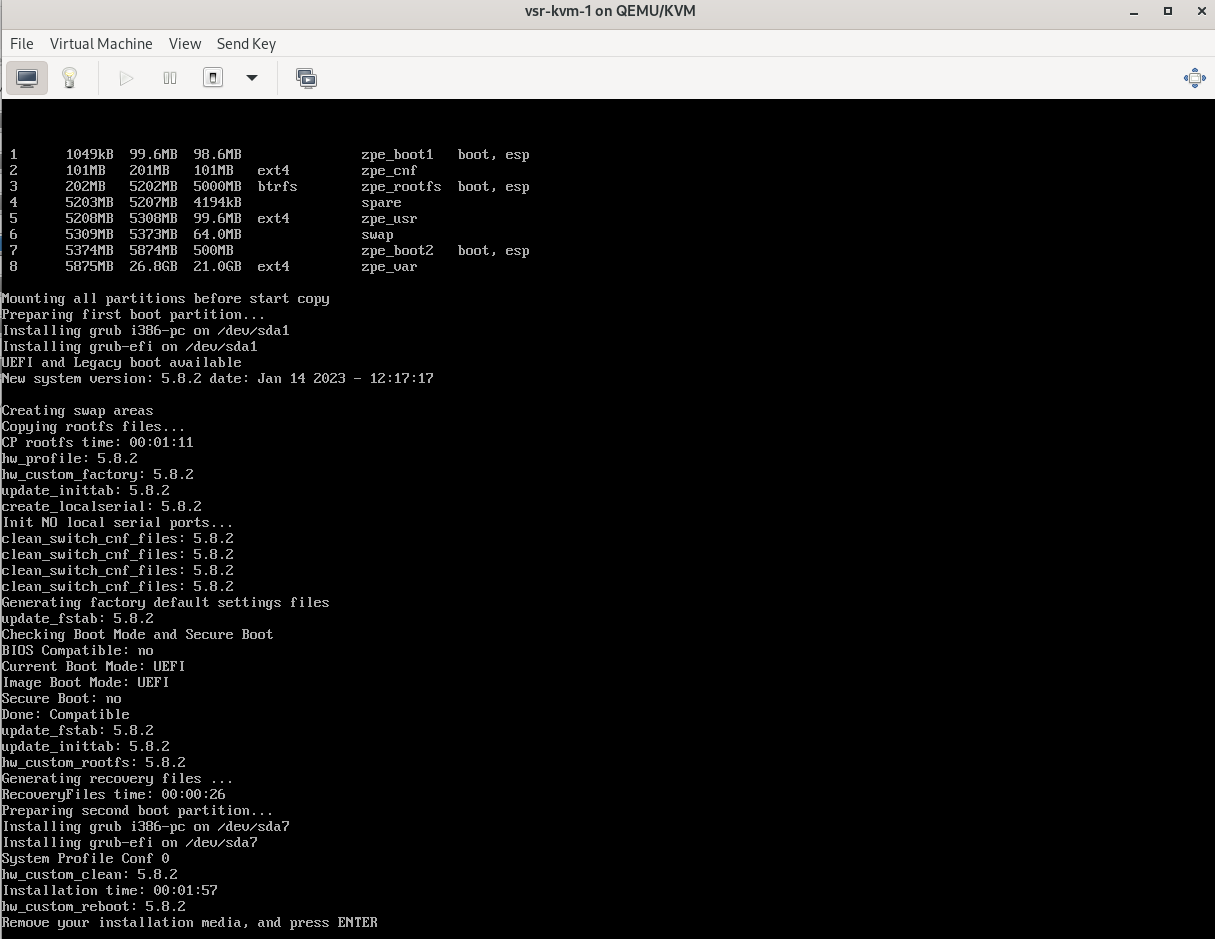
The Nodegrid Manager installation process shall take place. Once finished, reboot the VM
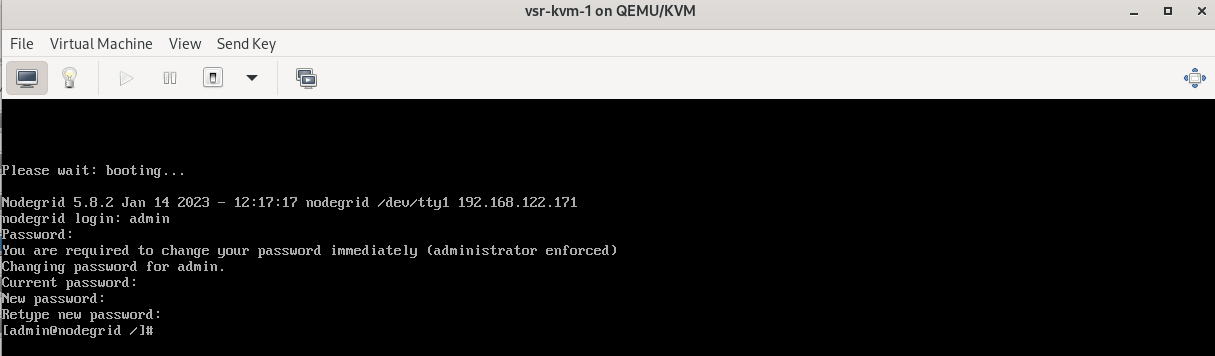
After the VM reboots, access the Nodegrid Manager terminal with these credentials:
user: admin
password: admin
Follow the process to change the admin password
On the CLI, execute the following commands:
show settings/network_connections/
show system/routing_table
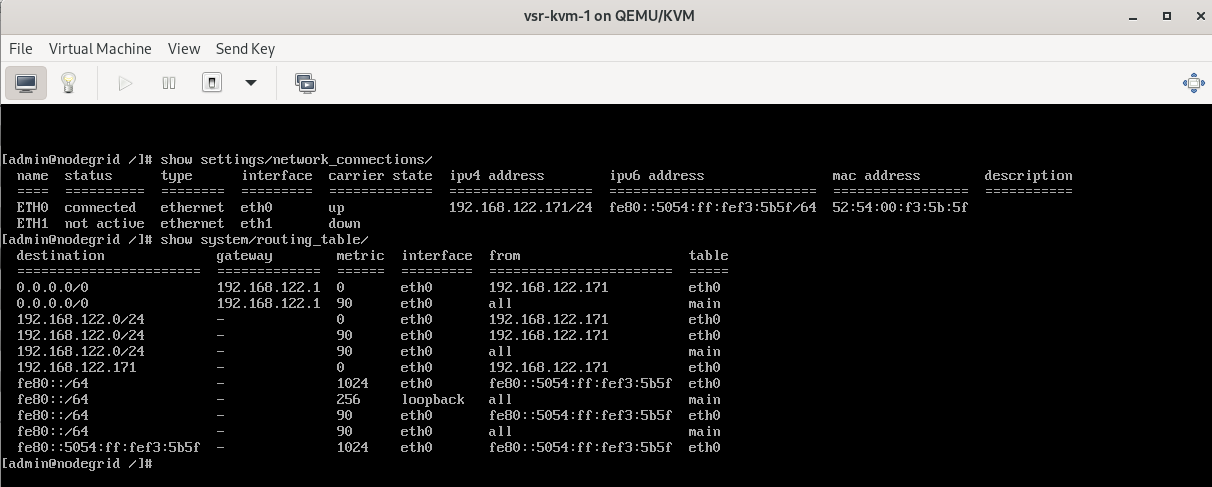
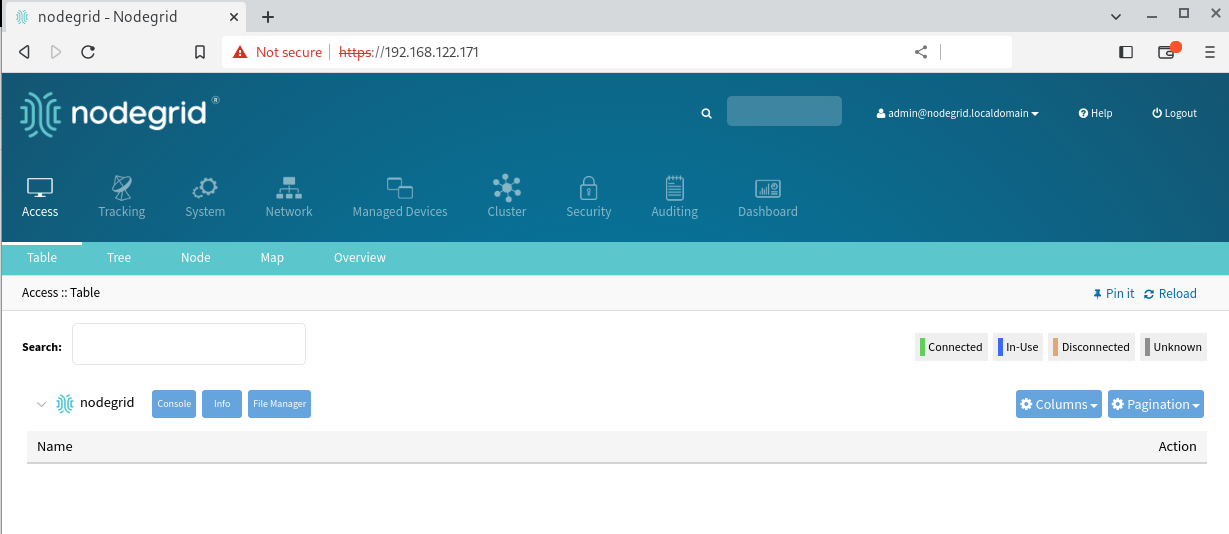
In this example, the IP address assigned to the Nodegrid Manager is 192.168.122.171. The next section details how to access the Nodegrid Manager Web UI.
4. Web Access to the Nodegrid Manager
To access the Nodegrid Manager WebUI depends on the client location: 1) access from the KVM hypervisor (same host), 2) access from a remote client (KVM hypervisor in a remote server)
For the first case:
Open the link https://private-IP in a browser, e.g., https://192.168.122.171
Log in to the Nodegrid Manager Web UI. Default credentials:
user: admin
password: admin
Change the password
Congratulations! You have successfully deployed a Nodegrid Manager
For the second case, the following options are:
Add a new interface to the VM that is bridged to your local LAN
Forward TCP/80 and TCP/8080 ports on the hypervisor toward the VM
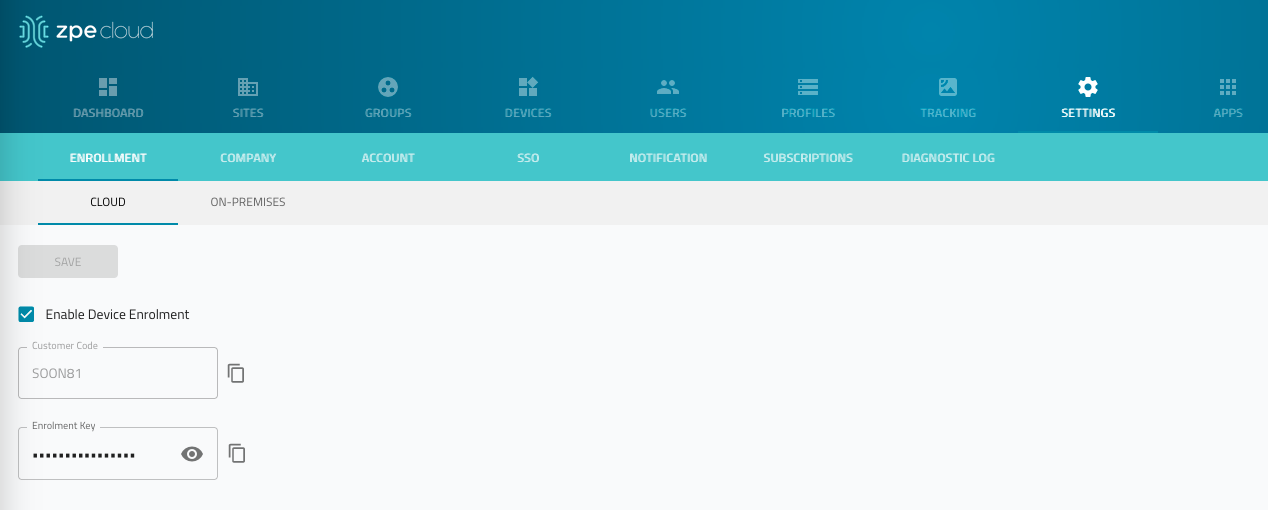
5. Enroll Nodegrid Manager to ZPE Cloud
A Nodegrid Manager can be managed from ZPE Cloud. It must be enrolled to the customer's ZPE Cloud instance.
Go to SETTINGS :: ENROLLMENT :: CLOUD.
Copy the Customer Code and Enrollment Key (required to claim the vSR).
In a browser, login to Nodegrid Manager with https://.
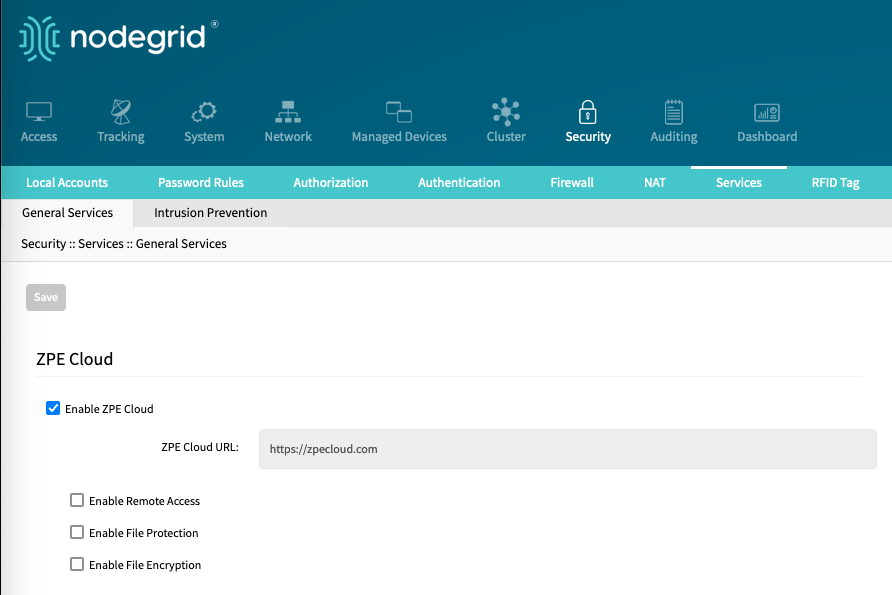
Go to Security :: Services and enable ZPE Cloud service
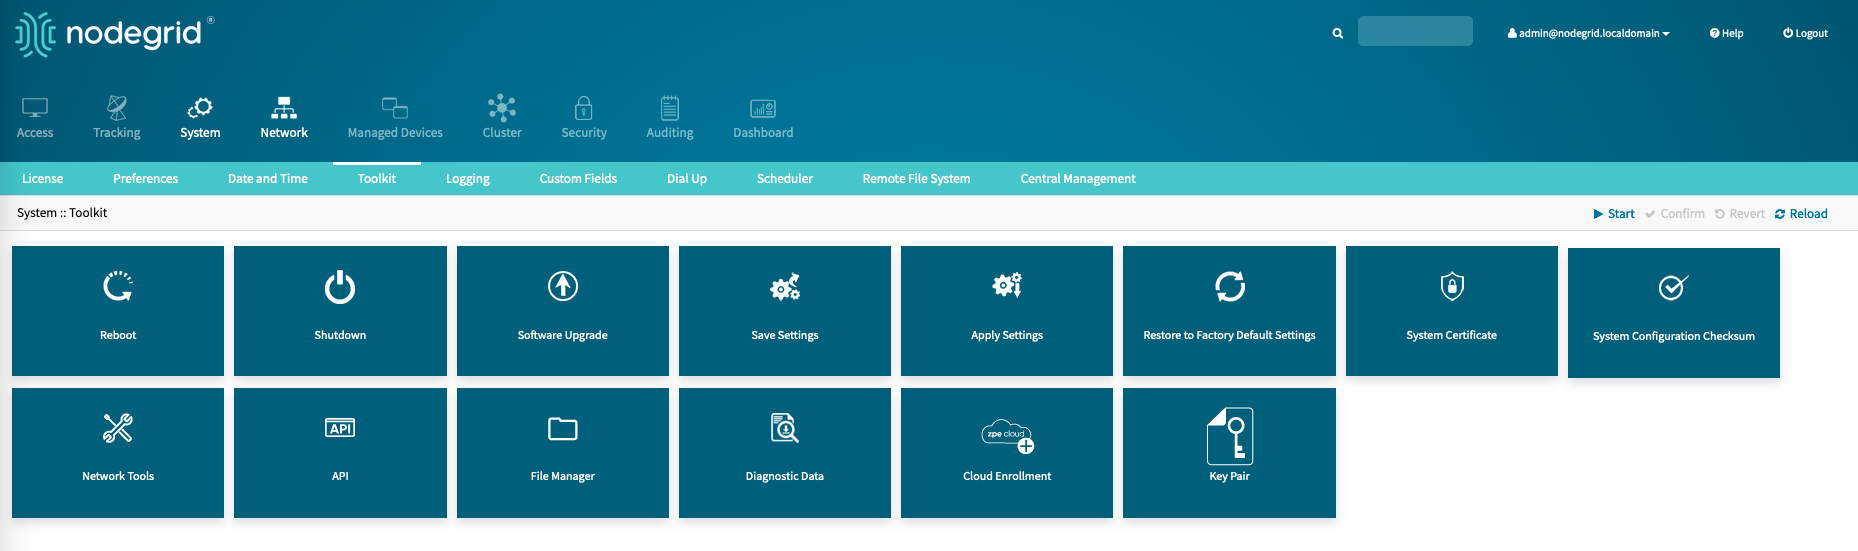
Go to System :: Toolkit :: Cloud Enrollment.
Enter the following information
URL: URL of the zpecloud instance, default https://zpecloud.com for US users and https://zpecloud.eu for EU users.
Customer Code: Use the copied Customer Code from the Cloud Instance
Enrollment Key: Use the copied Enrollment Key
Click ENROLL.
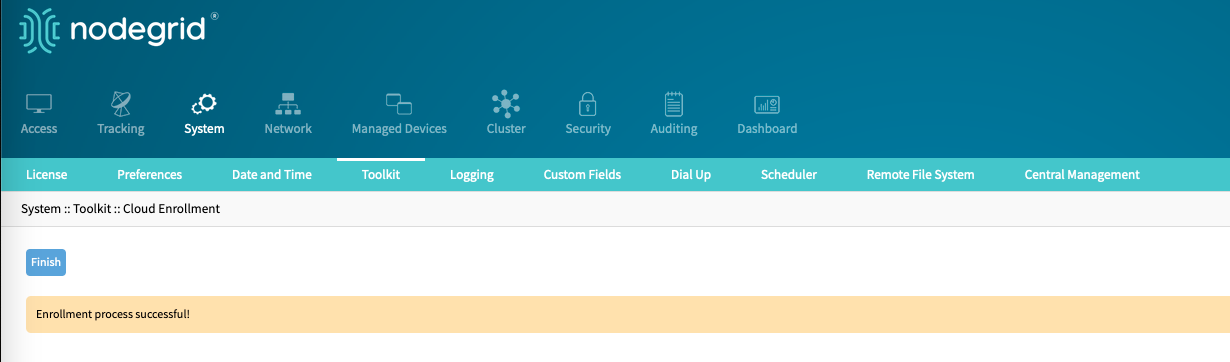
The unit is enrolled on ZPE Cloud and become available in ZPE Cloud under DEVICES :: AVAILABLE.
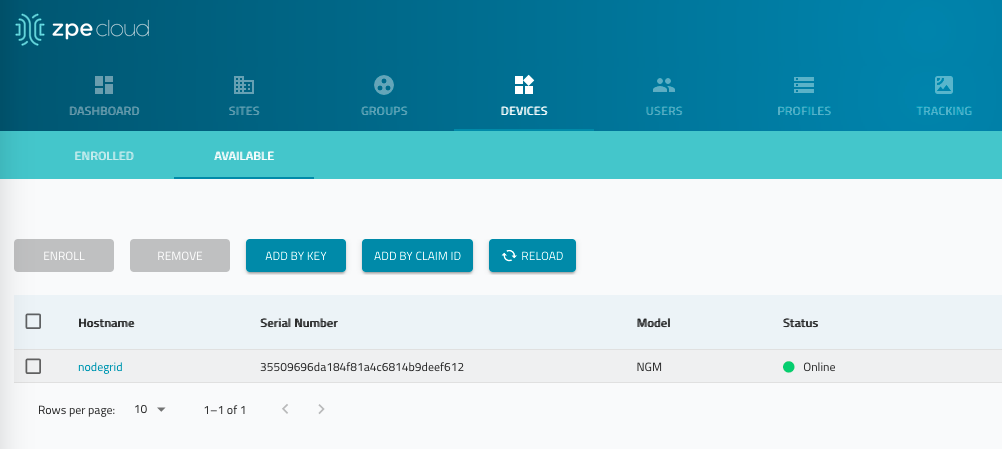
To start management of the vSR, select and click on ENROLL.
When enrolled, the vSR is managed on ZPE Cloud the same as any other Nodegrid device.