Requirements
EFI firmware
On vCenter 7.0 U2 and later this component is available by default
Datacenter in Cluster
FQDN (datacenter hostname) different from default
Nodegrid OS image version 5.8.2 or higher (recomended)
Preparation
VMware: Configure a Native Key Provider
Nodegrid Manager requires access to vTPM to be fully functional. vTPM functionalty is provided through a Native Key Provider. This section outline the configuration of a Native Key Provider for Nodegrid Manager
For more information about VMware Native Key Provider, see vSphere Native Key Provider Overview (vmware.com)
Required privilege: Cryptographic operations to manage key servers.
Open the **vSphere Client **application.
Log in to the vCenter Server system.
Browse the inventory list and select the vCenter Server instance.
Click Configure,
Under Security, click Key Providers.
Click Add.
Click Add Native Key Provider.
Enter a Name. Each logical key provider, regardless of type, must have a unique name. For more information, see Key Provider Naming.
To utilize this vSphere Native Key Provider only by hosts with TPM 2.0, select Use key provider only with TPM protected ESXi hosts checkbox.
Click Add Key Provider.
NOTE
Requires approximately five minutes for all the clustered ESXi hosts in a data center to get the key provider, and for the vCenter Server to update its cache. Because of the way the information is propagated, a few minutes may be needed before using the key provider for key operations on some of hosts.
The vSphere Native Key Provider is added and appears in the Key Provider pane. At this point, the vSphere Native Key Provider is not backed up. Before use, back up the vSphere Native Key Provider. See Back up a vSphere Native Key Provider (vmware.com)
To add vTPMs to the ESXi hosts, see Securing Virtual Machines with Virtual Trusted Platform Module.
To encrypt virtual machines, see Use Encryption in Your vSphere Environment.
Nodegrid Manager ISO image
The following steps describe how to obtain a Nodegrid Manager ISO file:
Access with your credentials https://zpecloud.com or https://zpecloud.eu depending upon your region.
Select Profiles > Software
Select a VSR Nodegrid version, e.g., Nodegrid_Platform_v5.8.2_20230114.
Download the ISO file.
NOTE: The iso file can also be obtained through the support portal.
Create a Nodegrid Manager instance
Upload Nodegrid Manager ISO to Data Storage
Open the vSphere Client application.
Upload NG iso image to vCenter storage.
Create a Nodegrid Manager VM
On Menu drop-down., select Hosts and Clusters.
On the Actions drop-down., select New Virtual Machine. Click Next.
On the Select a creation type page: Select Create a new virtual machine. Click Next.
On the Select a name and folder page: Enter a Name for the VM. Select the Location for the new VM. Click Next.
On the Select a compute resource page: Select the Destination Compute Resource. Click Next.
On the Select storage page: Select the Storage Configuration. Click Next.
On the Select compatibility page: On the Compatible drop-down., select ESXi 6.7 and later. Click Next.
On the Select a guest OS page:
On the Guest OS Family drop-down, select Linux.
On the Guest OS Version drop-down, select Other 4.x or later Linux (64-bit).
Click Next.
On the Customize hardware page, Virtual Hardware tab, select:
Setting | Value |
|---|---|
CPU | 2 |
Memory | 4GB |
Hard disk | 32 GB |
Virtual device node | IDE 0 |
On New CD/DVD Drive - Datastore ISO File: Select the uploaded iso image. Select Connected at power on checkbox.
To create a second network adapter, on Add new device, select Network Adapter. Under New network, for both network adapters, enter Adapter type = E1000E.
On the Customize hardware page, VM Options tab: Click Add new device and select Trusted Platform Module.
On the Customize hardware page, VM Options tab: Under Boot options select:
Firmware = EFI
Secure boot = disabled**
Click Next.On Ready to complete page: Review the VM configuration details. Click Finish.
Installation of Nodegrid Manager
Select Begin Installation. The VM installation process begins.
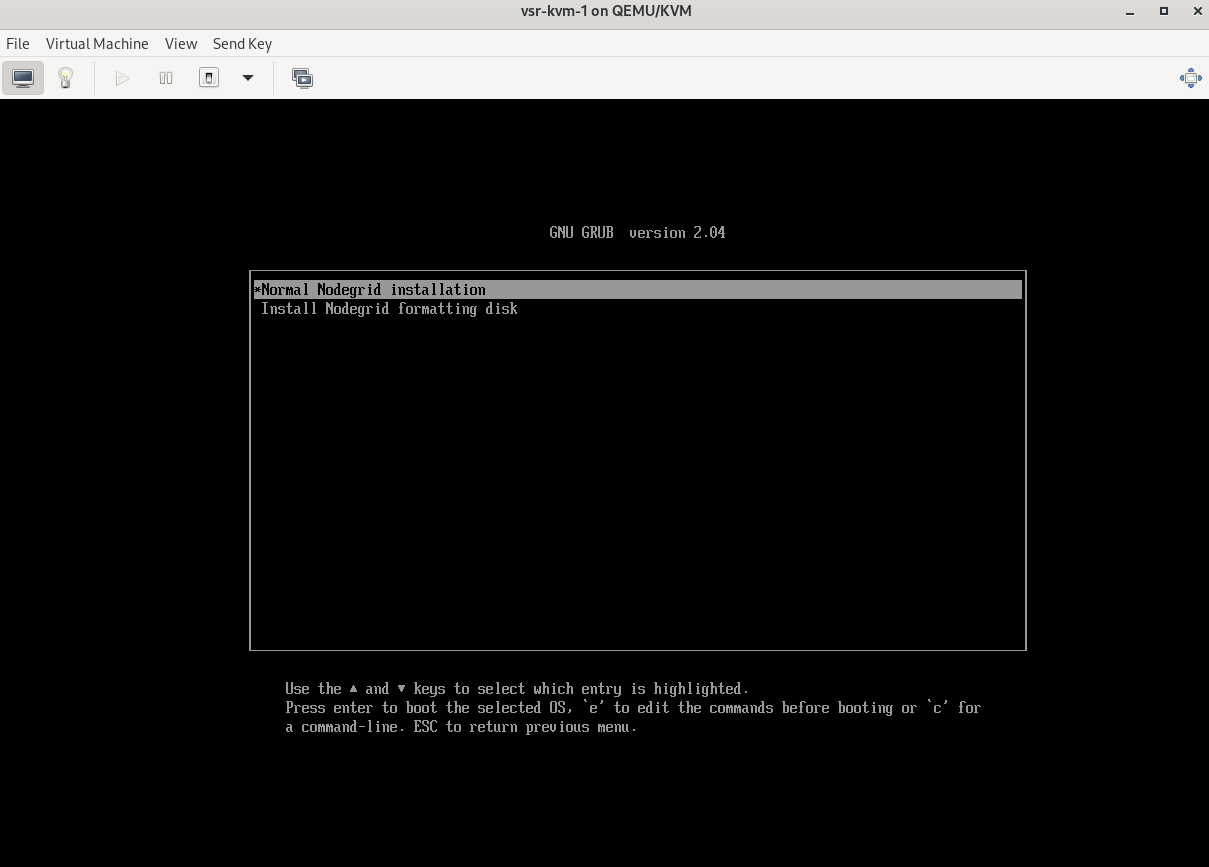
Select Normal Nodegrid installation.
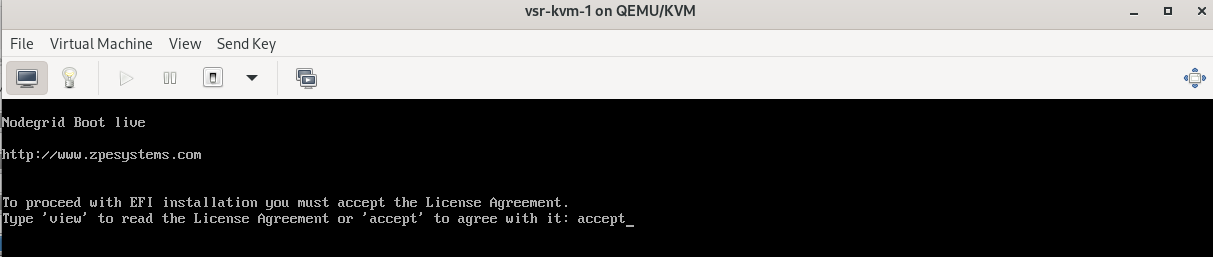
To accept the License Agreement, ether accept.
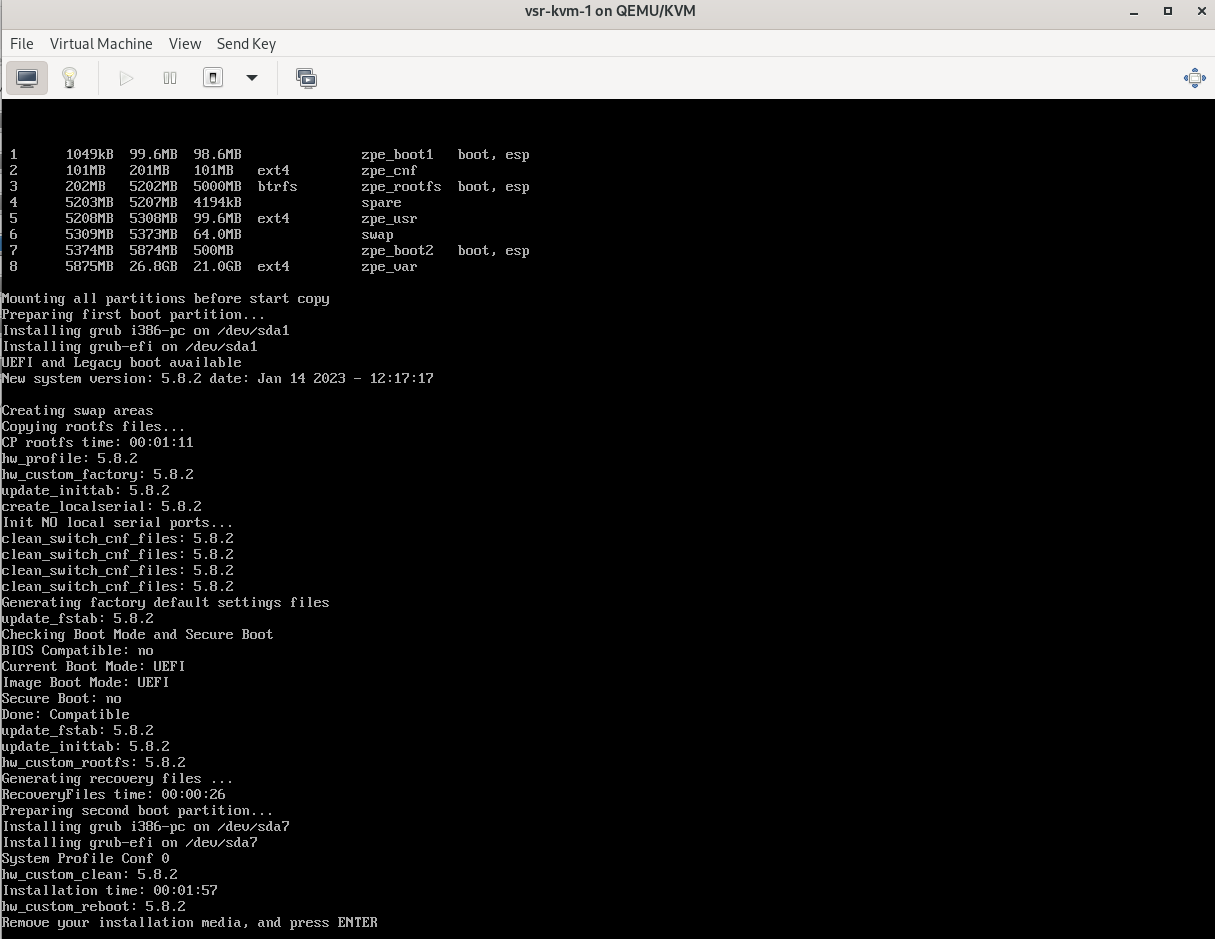
The Nodegrid Manager installation process begins. When finished, reboot the VM.
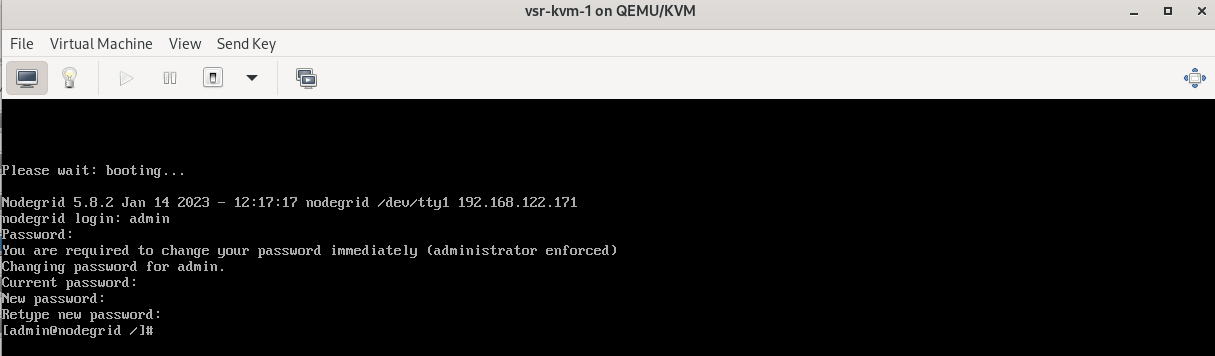
After the VM reboots, access the Nodegrid Manager terminal with the following credentials:
user: admin
password: admin
Follow the process to change the admin password
Execute the following commands on the cli:
show settings/network_connections/
show system/routing_table
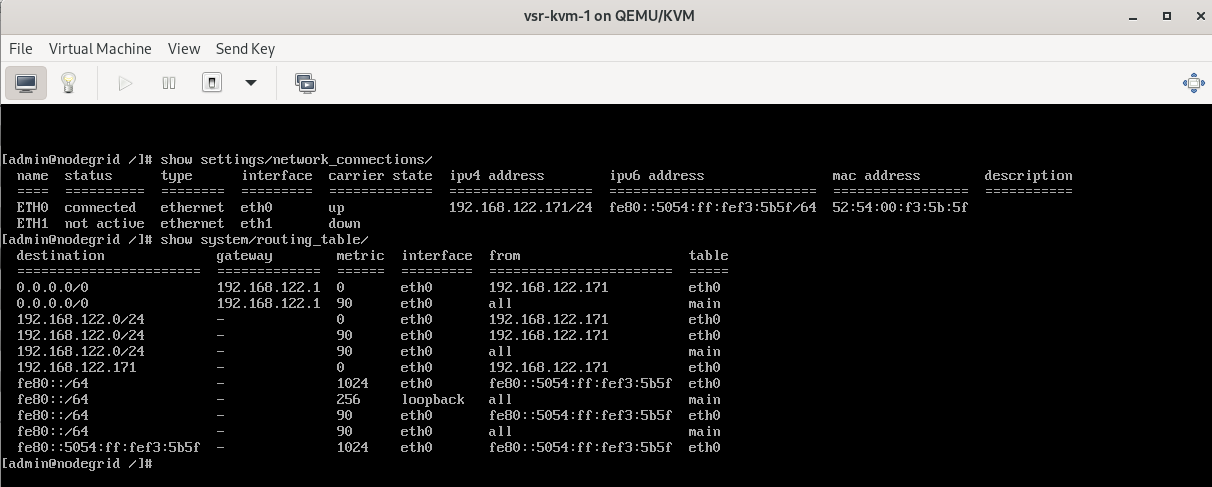
The IP address assigned to the Nodegrid Manager in this example is 192.168.122.171.
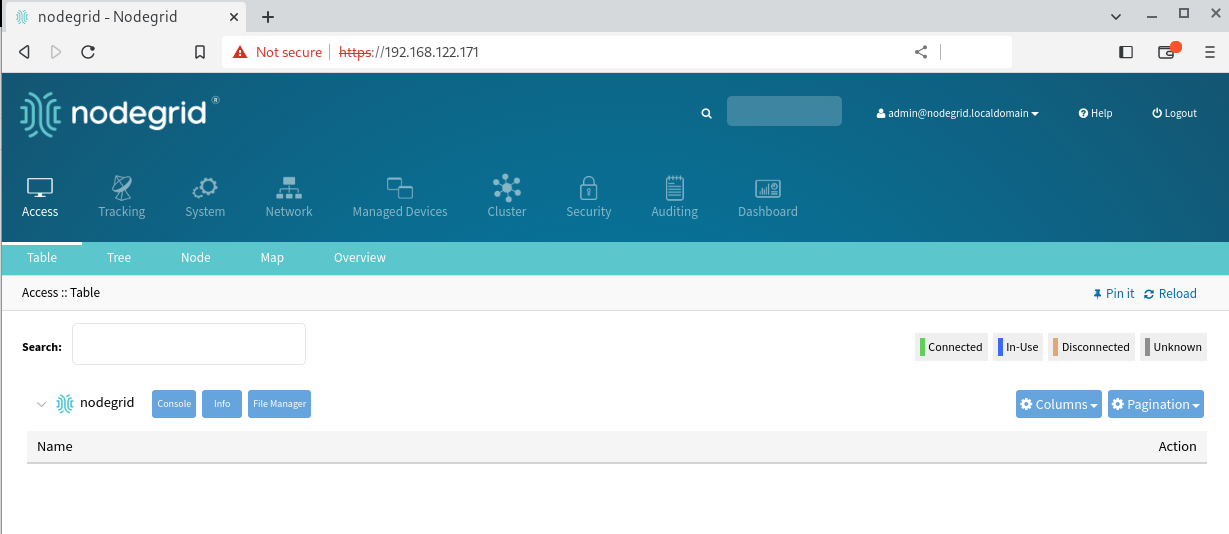
Web Access to the Nodegrid Manager
To access the Nodegrid Manager WebUI.
Open the link https://private-IP in a browser, e.g., https://192.168.122.171
Log in to the with default credentials:
user: admin
password: admin
Follow the steps to change the password
Congratulations! You have successfully deployed a Nodegrid Manager
Enroll Nodegrid Manager to ZPE Cloud
A Nodegrid Manager can be managed from ZPE Cloud. For this is it must be enrolled to the customer's ZPE Cloud instance.
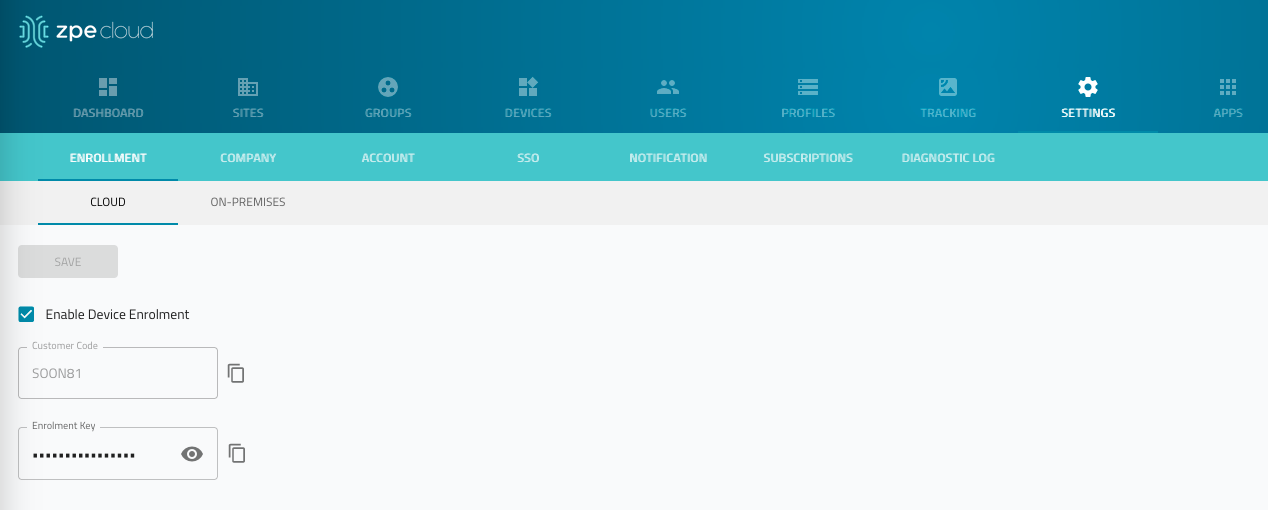
Go to SETTINGS :: ENROLLMENT :: CLOUD.
Copy the Customer Code and Enrollment Key (required to claim the vSR).
In a browser, login to Nodegrid Manager with https://IP-ADDRESS.
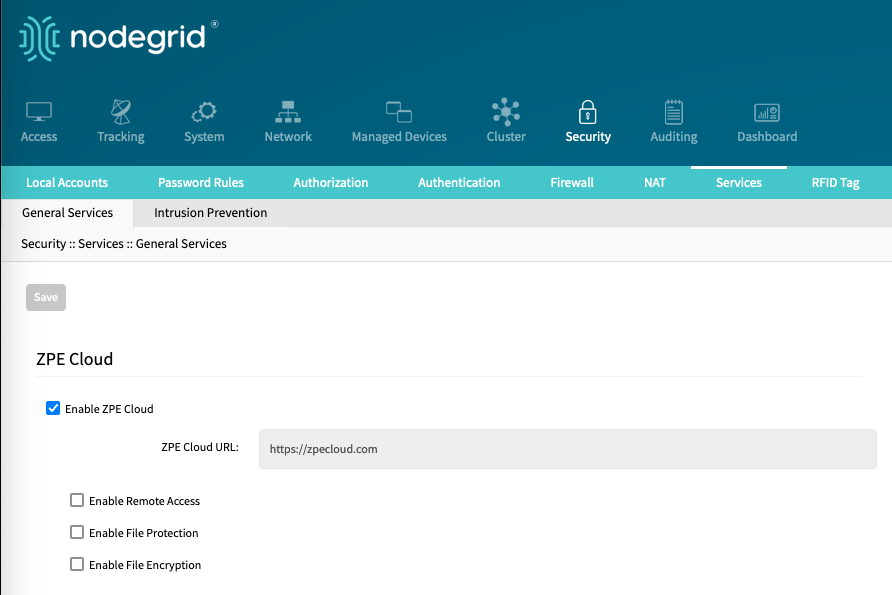
Go to Security :: Services and enable ZPE Cloud service.
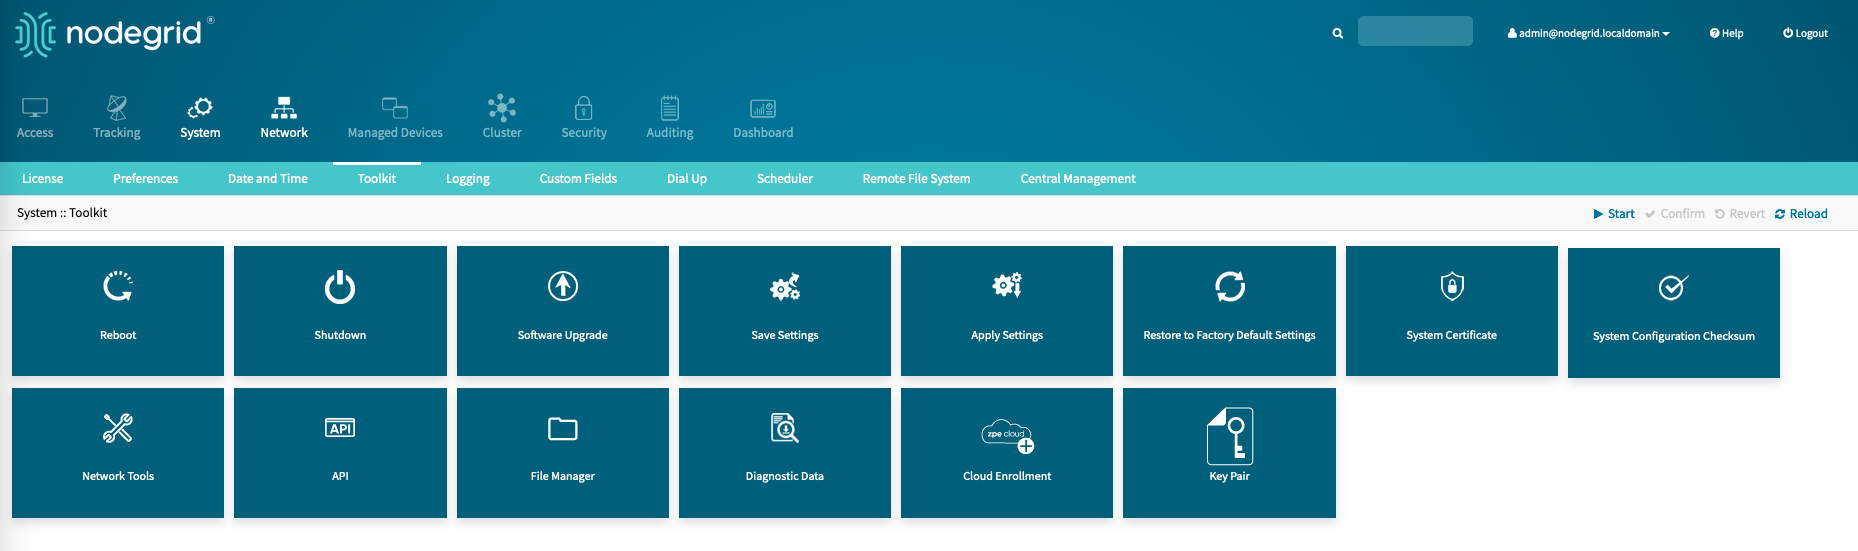
Go to System :: Toolkit :: Cloud Enrollment.
Enter the following:
a. URL: URL of the zpecloud instance, default https://zpecloud.com
b. Customer Code: Enter the copied Customer Code from the Cloud Instance.
c. Enrollment Key: Enter the copied Enrollment Key.
Click ENROLL.
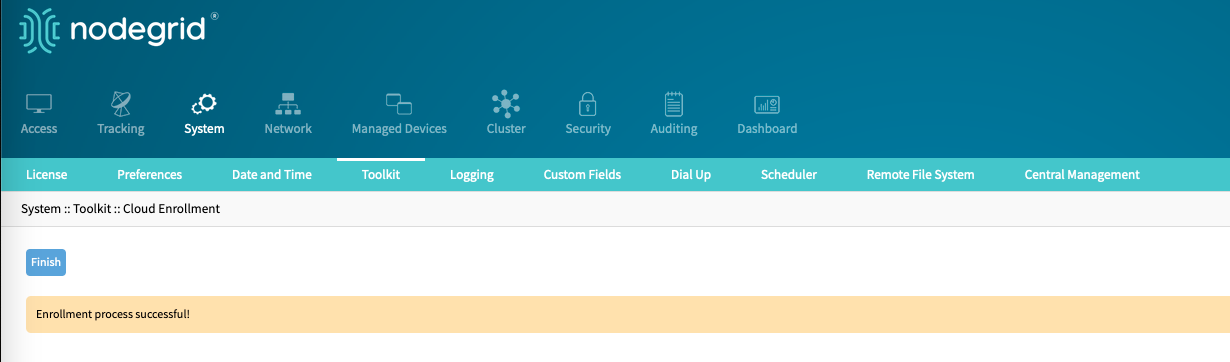
The unit is enrolled on ZPE Cloud and is available in ZPE Cloud under DEVICES :: AVAILABLE.
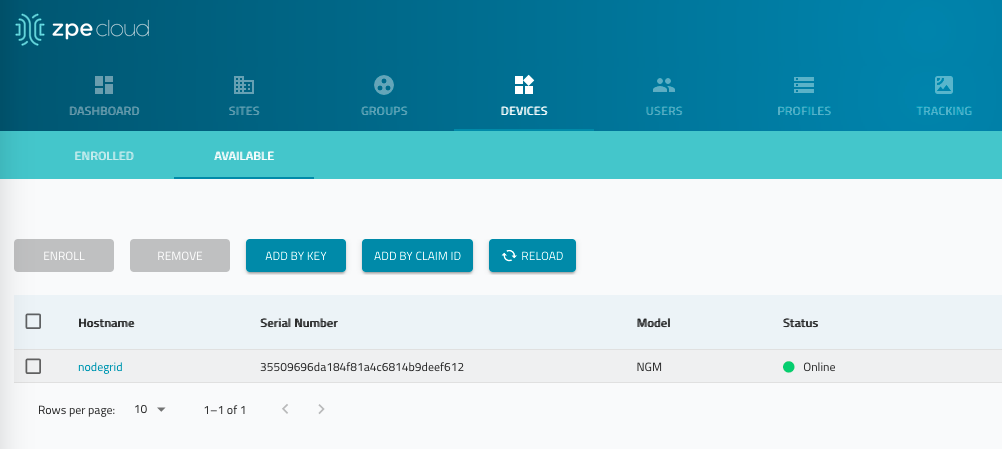
To manage the vSR, select and click ENROLL.
When enrolled, the vSR is managed on ZPE Cloud, the same as any other Nodegrid device.