Requirements
VMWorkstation 14 or later
Nodegrid OS image version 5.8.2 or higher (recommended)
Preparation
Nodegrid Manager ISO image
The following steps describe how to obtain a Nodegrid Manager ISO file:
Access with your credentials to https://zpecloud.com or https://zpecloud.eu depending upon the region.
Go to PROFILES :: SOFTWARE.
Select a VSR Nodegrid version, e.g., Nodegrid_Platform_v5.8.2_20230114
Download the ISO file
NOTE: The iso file can also be obtained through the support portal.
Create a Nodegrid Manager instance
Create a Nodegrid Manager VM
Open the VMware Workstation application.
In the File drop-down menu, click New virtual machine. This starts the VM wizard.
On the dialog: Select Custom (advanced). Click Next.
On Hardware compatibility page: Select Workstation 14.x (or later release). Click Next.
On the dialog: Select Install disc image file (iso). Locate and select the Nodegrid image iso file. Click Next.
On the dialog Guest operating systems, select Linux.
On Version, select Other linux 4.x kernel 64-bit. Click Next.
Enter Virtual machine name. Select the Location. Click Next.
For Number of Processes, enter 2. Click Next.
For Memory for this virtual machine, select 4096Mb. Click Next.
Select Use network address translation (NAT) checkbox. Click Next.
For I/O Controller Types, select LSI Logic. Click Next.
For Virtual Disk Type, select SCSI. Click Next.
Select Create a new virtual disk checkbox. Click Next.
For Maximum Disk size, select 32Gb. Click Next.
(no changes), click Next.
Click Finish.
On Library view, locate the created VM. Select the VM. Right click and select Settings.
On Options tab, Advanced menu, for Firmware Type, select UEFI.
On Access control menu, click Encrypt.
Enter a Password.
Click Encrypt.
On Hardware tab: Click Add.
Select Trusted Platform Module checkbox. Click Finish. Click OK.
Start the VM.
Installation of Nodegrid Manager
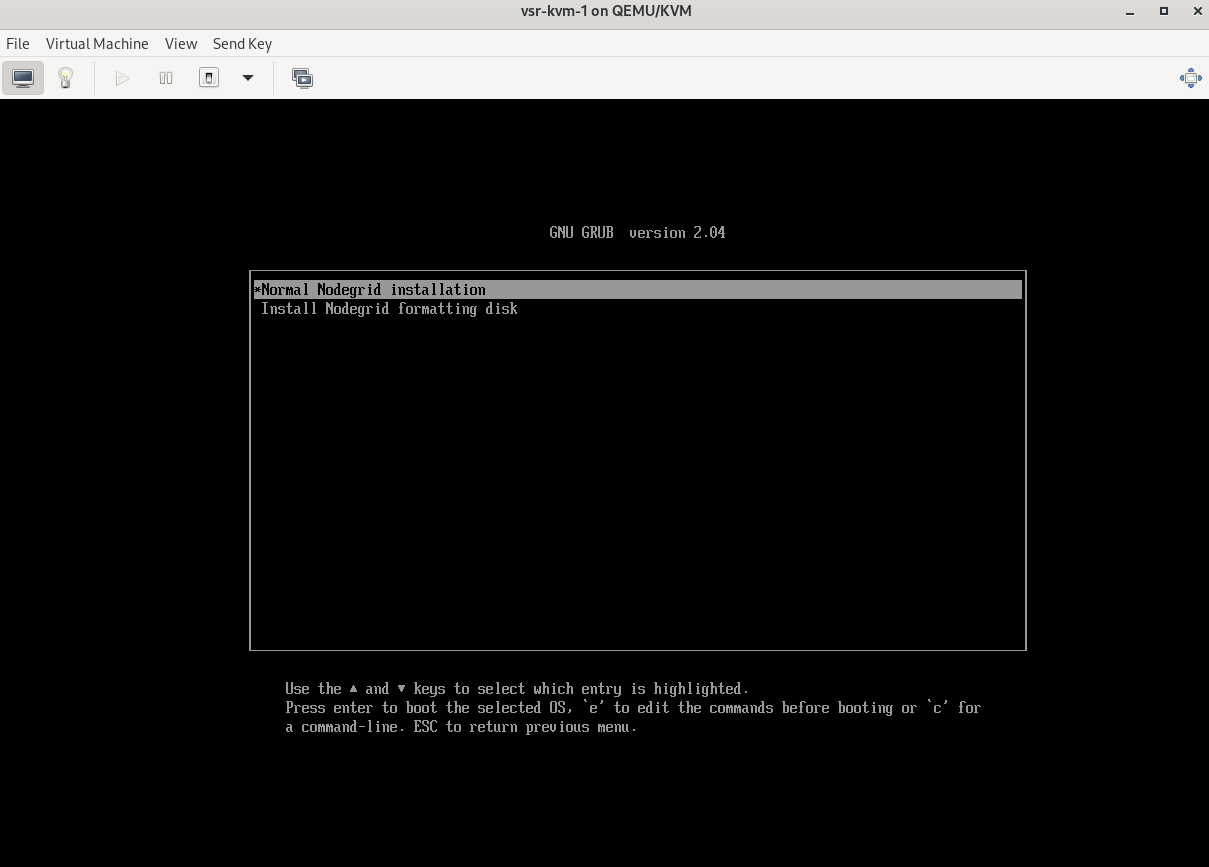
Select Begin Installation. The VM installation process starts.
Select Normal Nodegrid installation.
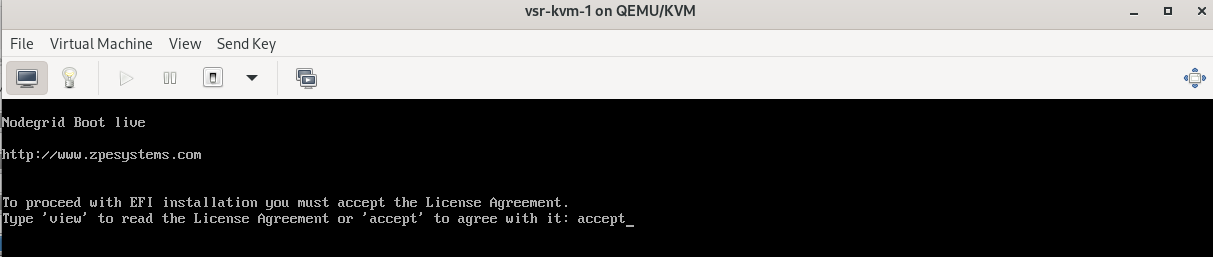
To accept the License Agreement, enter accept.
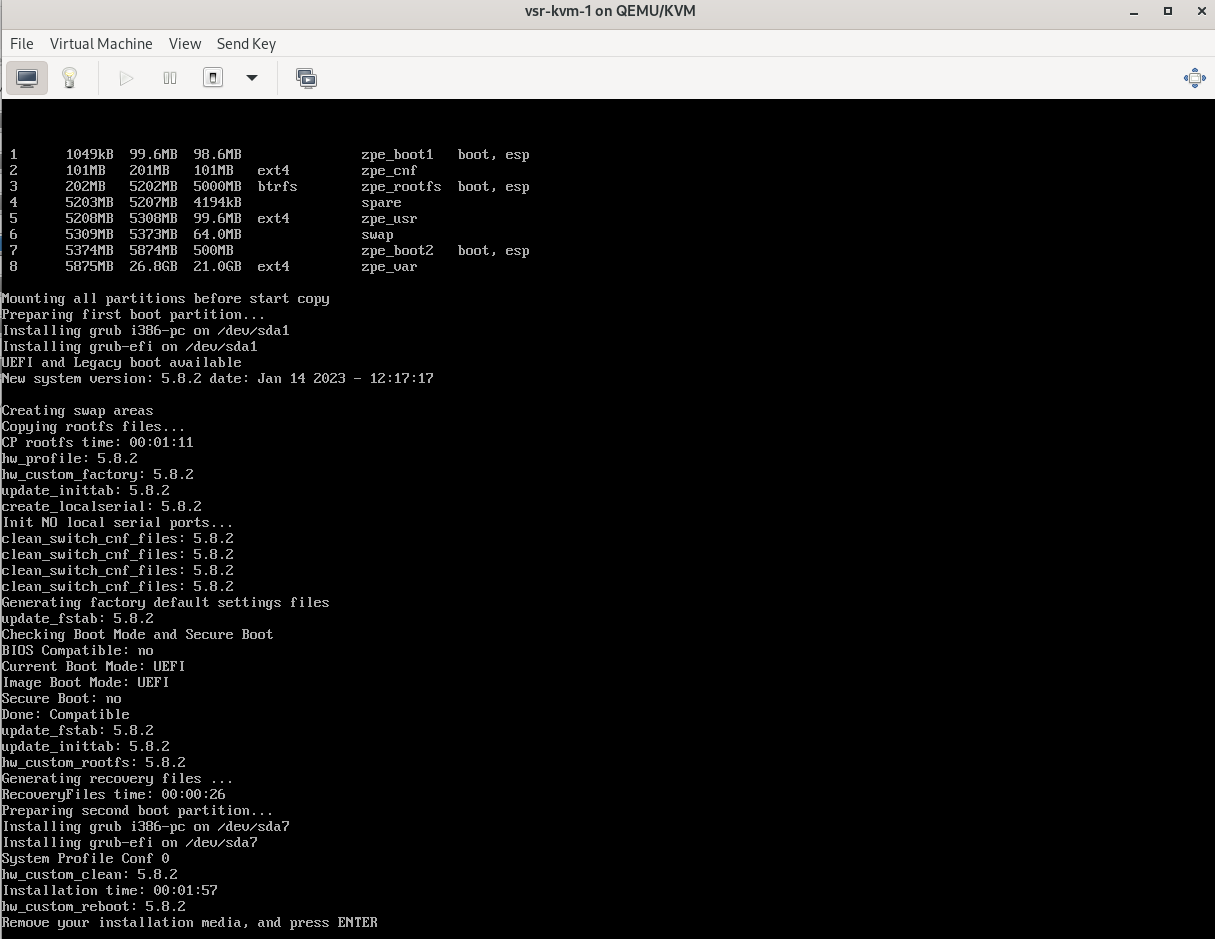
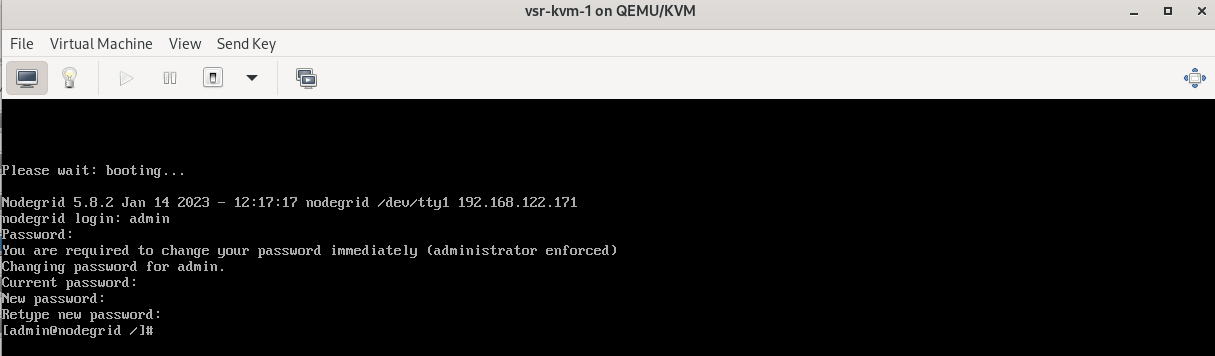
The Nodegrid Manager installation process begins. When finished, reboot the VM
After the VM reboots, access the Nodegrid Manager terminal with the following credentials:
user: admin
password: admin
Follow the process to change the admin password
On the CLI, execute:
show settings/network_connections/
show system/routing_table
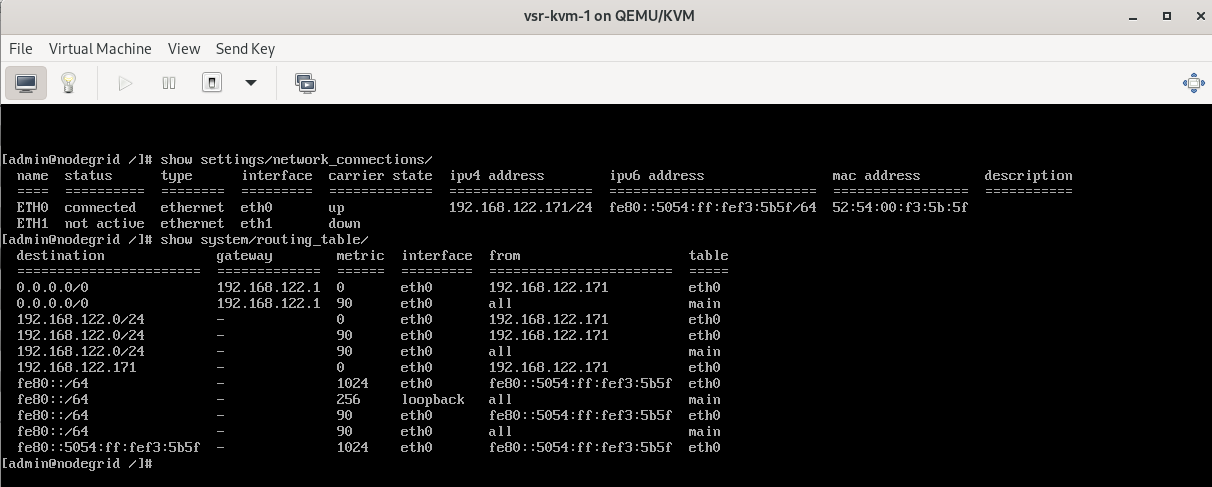
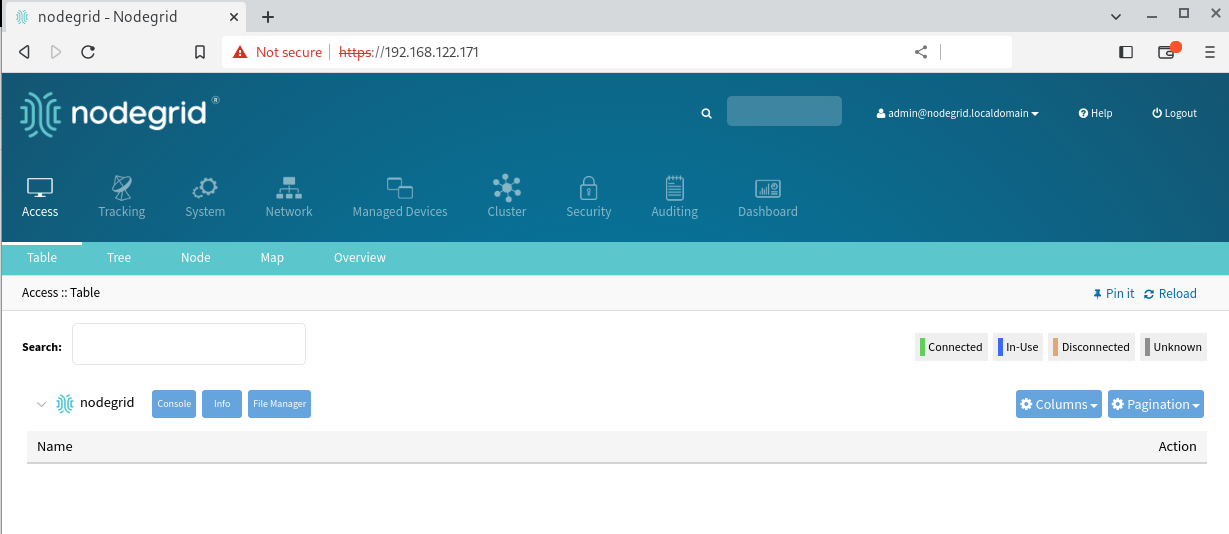
In this example, the IP address assigned to the Nodegrid Manager is 192.168.122.171.
Web Access to the Nodegrid Manager
Open the link https://private-IP in a browser, e.g., https://192.168.122.171
Log in to the Nodegrid Manager WebUI. Default credentials:
user: admin
password: admin
Follow the steps to change the password.
Congratulations! You have successfully deployed a Nodegrid Manager.