Set your desired port to Enable/Disable and configure the port settings. For configuration, navigate to Managed Devices:: Devices. Depending on the type of expansion cards configured, you can enable/disable the connections.
If you have added a serial console expansion module, you can enable the console or webUI access to the devices as explained in the Configure Device Management section.
Configure Device Management
This section provides the following examples for enabling console and rack PDU connections. It configures management connections to SSH and WebUI-based devices via the device_console device type and Power Control options through the pdu_XXX device type.
- RS-232/USB
- Rack PDU Connections
Example 1: Console Connection (RS-232/USB)
1. On the Nodegrid WebUI, go to Managed Devices::Devices.
2. Select the appropriate serial port (ttyS1 for port 1) and click Rename
3. Enter a new port name (for example, Fortinet-Console) and click Save.
4. On the table, click the renamed port ttyS1 (Fortinet-Console) (opens dialog).
5. Configure the port settings:
| Setting | Value | Description |
|---|---|---|
| Baud Rate | Auto | Select the baud rate as Auto so that the managed device port can establish optimal communication with the Nodegrid device. Selecting an Auto baud rate removes the necessity of manually configuring the baud rate for individual devices. |
| Mode | Enabled | Select the Enabled mode to redirect the URL to a web server and offer the same behavior as the HTML5 frame. This option enables users to view the managed device Web interface in full-screen mode instead of a windowed frame. |
| Icon | Icon | Select a device icon. |
.png)
- Click Save
WebUI or SSH-based Connections
- Go to Managed Devices :: Devices.

- Click Add (displays dialog).
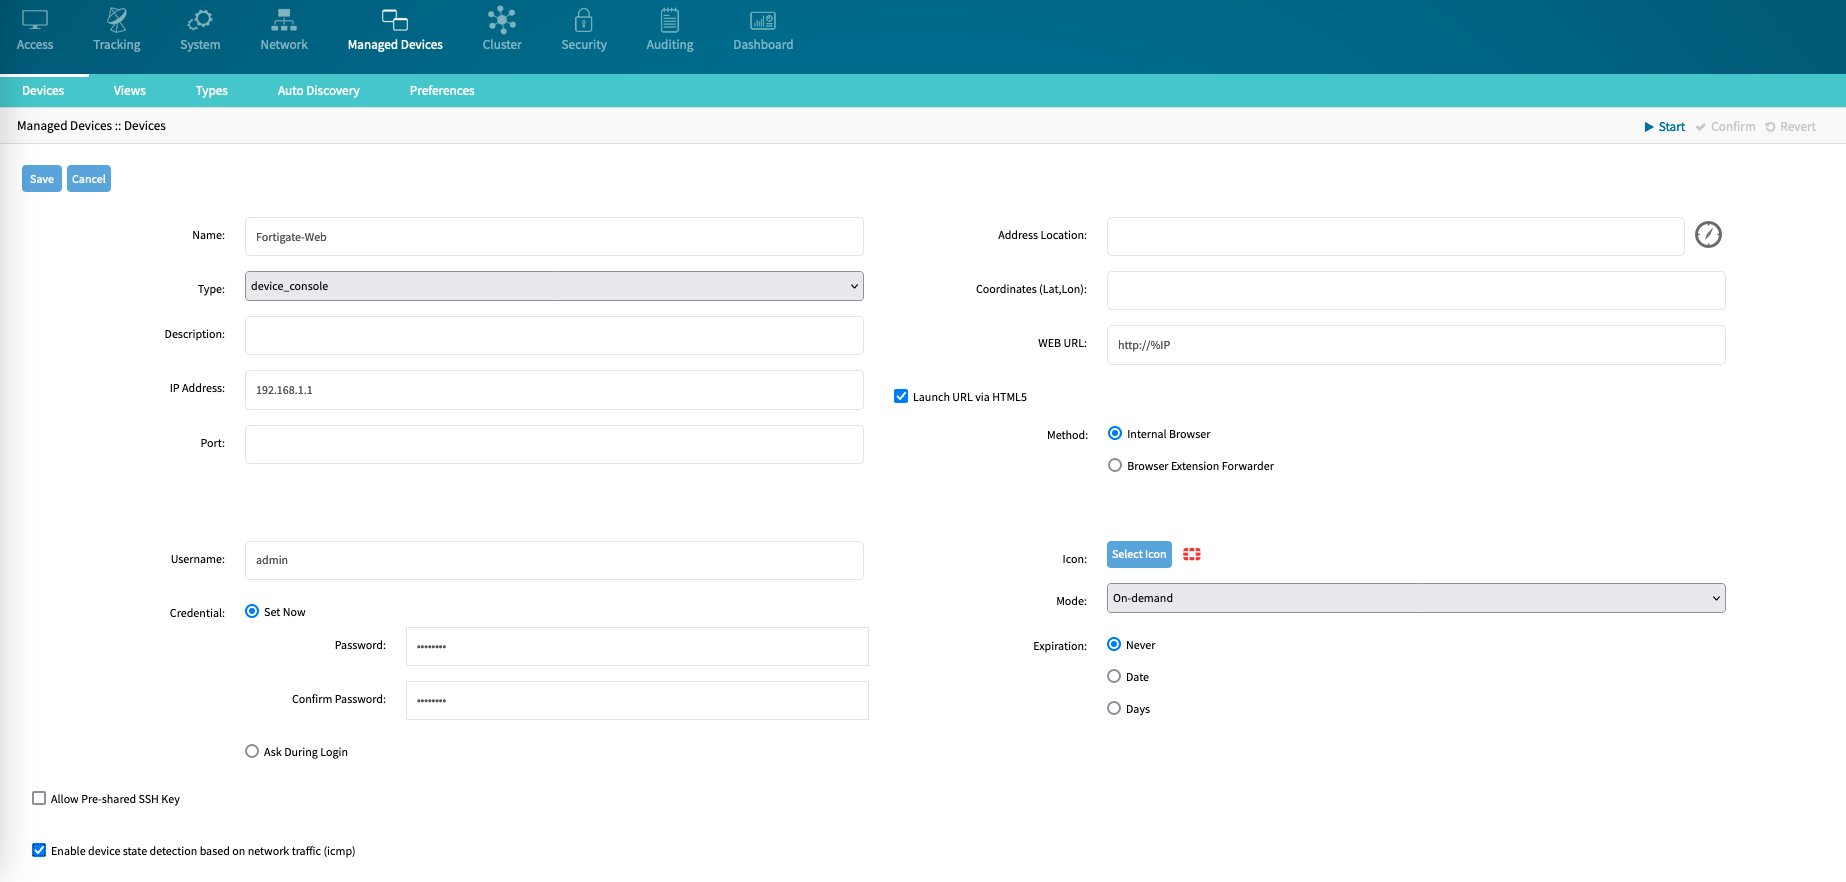
- Configure the new managed device with these settings:
| Setting | Value | Description |
|---|---|---|
| Name | Fortigate-Web | A valid device name. |
| Type | device_console | Select from the drop-down list (default device_console). Provides SSH and Web access. |
| IP Address | IP-ADDRESS | IP address of the management interface. |
| username | username | Username for the SSH connection. |
| password | password | Password for the SSH connection (optional). |
| Mode | On-Demand | This performs no active device state checks. |
| Enable device state detection based on network traffic (icmp) | Enabled | Enables device state checks via ICMP. |
| Icon | Icon | Select a device icon. |

- Click Save
Example 2: Rack PDU Connections
- Go to Managed Devices :: Devices.

- Click Add (displays dialog).
- Configure the new managed device with these settings:
| Setting | Value | Description |
|---|---|---|
| Name | Raritan_PDU | Provide a valid device name. |
| Type | pdu_raritan | Select a valid PDU type from the list. (provides SSH, Web access and Outlet control via SNMP). |
| IP Address | IP-ADDRESS | The IP address of the management interface. |
| username | username | Username for the SSH connection. |
| password | password | Password for the SSH connection (optional). |
| Mode | On-Demand | On-demand mode performs no active device state checks. |
| Enable device state detection based on network traffic (icmp) | Enabled | Enables device state checks via ICMP. |
| Icon | Icon | Select a device icon. |
.png)
- Click Save.
- On the table, click the created device Raritan_PDU.
- On the Management tab, configure the following settings:
| Setting | Value | Description |
|---|---|---|
| Protocol: SNMP | Enabled | Enables SNMP protocol. |
| SNMP Version | 2c | Select the correct SNMP version (1/2c/3). |
| Community | private | Provides SNMP community with read/write access to the device. |

- Click Save.
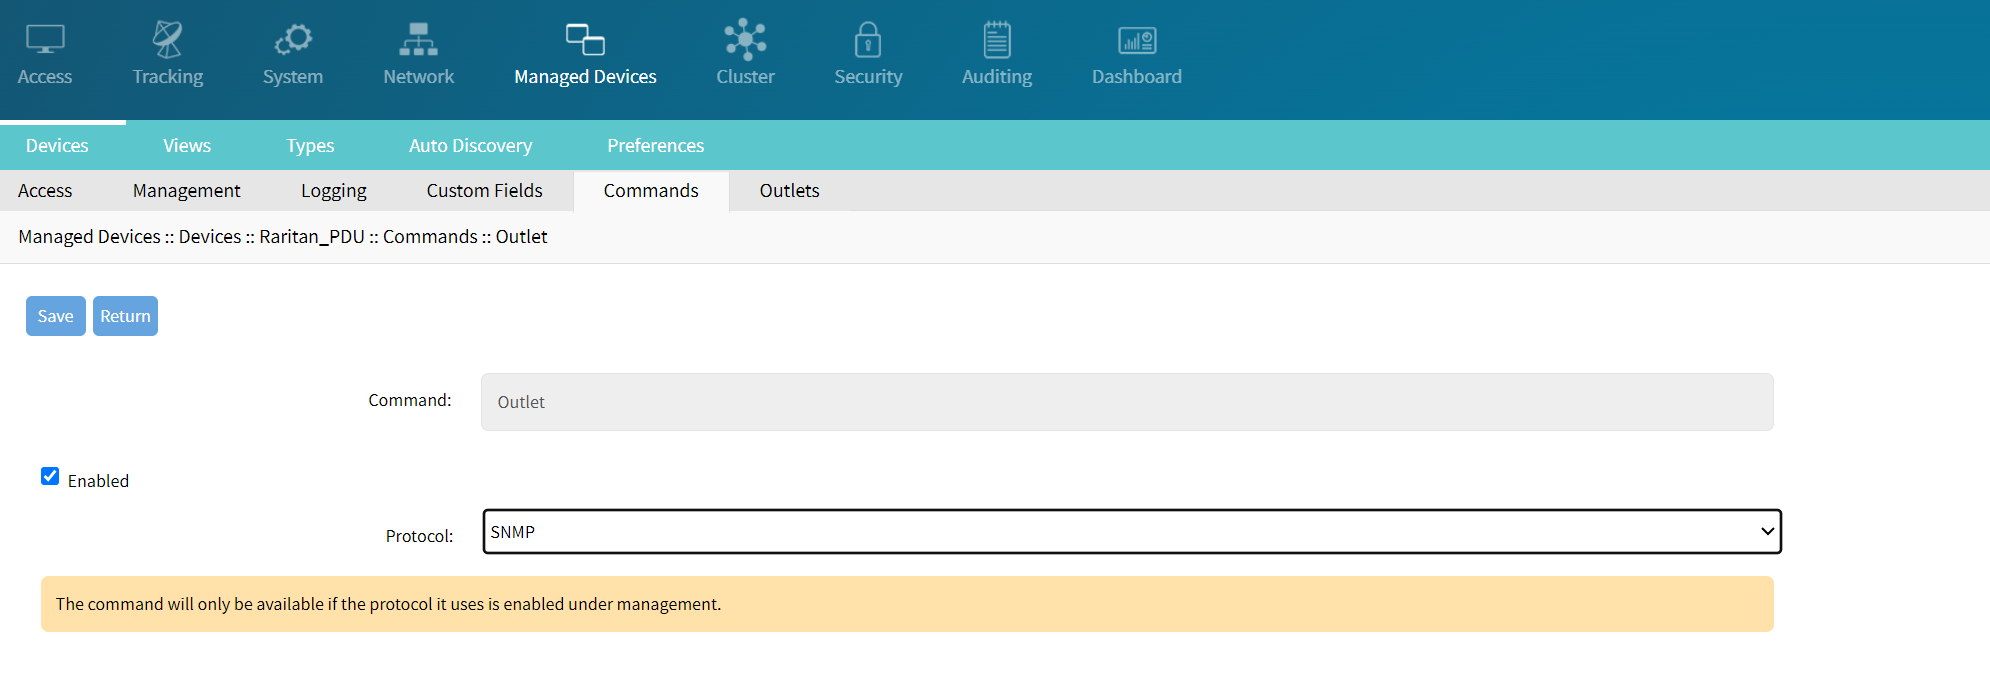
- On the Commands tab, click on Outlet.
- On the Protocol drop-down, select SNMP.
