# Nodegrid vSR on Amazon Web Services AWS
This documentation details creating a Virtual Service Router VM instance on Amazon Web Services AWS. The objective is to create a Nodegrid vSR instance that acts as a concentrator/hub to interconnect with other Nodegrid (e.g., Hive SR, Bold SR, or Mini SR).
The following diagram, Diagram-1, shows the expected result:
This is the process:
Licensing and Instance requirements
AWS Credentials
Nodegrid vSR AMI image
Create a Nodegrid vSR instance
Web Access to the Nodegrid vSR
1. Licensing
The Nodegrid vSR product has five hardware license tiers. vSR VM can run for 30 days with no restraints, but after 30 days without a license, the software restrict vSR use.
Tier | CPU | RAM | Equivalent |
|---|---|---|---|
1 | 2vCPU | 4GiB | AWS c5.large |
2 | 4vCPU | 8GiB | AWS c5.xlarge |
3 | 4vCPU | 16GiB | AWS m5.xlarge |
4 | 8vCPU | 32GiB | AWS m5.2xlarge |
5 | 16vCPU | 64GiB | AWS m5.4xlarge |
2. AWS Credentials
The following is assumed:
AWS Region and Zone selected to deploy the instance
3. Nodegrid vSR AMI image
Request access to VSR AMI image
The Nodegrid vSR AMI is distributed by ZPE Systems (currently, not publicly available in the AWS Marketplace AMIs/ Community AMIs). To request the AMI, contact support@zpesystems.com. Support will require the customer AWS account ID and will then share the current AMI image with the customer.
The AMI image is by default shared to us-east-2
To verify the AMI availability:
Access https://console.aws.amazon.com/ and select Region and Zone
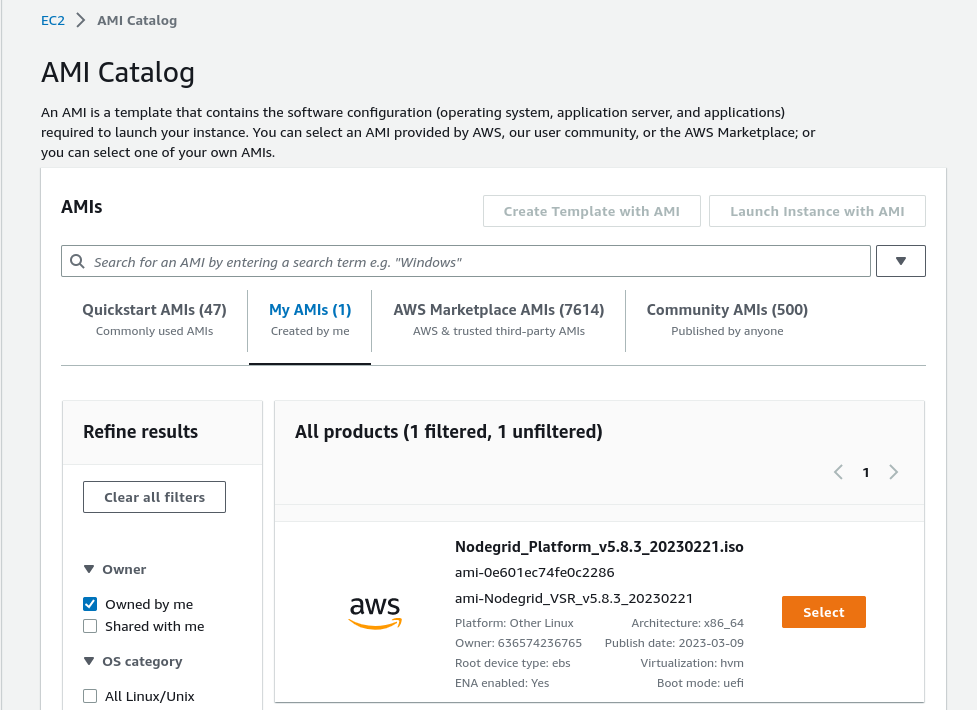
Select Images > AMI Catalog > My AMIs
Verify the image, e.g., Nodegrid_Platform_v5.8.3_20230221.iso
4. Create a Nodegrid vSR instance
This is the simplified procedure to deploy an EC2 instance in AWS (some resources shown in the Diagram-1 are automatically created with pre-defined AWS default configurations.
Access https://console.aws.amazon.com/ and select the preferred Region and Zone
Select Images > AMI Catalog > My AMIs
Select the Nodegrid vSR image, e.g., Nodegrid_Platform_v5.8.3_20230221.iso
Select Launch Instance with AMI
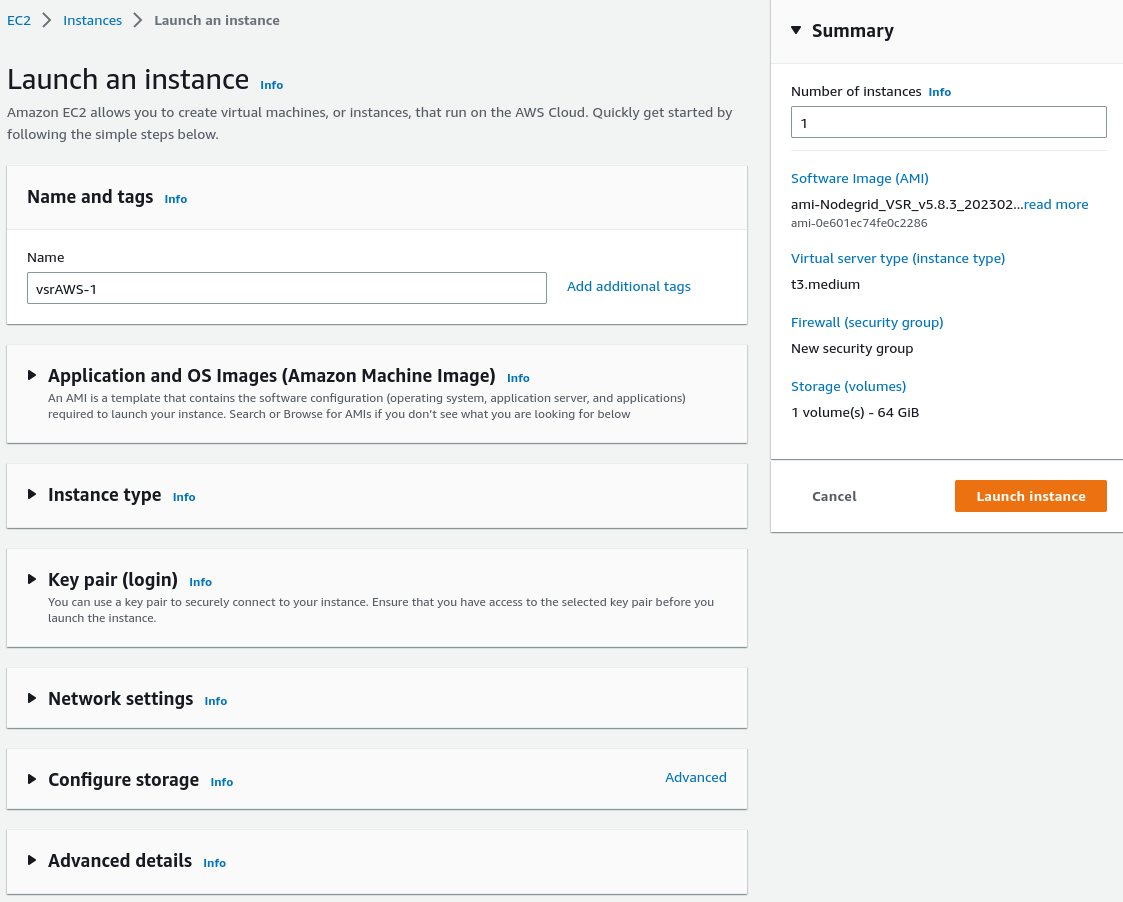
Enter Instance Name, e.g., vsrAWS-1
Select Instance type, e.g., t3.medium
Create or select a Key pair
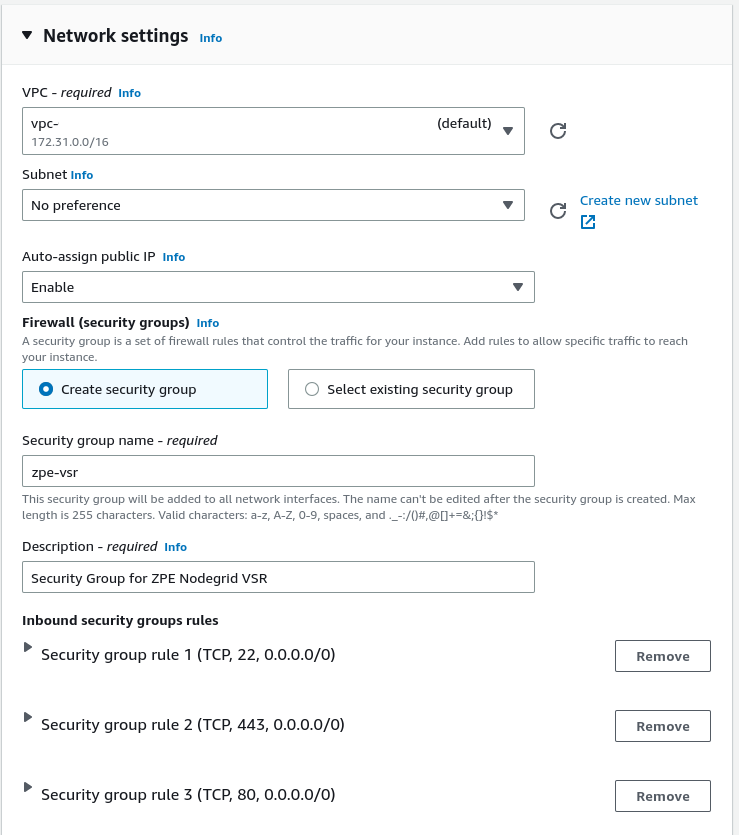
On Network settings
Select Create security group
Select Allow SSH traffic from Anywhere (adapt this rule as needed)
Select Allow HTTPS traffic from the internet
Select Allow HTTP traffic from the internet
Go to Network settings > Edit
Create a new default VPC, then refresh the drop-down list and select it
On Auto-assign public IP, select Enable
On Create security group: enter Name and Description, e.g., zpe-vsr and Security Group for Nodegrid vSR
Configure storage
Define disk size, e.g., 64 GiB, and select gp2
Select Launch Instance
Launch an instance Success

Click View all instances: on the list, select the created instance and look for the assigned public IP
5. Web Access to the Nodegrid vSR
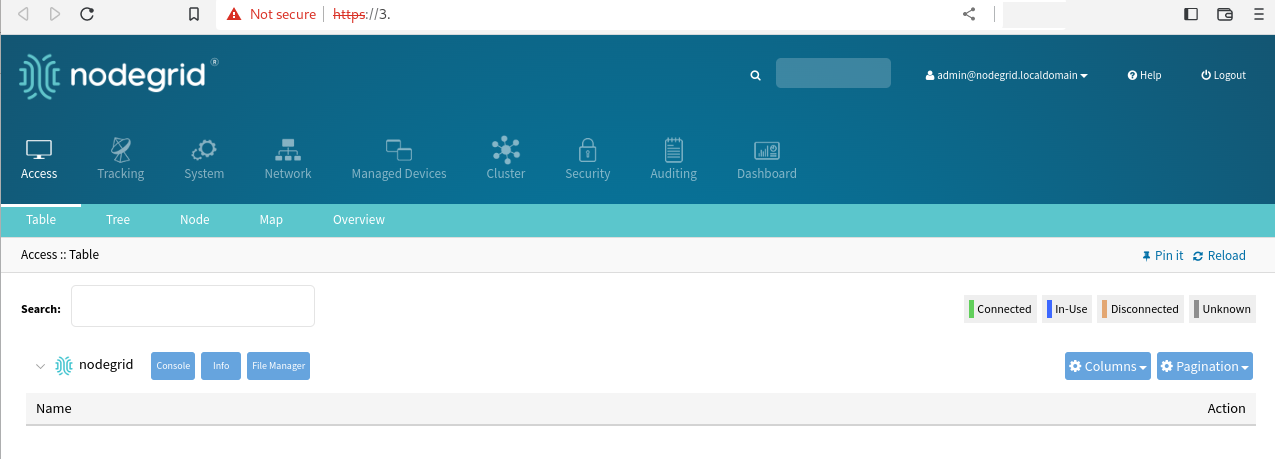
In a browser, open https://Public-AWS-IP
Log in to the Nodegrid vSR WebUI. Default credentials are:
user: admin
password: admin
Follow the steps to change the password
Congratulations! You have successfully deployed a Nodegrid vSR instance.
6. Enroll vSR to ZPE Cloud
A Nodegrid vSR is managed on ZPE Cloud. The new deployed unit must be enrolled to the customer's ZPE Cloud instance.
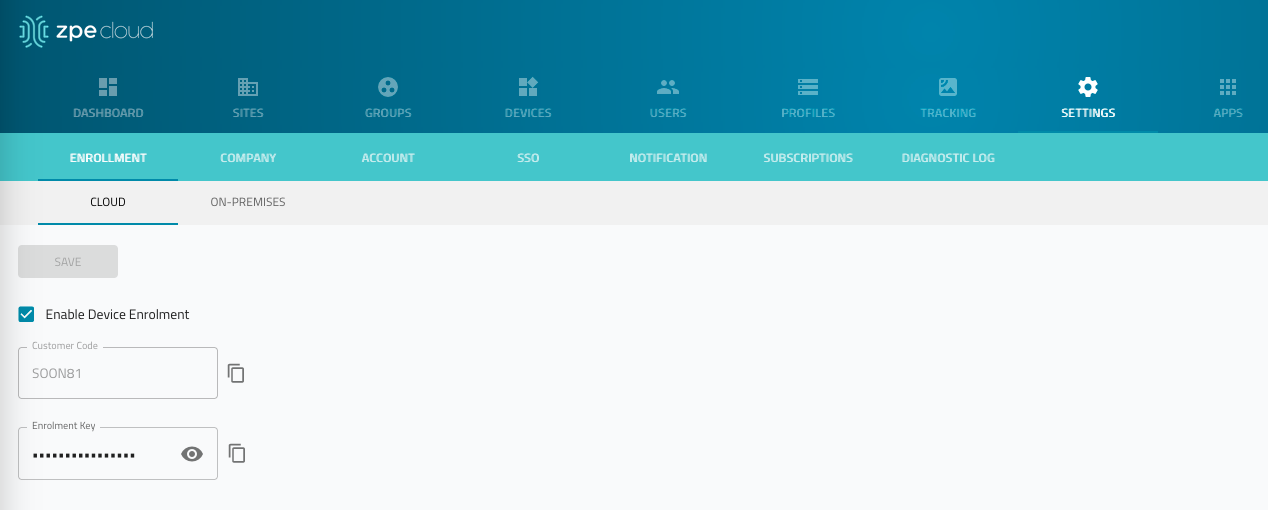
Go to SETTINGS :: ENROLLMENT :: CLOUD
Copy the Customer Code and Enrollment Key (required to claim the vSR).
In a browser, login to vSR with https://Public-AWS-IP.
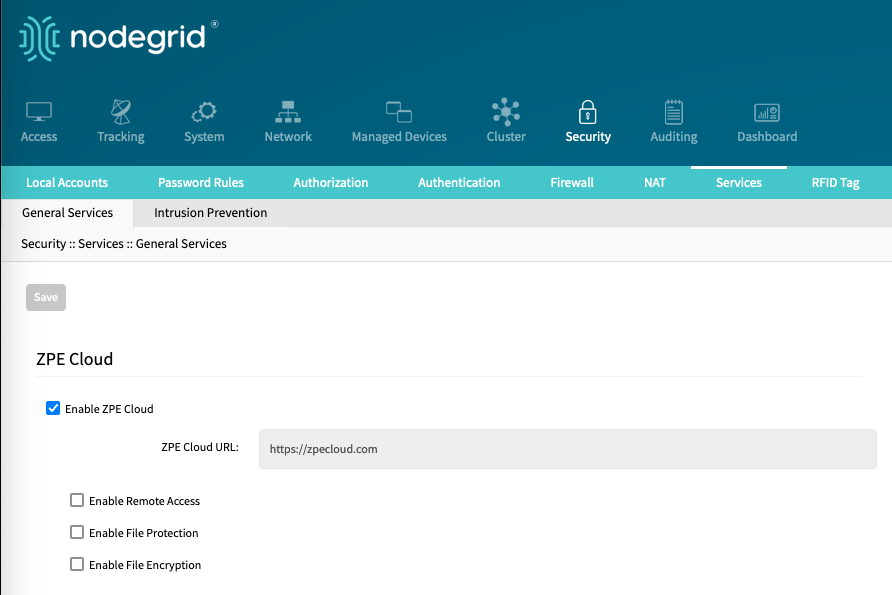
Go to Security :: Services and enable ZPE Cloud service
Go to System :: Toolkit :: Cloud Enrollment
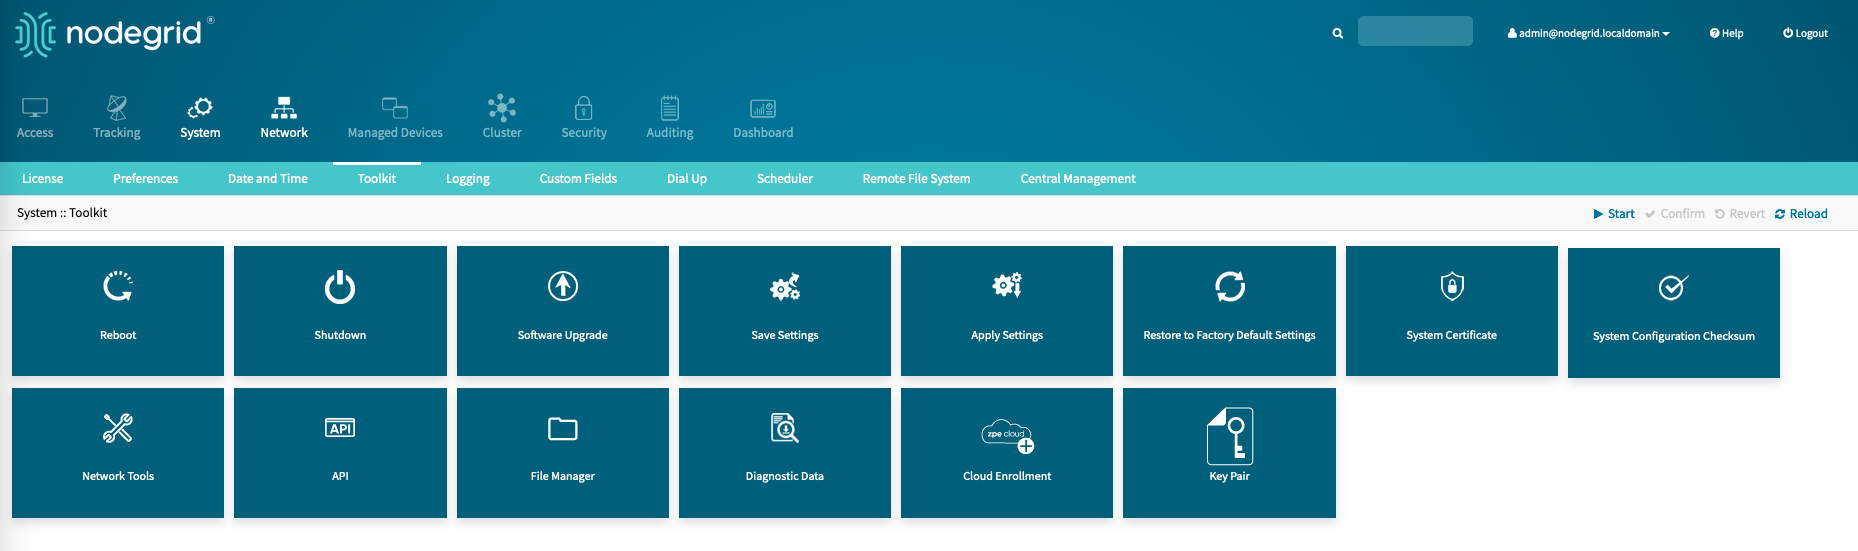
Enter the following information
URL: URL of the zpecloud instance, default https://zpecloud.com
Customer Code: Use the copied Customer Code from the Cloud Instance
Enrollment Key: Use the copied Enrollment Key
Click ENROLL
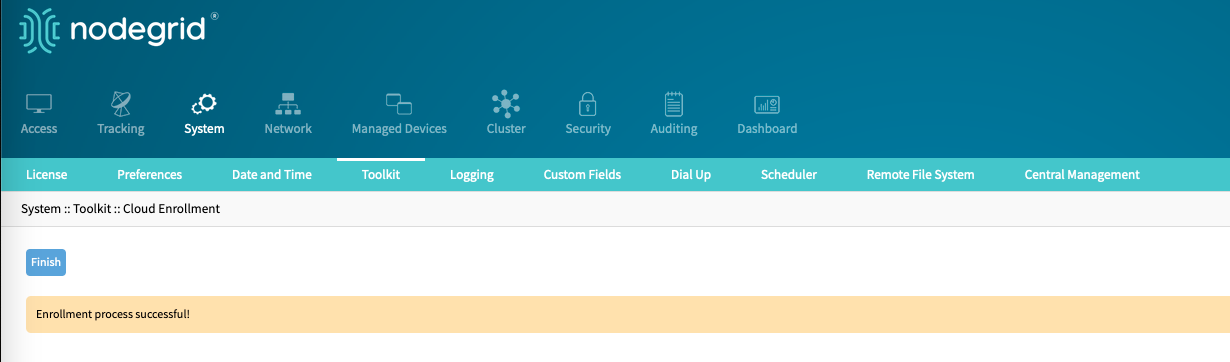
The unit is enrolled on ZPE Cloud and become available in ZPE Cloud under DEVICES :: AVAILABLE.
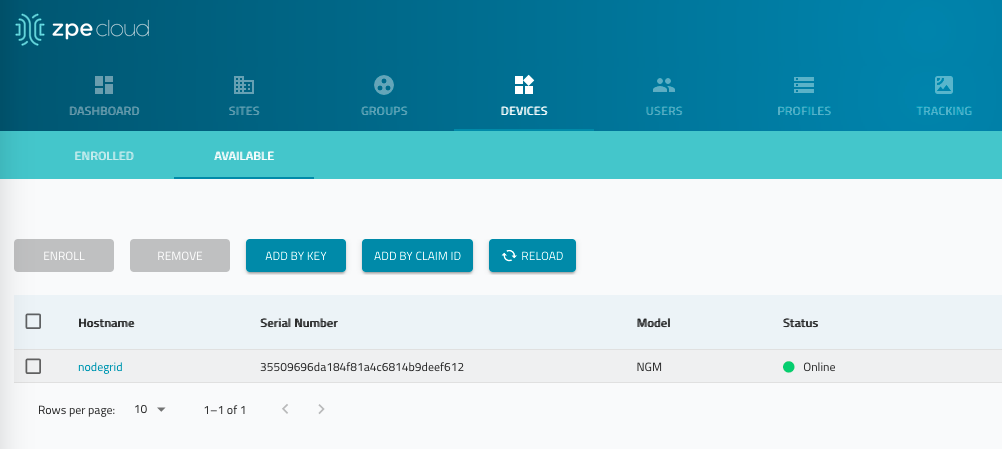
To start management of the vSR, select and click on ENROLL.
When enrolled, the vSR is managed on ZPE Cloud like any other Nodegrid device.
7. VSR Firmware Update
The created VSR instance can be updated using all officially supported methods, similar to all other appliance, including ZPE Cloud and firmware updated via the WebUI or CLI.
The AMI image is required only for the initial deployment.