# Nodegrid VSR on Google GCP
This documentation details creation of a Virtual Service Router VM instance on Google Cloud Platform GCP. The objective is to create a ZPE vSR instance that can act as a concentrator/hub to interconnect with other ZPE Systems Nodegrid appliances (e.g., Hive SR, Bold SR, or Mini SR).
The following diagram, Diagram-1, shows the expected result:

This guide structure is as follows:
- Licensing and Instance requirements
- GCP Credentials
- Nodegrid vSR AMI image
- Create a Nodegrid vSR instance
- Web Access to the Nodegrid vSR
1. Licensing
The Nodegrid vSR product has five hardware license tiers for different use cases. The vSR VM can run for 30 days with no restraints, but after 30 days uploadedwithout a license, the software restricts the software restricts use after 30 days without a license use.
| Tier | CPU | RAM | Equivalent |
|---|---|---|---|
| 1 | 2vCPU | 4GiB | GCP e2.median |
| 2 | 4vCPU | 8GiB | GCP Custom |
| 3 | 4vCPU | 16GiB | GCP e2-standard-4 |
| 4 | 8vCPU | 32GiB | GCP e2-standard-8 |
| 5 | 16vCPU | 64GiB | GCP e2-standard-16 |
2.GCP Credentials
This guide assumes the following:
- GCP user with privileges to create the following resources in a GCP Project:
- GCP Region and Zone selected to deploy the instance
3. Nodegrid vSR AMI image
The Nodegrid vSR AMI creation for GCP consists of two steps: 1) upload the vSR image file (e.g., Nodegrid_Platform_GCP_v5.8.2_20230114.tar.gz) into a GCP bucket, and 2) create the GCP AMI based on the uploadedThe default file. Below are the details.
The vSR .tar.gz image file for GCP is distributed by ZPE Systems directly. It is available to all customers via the support portal and is not publicly available in the GCP Public Images. Please contact support@zpesystems.com.
GCP Bucket
These steps are an example of how to configure a GCP Bucket. Adapt accordingly to your security requirements.
- Access to GCP Storage > Buckets
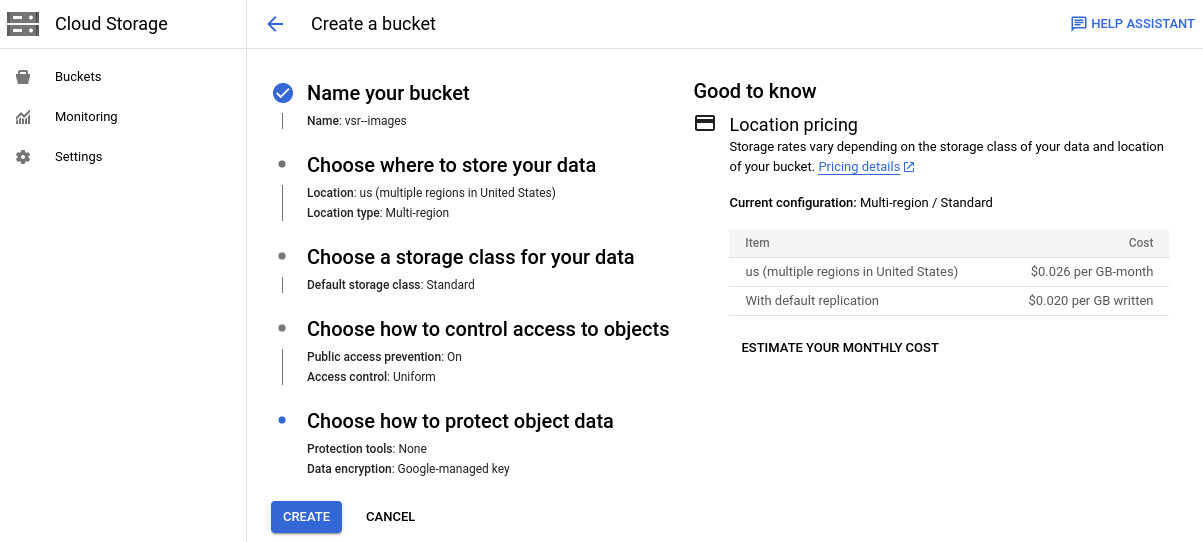
- Select Create and enter the required information:
- On Name your bucket: insert a unique, permanent name, e.g.,
vsr-images - For Choose where to store your data: consider Multi-region > us (multiple regions in United States)
- For Choose a storage class for your data: select Set a default class > Standard
- For Choose how to control access to objects: select both Enforce public access prevention on this bucket and Access control > Uniform
- For Choose how to protect object data: select None
- Click Create
Upload the Nodegrid vSR tar.gz image
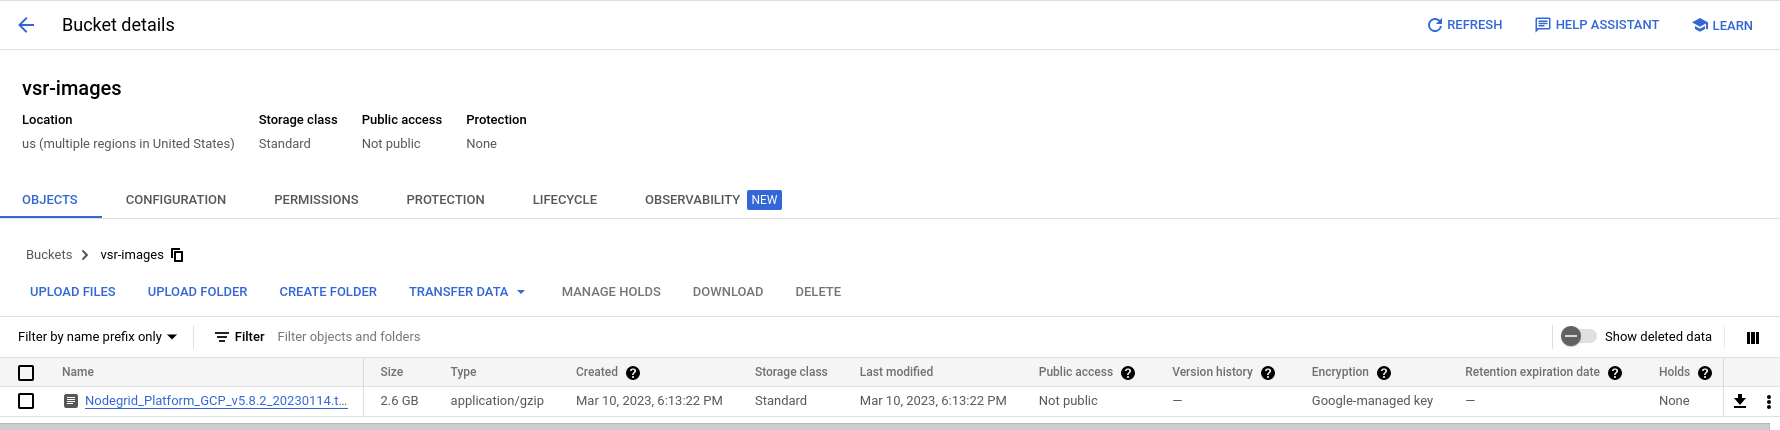
- Access to GCP Storage > Buckets
- Select a bucket, e.g.,
vsr-images - Click Upload Files
- Select the Nodegrid vSR
tar.gzimage file, e.g., Nodegrid_Platform_GCP_v5.8.2_20230114.tar.gz - Verify the image file successfully uploaded
Create a Nodegrid vSR Image for GCP
This creates the Nodegrid vSR AMI image based on the previously uploaded tarball file to the bucket.
This step is required to be executed gcloud cli. This document considers the Web Cloud Shell option!
Before executing the command on gcloud cli gcloud compute images create ..., the following information is required:
- AMI name: e.g., vsr-v5-8-2-20230114
- Project ID: global GCP project identification
- Storage Location: GCP region where the image is deployed, e.g., us-west1
- Source URI: google api endpoint for the image file, in the form:
https://storage.googleapis.com/<YOUR-BUCKET>/<NODEGRID_ISO>
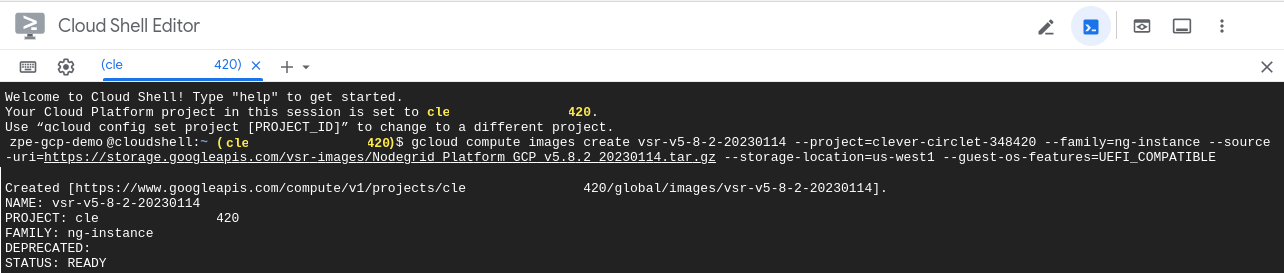
Execute the following command:
gcloud compute images create vsr-v5-8-2-20230114 \
  --project=clexxxxxxxxxxx420 \
  --family=ng-instance \
  --source-uri=https://storage.googleapis.com/vsr-images/Nodegrid_Platform_GCP_v5.8.2_20230114.tar.gz \
  --storage-location=us-west1 \
  --guest-os-features=UEFI_COMPATIBLE
To verify Image access, go to https://console.cloud.google.com/compute/images
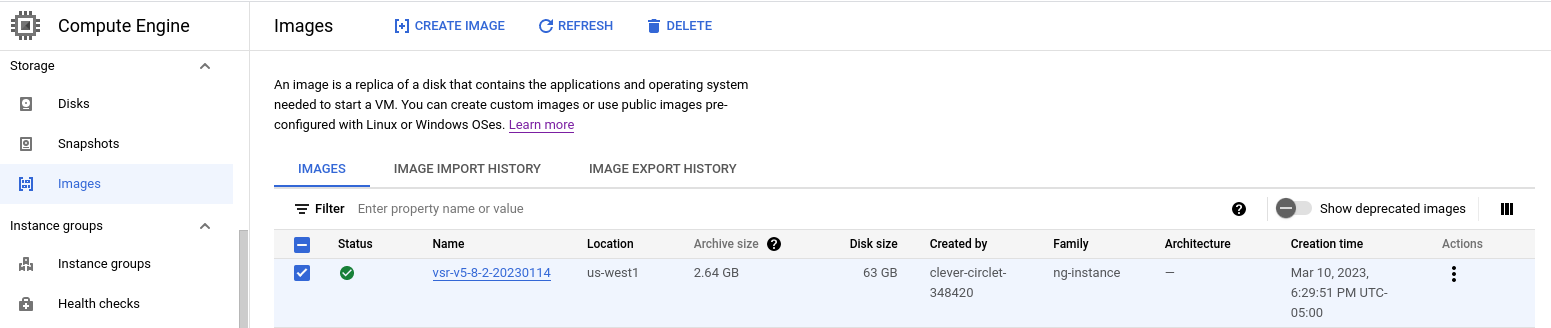
4. Create a Nodegrid vSR instance
The following steps are a simplified deployment of a VM instance in GCP. Some of the resources in Diagram-1 are automatically created with pre-established GCP default configurations.
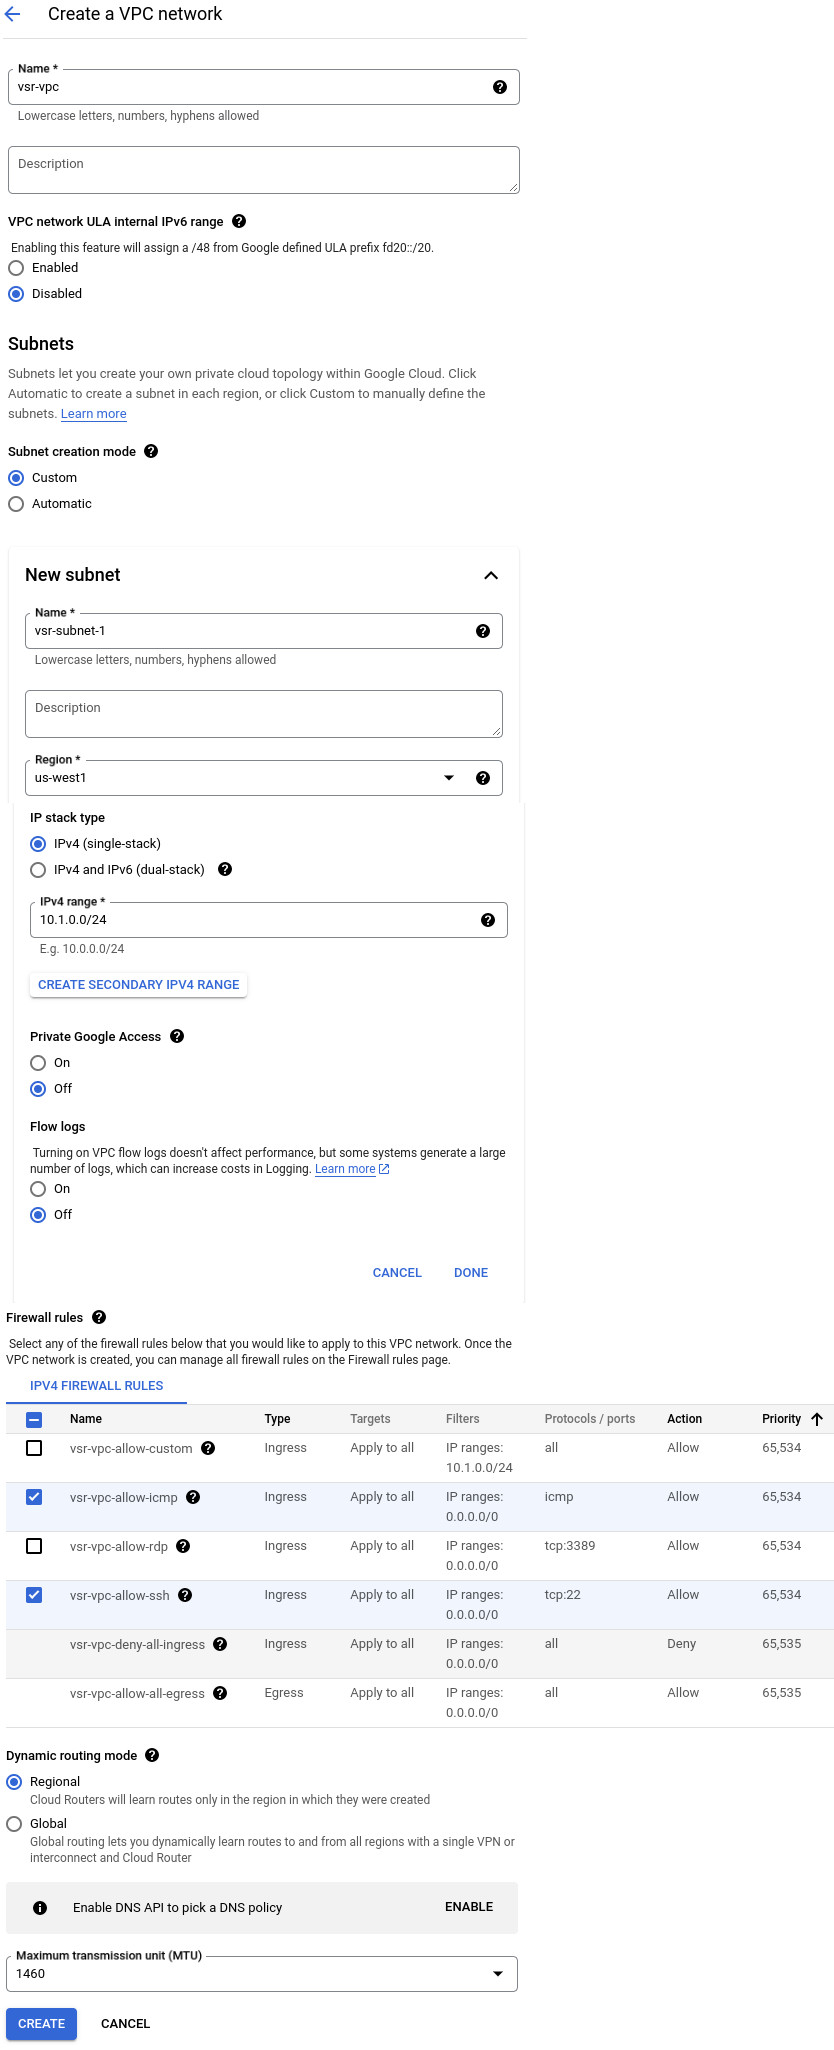
GCP VPC network
- Go to https://console.cloud.google.com/networking/
- Select VPC networks > Create VPC Network
- Enter the required information:
- Name: e.g., vsr-vpc
- Select Add subnet and enter a name, e.g., vsr-subnet-1
- Select subnet Region
- Enter IPv4 range: e.g., 10.1.0.0/24
- On Firewall rules: select the following:
- vsr-vpc-allow-icmp
- vsr-vpc-allow-ssh
- Click Create
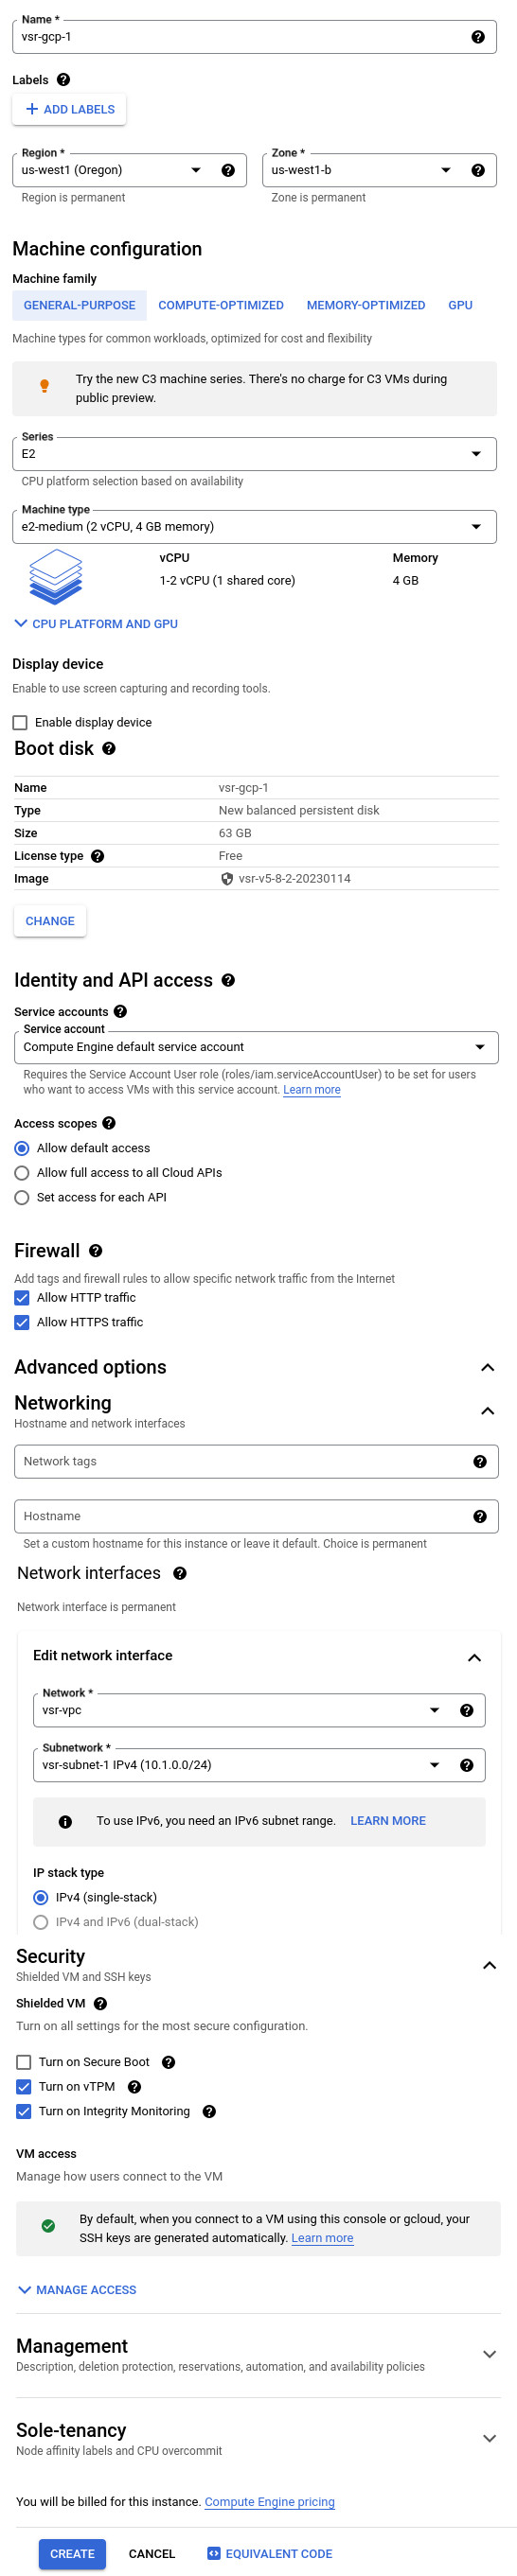
GCP Create VM
- Go to https://console.cloud.google.com/compute/images
- Find the Nodegrid vSR image, e.g., vsr-v5-8-2-20230114, and select Actions > Create instance
- Enter Instance Name, e.g., vsr-gcp-1
- Select Region and Zone, e.g., us-west1 (Oregon) and us-west1-b
- On Machine configuration: select a General-Purpose E2 medium machine type
- On Firewall: select Allow HTTP and HTTPS traffic*.
- On Networking
- Select Enable IP forwarding
- On Network interface: select a network interface in the VPC and Subnetwork previously created
- On Network Service Tier: select Standard
- On Security
- Select Turn on vTPM
- Select Turn on Integrity Monitoring
- Click Create
- On the Compute Engine > VM instances: select the created instance and look for the assigned public IP.
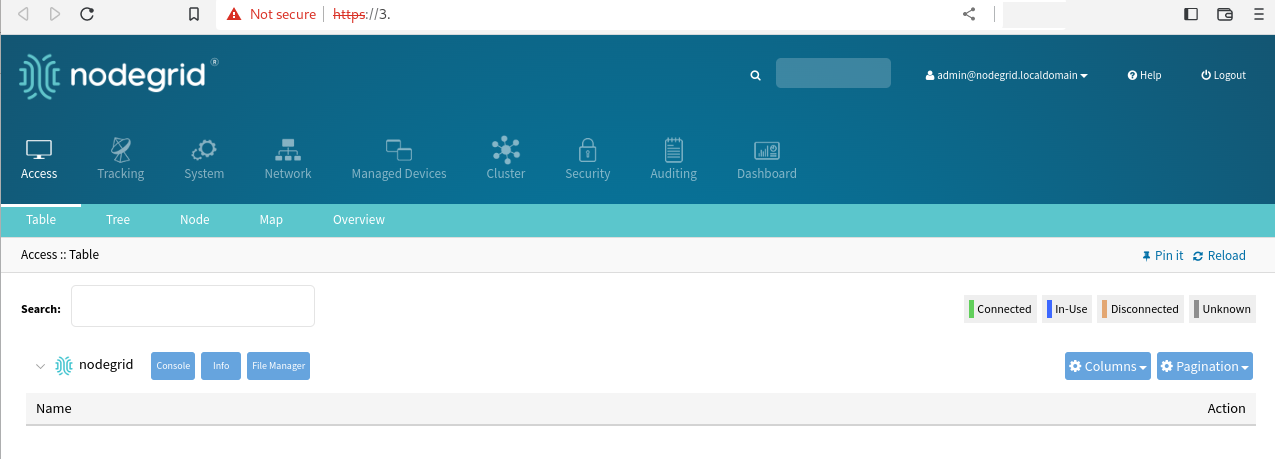
5. Web Access to the Nodegrid vSR
- In a browser, open https://Public-GCP-IP
- Log in to the Nodegrid vSR WebUI. Default credentials are:
- user: admin
- password: admin
- Follow the steps to change the password
- Congratulations! You have successfully deployed a Nodegrid vSR instance.
6. Enroll vSR to ZPE Cloud
A Nodegrid vSR is managed through ZPE Cloud. The new deployed unit must be enrolled to the customers ZPE Cloud instance.
- Login to your ZPE Cloud account Global , EU or onPrem
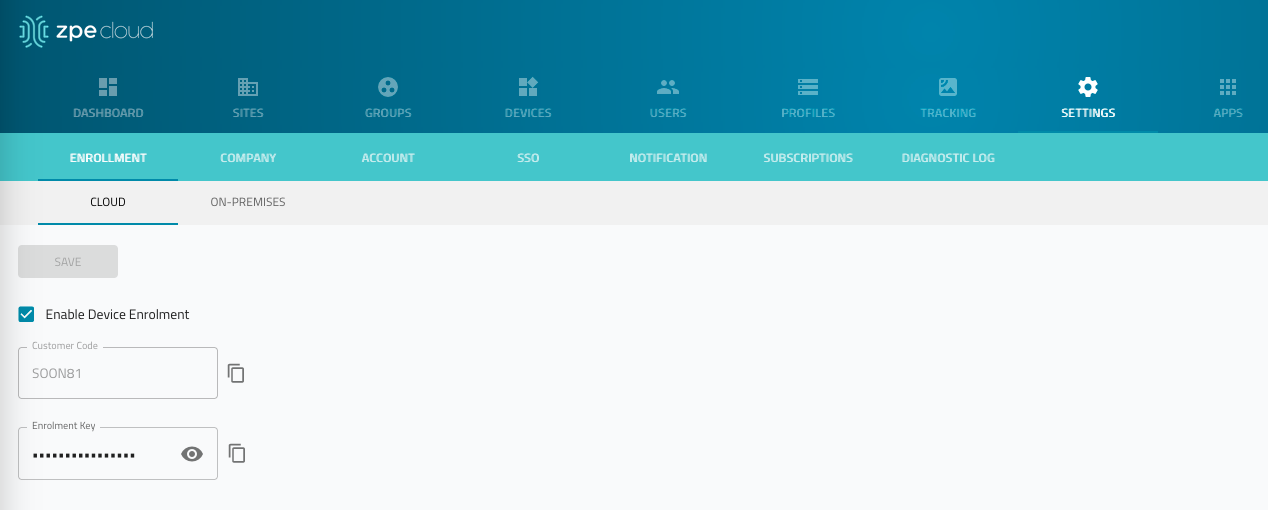
- Go to SETTINGS :: ENROLLMENT :: CLOUD
- Copy the Customer Code and Enrollment Key (required to claim the vSR)
- In a browser, login to vSR by with the link https://Public-AWS-IP
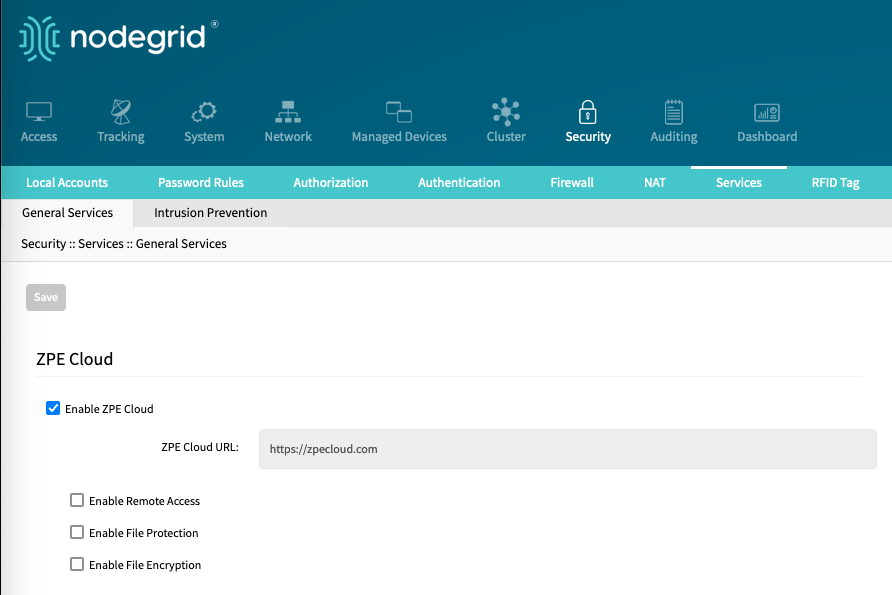
- Go to Security :: Services and enable ZPE Cloud service
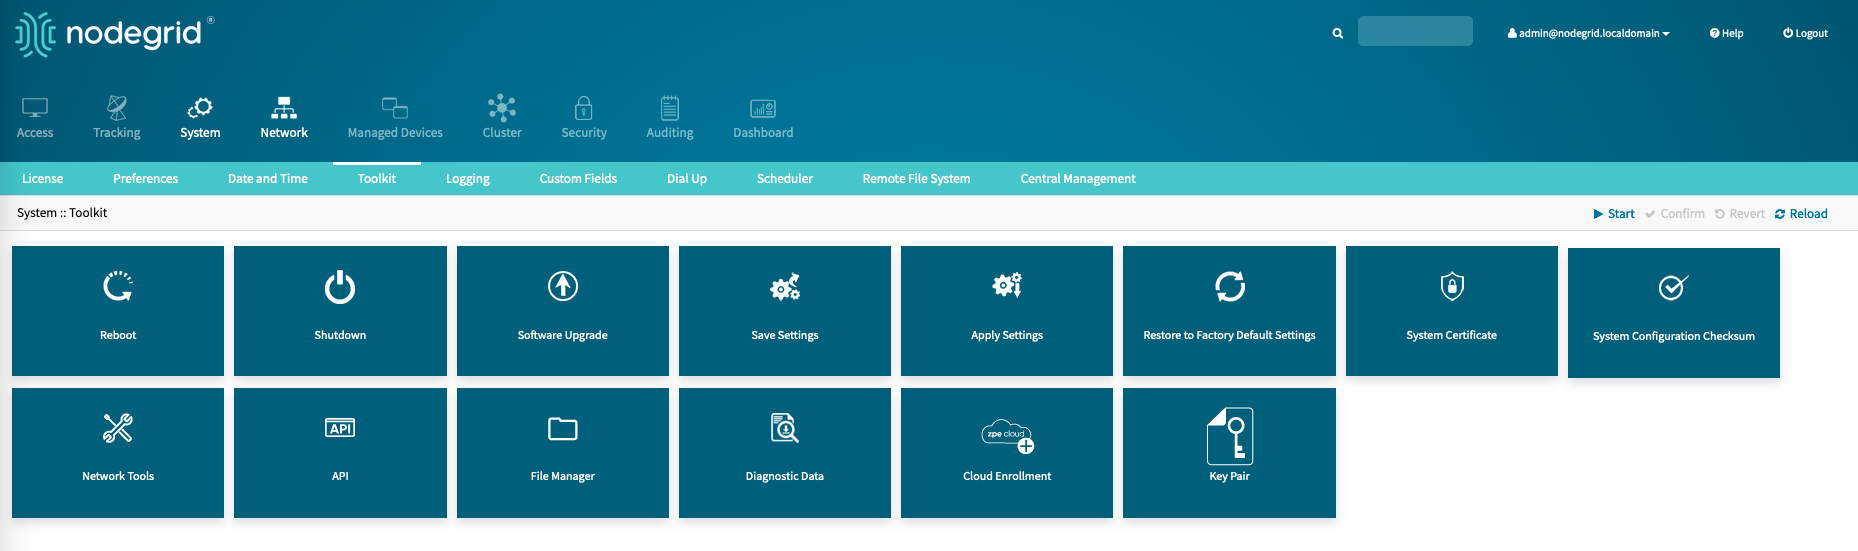
- Go to System :: Toolkit :: Cloud Enrollment
- Enter the following information
- URL: URL of the zpecloud instance, default https://zpecloud.com
- Customer Code: Use the copied Customer Code from the Cloud Instance
- Enrollment Key: Use the copied Enrollment Key
- Click on Enroll
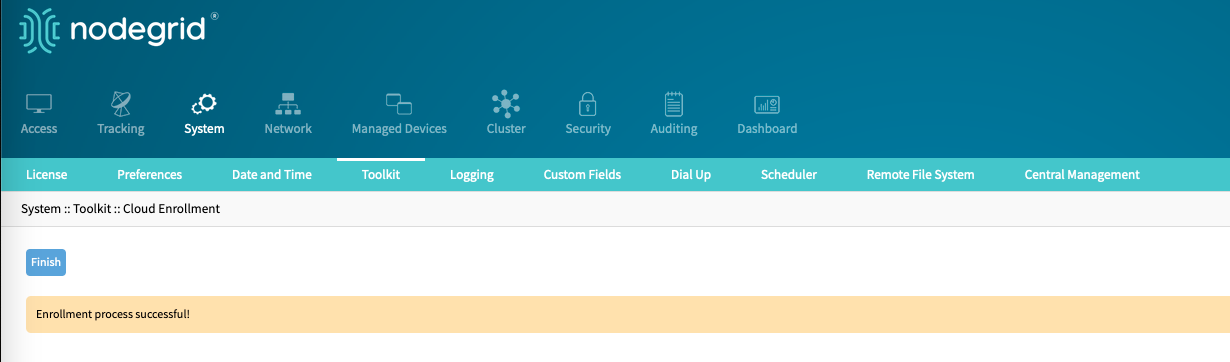
- This enrolls the unit to ZPE Cloud and be available in ZPE Cloud under DEVICES :: AVAILABLE
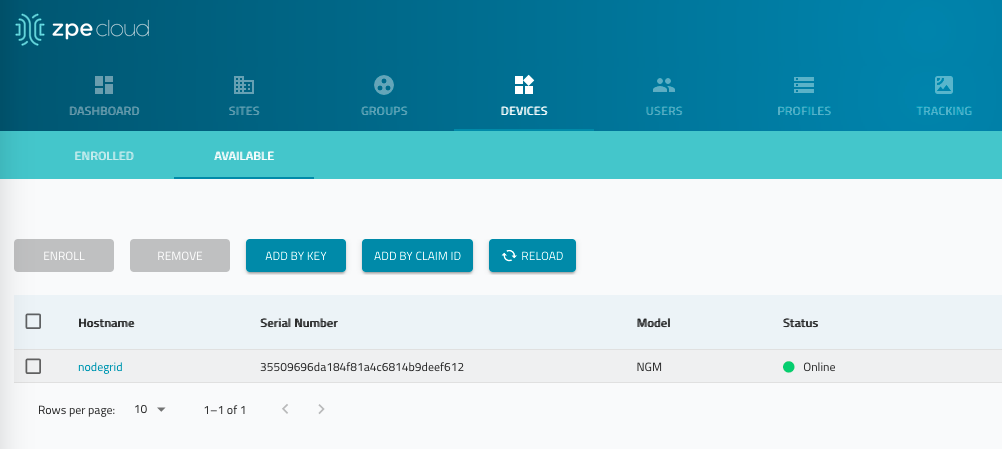
- To start managment of the vSR, select and click on ENROLL.
- When enrolled, the vSR is managed on ZPE Cloud like any other Nodegrid device.