Configure SSO with OKTA
ZPE Cloud offers a user-friendly solution for integrating Okta as a Single Sign-On Identity Provider. This seamless integration enables users to access ZPE Cloud effortlessly while enforcing all security policies established in Okta, including Multi-Factor Authentication (MFA).
In this article, you'll learn how to:
Configure the ZPE Cloud App in Okta
Log in to the Okta Administrator Panel.
Navigate to Applications.

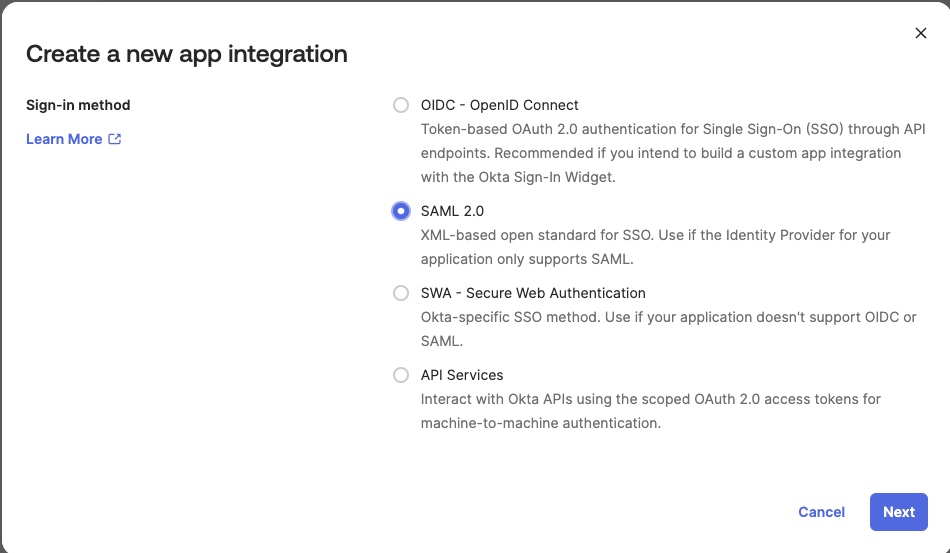
Click Create App Integration and select SAML 2.0.
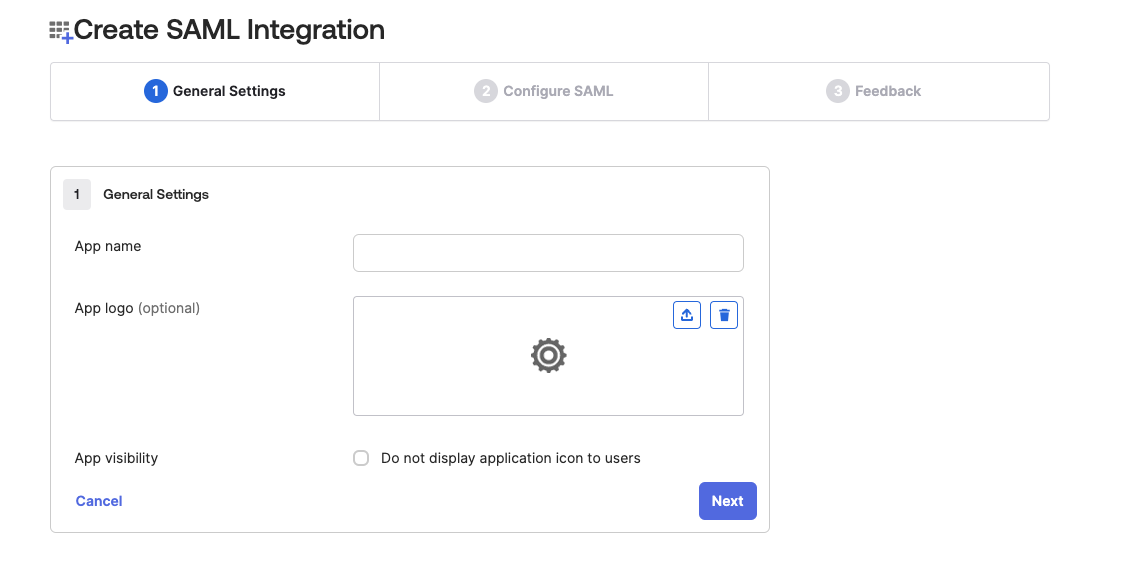
Provide a Name for the application, the recommended names are ZPE Cloud or ZPE Cloud EU and click Next.
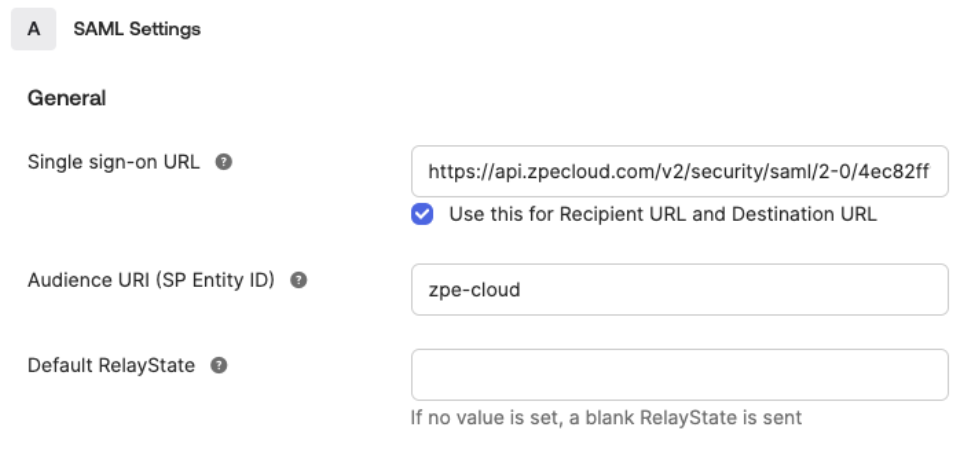
Add a Single sign-on URL and Entity ID.
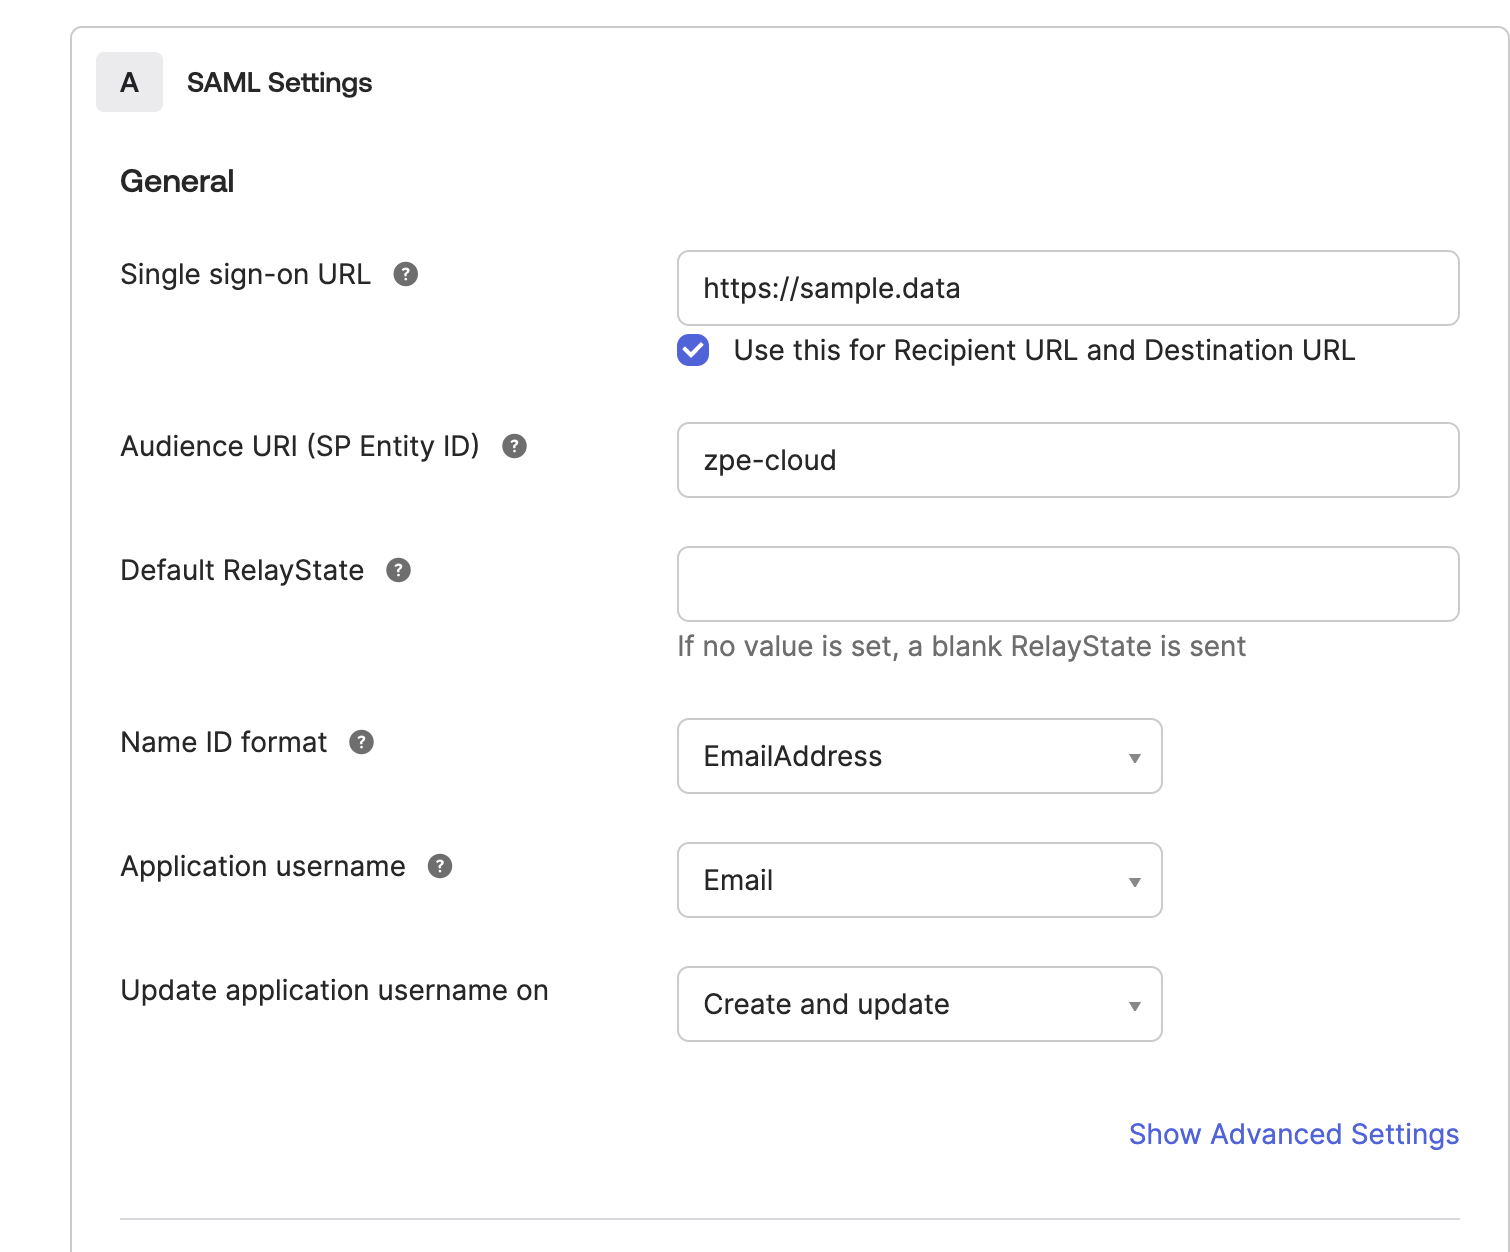
Note:
The Single sign-on URL is a temporary placeholder. Once we generate the Metadata XML file, we'll retrieve the correct value from the ZPECloud.
(Optional) If you wish to have all the personal user information sent from Okta, add Attribute Statements.
Name : firstName , Value: user.firstName
Name : lastName , Value: user.lastName
Name: phone, Value: user.mobilePhone
Name : memberOf , Value: “Administrator“
Name : timeout, Value: 600
Note:
The memberOf value must correspond to an existing Group name in ZPE Cloud. The Administrator group and the User group serve as the default groups. If a user cannot be matched to a ZPE Cloud group, they will be placed into the Default group, which is the User group.
Click Save.
Assign the users that will have access to ZPE Cloud.

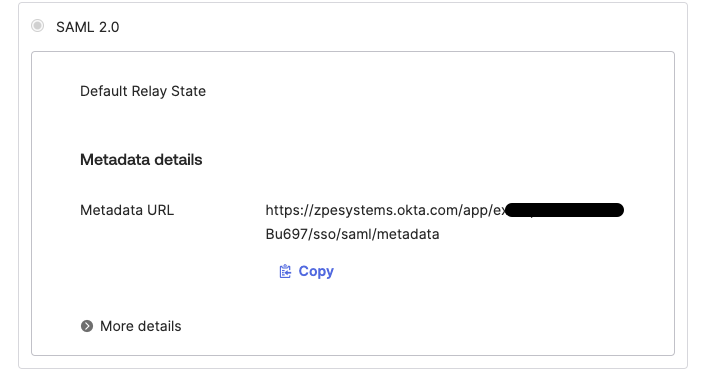
Download the Federation Metadata XML in the Sign-on Tab.
Copy the Metadata URL and save it.
Configure Okta SSO on ZPE Cloud
Log in to the ZPE Cloud account as an Administrator.
(Optional) SSO providers require a signed Logout request. For this, a certificate needs to be created. This can be a self-sign certificate or can be a signed certificate.
To create a Certificate:
Navigate to Settings > SSO >Certificate and provide the following values:
Country Code: 2-letter country code for your company location.
State: state for your company location.
Location: location for your company location.
Organization: the name of the company.
Organization Unit: any additional OU.
Common Name: recommended value: zpecloud.com or zpecloud.eu Email Address: email address of the Administrator.
Subject Alternative Name: same as Common Name, recommended value: zpecloud.com or zpecloud.eu.
For a Self-Signed Certificate, enable Self-Sign Certificate. Provide a value for Certificate Validity (days).
To create the SSO, navigate to Settings > SSO, and click Add.
Name: use the same value that was used in the Reply URL on Okta, the recommended value is okta.
Entity ID: use the same value that was used in the Entity ID on Okta, the recommended value is zpe-cloud or zpe-cloud-eu.
Click LOAD METADATA and select the downloaded MetadataXML file from Okta.
Select Enable Single Logout.
Click Save.
Copy the ACS URL.

Configure ZPE Cloud App in Okta
Log in to the Okta Administrator portal, go to your ZPE Cloud Application, and edit the configuration.
Add the ACS URL you copied to the Single sign-on URL.
Under Advanced Settings, add https://proxy-access.zpecloud.com, which is used to set up the remote access SSO option.

Click Save. The configuration is complete, you should be able to access ZPE Cloud using SSO.
(Optional) Configure ZPE Cloud SSO for Remote Access to devices
Log in to your Nodegrid device and navigate to Security :: Authentication :: SSO.
Click Import Metadata.
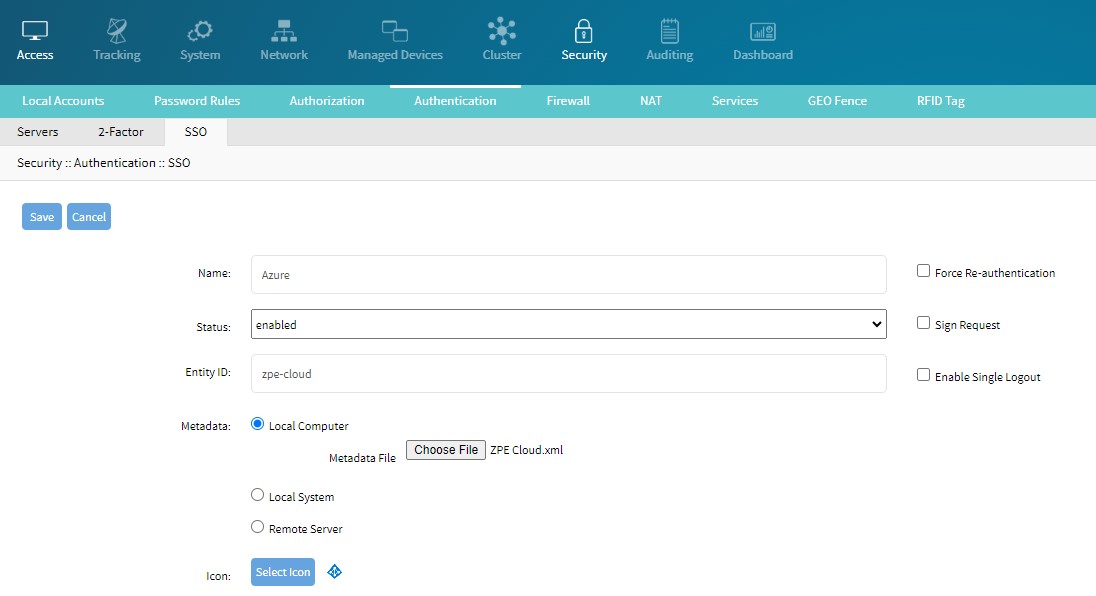
Add the Name.
Change the Status to Enabled.
Add the Entity ID, same as Okta.
Select the Metadata file, same as downloaded previously from Okta.
Add the Icon and click Save.