Configure Okta App Integration
Log in to the Okta Administrator Panel.
Go to Applications and click Create App Integration.
.png)
Click OIDC - OpenID Connect and then click on Web Application and click Next.
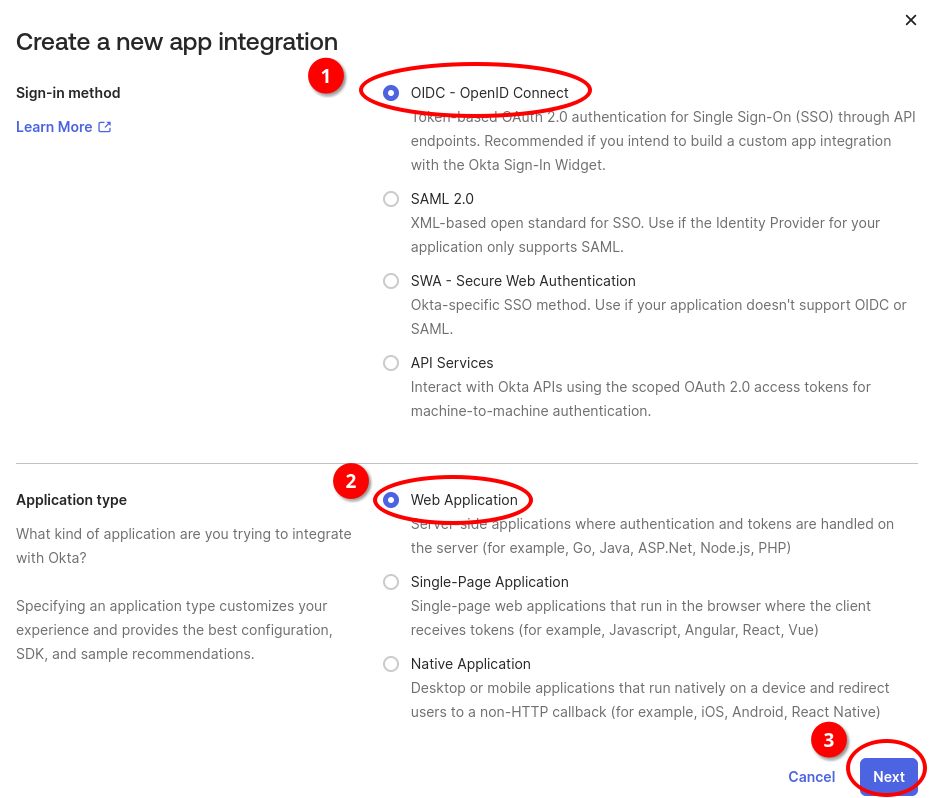
Note: Scroll down and keep default values and just click Next.
Copy your client ID and client secret.
These values are used when configuring this application on ZPE Cloud Platform.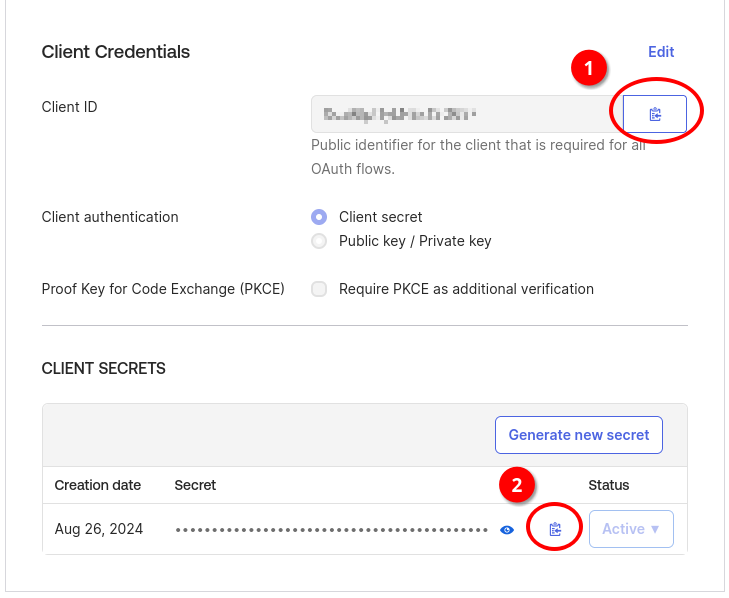
Assign the users that has access to ZPE Cloud.
Configure Okta with ZPE CLOUD SSO
Log in to ZPE Cloud as administrator.
Go to Settings :: SSO :: Identity providers.
Click Add to add a new SSO provider.
Select Protocol as OIDC and Provider as Okta.
Enter the information from Add Okta App Integration.
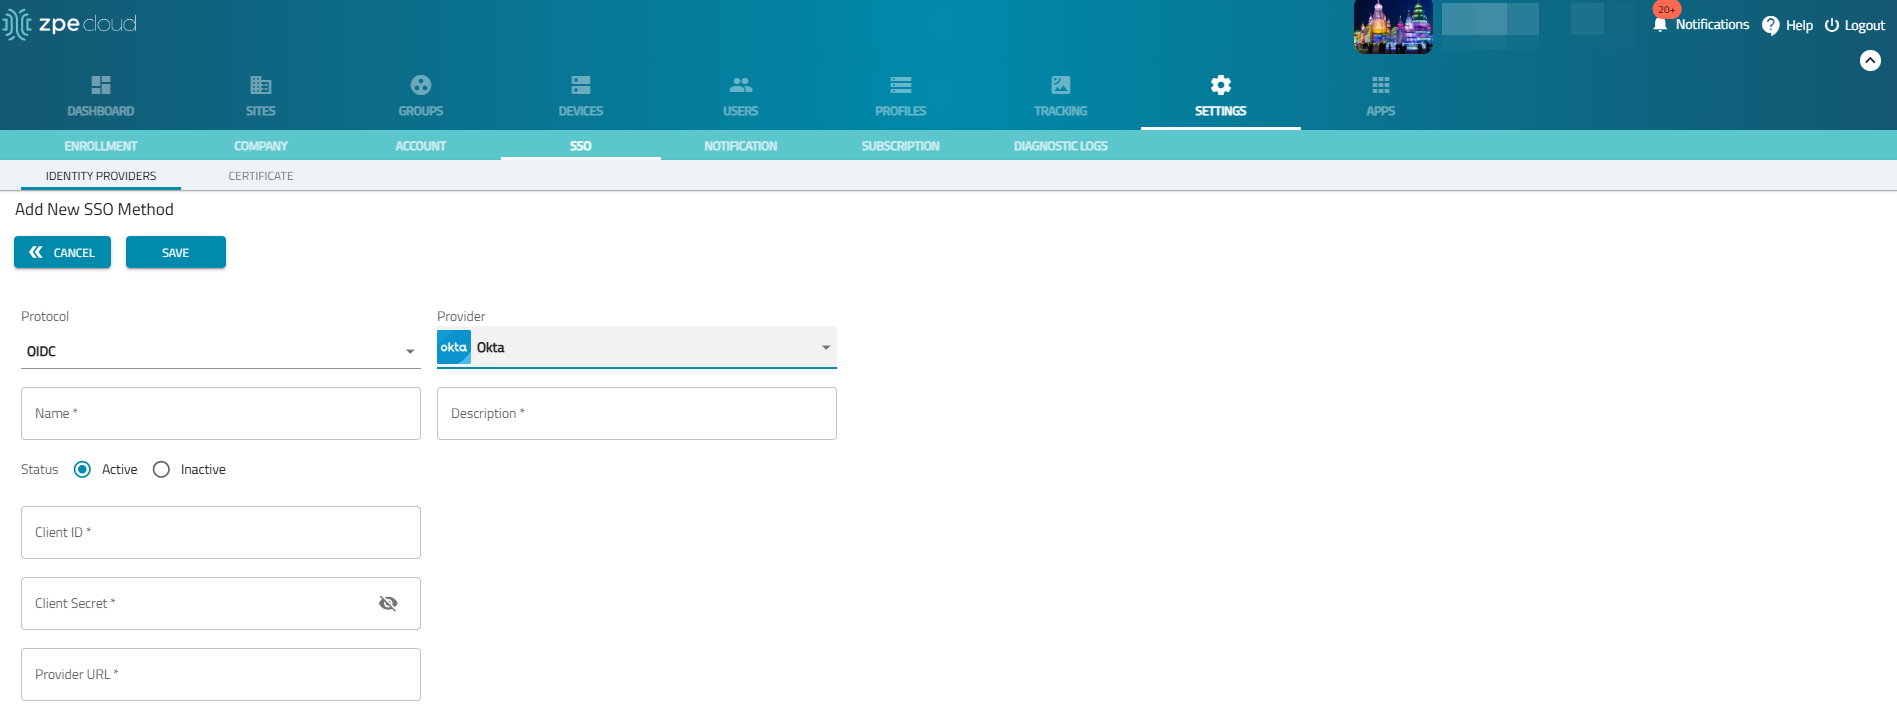
Enter the name that was used in the Reply URL on Okta, the recommended value is okta.
Enter a description for the SSO.
Enter the client ID and client secret. You can obtain the client ID and client secret from the identity provider. These are defined during configuring Okta App integration.
Enter the Provider URL that identifies your OIDC identity provider.
Post configuration on Okta
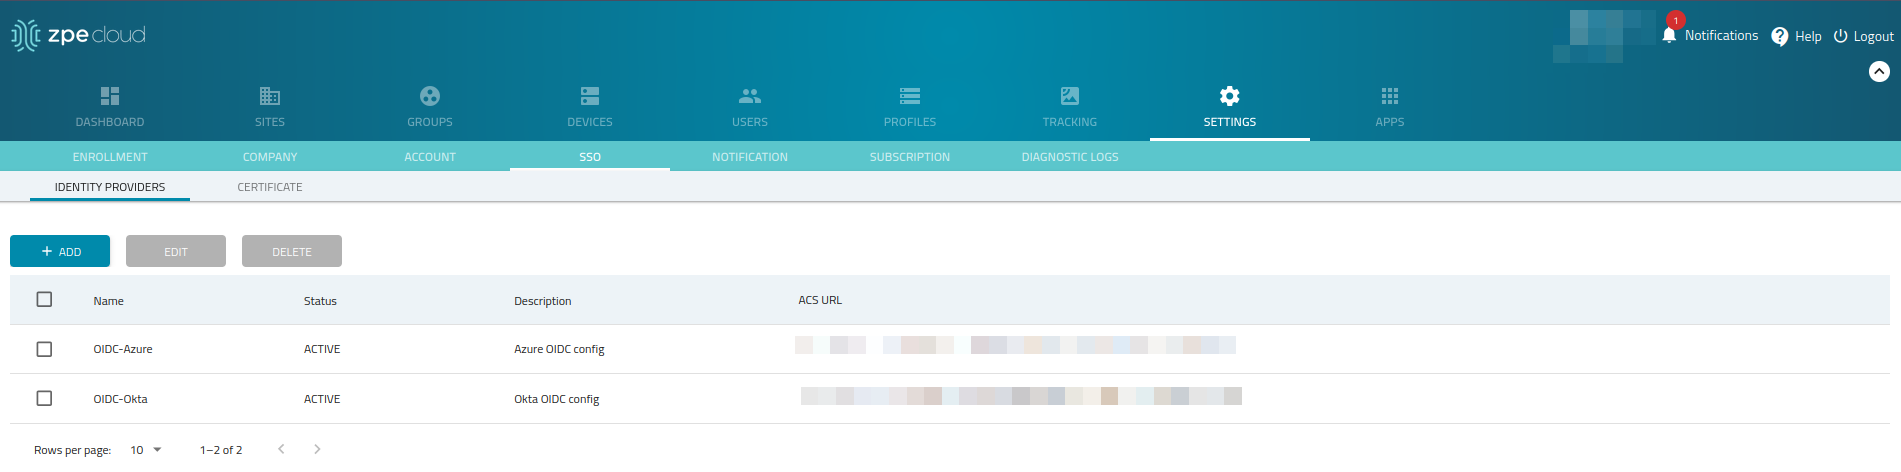
On ZPE Cloud, SSO table, you can view the ACS URL, for the OIDC configuration that was just created.
Click and copy the ACS URL.
Log in to Okta admin page, in Login section, edit Sign-in redirect URIs value, add the ACS URL and append “/callback” at the end.
Select Either Okta or App in the drop-down Login initiated by and enter the values as mentioned in the following image.
