This section explains how to configure the Border Gateway Protocol (BGP) routing policy IP prefix list. A prefix list identifies which routes must be accepted or denied in a BGP network. The prefixes represent the match criteria to apply the filter. Routes are then either permitted or denied based on these specified criteria. For example, if there is a need for a BGP network to disallow the distribution of a route with the IP address 10.1.1.3, this prefix can be included in the match criteria within the route map to block connections for this IP. To configure the prefix list:
Log into the Nodegrid Web UI
Navigate to the NETWORK::ROUTING::POLICY page
Click Add
Specify a name for the prefix list
Select the IPv4 or IPv6 address family
Specify a meaningful description of the prefix list
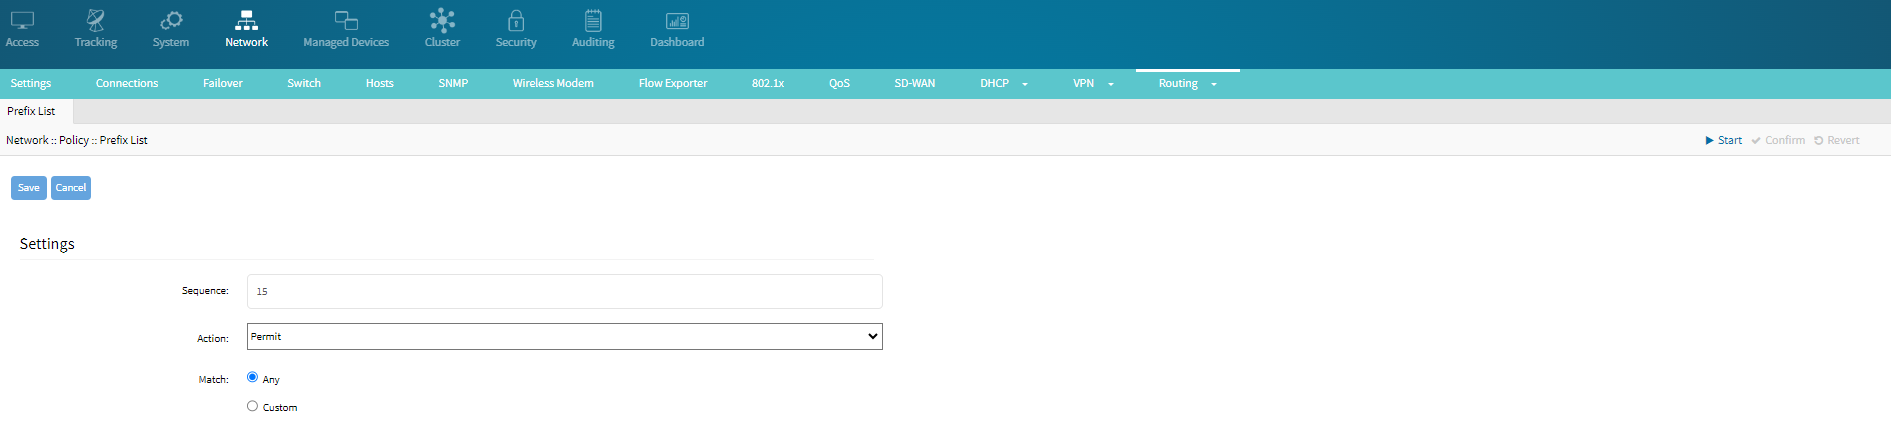
Specify the sequence in which the prefix entries will be processed. You can include multiple sequences in the prefix list. For more information, see Adding Multiple Sequences to the Prefix List
Select the action Deny or Permit based on whether you want to deny or allow the route in the BGP network for redistribution
Select the match criteria Any or Custom to apply the prefix rule
Option Any filters the route without any network parameters defined
The Custom option applies prefix rules based on the network length and parameters LE and GE. If the parameter is LE, the prefix rules are only applied to routes whose subnets are equal to or smaller than the specified value. If the parameter is GE, the prefix rules are only applied to routes whose subnets are equal to or larger than the specified value.
Click Save
CLI Configuration Example
[admin@nodegrid /]# cd settings/routing/policy/prefix_list/
[admin@nodegrid prefix_list]# add
[admin@nodegrid {prefix_list}]# set name=test-ipv4
[admin@nodegrid {prefix_list}]# set ip_type=ipv4
[admin@nodegrid {prefix_list}]# set description=docu-testing
[admin@nodegrid {prefix_list}]# set sequence=5
[admin@nodegrid {prefix_list}]# set action=permit
[admin@nodegrid {prefix_list}]# set match=custom network|length=10.0.0.0/24 le=30 ge=28
[admin@nodegrid {prefix_list}]# commit
Adding Multiple Sequences to the Prefix List
Follow this procedure to include multiple sequences.
1. Navigate to the NETWORK::ROUTING::POLICY page

2. Click on the configured prefix list in the table

3. Click Add
4. Specify the new sequence number to be included in the list and specify Action and Match criteria to be applied to the prefix rule
5. Click Save
The newly created sequence is included in the prefix list

CLI Configuration Example
[admin@nodegrid /]# cd /settings/routing/policy/prefix_list/
[admin@nodegrid prefix_list]# cd my-prefix-list-ipv6-ipv6/
[admin@nodegrid my-prefix-list-ipv6-ipv6]# ls
settings/
sequence/
[admin@nodegrid my-prefix-list-ipv6-ipv6]# cd sequence
[admin@nodegrid sequence]# add
[admin@nodegrid {sequence}]# set sequence=15
[admin@nodegrid {sequence}]# set action=permit
[admin@nodegrid {sequence}]# set match=any
[admin@nodegrid {sequence}]# commit
[admin@nodegrid sequence]# show
  sequence  action  network/length  ge  le
  ========  ======  ==============  ==  ===
  5         Permit  Any
  10        Permit  2001:db8::/32   32  128
  15        Permit  Any