Any triggered event can be sent as an SNMP trap to an existing NMS system. SNMP v2 and 3 for traps is supported. The MIB files for the device are available together with the firmware files. 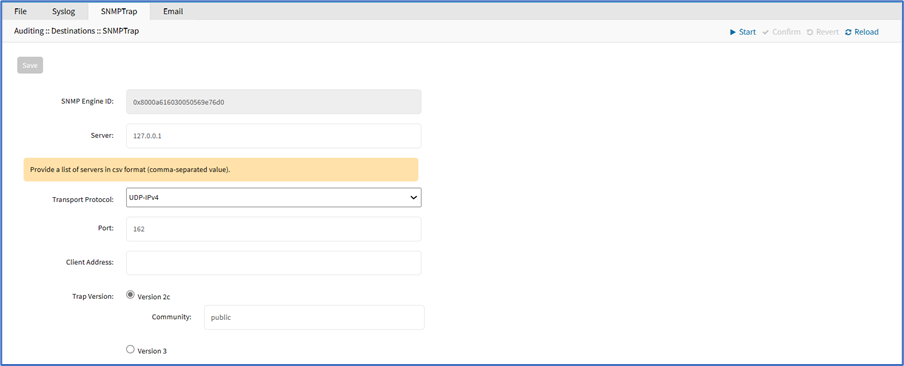
Configure SNMP Trap Settings
- Go to Auditing :: Destinations :: SNMP Trap.
- Enter Server (comma-separated list).
- On Transport Protocol drop-down, select one (UDP-IPv4, TCP-IPv4, UDP-IPv6, TCP-IPv6) (protocol to send traps - default: UDP-IPv4).
- Enter Port (default: 162).
- Enter Client Address.
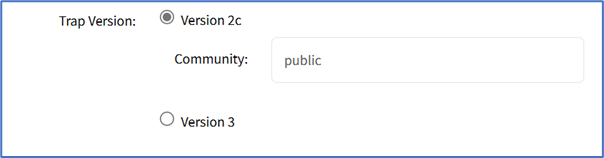
- On Trap Version menu, select one:
- Version 2c radio button. Enter Community.
- Version 3 radio button (expands dialog).
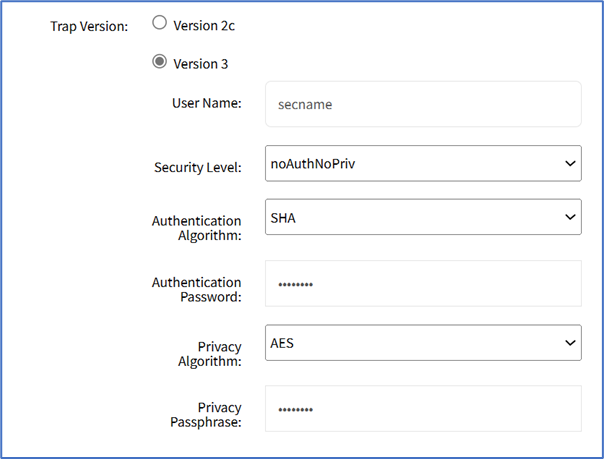
- Enter User Name.
- On Security Level drop-down, select one (noAuthNoPriv, authNoPriv, authPriv).
- On Authentication Algorithm drop-down, select one (MD5, SHA).
- Enter Authentication Password.
- On Privacy Algorithm drop-down, select one (DES, AES).
- Enter Privacy Passphrase.
- Version 2c radio button. Enter Community.
- Click Save.
Access MIB files
(available in v5.6+)
CLI Procedure
The MIB files are located as follows:
root@nodegrid:~# ls -l /usr/local/mibs/
total 104
-rw-r--r-- 1 root root 36940 Nov 20  2017 NodeGrid-MIB.asn
-rw-r--r-- 1 root root 61403 Nov 20  2017 NodeGrid-TRAP-MIB.asn
-rw-r--r-- 1 root root  2732 Nov 20  2017 ZPESystems.smi