IKE Profiles are managed on this page. 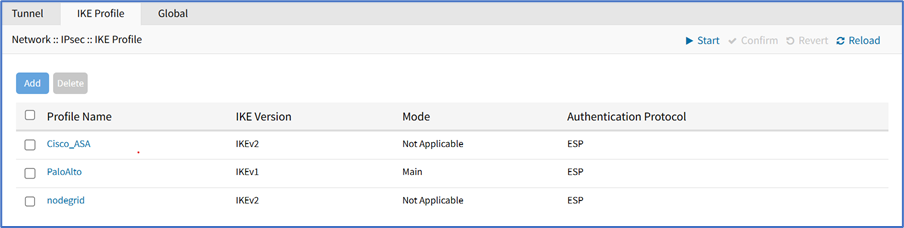
Add New Profile
- Go to Network :: VPN drop-down :: IPsec :: IKE Profile.
- Click Add (displays dialog).
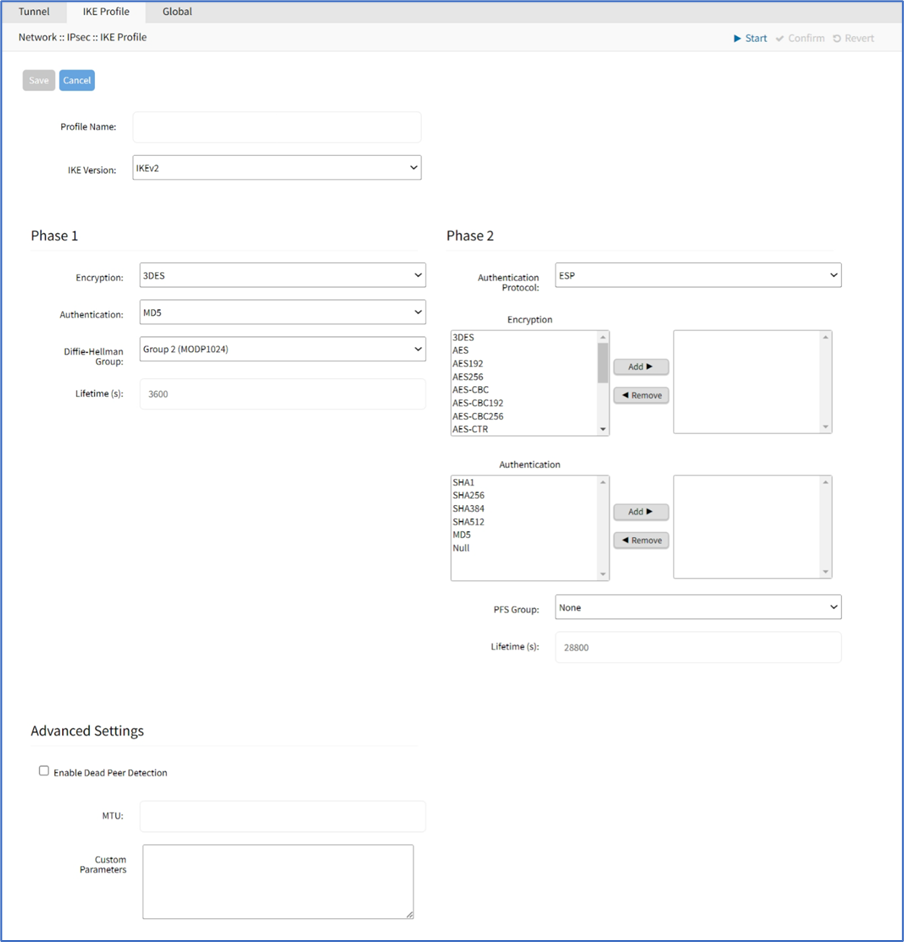
- Enter Profile Name.
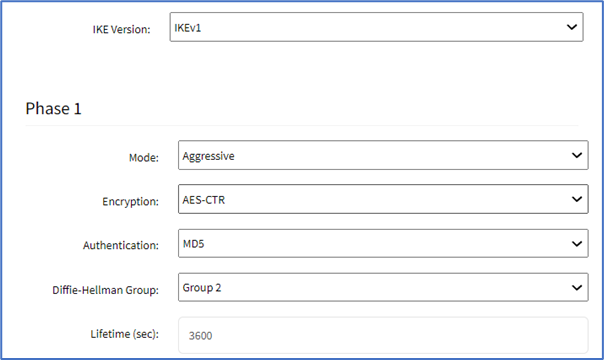
- On IKE Version drop-down, select one (IKEv1, IKEv2) (modifies Phase 1 selection).
- If IKEv1 selection, on Mode drop-down, select one (Aggressive, Main).
- If IKEv2 selection:
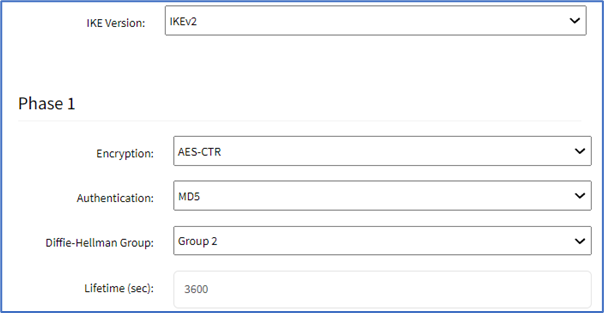
- On Encryption drop-down, select one (3DES, AES, AES192, AES256, AES-CBC, AES-CBC192, AES-CBC256, AES-CTR, AES-CTR192, AES-CTR256, AES-GCM, AES-GCM192, AES-GCM256).
- On Authentication drop-down, select one (SHA1, SHA256, SHA384, SHA512, MD5).
- On Diffie-Hellman Group drop-down, select one (Group 2, 5, 14, 15, 16, 17, 18, 19, 20, 21, 31).
- Enter Lifetime (sec) value.
- On Encryption drop-down, select one (3DES, AES, AES192, AES256, AES-CBC, AES-CBC192, AES-CBC256, AES-CTR, AES-CTR192, AES-CTR256, AES-GCM, AES-GCM192, AES-GCM256).
- If IKEv1 selection, on Mode drop-down, select one (Aggressive, Main).
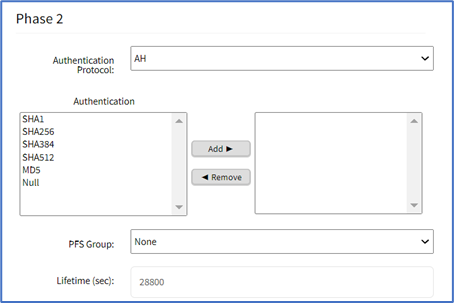
- Phase 2 menu, Authentication Protocol drop-down, select one (ESP, AH).
- If ESP selection, On Encryption, select from left-side panel, click Add► to move to right-side panel. To remove from right-side panel, select, and click ◄Remove.
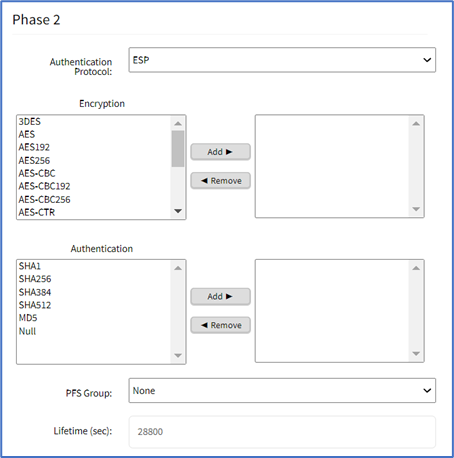
- If AH selection, On Authentication, select from left-side panel, click Add► to move to right-side panel. To remove from right-side panel, select, and click ◄Remove.
- If ESP selection, On Encryption, select from left-side panel, click Add► to move to right-side panel. To remove from right-side panel, select, and click ◄Remove.
- On Advanced Settings menu, if Enable Dead Peer Detection checkbox selected:

- Select Enter number of retries checkbox
- Enter Interval (sec)
- On Action drop-down, select one (hold, clear, restart)
- Enter MTU
- Enter Custom Parameters (comma separated)
- Click Save.
Edit Profile
- Go to Network :: VPN drop-down :: IPsec :: IKE Profile.
- Locate and click on the Profile Name.
- Modify details, as needed.
- Click Save.
Delete Profile
- Go to Network :: VPN drop-down :: IPsec :: IKE Profile.
- Click the checkbox next to the profile to delete.
- Click Delete.