Installation of Collections and Dependencies
ZPE Systems has released a collection of Ansible libraries which enable customers to manage Nodegrid appliances using the RedHat Ansbile eco-systems including Ansible Tower(AWX). This guide outlines the required steps to install the Nodegrid ansible collections and recommended steps on how to setup the AWX enviorment, so that it can interact with Nodegrid appliances.
Ansible Galaxy Account
To install additional collections, is it essential that the administrators Ansible Galaxy Account is linked to the AWX installation
-
Got to Ansible Galaxy
-
Login with your credentials
-
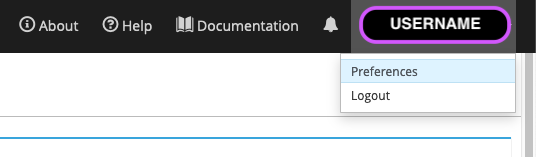
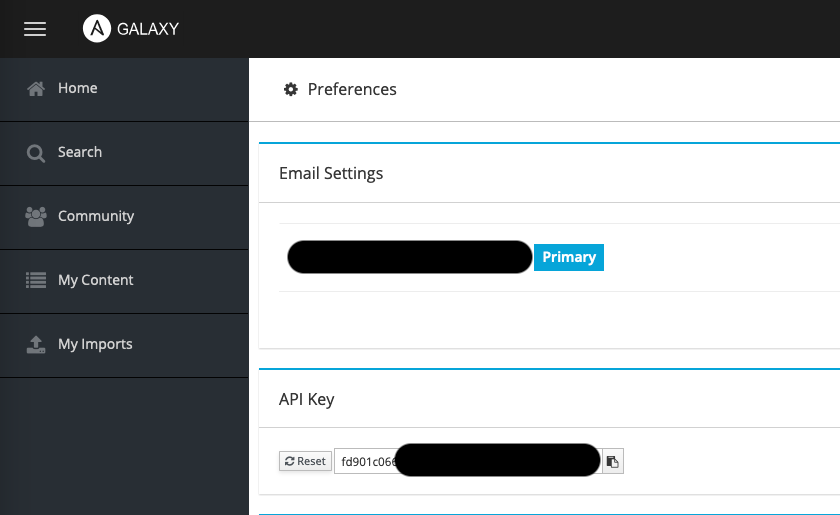
Go to Preferences
-
Copy the API Key
-
Login to AWX
-
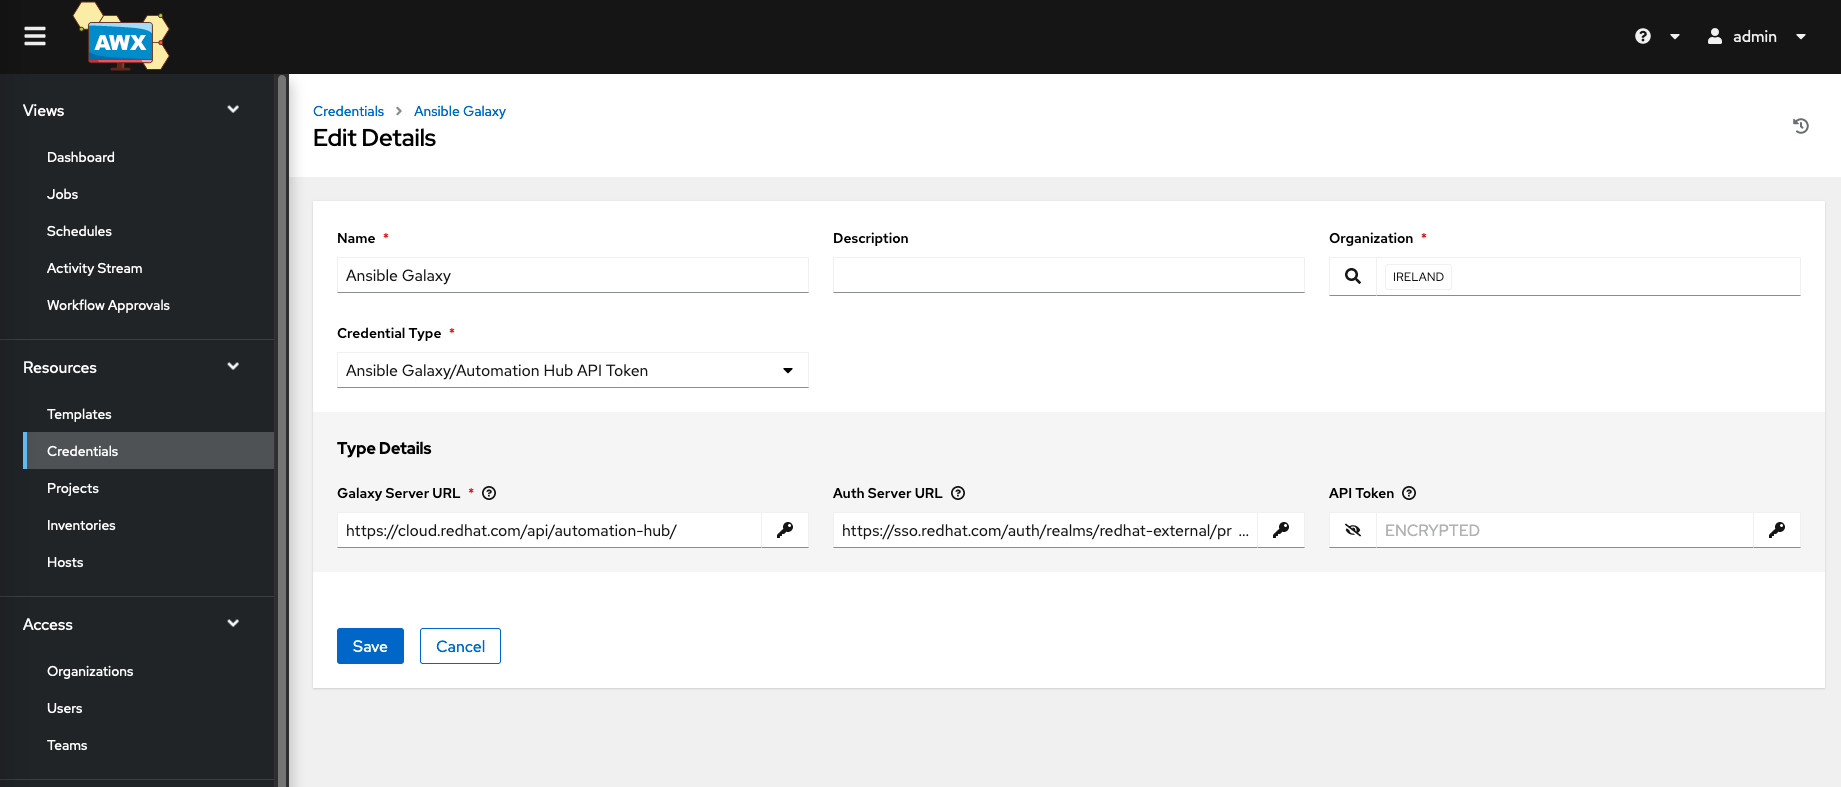
Navigate to Resources Credentials
-
Create a New Credential Store with the following details
| Setting | Value | Comment |
|---|---|---|
| Name | Ansible Galaxy | |
| Credential Type | Ansible Galaxy | |
| Galaxy Server URL | https://cloud.redhat.com/api/automation-hub/ | |
| Auth Server URL | https://sso.redhat.com/auth/realms/redhat-external/protocol/openid-connect/token | |
| API Token | API Token from Ansible Galaxy |
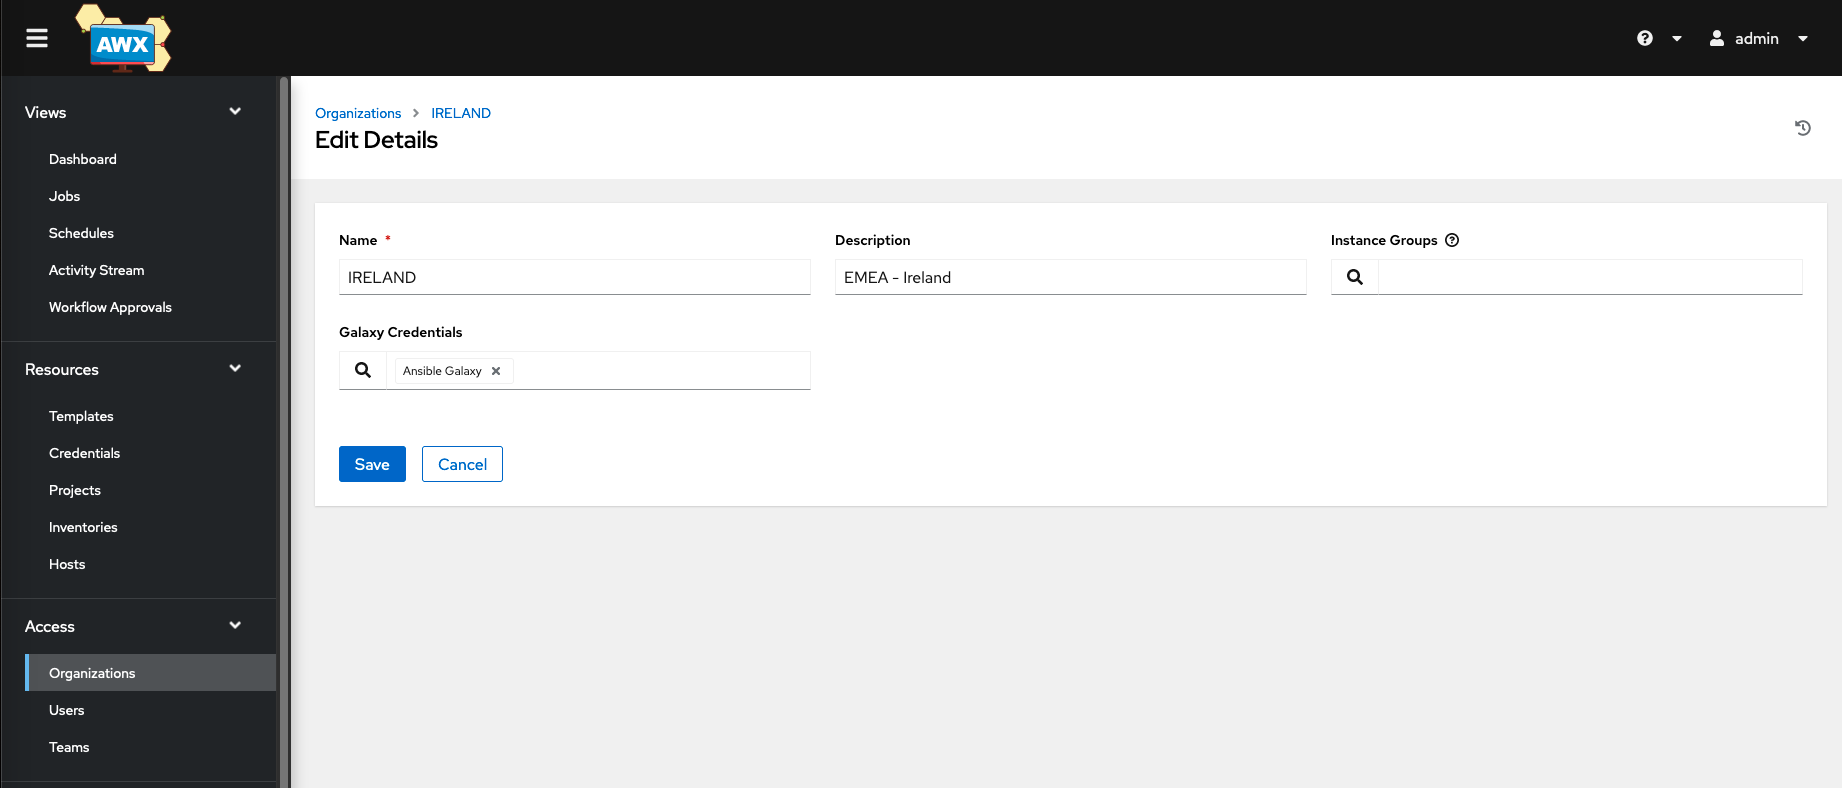
- Navigate to Access
- Either create and edit an existing Organisation
- Assign the Newly created Ansible Galaxy credential to the organization
Organisation of the Git repository
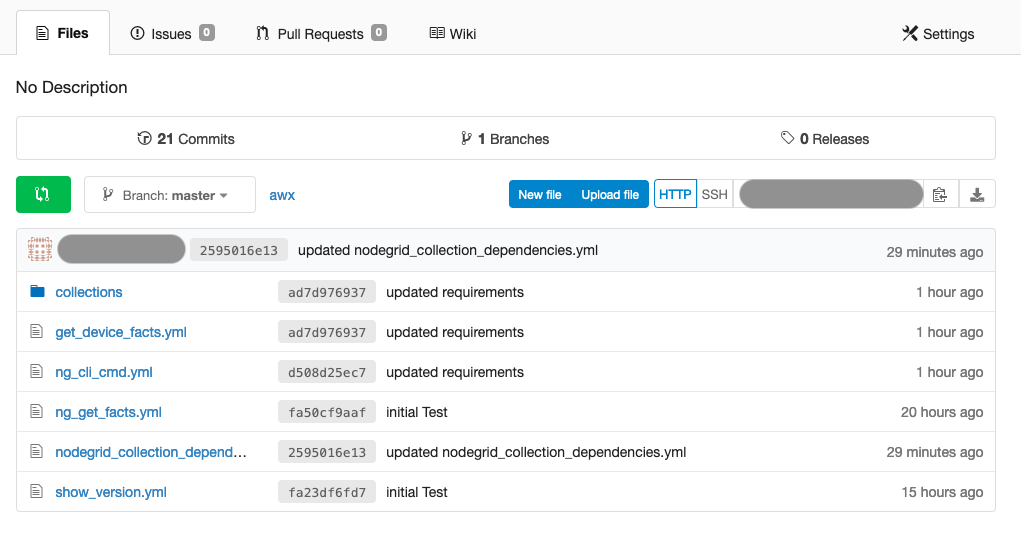
AWX supports multiple ways to store and maintain playbooks and related artifacts like collections or roles. Git is one of the standard options. For example, to install the ZPE Nodegrid collections must, the Git repo have the following structure.
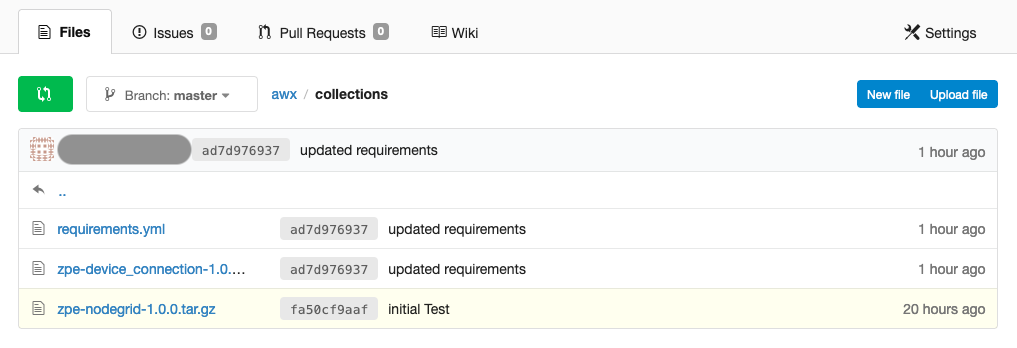
- In the root directory, create a folder called collections
- Inside the folder, create a file requirements.yml
- The content of the file should contain the following content
---
collections:
  - name: ./collections/zpe-nodegrid-1.0.0.tar.gz
    type: file

  - name: ./collections/zpe-device_connection-1.0.2.tar.gz
    type: file
- place the two files zpe-nodegrid-1.0.0.tar.gz and zpe-device_connection-1.0.2.tar.gz, these files can be optained from the offical Nodegrid Ansible GitHub repository.
- In the root directory, create a playbook called nodegrid_collection_dependencies.yml with the following content
- hosts: localhost
  gather_facts: false

  tasks:
    - name: Install Dependencies
      pip:
        name:
         - ttp
         - importlib
         - pexpect
         - datetime
- Place all the desired playbooks into the root directory of the repo.
Installation of Collection and Dependencies
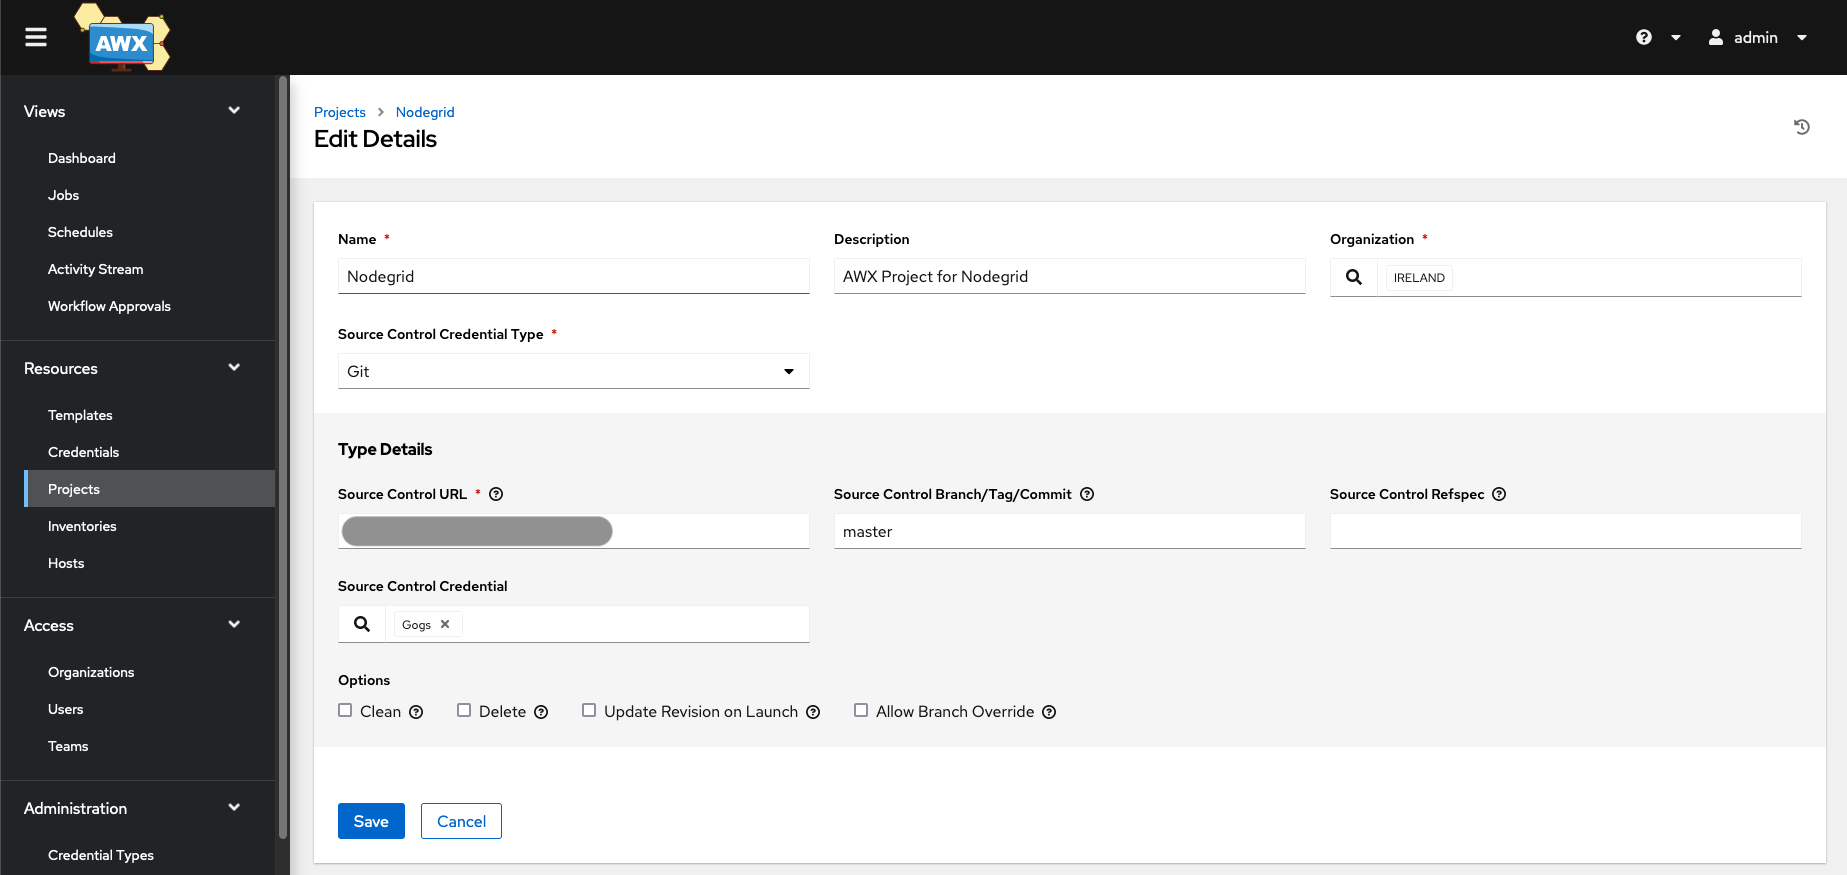
Projects
In AWX, create a new project; this will synchronize the AWX installation with the GIT repository and make the Nodegrid Libraries available
-
Navigate to Projects
-
Click on Add to create a new project
-
After the project was created, Sync the project by pressing the button
-
The execution and result of the sync job can be seen under Jobs
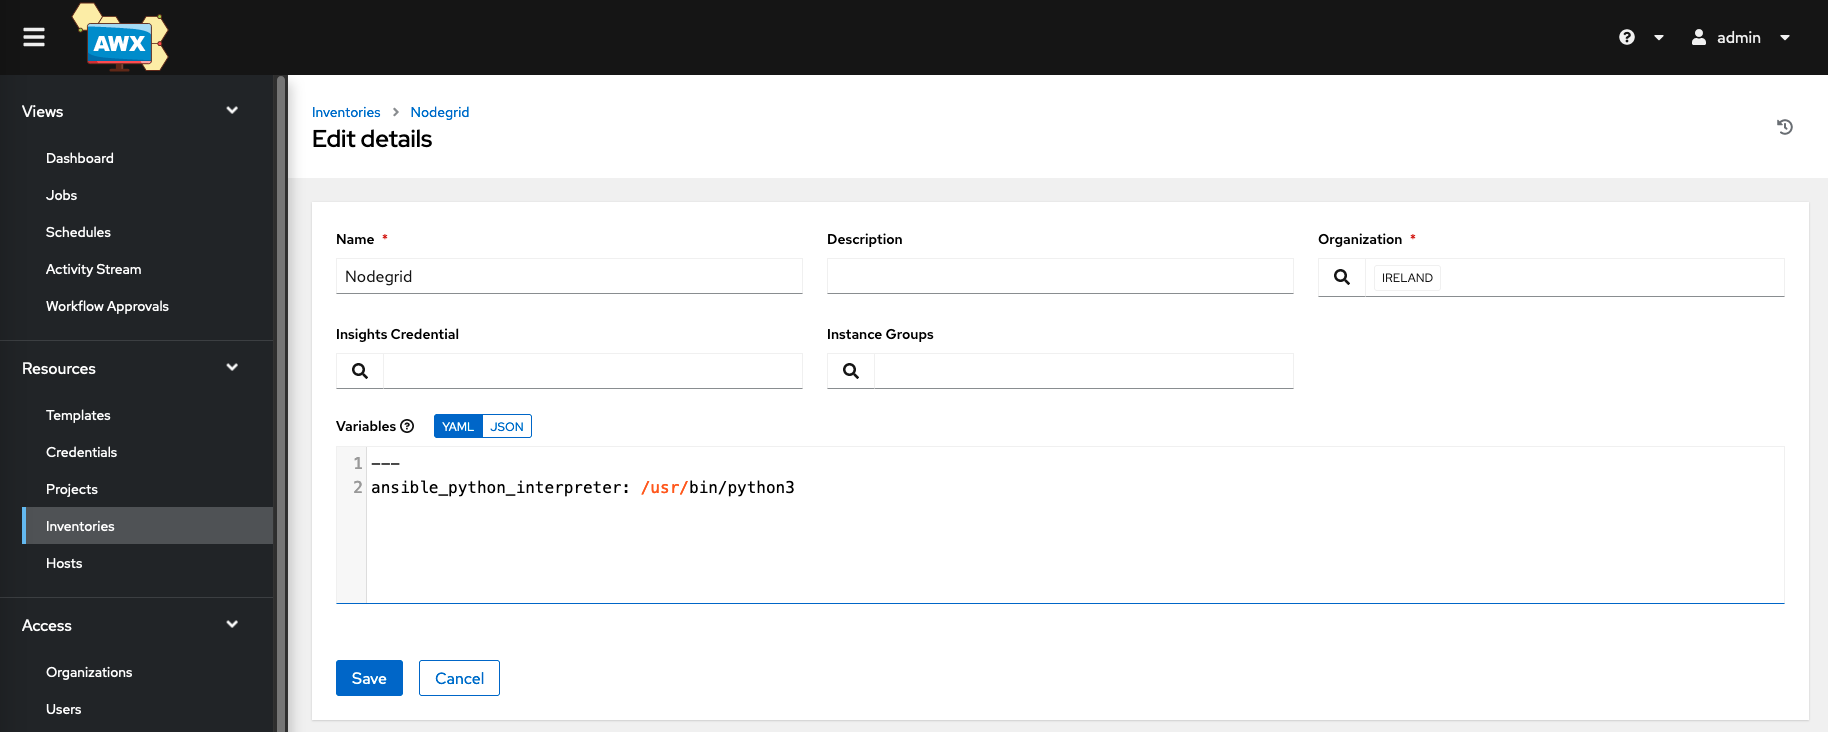
Inventory
The Inventory contains the list of hosts and groups. These are used to execute playbooks(templates) against a specific set of hosts.
- Navigate to Inventories
- Click on Add and Add inventory
- Provide a name for the Inventory, i.e., Nodegrid
- In the Variables section define the correct ansible_python_interpreter as ansible_python_interpreter: /usr/bin/python3
---
ansible_python_interpreter: /usr/bin/python3
ansible_ssh_common_args: "-o ControlMaster=no -o ControlPersist=3600s -o PreferredAuthentications=publickey"
- Go to Hosts
- Add at least one host to the new Inventory
- The following variables should be provided for each Nodegrid appliance
| Setting | Value | Comment |
|---|---|---|
| ansible_host | <IP_ADDRESS> | this is only required if teh hostname can not be resolved in the enviorment |
| console_ports | <CONSOLE_PORT_DETAILS> | Only required for device connection library, for more details take a look at the offical library documentation |
---
ansible_host: 192.168.10.1
console_ports:
      -   port: ttyS1
          target_os: ios
      -   port: ttyS2
          target_os: nodegrid

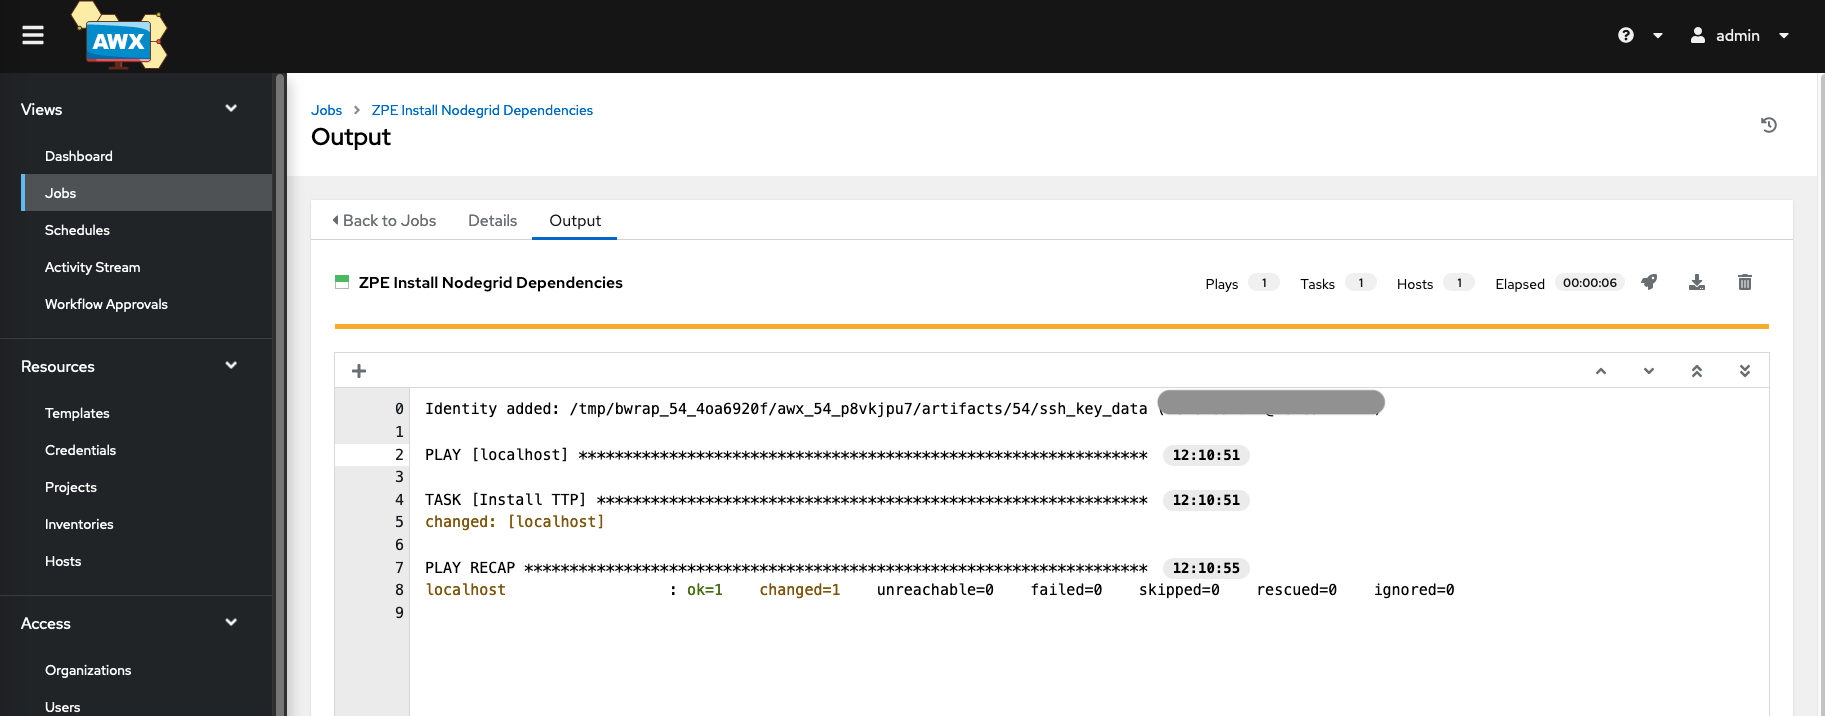
ZPE Install Nodegrid Dependencies Template
- Navigate to Templates
- Click on Add and Add job template
- provide the following details
| Setting | Value | Comment |
|---|---|---|
| Name | ZPE Install Nodegrid Dependencies | |
| Job Type | Run | |
| Inventory | Nodegrid Inventory Name | |
| Project | Nodegrid Project Name | |
| Playbooks | nodegrid_collection_dependencies.yml | |
| Credentials | Nodegrid Credentials | The exact credentials don't matter as the playbooks run against the AWX host only |
- Click on Save
- Click on Launch
- This will start the installation of the required python dependencies; the status can be seen under Jobs
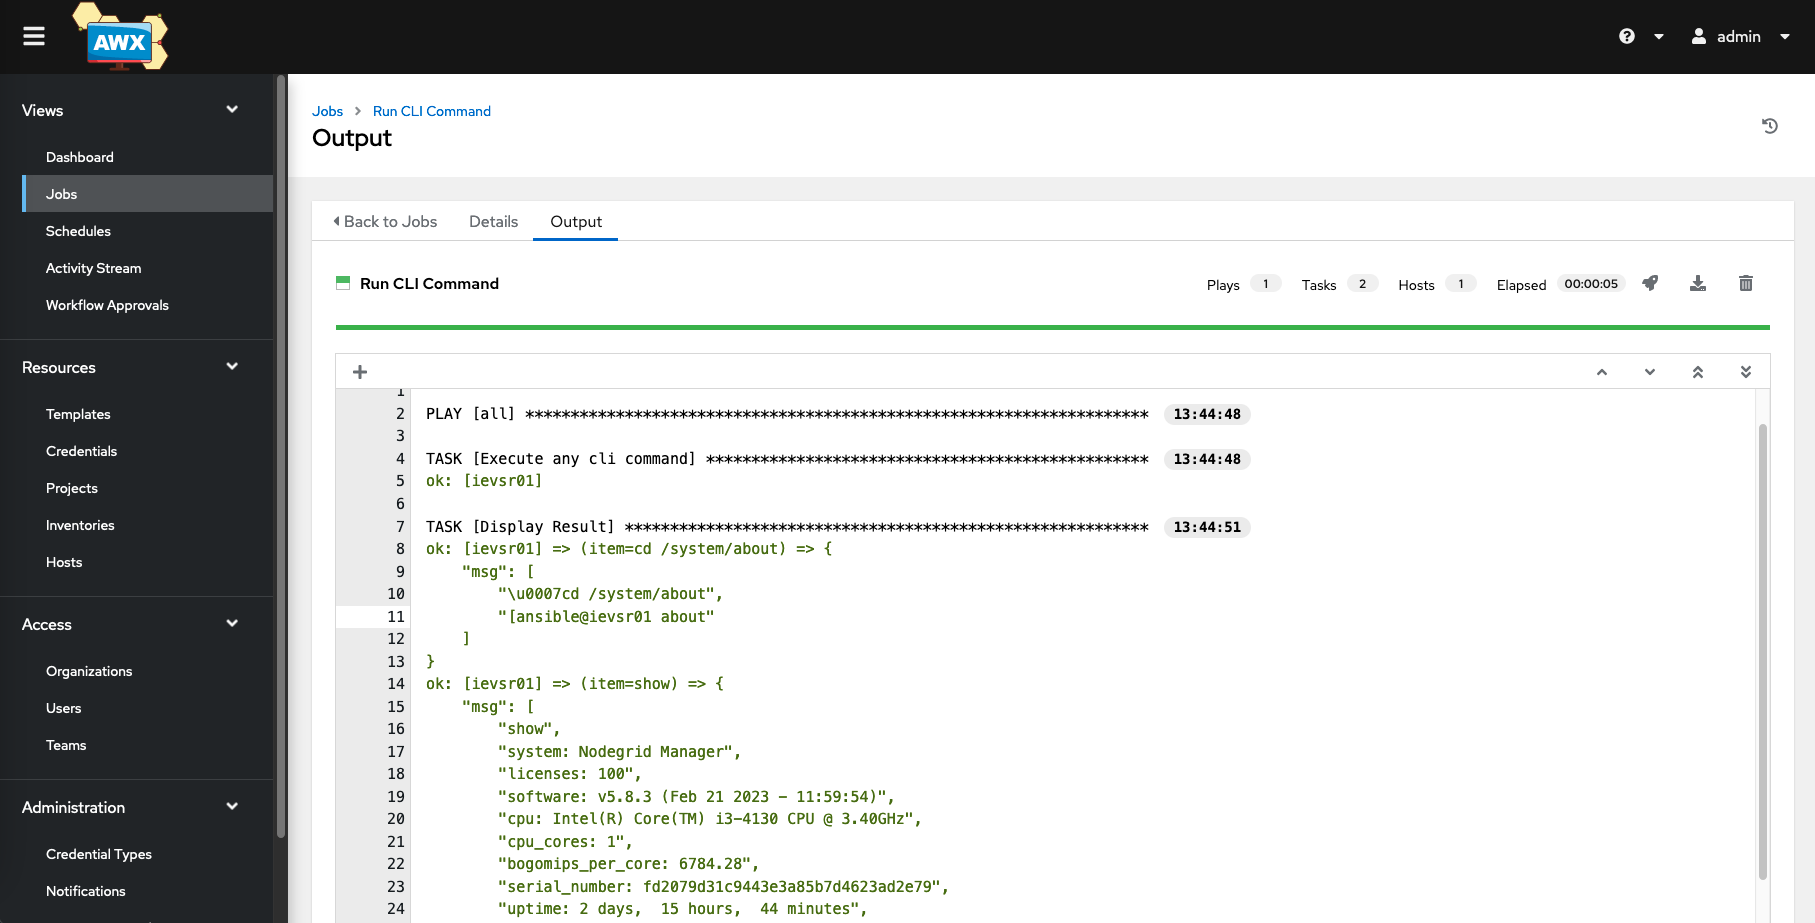
Run the first playbook
The system is now ready to run the first playbook. For example, do we run the ng_cli_cmd.yml playbook, which is part of the example git repository. The playbook will connect to the Nodegrid appliance and read the system about details.
- Navigate to Templates
- Click on Add and Add job template
- provide the following details
| Setting | Value | Comment |
|---|---|---|
| Name | Run CLI Command | |
| Job Type | Run | |
| Inventory | Nodegrid Inventory Name | |
| Project | Nodegrid Project Name | |
| Playbooks | ng_get_facts.yml | |
| Credentials | Nodegrid Credentials |
- Click on Save
- Click on Launch
- This will start the installation of the required python dependencies. The status can be seen under Jobs
Password Management for Target Devices
The device connection library lets customers interact with connected end devices through a serial console connection. A username and password protect most console interfaces or should be protected as such.
The general recommendation is, therefore, to enable user authentification on console ports and limit the permissions on the end devices, for example, by allowing access through the automation tool using a read_only account. Examples of how read_only account can be created on various systems can be found in the Appendix.
Ansible Tower has built-in methods to handle secrets that can be used to provide the required credentials to playbooks. This section provides examples of how to console port credentials can be stored and utilised in Ansible Tower (AWX) and Nodegrid Device connection library.
Template Survey function
Ansible Towers Template Survey feature allows users to define variables, including secrets that can be used within a playbook. For example, this can be used to provide the username and password for a console connection to a playbook/template, either through a default value or by asking for the details during the playbook execution.
-
Create a new template and configure as normal
-
In the Template -> Survey tab, add a new Survey Question
-
For this example, create new entries for username and password with the following values
-
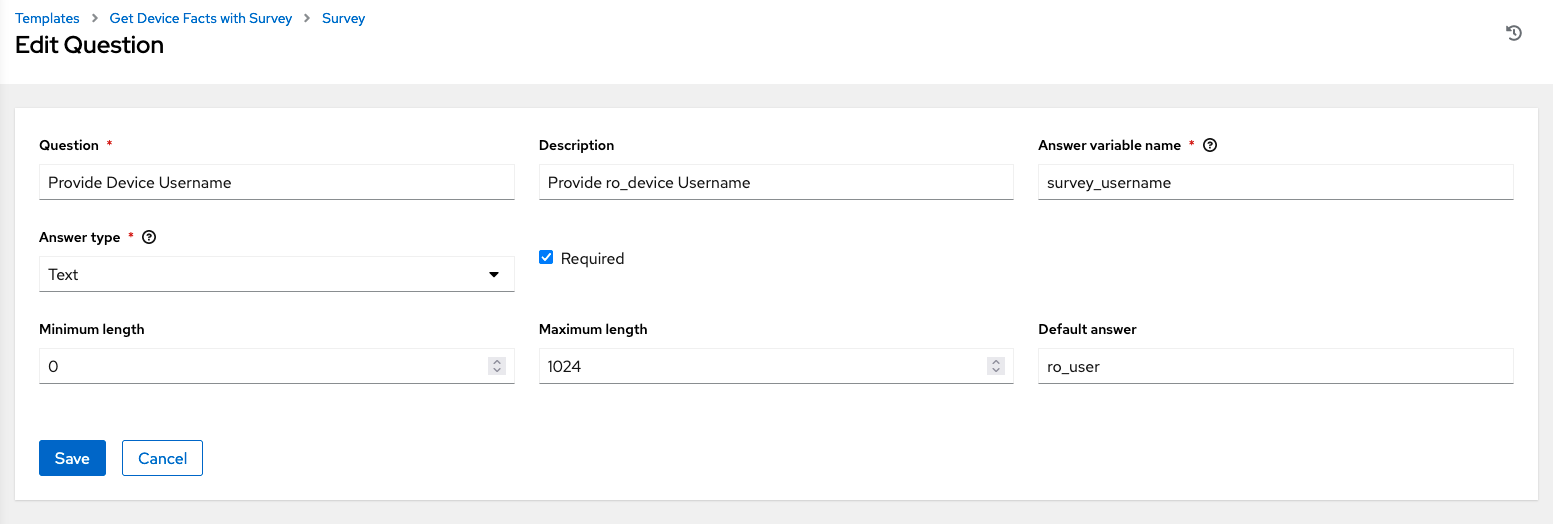
username values
| Setting | Value | Comment |
|---|---|---|
| Question | Provide Device Username | |
| Description | Provide ro_device Username | |
| Answer variable name | survey_username | variable which is used in the playbook |
| Answer Type | Text | |
| Required | Enabled | |
| Minimum length | 0 | |
| Maximum length | 1024 | |
| Default answer |
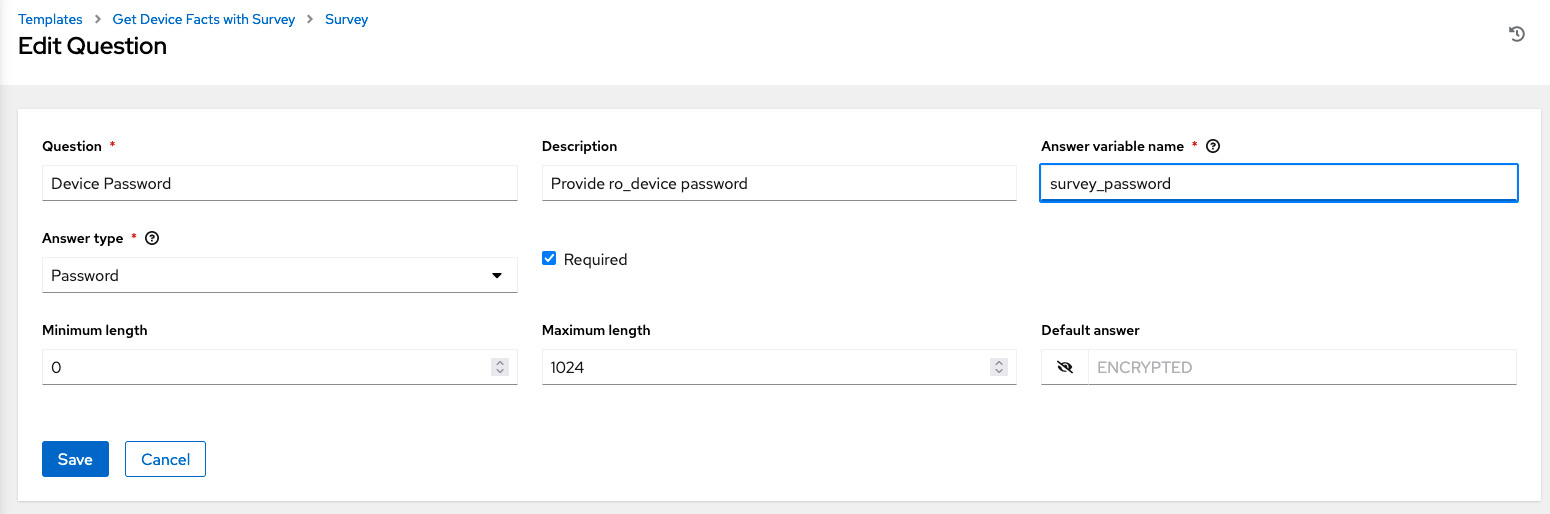
- password values
| Setting | Value | Comment |
|---|---|---|
| Question | Device Password | |
| Description | Provide ro_device password | |
| Answer variable name | survey_password | variable which is used in the playbook |
| Answer Type | Password | |
| Required | Enabled | |
| Minimum length | 0 | |
| Maximum length | 1024 | |
| Default answer |
- Example playbook, which uses the defined survey variables
   - hosts: all
    gather_facts: false
    collections:
      - zpe.device_connection

    tasks:
      - name: Get Device Facts from a Managed Device
        fact:
            target: "{{ item.port }}"
            username: "{{ survey_username }}"
            password: "{{ survey_password }}"
            target_os: "{{ item.target_os }}"
        with_items:
          - "{{ console_ports }}"

      - name: show Ansible_facts
        debug:
          var: ansible_facts
Custom Credential Types
Ansible Tower supports the creation of custom credentials which the build-in secrets manager then manages. The custom secrets can then be applied to Templates, and the variables can be used as normal as part of a playbook
To create a custom credential type and use it in a playbook, follow the below steps
-
Go to Administration -> Credential Types and click on ADD
-
Create a new type by providing the following values
-
Name : Nodegrid_Devices
-
Description : Contains Nodegrid Device Console Credentials
-
Input configuration
fields: - id: username type: string label: Username - id: password type: string label: Password secret: true required: - username - password -
Injector configuration
extra_vars:
  i_password: '{{ password }}'
  i_username: '{{ username }}'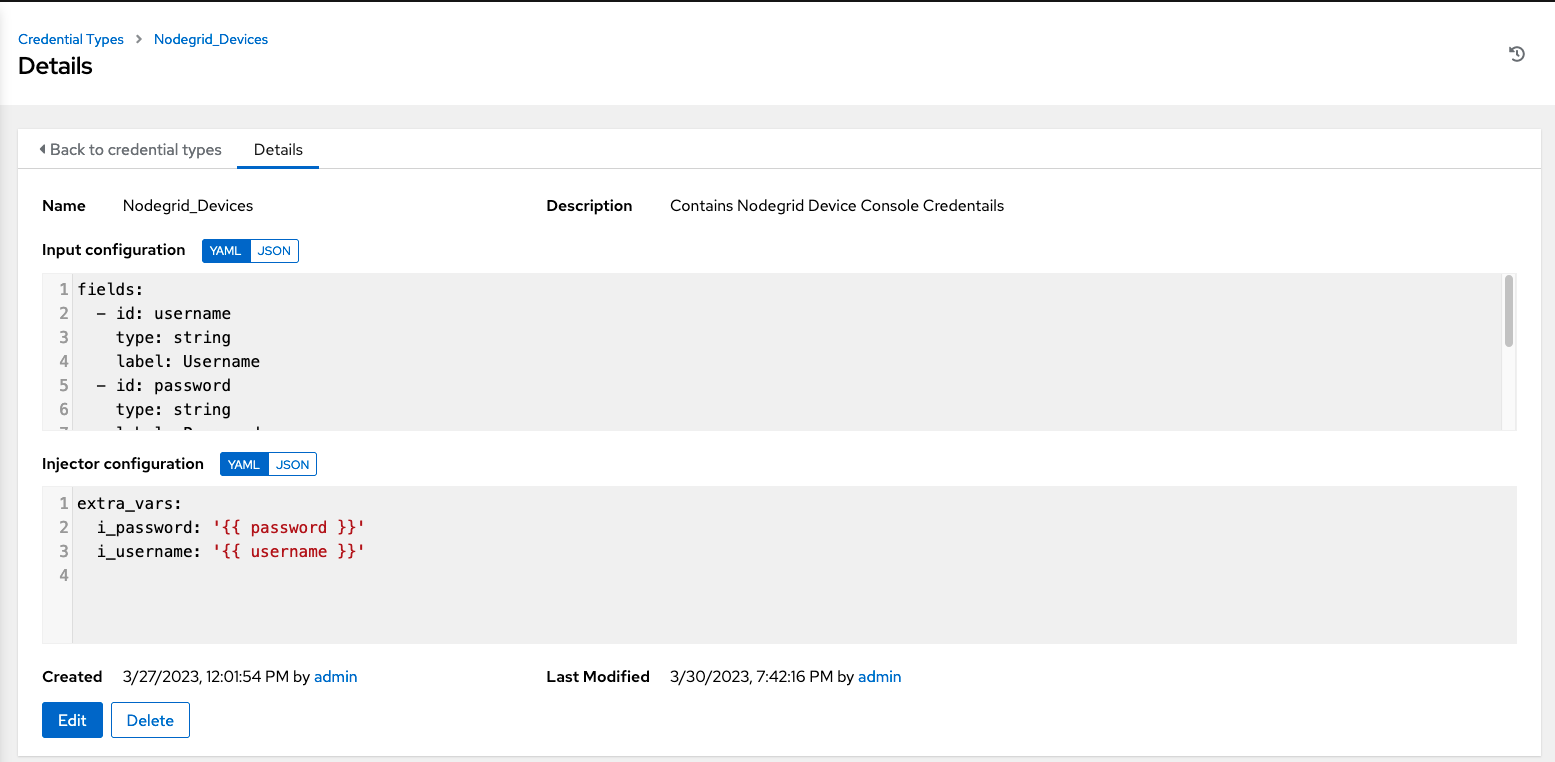
-
-
the variable which are used in the playbook is called
i_username,i_passwordin this example -
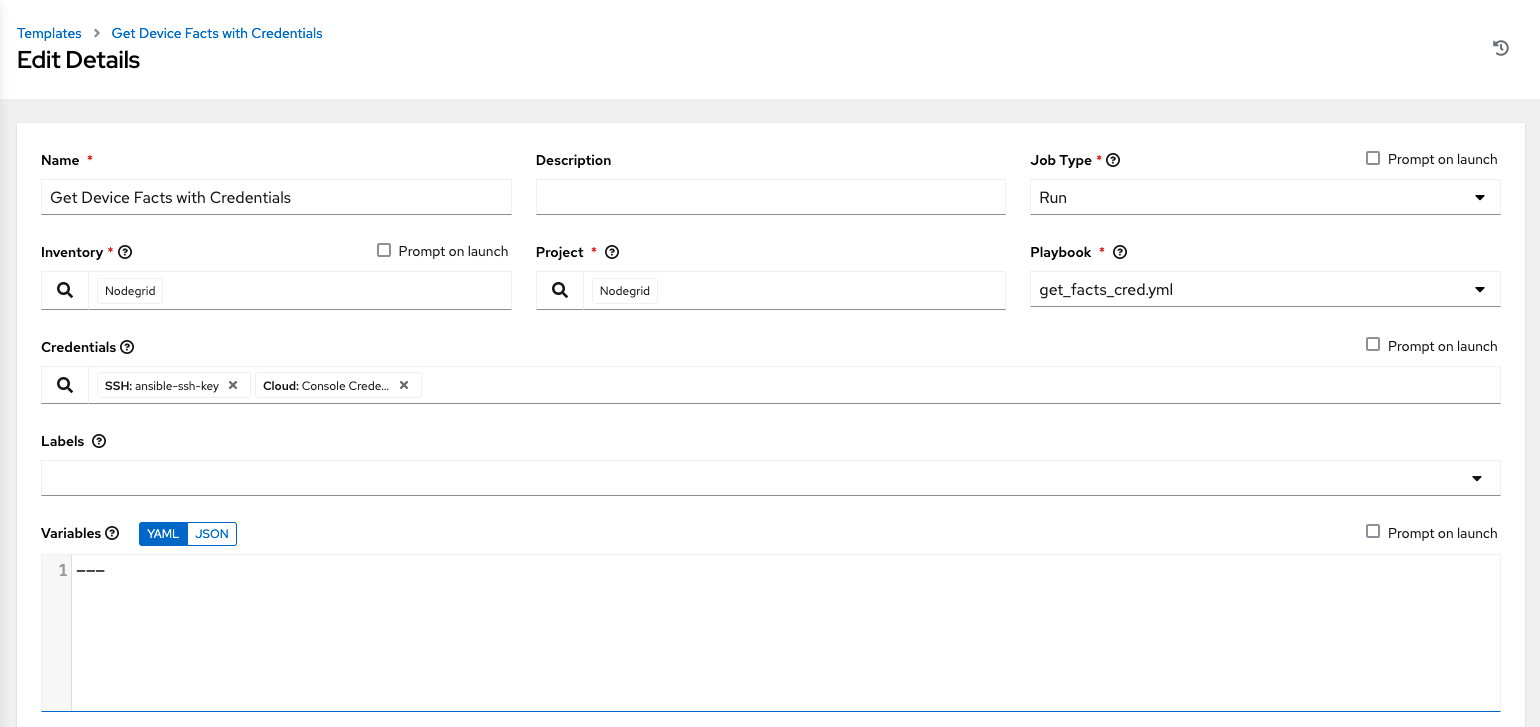
Store now the Console connection credentials in the Resource -> Credentials section by creating a new entry and selecting the credential type Nodegrid_Devices

- Assign the newly created console credentials to the playbook/template as a 2nd set of credentials
- Example playbook
 - hosts: all
gather_facts: false
collections:
 - zpe.device_connection

tasks:
 - name: display
   debug:
      msg: "{{ i_username }}"

 - name: Get Device Facts from a Managed Device
   fact:
       target: "{{ item.port }}"
       username: "{{ i_username }}"
       password: "{{ i_password }}"
       target_os: "{{ item.target_os }}"
   with_items:
     - "{{ console_ports }}"

 - name: show Ansible_facts
   debug:
     var: ansible_facts
Appendix
Enable playbook debug
- go to
<your-awx-fqdn>/api/v2/settings/jobs/ - At the bottom of the page, you have a small window that allows you to modify the content. Within the content box look for:
"PROJECT_UPDATE_VVV": false,
and change it to:
"PROJECT_UPDATE_VVV": true,
Click the PATCH button. That enables the -vvv option for project refresh jobs. As written, those refresh jobs install the requirements.
Created ro_user for Cisco IOS
cisco(config)#username ro_user privilege 3 pass PASSWORD
cisco(config)#privilege exec level 3 show running-config
cisco(config)#exit
cisco(config)#copy running-config startup-config
Create ro_user for Junos
root@iejuniper01> configure
Entering configuration mode

{master:0}[edit]
root@iejuniper01# edit system login user ro_user

{master:0}[edit system login user ro_user]
root@iejuniper01# set authentication plain-text-password
New password:
Retype new password:

{master:0}[edit system login user ro_user]
root@iejuniper01# set class read-only
root@iejuniper01# commit
Create ro_user for FortiOS
fortios # config system accprofile
fortios # edit "ro_users"
fortios # set comments "Read Only Users"
fortios # set secfabgrp read
fortios # set ftviewgrp read
fortios # set authgrp read
fortios # set sysgrp read
fortios # set netgrp read
fortios # set loggrp read
fortios # set fwgrp read
fortios # set vpngrp read
fortios # set utmgrp read
fortios # set wifi read
fortios # next
fortios # config system admin
fortios # edit "ro_user"
fortios # set accprofile "ro_users"
fortios # set comments "Read Only User"
fortios # set vdom "root"
fortios # set password ENC PASSWORD
fortios # next
Create ro_user for PanOS
admin@pa-3020> configure
admin@pa-3020> set mgt-config users ro_user password
admin@pa-3020> set mgt-config users ro_user permissions role-based superreader yes
admin@pa-3020> commit
Create ro_user for NodegridOS
[admin@nodegrid /]# import_settings
Type or paste data output from export_settings. Press <CTRL-D> to finish.
/settings/authorization/ro_users/members memberRemote=ro_user,
/settings/authorization/ro_users/profile track_system_information=yes
/settings/authorization/ro_users/profile terminate_sessions=yes
/settings/authorization/ro_users/profile software_upgrade_and_reboot_system=yes
/settings/authorization/ro_users/profile configure_system=yes
/settings/authorization/ro_users/profile configure_user_accounts=yes
/settings/authorization/ro_users/profile apply_&_save_settings=no
/settings/authorization/ro_users/profile shell_access=no
/settings/authorization/ro_users/profile restrict_configure_system_permission_to_read_only=yes
/settings/authorization/ro_users/profile menu-driven_access_to_devices=no
/settings/authorization/ro_users/profile sudo_permission=no
/settings/authorization/ro_users/profile custom_session_timeout=no
/settings/authorization/ro_users/profile startup_application=cli
/settings/authorization/ro_users/profile manage_devices_permissions=no
/settings/local_accounts/ro_user username=ro_user
/settings/local_accounts/ro_user account_type=regular_account
/settings/local_accounts/ro_user password=PASSWORD
/settings/local_accounts/ro_user hash_format_password=no
/settings/local_accounts/ro_user password_change_at_login=no
/settings/local_accounts/ro_user user_group=ro_users