You can import a certificate or generate a Certificate Signing Request (CSR) and use that certificate on the web server or an IPsec tunnel.
To create a certificate:
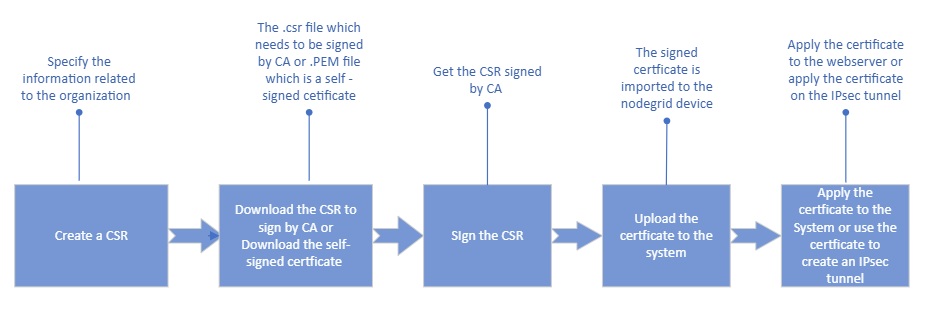
You must first create a CSR; and complete all the required information related to the certificate, including details such as Common Name, Organization, Organization Unit, and more. For more information, see the Create a CSR section.
After creating the CSR, you can either self-sign it or send it to a Certificate Authority (CA) for signature, and the CA will then generate the certificate.
Once you upload the certificate to the system, you can either use it as a web server certificate or use it while creating an IPsec tunnel.
Create a CSR
You can either generate a CSR and get it signed by a Certificate Authority or self-sign it.
To create a CSR:
Go to Security :: Certificates.
Click Create CSR.
To generate a CSR to be signed by a CA:
Enter the details.
DO NOT check the Self-signed field.
Click Generate CSR. Download the CSR and send it to a CA.
To download the CSR, go to the Certificate table, and click the CSR name link.
Click Download.
To generate a self-signed certificate for the webserver:
Select the Self-Sign Certificate field.
Specify the Certificate validity in days.
Select the Self-Sign Certificate field.
Click Generate CSR. A self-signed certificate is listed in the Certificate tab.
To generate a self-signed certificate for the IPsec tunnel:
Specify the Certificate validity in days.
Select the User SSL Certificate Trust Attribute field.
Trusted Peer (P): Select this field if the Nodegrid device can act as a trusted
peer and be used in the authentication phase in an IPsec network.
In the case of self-signed certificates, where there's no external CA involved,
these attributes are used to establish trust within the IPsec network.
Trusted CA to issue client certificates (T ): This attribute ensures
that the self-signed CA certificate is trusted to issue client certificates.
Select the field to allow the IPsec to be validated against this CA
certificate to prove their identity and securely gain access to the IPsec
network.
Trusted CA to issue server certificates (C): This attribute ensures
that the self-signed CA certificate is trusted to issue server certificates.
Select the field to allow the IPsec servers to validate against this CA
certificate to prove their identity and securely gain access to the IPsec.
Click Generate CSR.
A self-signed certificate is generated and listed under the Certificates tab.