Devices transferred to a company account need to be approved before they become available for operations. The Device listing and Devices Details tables on this tab are the same as on the ENROLLED tab.

ENROLL button – moves selected device(s) to Enrolled status
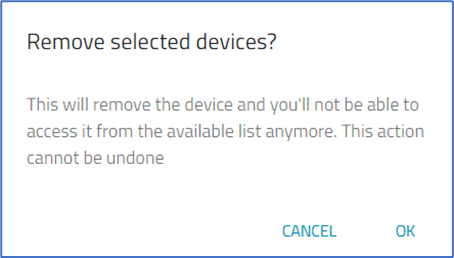
REMOVE button – removes selected device
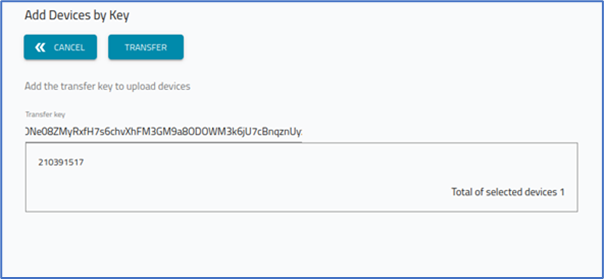
ADD BY KEY button – add device with supplied key
ADD BY CLAIM ID button – add device with Claim ID
RELOAD button refreshes the table contents.
Device Status
Online - The device is connected to ZPE Cloud.
Offline - The device is not connected to ZPE Cloud.
Never Connected - The device is not connected to ZPE Cloud and has never connected.
Failover - The device is connected to ZPE Cloud, but it is using the “backup” interface from the failover.
Pending Connection - The device is not connected and has never connected. This status applies to devices in Europe.
NOTE
Device status is updated at regular intervals.
If a device is Offline, Never connected or Pending Connection, refer to the Firewall article in our KB.
Manage Available Devices
Enroll Device
When a device is moved from Available to Enrolled, the default scripts and configurations are applied. If a device is Unenrolled and moves to Available, the next time it is enrolled, a prompt asks whether to re-apply the default configuration.
Go to DEVICES :: AVAILABLE.
In the table, locate the device(s) and select checkbox(es).
Click ENROLL.
When the enrollment is completed, the device is moved to the ENROLLED tab.
NOTE
Devices in Available status do not receive data (cellular, application, connection status, etc.).
Remove Device
WARNING
Perform this procedure only for devices that are malfunctioning or to exclude from availability.
Go to DEVICES :: AVAILABLE.
Select checkbox(s) next to devices to be removed.
Click REMOVE (displays dialog).

Click OK.
Add by Key
When a new device order is sent, the notification email includes this Transfer Key. This key can be used to import the device to ZPE Cloud.
Go to DEVICES :: AVAILABLE.
Click ADD BY KEY (displays dialog).

Enter the Transfer Key.
Click LOAD DEVICES (displays dialog). Confirm the list is correct.

Click TRANSFER.
The devices on the list are added to the AVAILABLE tab.
Add by Claim ID
This option imports devices with the Device's Claim ID. A device can only be claimed once. The device must be on the AVAILABLE page. If needed, contact support@zpesystems.com.
Go to DEVICES :: AVAILABLE.
Click ADD BY CLAIM ID (displays dialog).

Enter the Claim ID.
Click SAVE (displays success pop-up dialog).

If incorrect, this dialog displays.
