This guide will illustrate how to setup the OAuth 2.0 Client Credential Flow using Microsoft Entra ID as the External Authorization Server.
1. Configure the OAuth resource in Microsoft Entra ID
1.1 Register resource application
Navigate to Microsoft Entra ID
Click on App Registrations
Click on New Registration
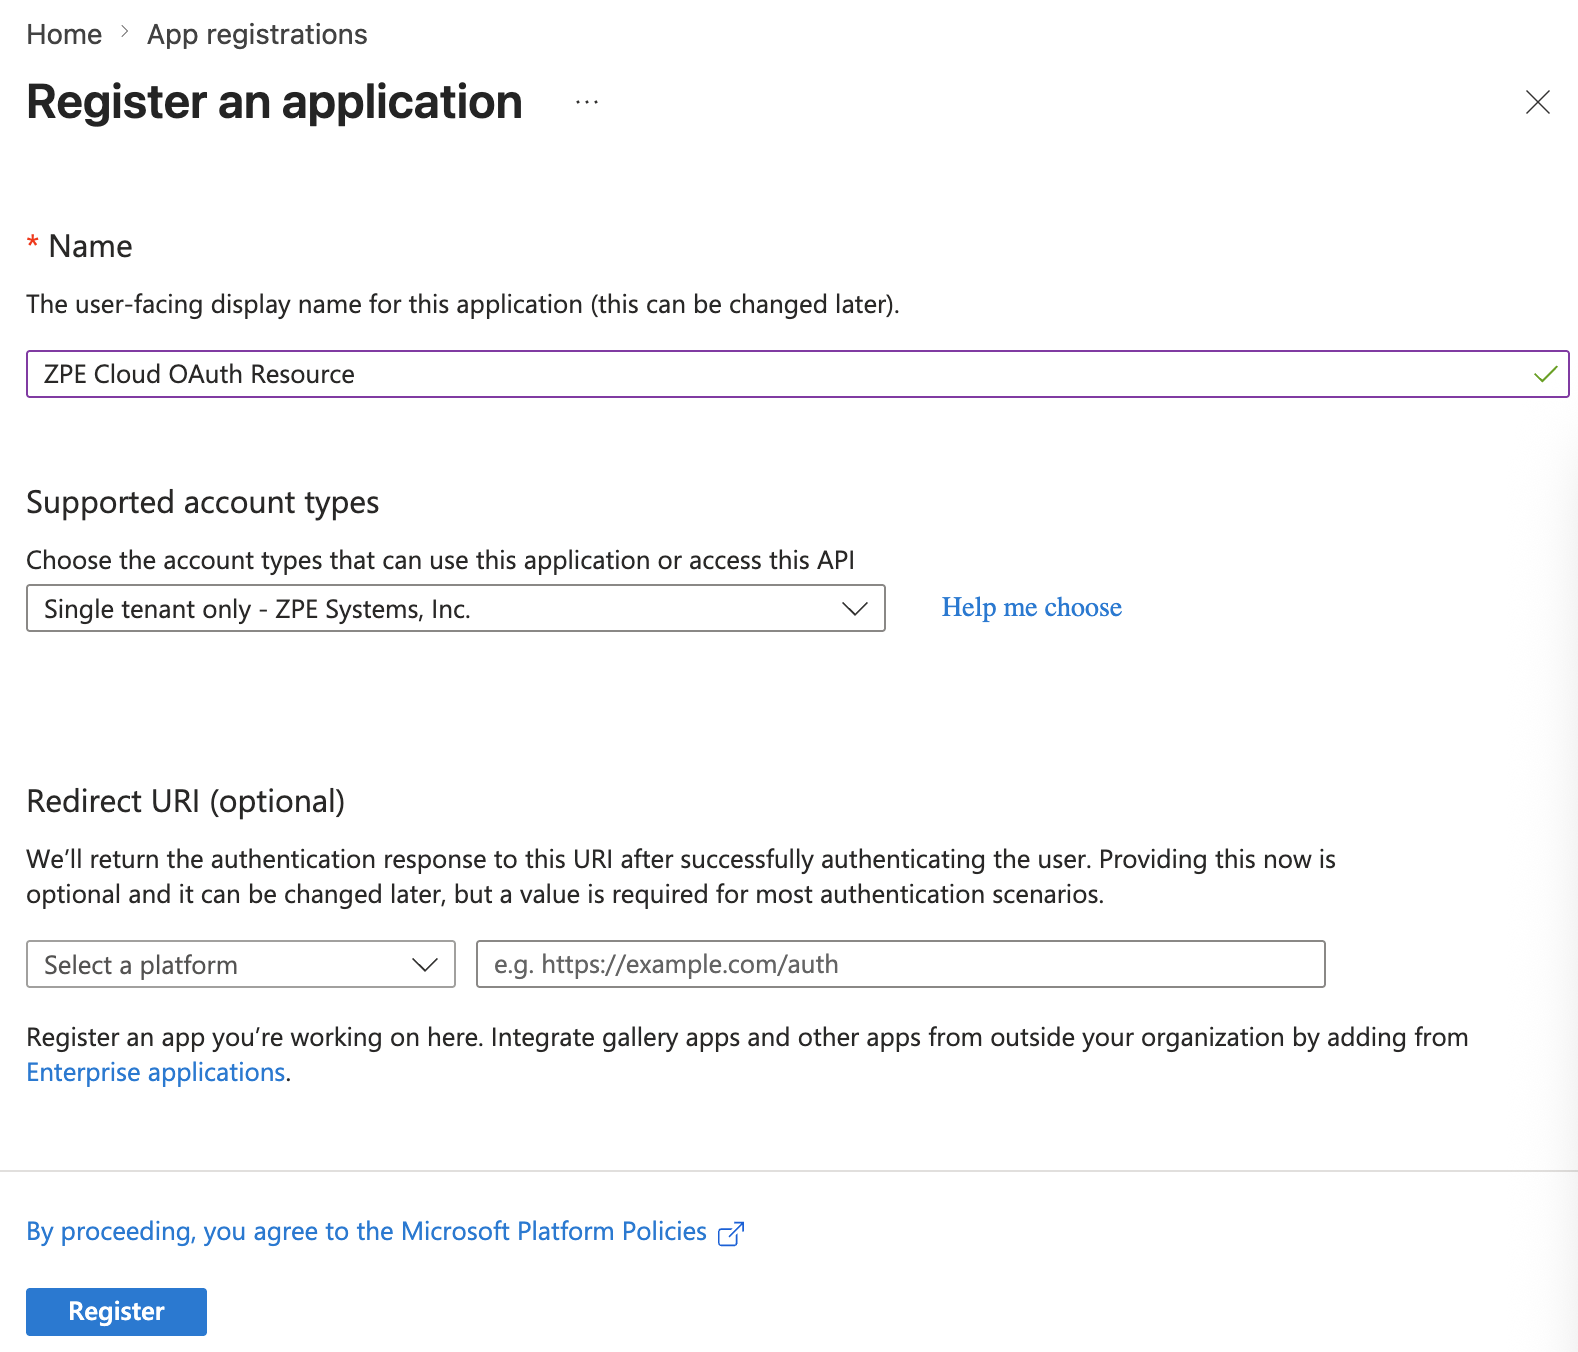
In the Register an application window:
Name: Enter a name for the application (i.e. ZPE Cloud OAuth Resource)
Supported account types: Select the “Single tenant only” option
Click Register
1.2 Expose API on resource application
Click Expose an API on the left-side navigation of the app
Click Add next to “Application ID URI”
Click Save with the default value that is provided
Copy this value as this will be known as the AUDIENCE variable, and will be needed when setting up the Service Account in ZPE Cloud
1.3 Add Scope
Click on Add Scope
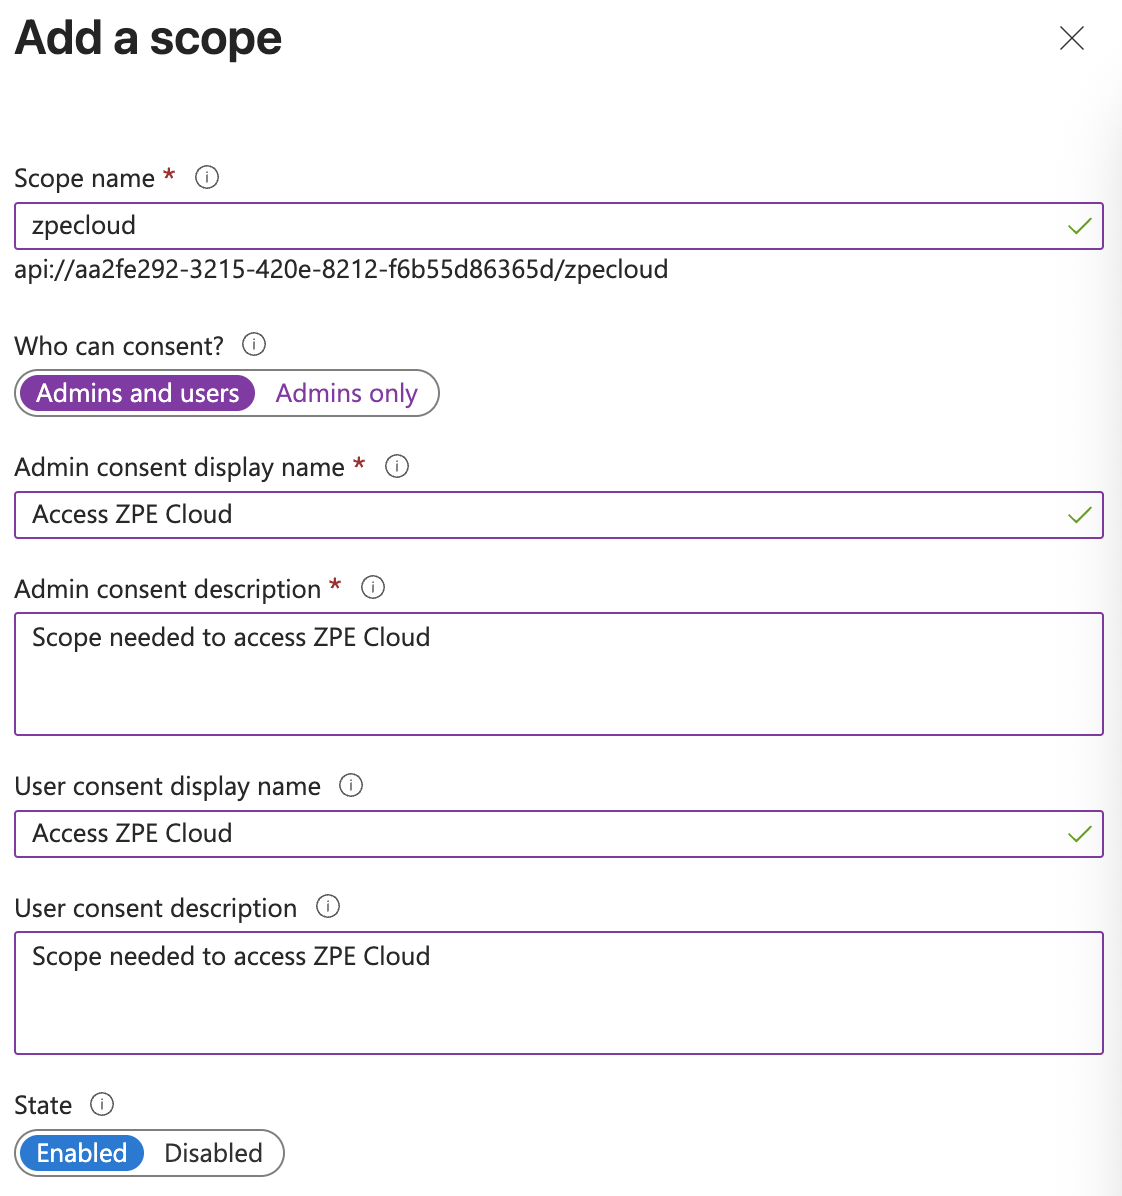
In the Add scope pane:
Scope name: Enter scope name
Who can consent?: Choose which users can consent to the scope (either ‘Admins and users’ or ‘Admins only’
Admin consent display name: Enter the name that will be displayed in the consent screen
Admin consent description: Enter the description that will be displayed in the consent screen
User consent display name: Same as 2.c but for Users
User consent description: Same as 2.d but for Users
State: Set it as enabled
Click on ‘Add scope’
1.4 Collect Microsoft Entra ID configuration needed by ZPE Cloud
Navigate to Overview on the left-side navigation of the app
Click the Endpoints tab on the Overview page
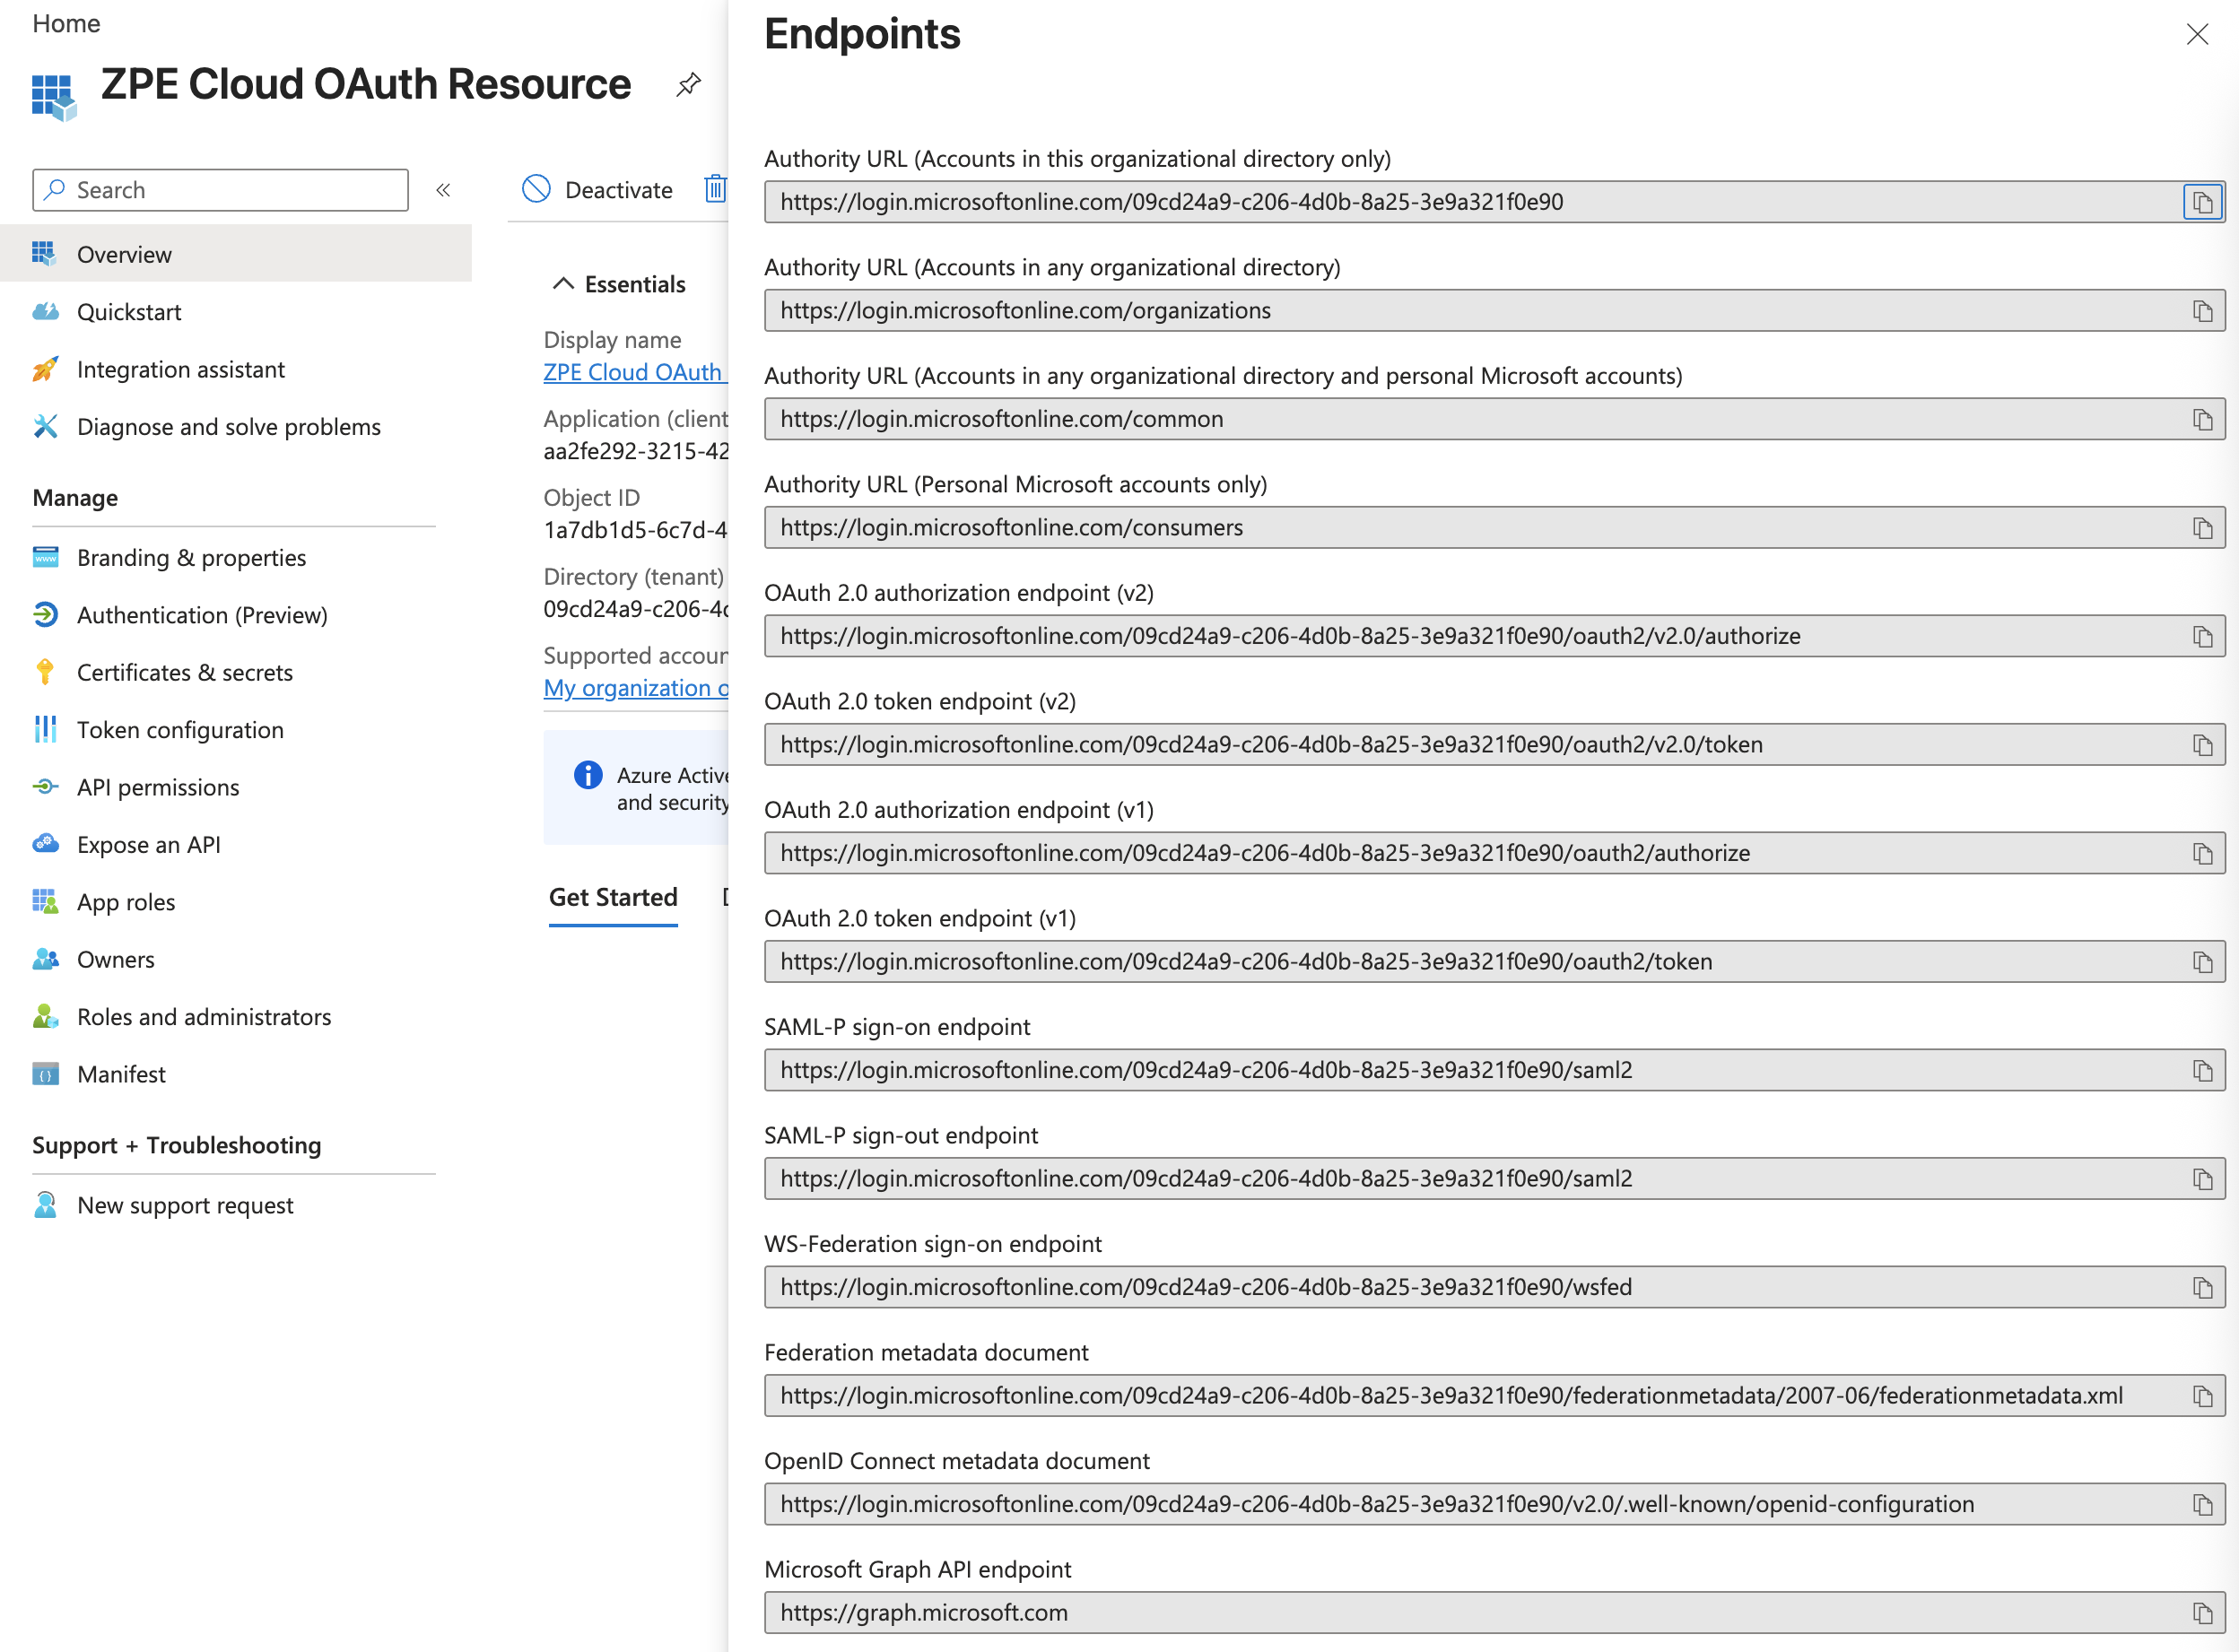
Copy the URL displayed in the OpenID Connect metadata document, and open the link. Locate the jwks_uri and copy its value, this will be known as the PROVIDER_URL
Copy the Federation metadata document, and open the link. Locate the entityID and copy its value, this will be known as the ISSUER
The OAuth 2.0 token endpoint (v2) will be known as TOKEN_URL
2. Create an OAuth Client in Microsoft Entra ID
2.1 Register OAuth Client Application
Navigate to Microsoft Entra ID
Click on App Registrations
Click on New Registration
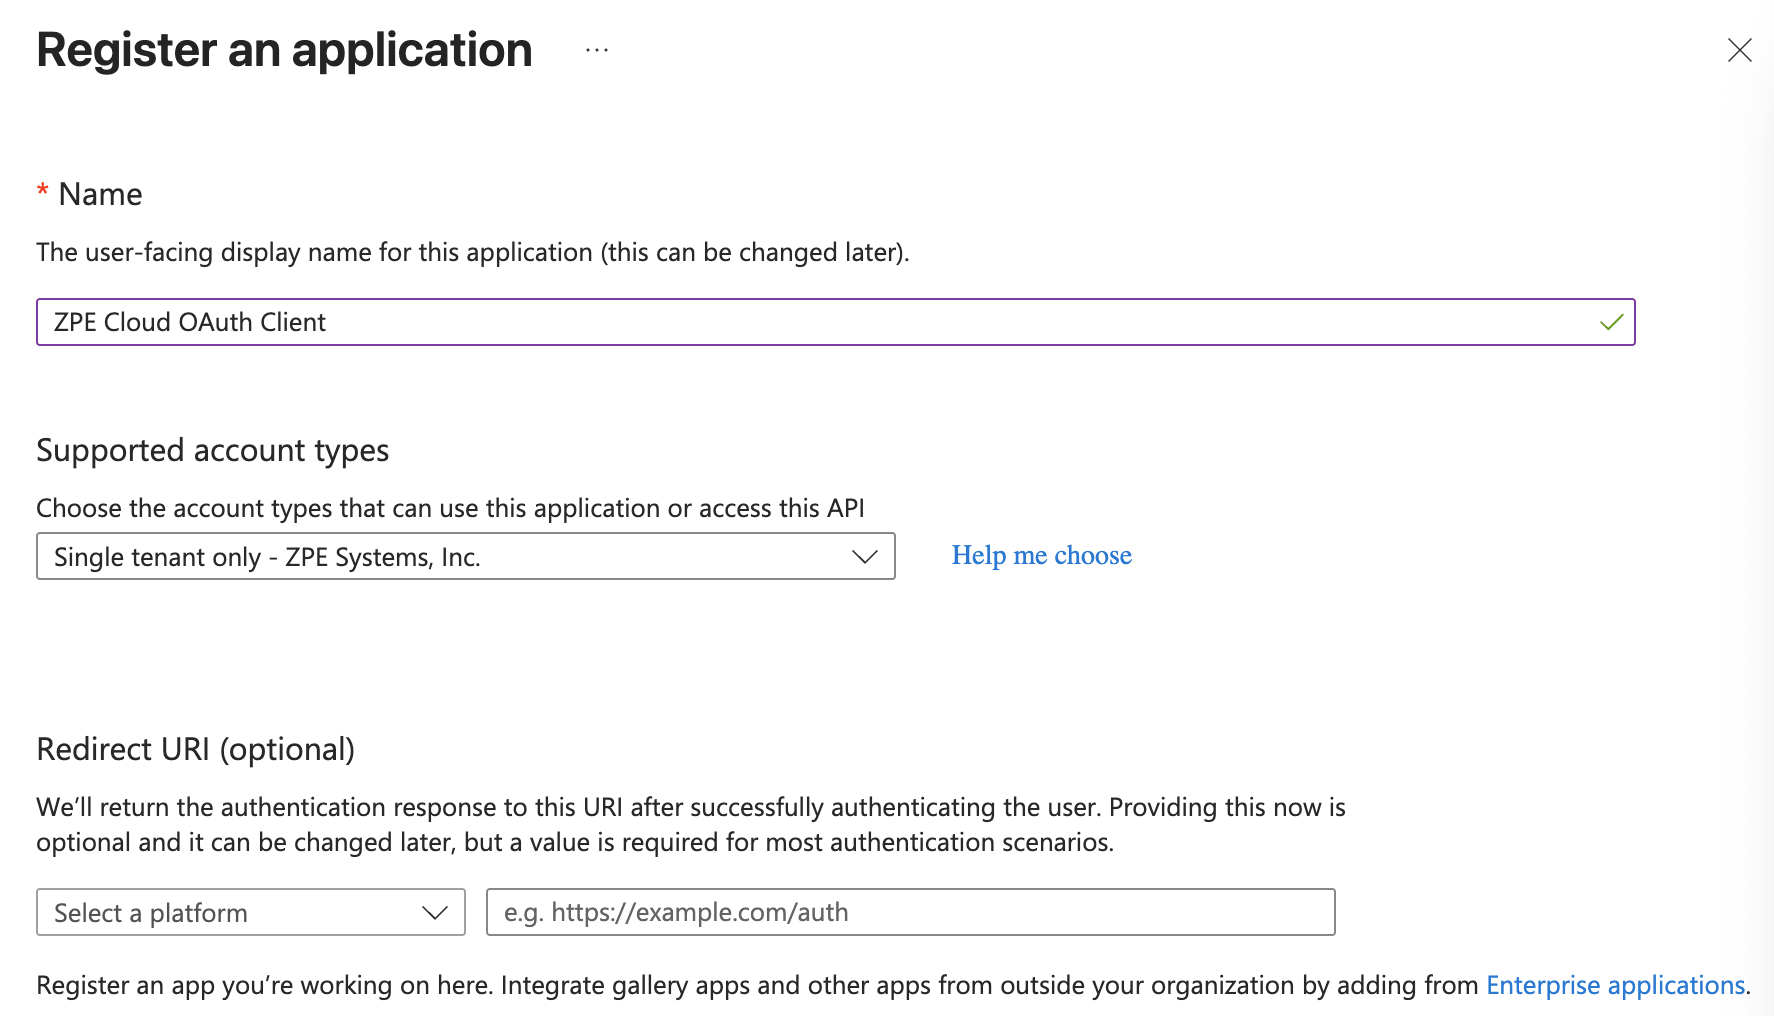
In the Register an application window:
Name: Enter a name for the application (i.e. ZPE Cloud OAuth Client)
Supported account types: Select the “Single tenant only” option
Click Register
Copy the Application (client) ID in the overview, this will be the CLIENT_ID used to configure the Service Account on the Cloud side
2.2 Configure the Client Secret
Click on Certificates & secrets on the left-side navigation of the app
Click on ‘New client secret’
On the ‘Add a client secret’ pane:
Description: Enter a description for the secret
Expires: Set an expiration time for the secret
Click Add
Copy the Secret Value, this will be used for the authentication. This will be the CLIENT_SECRET
3. Create a Service Account in ZPE Cloud
Note
For OAuth 2.0, service accounts start in the default group. Upon authentication, membership is updated to match the latest group sent by your Identity Provider via Claims and Grants; otherwise, the account membership is the company's default group. See more details on the Add App Roles section below.
Login as an Administrator
Navigate to USERS::SERVICE ACCOUNTS
Click on Add
In the ‘Add’ pane:
Authentication Method: OAuth 2.0
Name: Enter a name for the service account (i.e. entra-id-oauth)
Provider URL: PROVIDER_URL
Issuer: ISSUER
Audience: AUDIENCE
Client ID: CLIENT_ID
Click Save
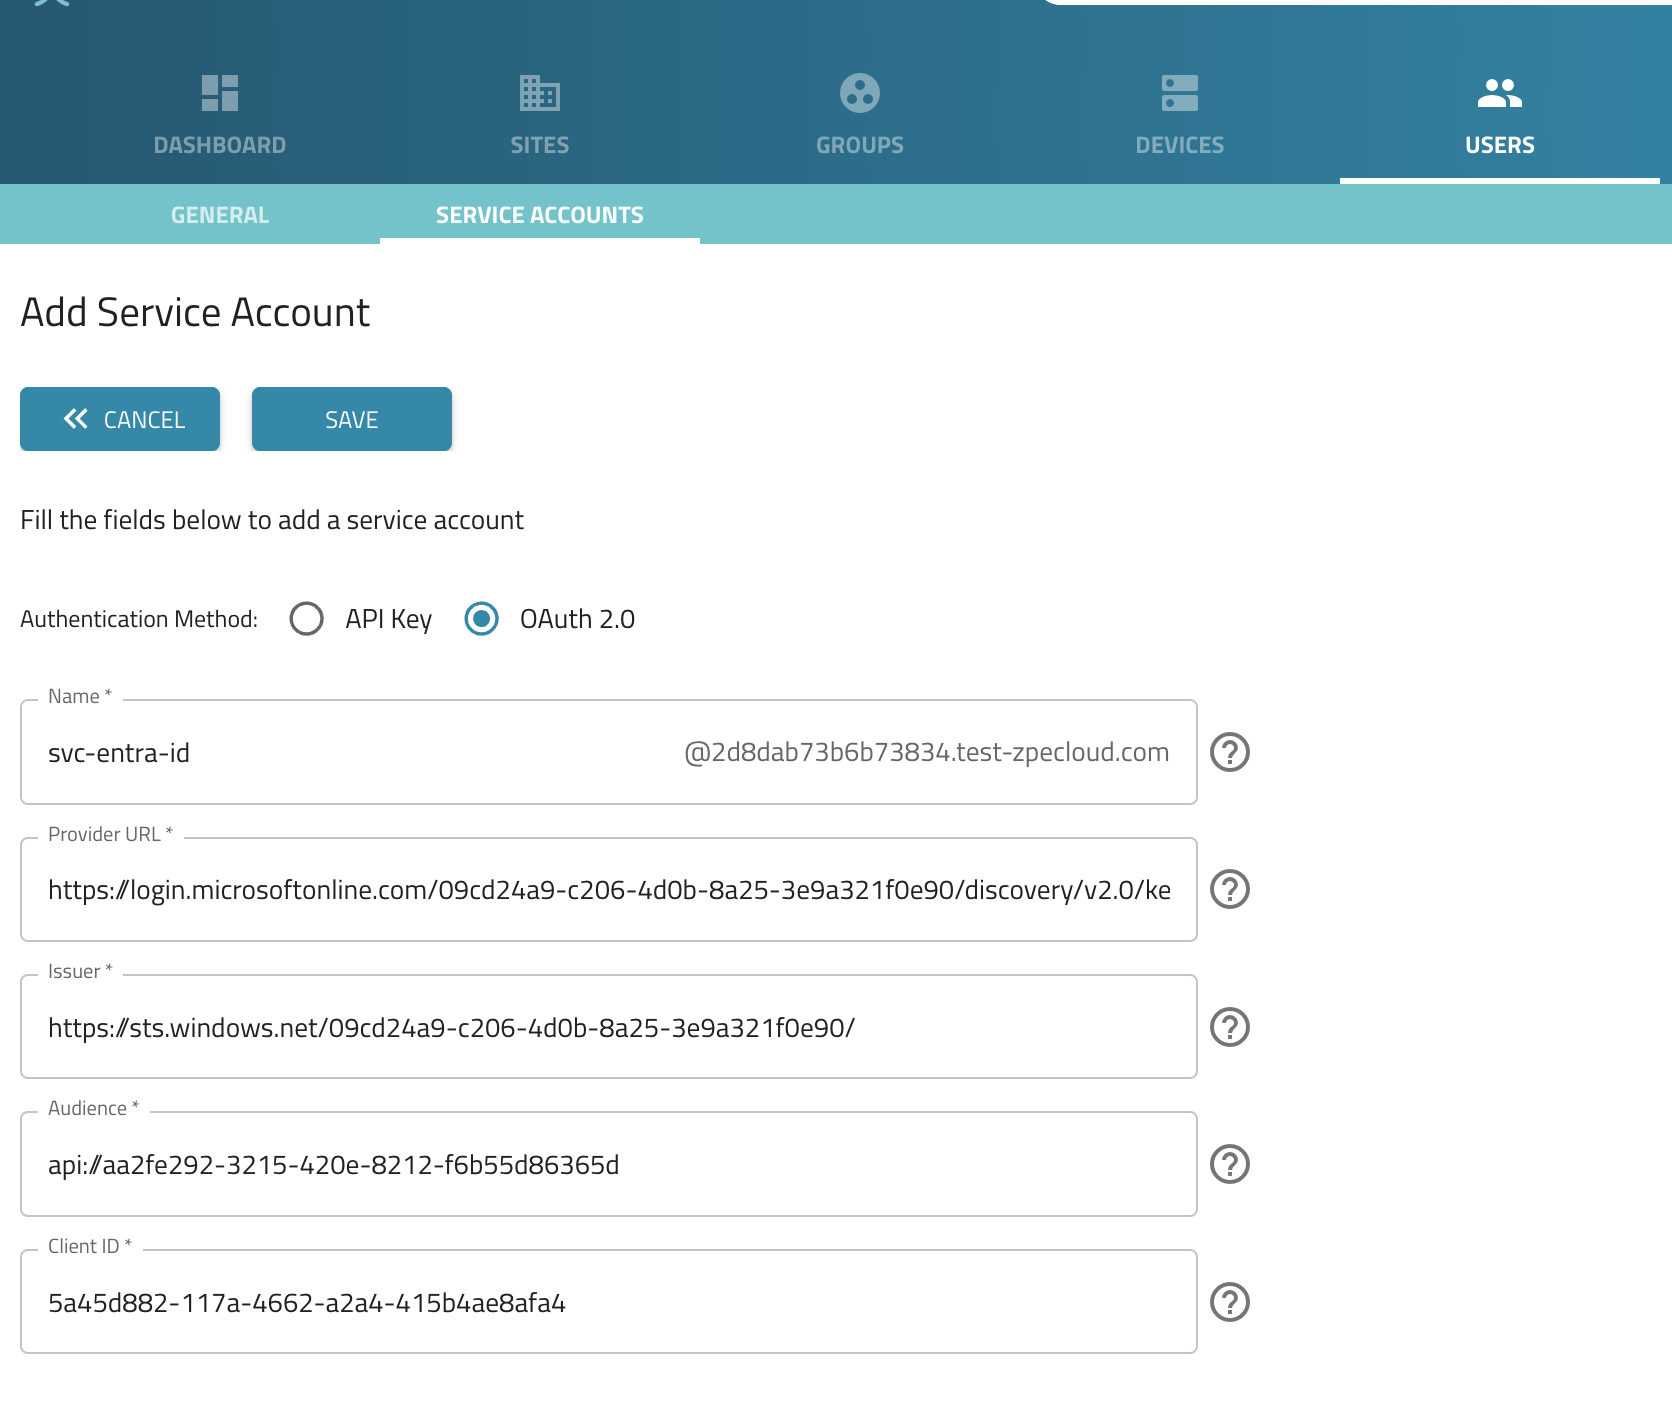
Copy the Service Account Name, this will be known as SERVICE_ACCOUNT_NAME
Navigate to GROUPS::GENERAL, choose what group the service account should belong to, the group name will be known as GROUP_NAME
4. Add App Roles in the OAuth Resource application
Navigate to the OAuth Resource application created in previous steps
Click App Roles on the left-side navigation of the app
Click on ‘Create app role’
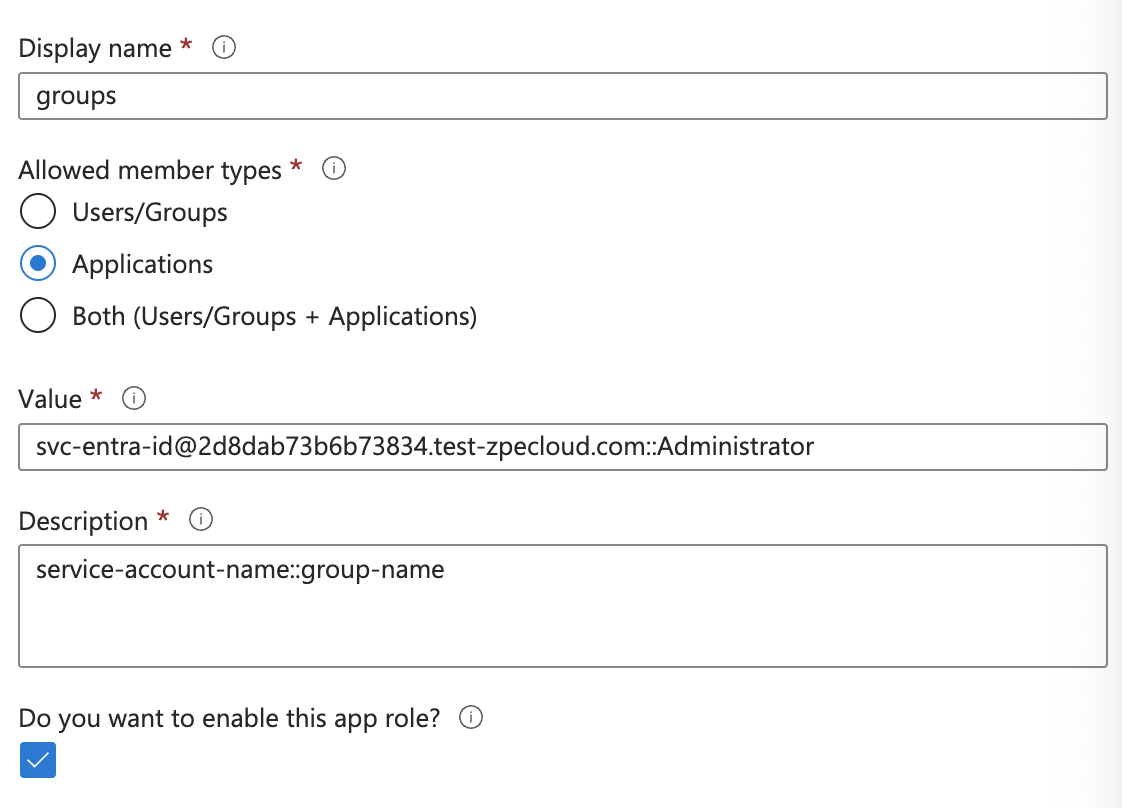
In the ‘Create app role’ pane:
Display name: ‘groups’
Allowed member types: Applications
Value: SERVICE_ACCOUNT_NAME::GROUP_NAME
Description: Service account name followed by the group name
Do you want to enable this app role? Enable checkbox
Click on Apply
5. Configure Application Permissions in the OAuth Client application
Navigate to the OAuth Client application created in previous steps
Click on API Permissions on the left-side navigation of the app
Click on Add a permission
Click on APIs my organization uses
Search for the OAuth Resource application
Select it
Select “Application permissions” on ‘What type of permission does your application require?’
Select the Role you added on Step 4
Click on Add permissions
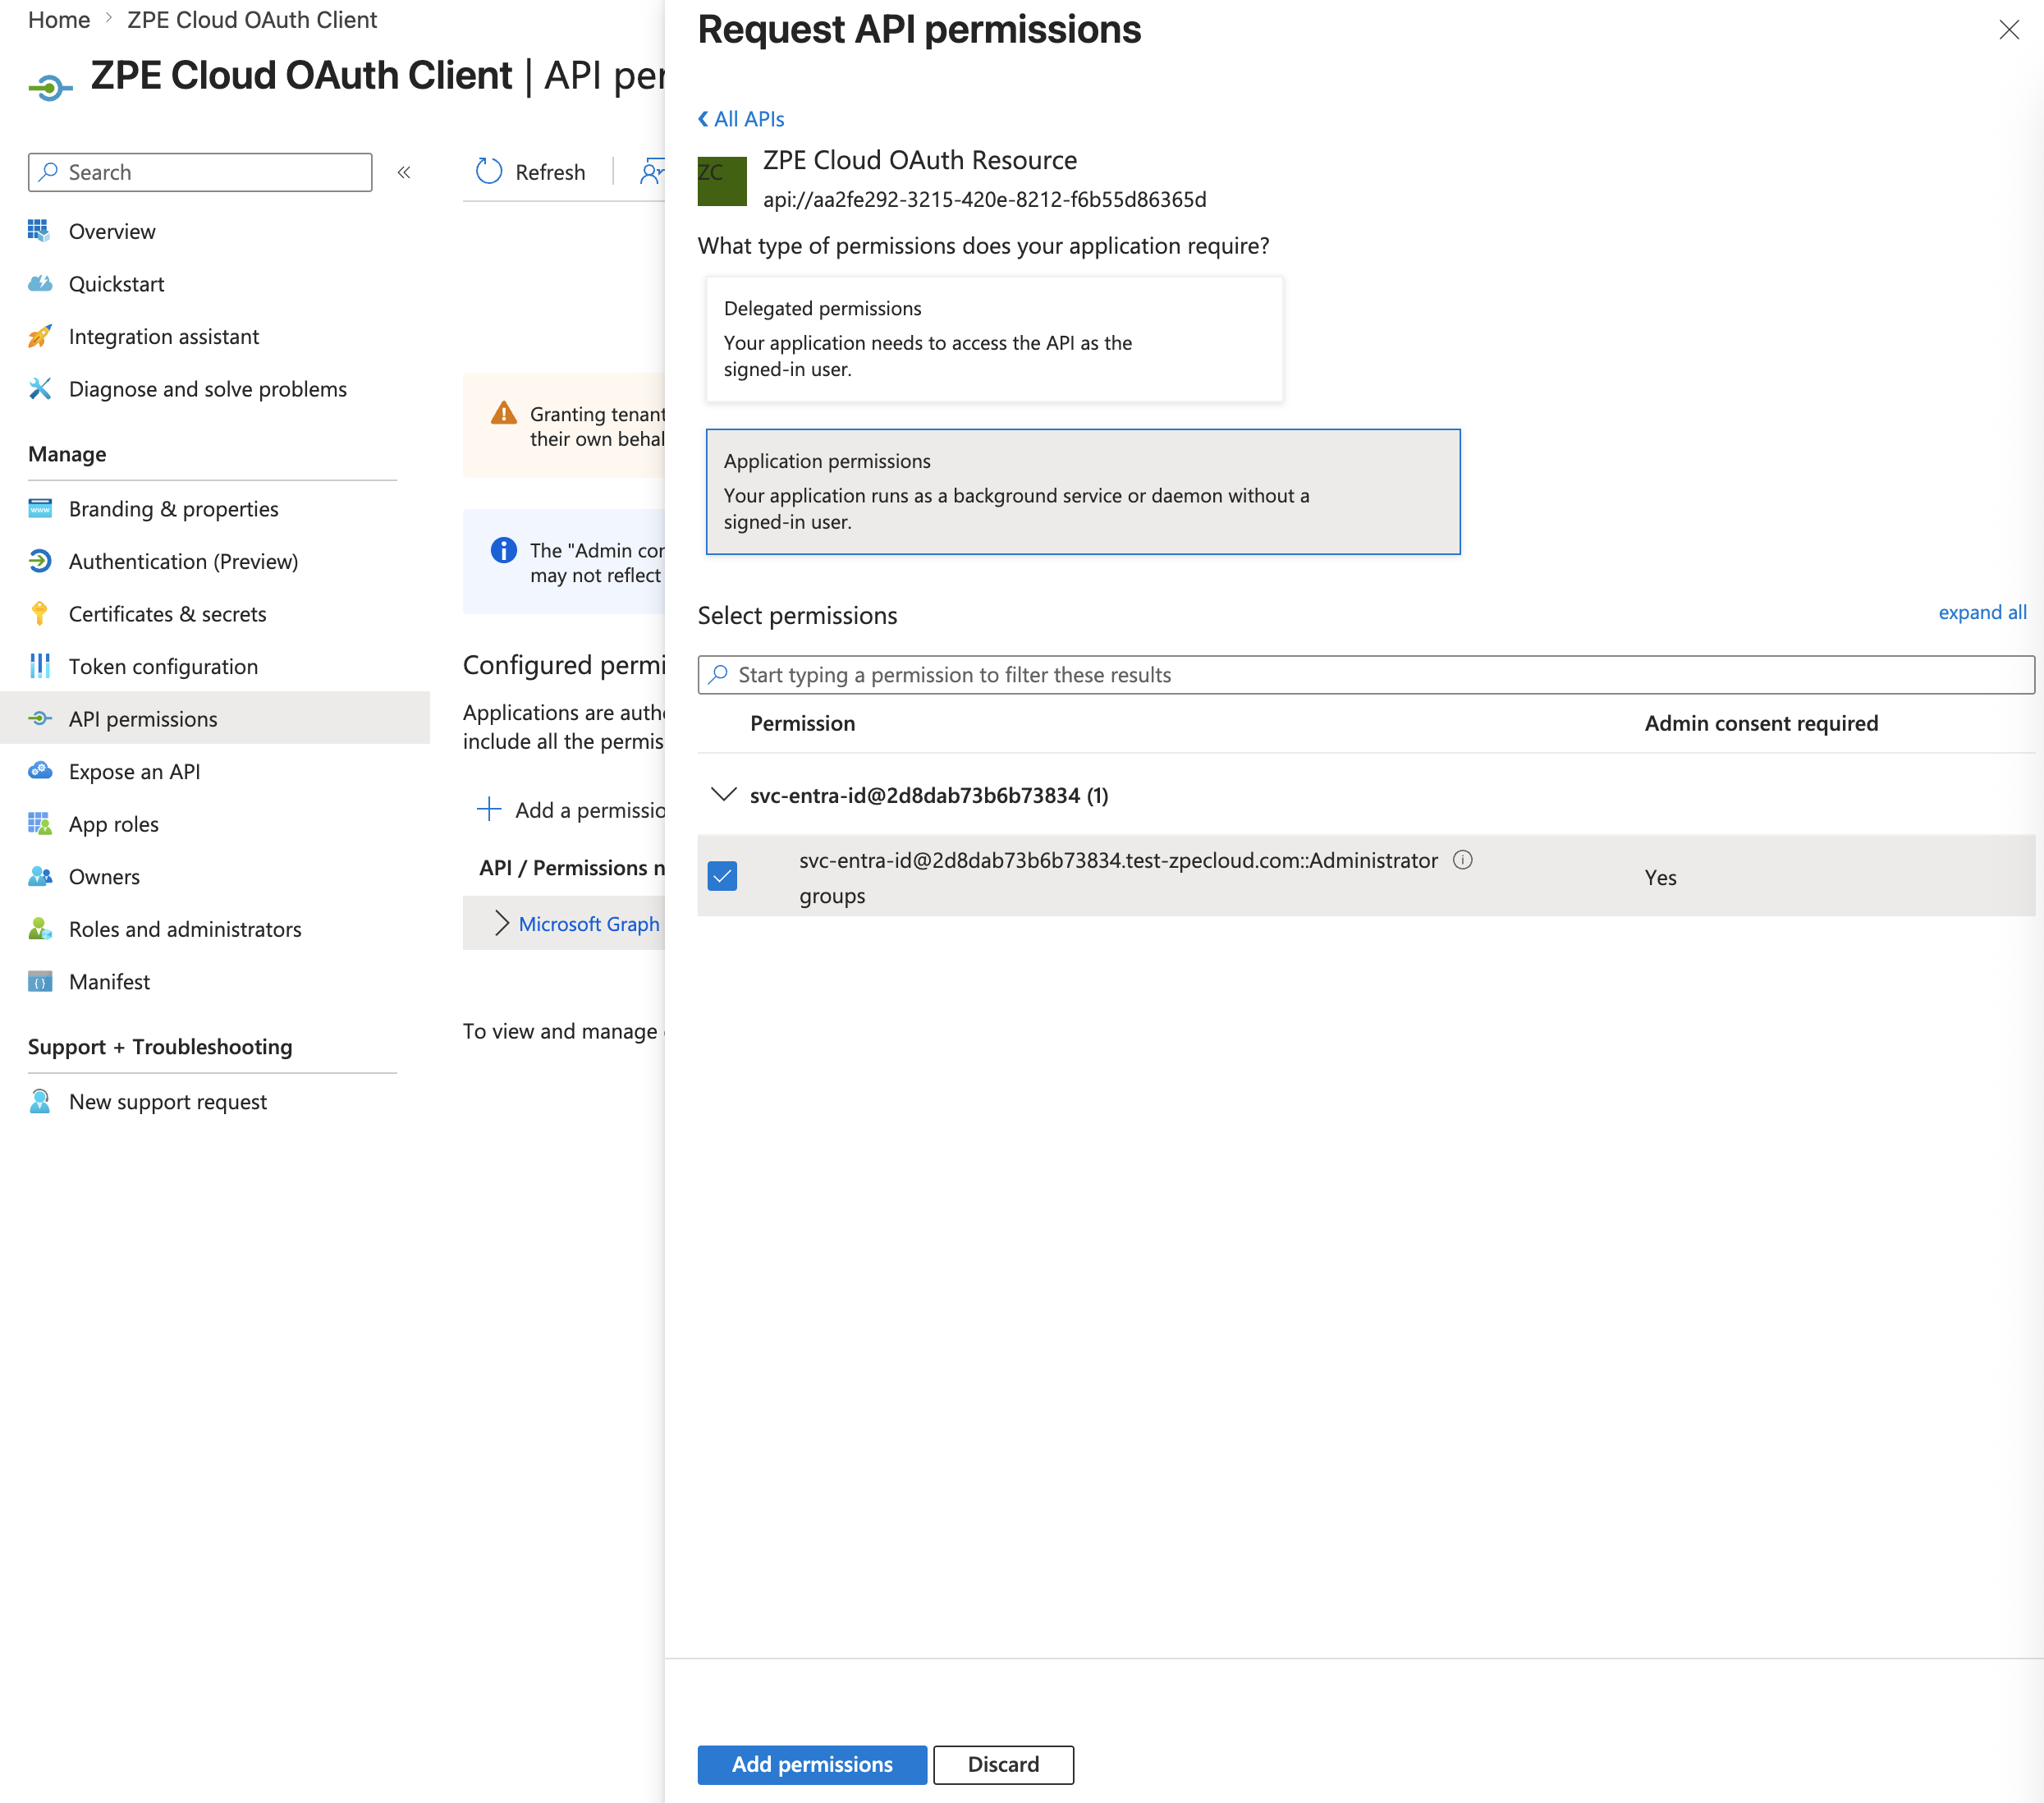
Click on “Grant Admin Consent” button to grant the permissions
Click Yes
6. Retrieve Access Token and Access ZPE Cloud
Using the CLIENT_ID and CLIENT_SECRET, we are able to authenticate the client application with Microsoft Entra ID
curl -X POST -d "client_id={CLIENT_ID}" -d "client_secret={CLIENT_SECRET}" -d "scope={AUDIENCE}/.default" -d "grant_type=client_credentials" "{TOKEN_URL}"If the authentication is successful, it should return something like this:
{"token_type":"Bearer","expires_in":3599,"ext_expires_in":3599,"access_token":"{TOKEN}"}Using the TOKEN that was returned by Entra ID, we are able to access any ZPE Cloud endpoint that is authorized by the group that the service account belongs to
curl "https://api.zpecloud.com/user?limit=1" -H "Authorization: Bearer {TOKEN}"