This section provides information on Service Accounts and the tasks that can be performed with it in ZPE Cloud.
A service account is a special type of non-human account used by applications, workloads, or system components to authenticate and interact with ZPE Cloud APIs without user intervention. Instead of representing a person, it represents the identity of a process that can perform an action in ZPE Cloud. The service account authentication in ZPE Cloud uses API keys and OAuth 2.0 that simplifies workflows by not requiring explicitly previous logins and makes it easy to integrate enterprise, orchestration and monitoring tools.
The Service Accounts authentication works with the API keys and OAuth 2.0 being provided on the header of the REST API request with the following format:'Authorization: Bearer <API Key>' or 'Authorization: Bearer <OAuth 2.0>', in which, the <API Key>/<OAuth 2.0> can be replaced by your actual Service Account key. Example as per: 'Authorization: Bearer zpe_cloud_FaaBBqaSS7SrOnKrq2KS3sFW19S9oB0s9Q0xrLXs5e8' / 'Authorization: Bearer eyJ0eXAiOiJKV1QiLCJhbGciOiM'.
This means, the Service Account is not required to login to ZPE Cloud to perform an action as a normal user would do and the API key/OAuth 2.0 already authenticates and authorizes the account.
Note that the Service accounts permissions are based on the Group the account is part of and only an Administrator can access and manage accounts on this page. For OAuth 2.0, the group configured in the Identity Provider must match the Group in ZPE Cloud or the account will be part of the Default Group configured in ZPE Cloud.
Note
For more information on how to use Service Accounts in ZPE Cloud through the API, check ZPE Cloud API Resources

Add a Service Account
This section provides information on how to add Service Accounts:
Go to USERS::SERVICE ACCOUNTS
Click ADD
Select the Authentication Method
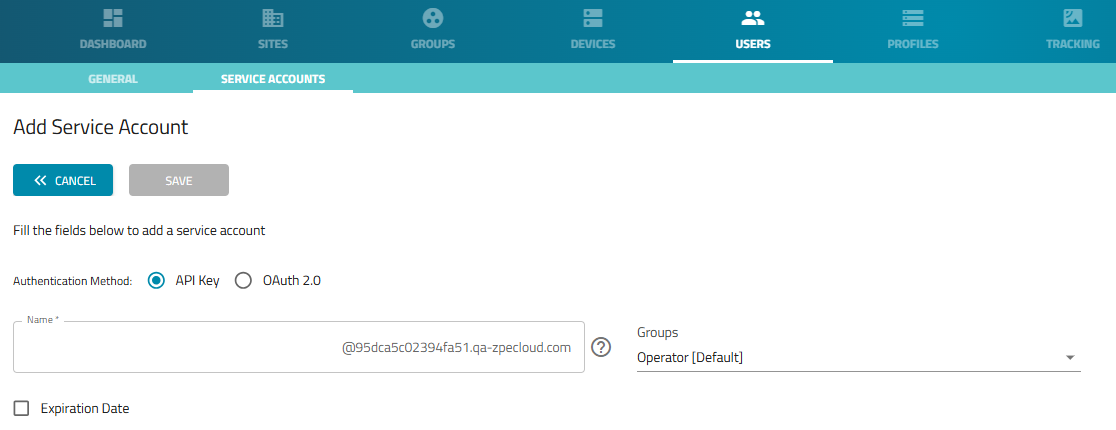
Add an API Key Service Account
Select API Key
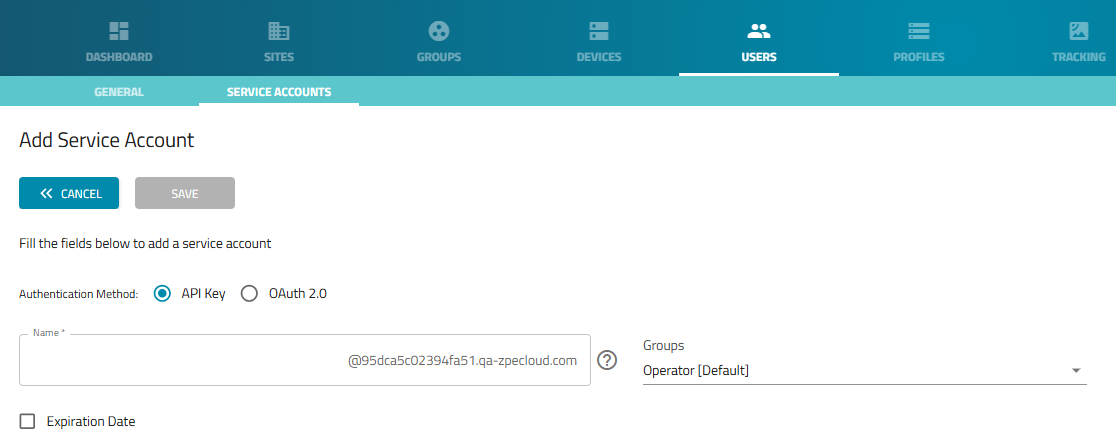
Enter the Name of the Service Account
NOTE
The domain is generated using a company identifier to ensure uniqueness. Enter the desired name that will be associated with the company identifier to be unique within a company.
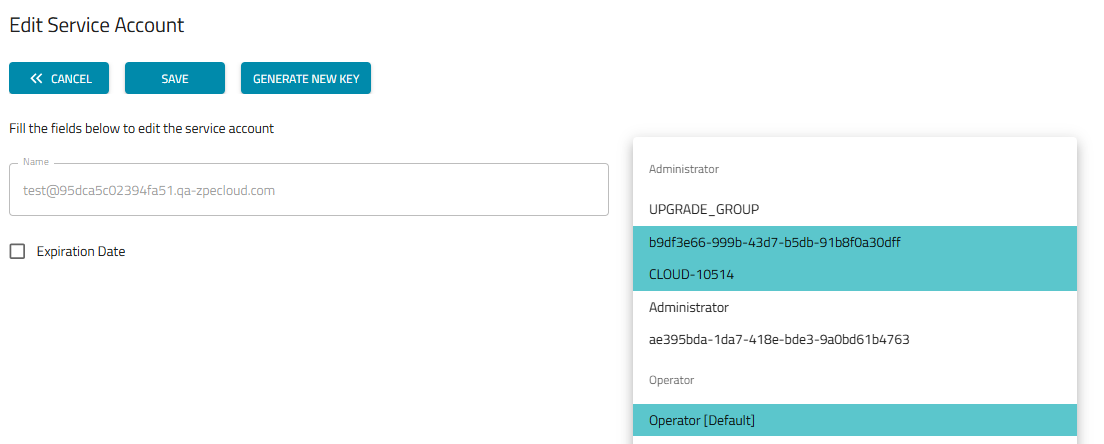
Select the group from the Groups drop-down
NOTE
For more information on creating or editing a group for a user, see the Groups section.
Click SAVE
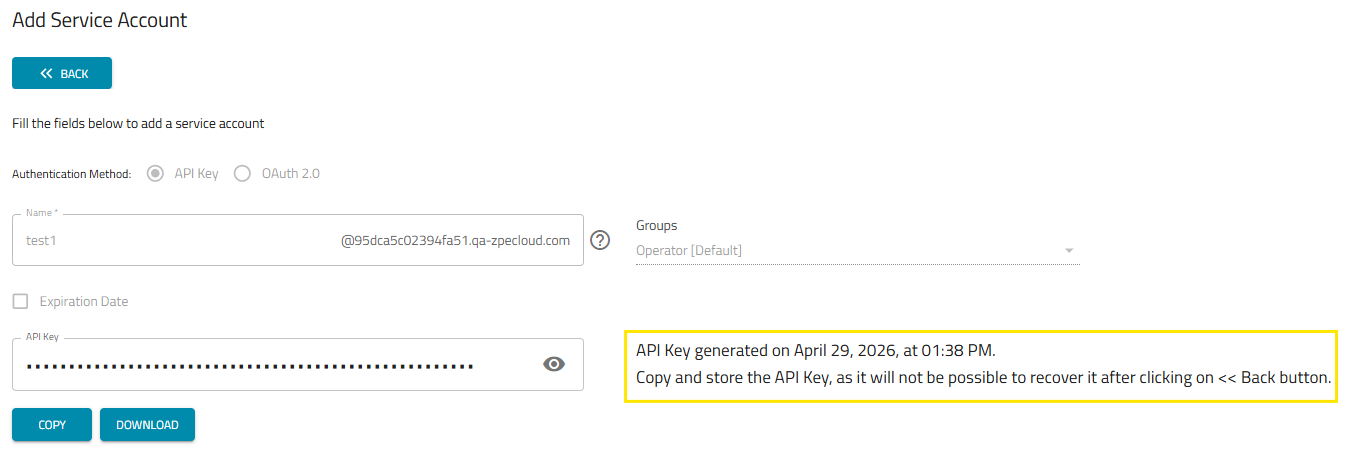
Alert
After creating the Service Account, it is necessary to save and store the API Key as it will not be available after exiting the current screen.
Add an OAuth 2.0 Service Account
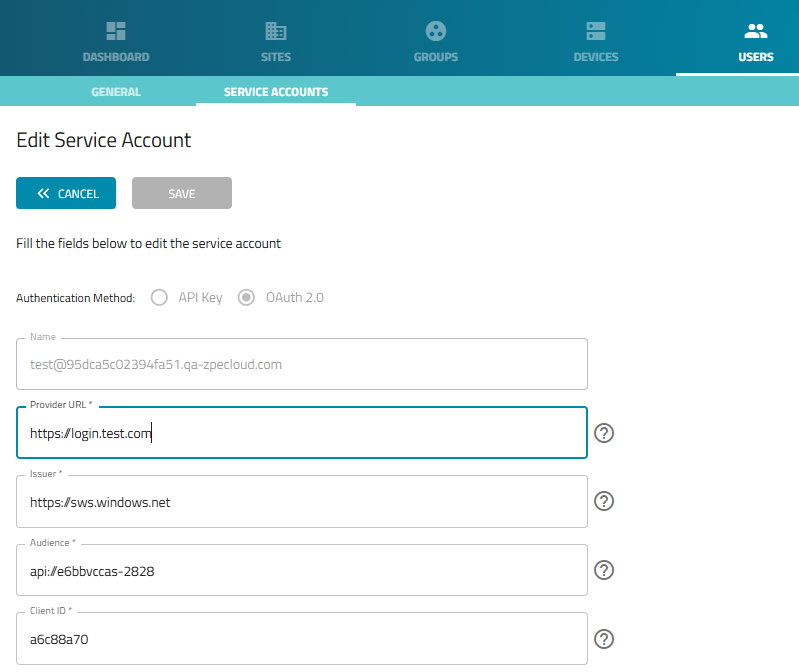
Select OAuth 2.0
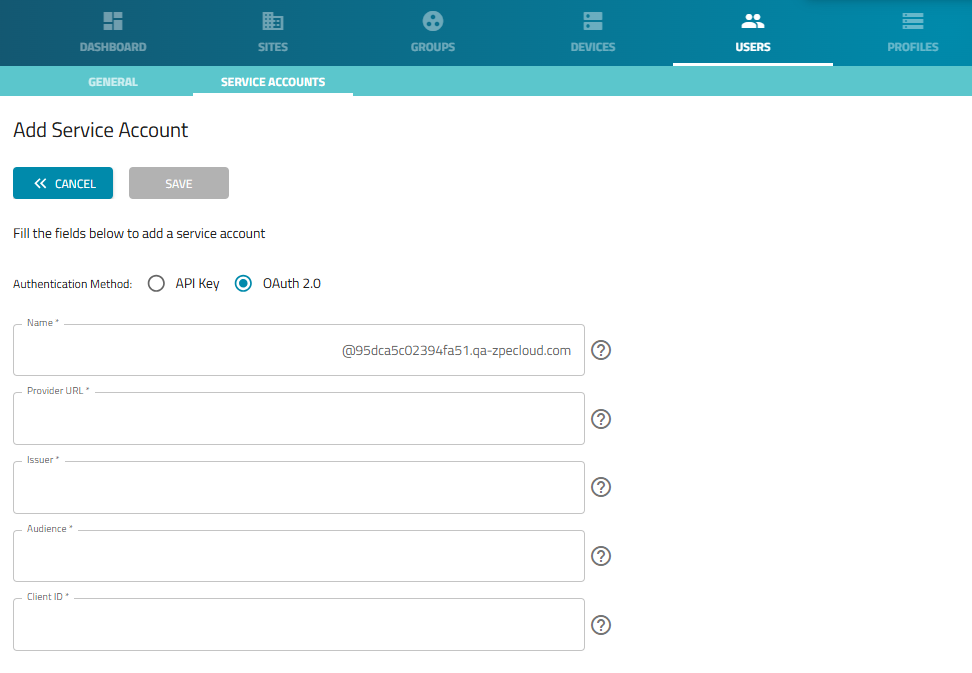
Enter Name of the Service Account
Enter the Provider URL (The JWKS (JSON Web Key Set) endpoint URL from your Identity Provider, used to verify the signature of the tokens)
Enter the Issuer (The identifier of the entity issuing the security tokens, typically a URL. This must exactly match the Issuer (iss) claim in the tokens issued by your Identity Provider)
Enter the Audience (The identifier of the recipient of the token. This must match the Audience (aud) claim in the tokens)
Enter the Client ID (The unique public identifier for your application, generated by the Identity Provider)
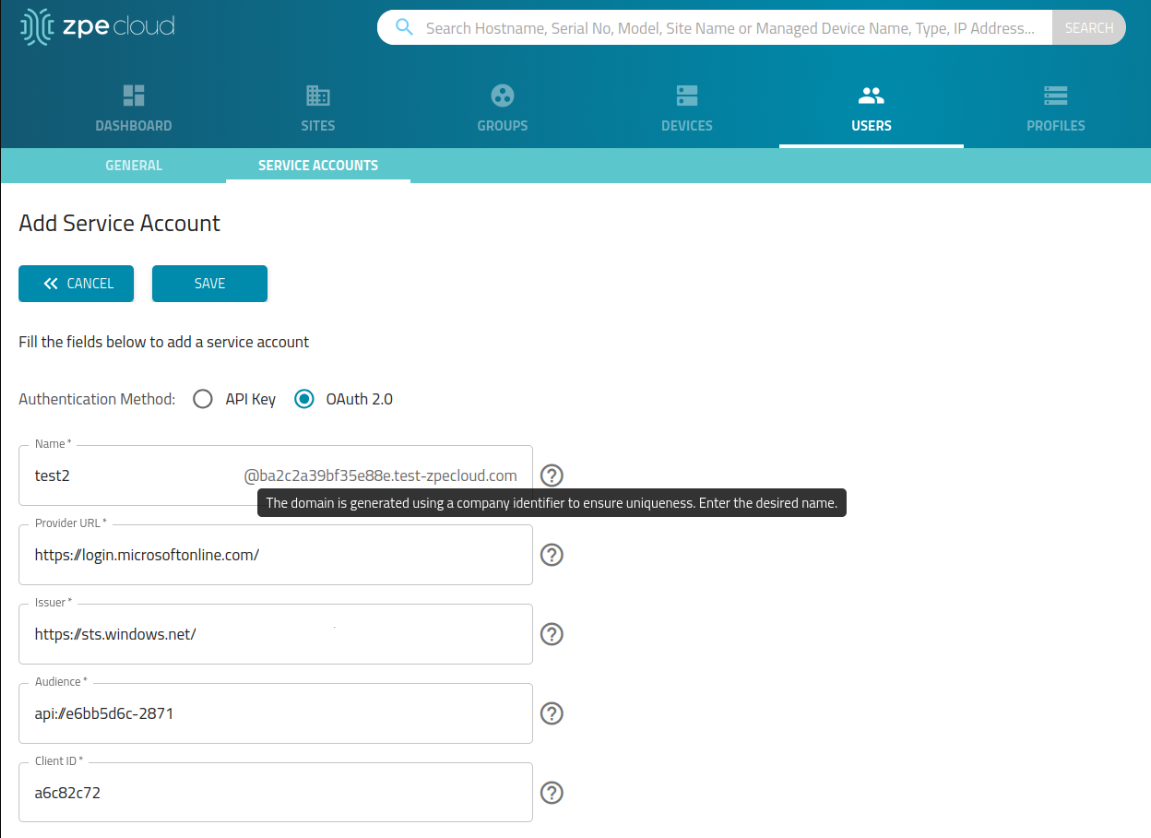
Click Save
Note
Tooltips are provided for each field to help the user identify what the field requires for an OAuth 2.0 service account to be created.
Note
For OAuth 2.0, service accounts start in the default group. Upon authentication, membership is updated to match the latest group sent by your Identity
Provider via Claims and Grants; otherwise, the account membership is the company's default group.
Add an Expiration to an API Key Service Account
When adding a new API Key Service Account, it is possible to add an expiration date for the account to expire:
Go to USERS::SERVICE ACCOUNTS
Click ADD
Enter the Name of the Service Account
NOTE
The domain is generated using a company identifier to ensure uniqueness. Enter the desired name.
Select the group from the Groups drop-down
NOTE
For more information on creating or editing a group for a user, see the Groups section.
Check the Expiration Date checkbox
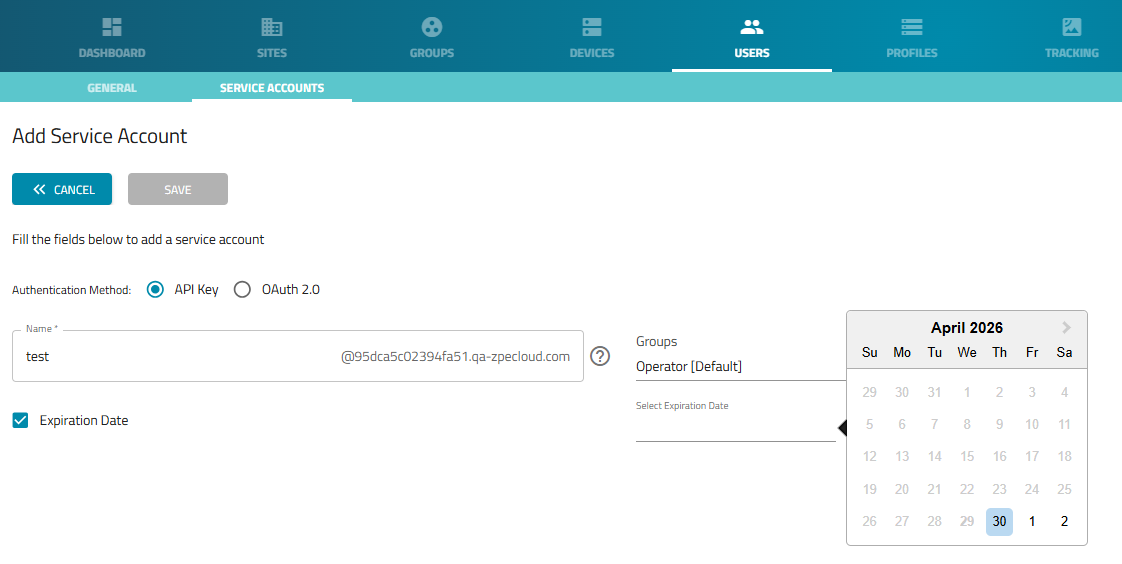
Select the Expiration Date
Click SAVE
Note
Expiration is only available for accounts created using the API Key Authentication Method.
Edit an API Key Service Account
Go to USERS::SERVICE ACCOUNTS
In the table, locate the service account and select the checkbox
Click EDIT
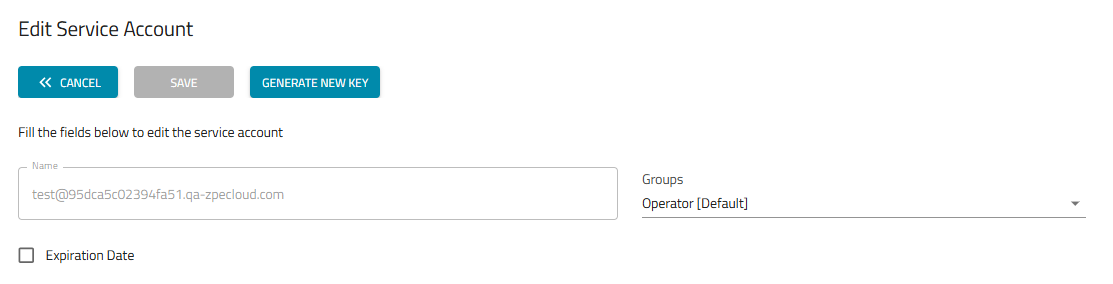
Note
It is possible to edit the API Key Service Account in 3 different ways:
Edit the service account by adding an expiration date.
Edit the group of the service account.
Generate a new key for the API Key Service Account.
Edit the API Key Service Account by Adding an Expiration Date
Check the Expiration Date checkbox
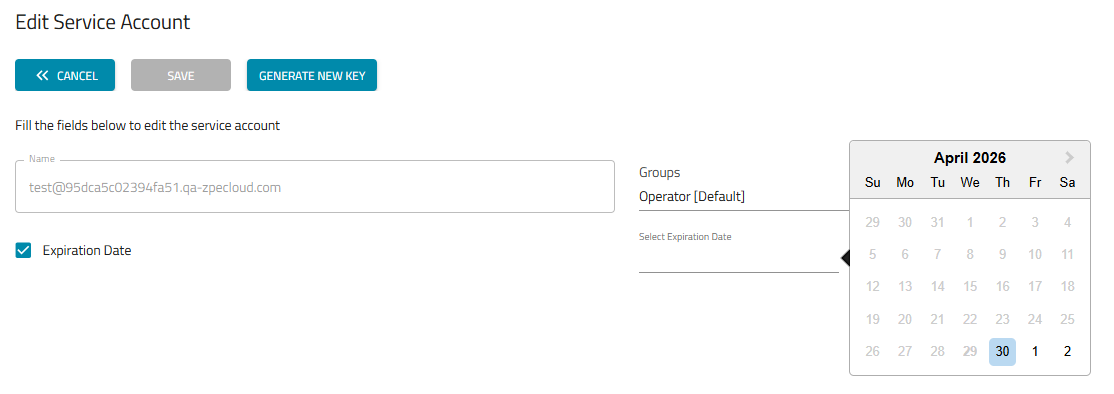
Select the Expiration Date
Click SAVE
Edit the Group of the API Key Service Account
Select the group/groups from the Groups drop-down
Click SAVE
Generate a New Key for the API Key Service Account
Note
Regeneration of a new key is only valid for API Key Service Accounts.
Click on GENERATE A NEW KEY
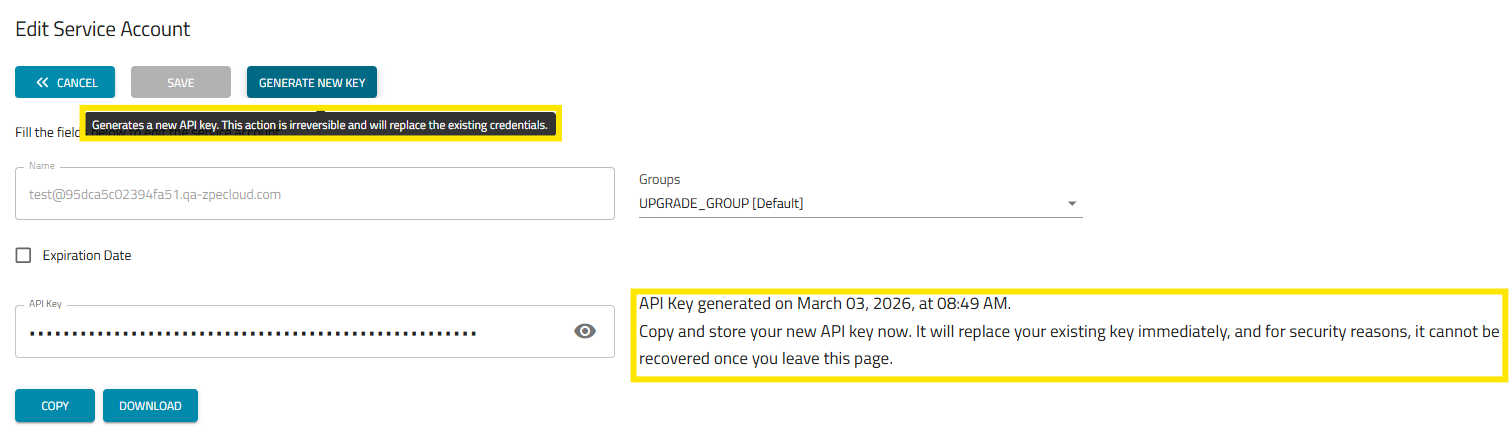
COPY or DOWNLOAD the new key
Alert
After editing the Service Account, it is necessary to save and store the API Key as it will not be available after exiting the current screen
Edit an OAuth 2.0 Service Account
Go to USERS::SERVICE ACCOUNTS
In the table, locate the service account and select the checkbox
Click EDIT
Edit the desired field
Click Save
Note
The Save button is only enabled after a change has been made to one of the fields. Otherwise, the button will be grayed out.
Delete a Service Account
Go to USERS::SERVICE ACCOUNTS
In the table, locate the user and select the checkbox
Click DELETE
A confirmation box is displayed
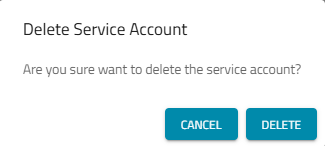
Click DELETE to confirm
Lock a Service Account
This disables the Service Account
Go to USERS::SERVICE ACCOUNTS
In the table, locate the user and select the checkbox
Click LOCK
A confirmation box is displayed
Click LOCK to confirm
If the account needs to be reactivated, it's only necessary to select it and click the UNLOCK button
Unlock a Service Account
This enables the Locked Service Account
Go to USERS::SERVICE ACCOUNTS
In the table, locate the locked user and select the checkbox
Click UNLOCK
A confirmation box is displayed
Click UNLOCK to confirm