Manage Configurations/Script
Download Configuration/Script
Go to PROFILES :: CONFIGURATION.
Locate configuration/script.
On Download column, click Download
 icon.
icon.
If password protected, on the Profile File Download dialog, enter Password and click CONFIRM.The file is saved on the local computer's Download location.
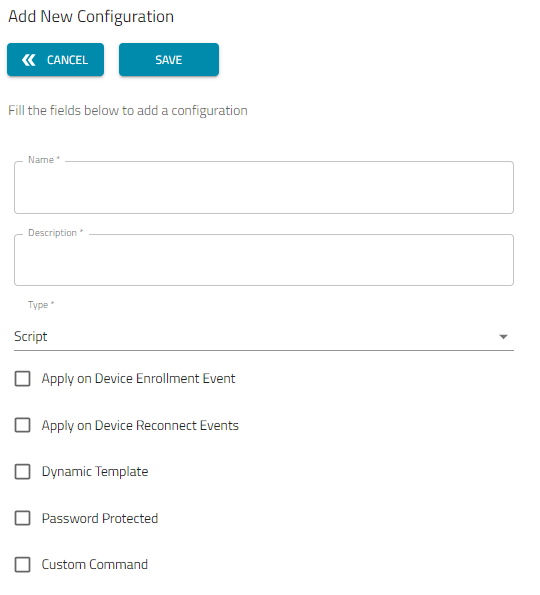
Add New Configuration
Go to PROFILES :: CONFIGURATION.
Click +ADD (displays dialog).
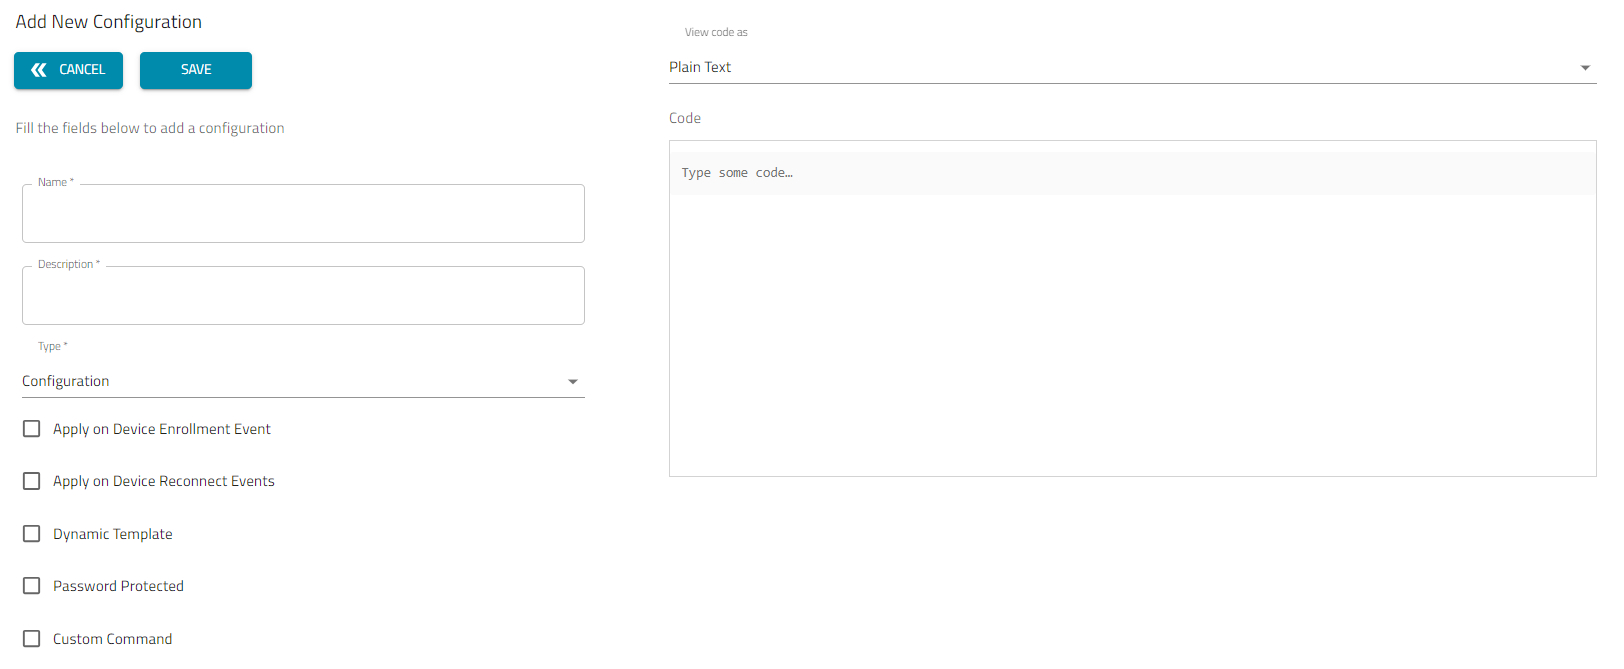
Enter Name and Description.
From the Configuration drop-down list, select one (Configuration, Script).
Select Automatically apply on device enrollment checkbox (if selected, the configuration is applied when the device is enrolled).
Select Apply on Device Reconnect Event: Applies profiles automatically to the Nodegrid device when it goes from offline state to online state. For example, if you factory reset a device or upgrade a device you may lose the old configuration, you can use this option to automatically import those profiles to apply the old configuration once the device is available or upgraded.
When the script is enabled, every time a device gets back from an offline to an online state, the system is alerted with a notification, based on the mentioned code. For example, you can write a script to determine if the device has an updated revision tag. If the revision tag is updated, the old configuration is restored once the device is online. For more information on creating a Configuration, see https://docs.zpesystems.com/docs/user-interfaces#cli-interface.
Note:If the script contains a reboot condition, the system will be stuck in a loop indefinitely.
Only those devices listed on the ENROLLED tab are considered for applying the profiles.
Select the Dynamic Template checkbox.
Select the Password Protected checkbox (if selected expand dialog). Enter Password.

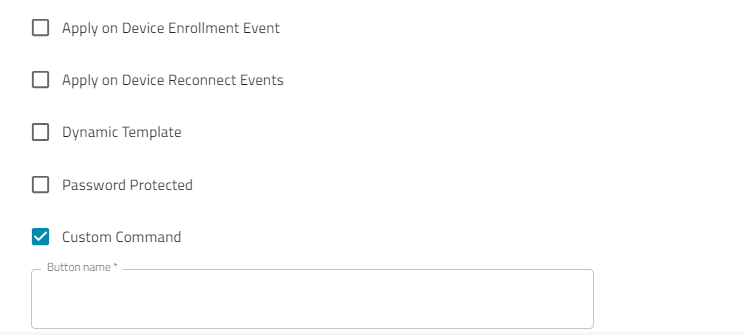
Select the Custom Command checkbox (expands dialog). Enter the Button name.
On View Code as drop-down, select the type of code (Plain Text, Shell, Python, Javascript/Node JS)
In the Code textbox, paste lines of code.
Click SAVE.
On PROFILES :: CONIGURATION table, Custom Command column, is set to Enabled.
NOTE
To disable Custom Command, select the checkbox and click EDIT.
On the dialog, unselect Custom Command checkbox and click SAVE.
Add Configuration from File
Go to PROFILES :: CONFIGURATION.
Click +ADD FROM FILE (displays dialog).
Enter Name and Description.
Click Import from File (opens dialog to select a local file).
Select Automatically apply on device enrollment checkbox (if selected, the configuration is applied when the device is enrolled).
Select Apply on Device Reconnect Event: Applies profiles automatically to the Nodegrid device when it goes from offline state to online state. For example, if you factory reset a device or upgrade a device you may lose the old configuration, you can use this option to automatically import those profiles to apply the old configuration once the device is available or upgraded.
When the script is enabled, every time a device gets back from an offline to an online state, the system is alerted with a notification, based on the mentioned code. For example, you can write a script to determine if the device has an updated revision tag. If the revision tag is updated, the old configuration is restored once the device is online. For more information on creating a Configuration, see https://docs.zpesystems.com/docs/user-interfaces#cli-interface.
Note:If the script contains a reboot condition, the system will be stuck in a loop indefinitely.
Only those devices listed on the ENROLLED tab are considered forapplying the profiles.
Select the Dynamic Template checkbox.
Select the Password Protected checkbox (if selected expands the dialog). Enter Password.
Select the Custom Command checkbox (if selected, expands dialog). Enter Button name.
On View Code as drop-down, select the type of code (Plain Text, Shell, Python, Javascript/Node JS)
In Code textbox (paste lines of code).
Click SAVE.
Add Configuration from Template
Go to PROFILES :: CONFIGURATION.
Click ADD FROM TEMPLATE (displays dialog).
Enter Name and Description.
From the Template drop-down, select the required template.
Note:From the Configuration drop-down, select one (Configuration, Script).
Select the Automatically apply on the device enrollment checkbox (if selected, the configuration is applied when the device is enrolled).
Select Apply on Device Reconnect Event: Applies profiles automatically to the Nodegrid device when it goes from offline state to online state. For example, if you factory reset a device you lose the old configuration, you can use this option to automatically import those profiles to apply the old configuration once the device is available or upgraded.
When the script is enabled, every time a device gets back from an offline to an online state, the system is alerted with a notification, based on the mentioned code. For example, you can write a script to determine if the device has an updated revision tag. If the revision tag is updated, the old configuration is restored once the device is online. For more information on creating a Configuration, see https://docs.zpesystems.com/docs/user-interfaces#cli-interface.
Note:If the script contains a reboot condition, the system will be stuck in a loop indefinitely.
Only those devices listed on the ENROLLED tab are considered for applying the profiles.
Select the Dynamic Template field.
Select the Password Protected field. Enter Password.
On the Custom Command checkbox (expands dialog). Enter Buton name.
On View Code as drop-down, select the type of code (Plain Text, Shell, Python, Javascript/Node JS)..
In Code textbox (paste lines of code).
Click SAVE.
Clone a Configuration
NOTE
The configuration details and code are also cloned.
Go to PROFILES :: CONFIGURATION.
In the table, locate profile and select the checkbox.
Click CLONE (displays dialog).
Enter Name.
Modify details, as needed.
Click SAVE.
Edit a Configuration
Go to PROFILES :: CONFIGURATION.
In the table, locate the profile and select the checkbox.
Click EDIT (displays dialog).
Make changes, as needed.
Click SAVE.
Delete a Configuration
Go to PROFILES :: CONFIGURATION.
In the table, locate profile and select checkbox.
Click DELETE (displays dialog).
On the confirmation dialog, click DELETE.
Enable Password Protection on the Configuration/Script
If password-protected, the file is only installed on the device(s) configured with the matching password.
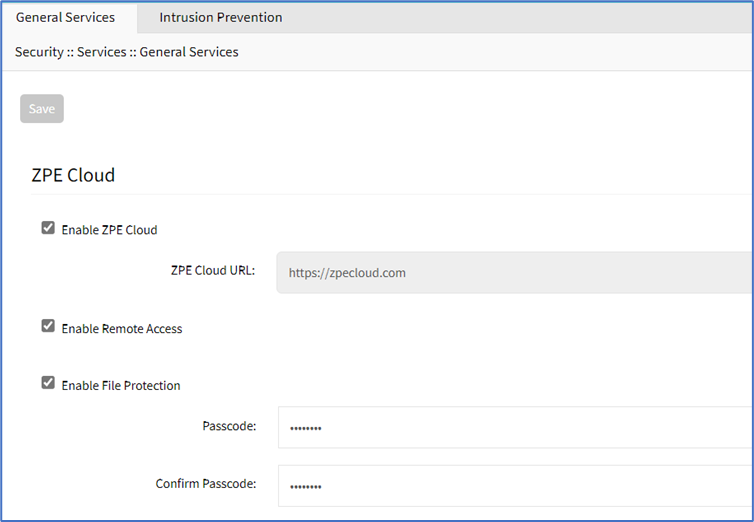
Log into the device and go to Security :: Services :: General Services.
In the ZPE Cloud menu, if the Enable File Protection checkbox is selected, must include the Passcode and Confirm Passcode (must match the password in the Add New Configuration dialog).
Encrypt Configuration Files
Before uploading ZPE Cloud, configuration/script files can be encrypted. The file can only be installed if the Nodegrid device settings are correctly enabled.
Log into the Nodegrid device.
Go to Security :: Services :: ZPE Cloud.
Select Enable File Protection checkbox and enter Passcode.
Select Enable File Encryption checkbox.
Click Save.
Encryption Requirements
To add extra security to the file encryption process, the following openssl features must be enabled:
Cipher: aes-256-cbc
Encoding: base64
Salted: yes
Key Digest Algorithm: sha256
Requirements
Openssl version :: 1.1.0
Before upload to ZPE Cloud; Files (CLI commands, custom scripts and save_config tarball) can be encrypted externally or on the Nodegrid device.
OS Encryption
Nodegrid OS Requirements
Nodegrid version >= 4.1
Openssl 1.1.1
To encrypt a file using Nodegrid, enter:
openssl aes-256-cbc -base64 -salt -md sha256 -in <input_file> -out <encrypted_file>To encrypt the file, openssl asks for the password. Alternatively, instead of entering at the prompts, use – k, followed by the password flag.
Linux OS Requirements
Openssl 1.1.0
To install on Ubuntu machines, enter:
sudo apt-get install libssl-devTo encrypt the file using Linux, enter:
openssl aes-256-cbc -base64 -salt -md sha256 -in <input_file> -out <encrypted_file>To encrypt the file, openssl asks for the password. Alternatively, instead of entering at the prompts, use – k, followed by the password flag.
Mac OS Encryption Requirements
Openssl >= 1.1.0
On Mac OS, install Brew. Follow the steps at https://brew.sh/
After Brew is installed, to install openssl, enter:
brew install openssl brew link --force opensslTo encrypt the file on Mac OS, enter:
openssl aes-256-cbc -base64 -salt -md sha256 -in <input_file> -out <encrypted_file>To encrypt the file, openssl asks for the password. Alternatively, instead of entering at the prompts, use – k, followed by the password flag.
Windows OS Encryption Requirements
Openssl >= 1.1.0
Openssl can be installed on Windows via the binary installer. For more information, please see the Openssl Wiki.
To encrypt the file using Windows, use the following command:
openssl aes-256-cbc -base64 -salt -md sha256 -in <input_file> -out <encrypted_file>To encrypt the file, openssl asks for the password. Alternatively, instead of entering at the prompts, use – k, followed by the password flag.